6 Linux Commands I Use for Malware Analysis

Linux cybersecurity analysts spend countless hours dissecting malicious software to understand its functionality, origin, and impact.
Here are six Linux commands that help me in this process, which I believe every professional in the field should have in their toolkit.
1. strings
The strings command is a lifesaver in the initial stages of malware analysis. It helps me extract printable strings from a binary file, often providing valuable clues about the malware’s functionality.
For instance, I’ve found domain names, IP addresses, error messages, or function names that have helped me better understand the malware’s purpose.
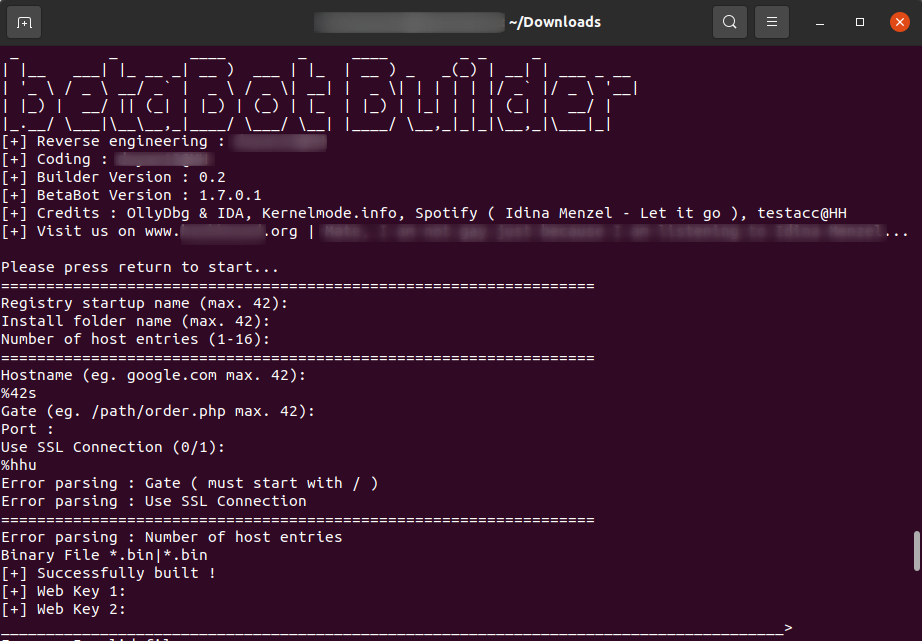
In the above screenshot, you can see the output of the strings command applied to a binary file of the BetaBot builder. It reveals information about the program, including version numbers and developer credits.
2. file
The file command is my go-to for determining the type of any file. It’s a simple yet effective tool that can identify executable files, scripts, archives, and even some document types. This command has helped me get a basic understanding of the file I’m dealing with, which is a crucial first step in malware analysis.
Want to know the type of file you are dealing with? The file tool is helpful at the start of the analysis. After this, analysts can decide on the next step.

For instance, here, the file command reveals that the file in question is an executable program designed to run on Microsoft Windows systems. The technical details indicate it’s a PE32 format executable, a common format for Windows programs, and the (GUI) tag suggests it has a graphical user interface for interacting with the user.
Interestingly, while it’s a Windows executable, the additional information reveals it’s also a Mono/.Net assembly. Mono is a framework that allows running .NET applications, typically designed for Windows, on other operating systems.
See, the command looks simple but it is quite useful.
3. xxd
The xxd command is a versatile tool that I use to create a hex dump of a file or to perform the reverse operation.
Hex dumps are essential when I need to examine a file’s raw bytes, such as when searching for specific patterns or signatures. It is also a handy tool for examining the contents of binary files directly in the terminal.
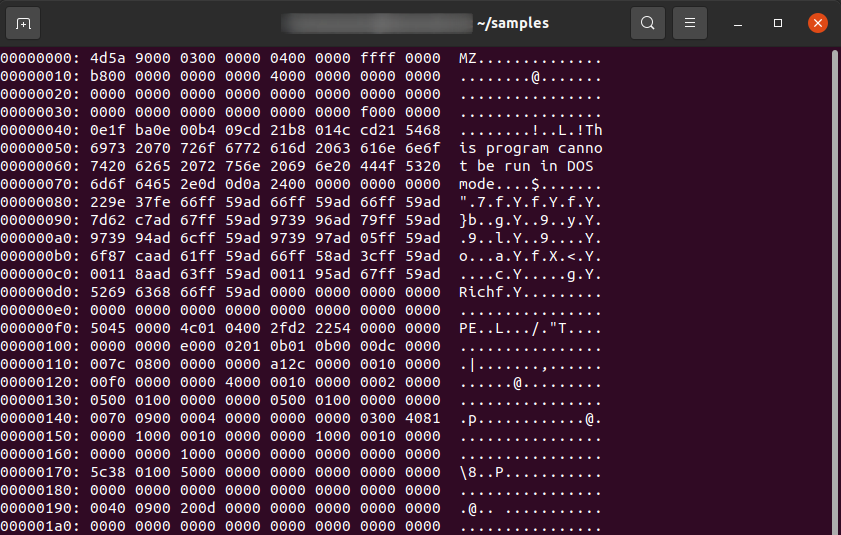
Here, you can see the magic bytes ‘MZ,’ which are the signature for executable files on the Windows operating system
4. objdump
The objdump command is a powerful tool that I use to display information about one or more object files. It can disassemble executable files, providing a low-level view of the code that the malware is executing.
This has been particularly useful when dealing with obfuscated or encrypted malware, as well as malware designed specifically for Linux. It aids in understanding how programs work and in learning.
For example, in the screenshot, we can see and examine a compiled binary.
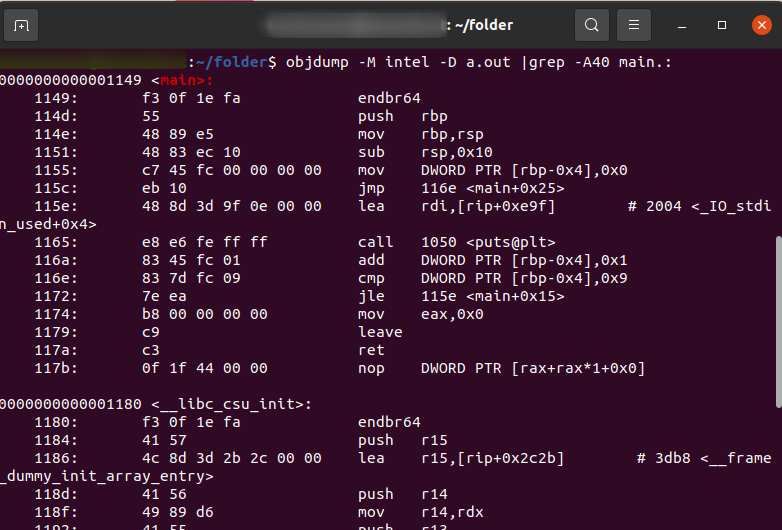
Here I use objdump to disassemble a function named “main” within the object file. The output displays assembly instructions alongside their corresponding memory addresses and machine code.
These instructions are related to setting up the function’s environment on the stack, allocating space for local variables and initializing them. The final jump instruction redirects the program flow to another part of the function.
5. nm
The nm command is a tool that I use to list the symbols from object files. It’s useful for identifying functions and variables used in a program, which can give me valuable clues about the functionality of the malware. This command has helped me understand the structure of the malware and its potential capabilities.
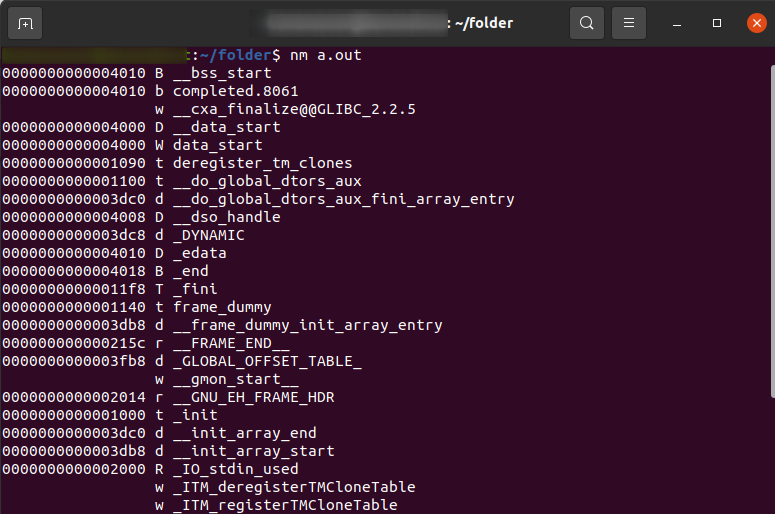
The nm command here reveals information about symbols (functions and variables) within a file named “a.out”. It shows the memory address where the symbol resides in the program’s memory, a code indicating its type (function, data variable, etc.), and finally, the symbol’s name.
For instance, one line shows a function named _init at address 0x40, likely an internal function for program initialization. The symbol table displayed by nm is a valuable tool for programmers. It allows them to understand the program’s structure, identify specific parts based on symbol names and memory addresses, and aid in debugging or reverse engineering tasks.
6. gdb
The GNU Debugger (gdb) allows me to run programs in a controlled environment, set breakpoints, inspect memory, and more. This tool has been essential in my deep-dive analysis of malware, helping me understand the inner workings of malicious software.
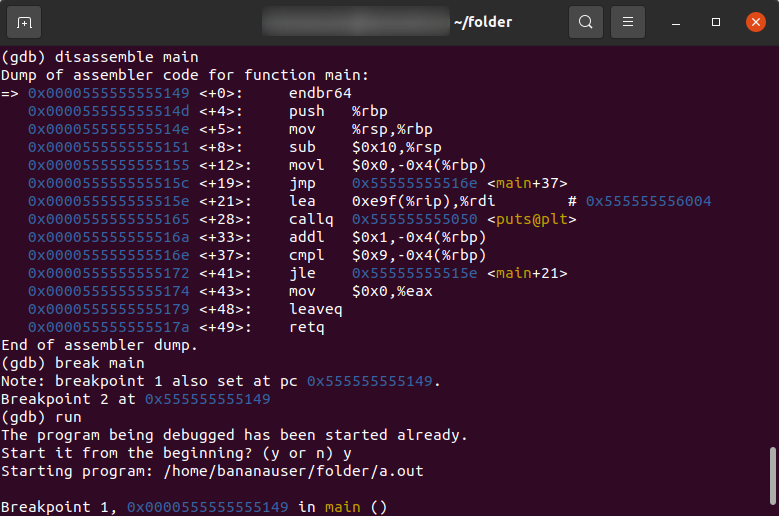
In the screenshot, you can see how GDB can be used to learn reverse engineering. I display the disassembly of the main() function of a simple ‘Hello, world’ program, set a breakpoint on it, and run the program. After that, I check the value of the Instruction Pointer (EIP).
Analyze Linux Cyber Threats in ANY.RUN
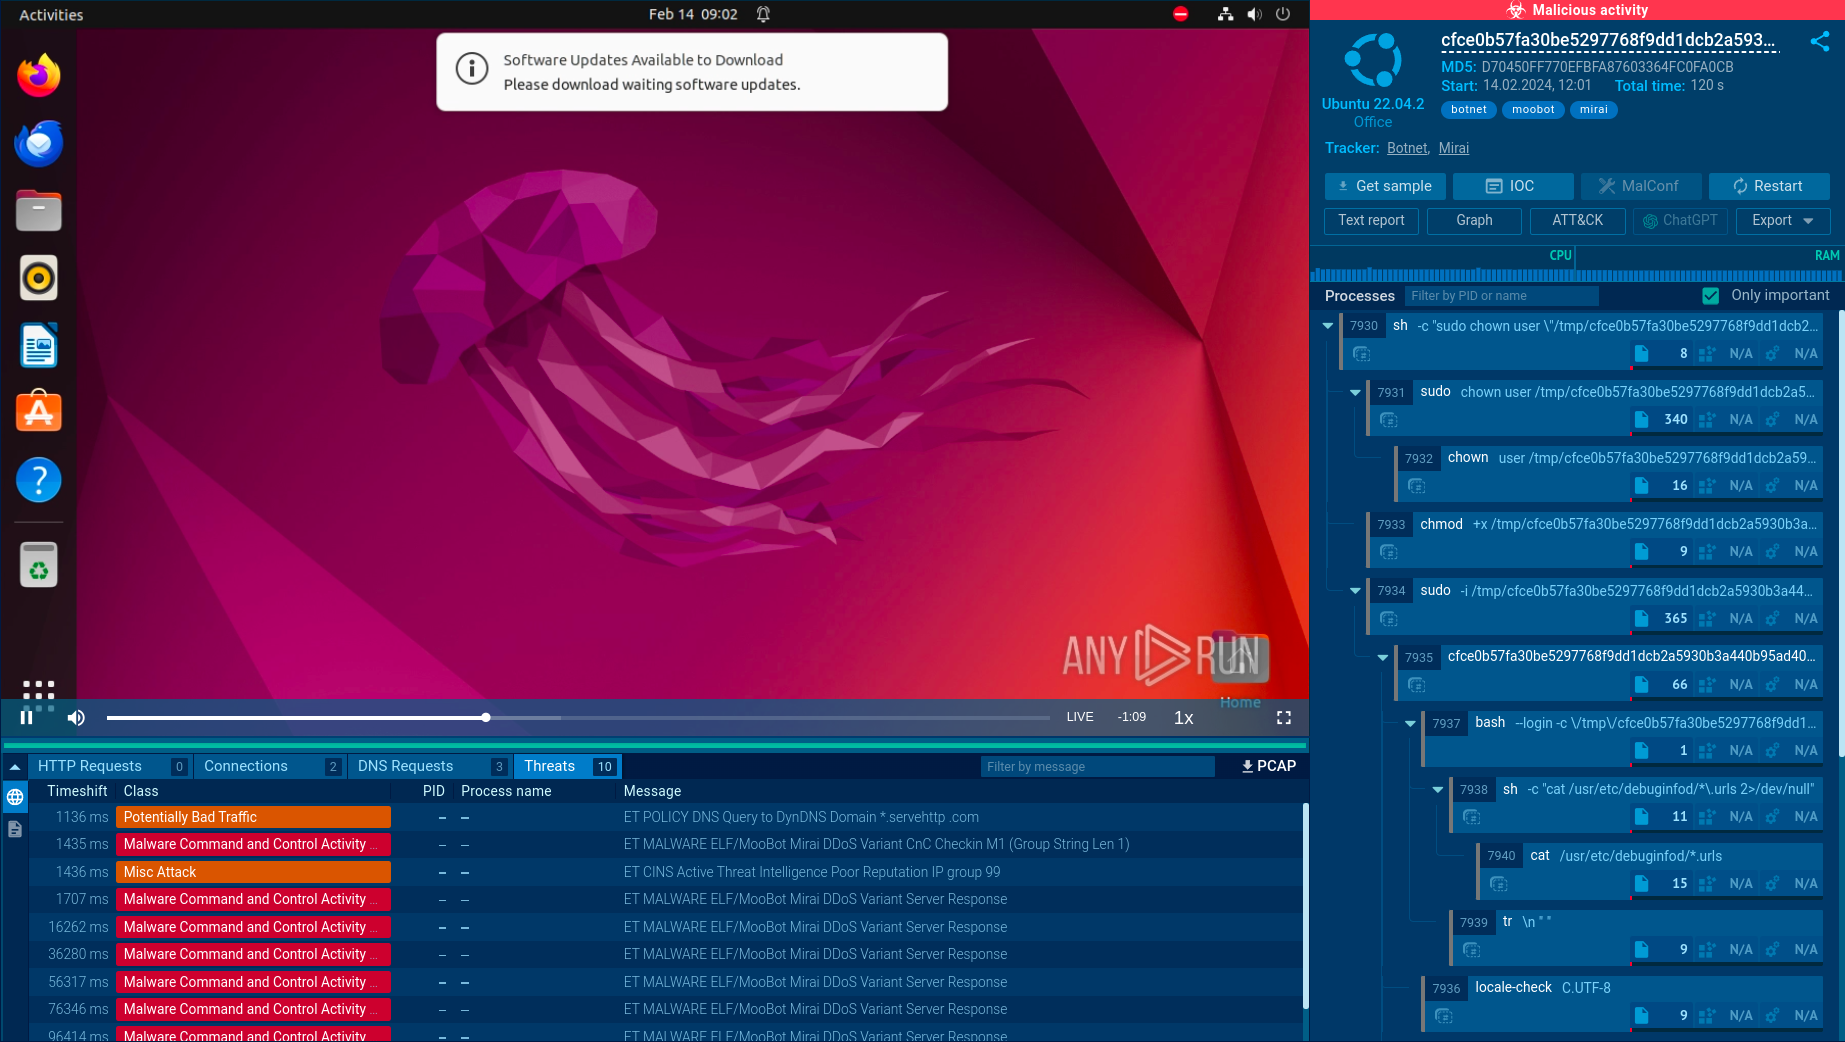
ANY.RUN is a cloud-based sandbox that lets you quickly detect threats. It provides Windows and Linux VM environments, where you can safely detonate and analyze malicious files and URLs. Interactivity is the cornerstone of ANY.RUN, as it makes it possible to control the analysis process by interacting with the system, including by launching programs, opening documents, and downloading files from the Internet.
Some of ANY.RUN’s key features include:
- Fast threat detection in under 40 seconds.
- In-depth information about malicious network activity, registry changes, processes, etc.
- Detailed reports featuring malware configs, indicators of compromise (IOCs), and TTPs.
Sign up for a free ANY.RUN account to try it yourself.
Author Info

Vlad Ananin is a technical writer at ANY.RUN with an interest in malware analysis. With 5 years of experience, he writes about cybersecurity and technology, aiming to make it easier for non-experts to understand.
