ArmSoM AIM7: A Promising Upcoming Rockchip Device for AI Development
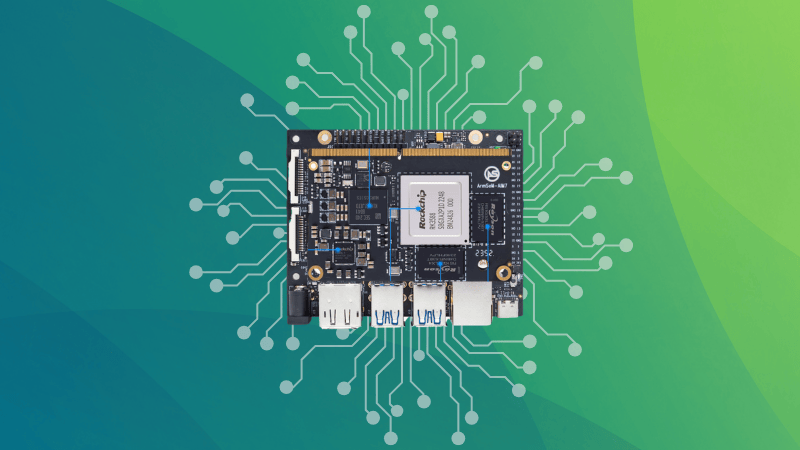
When ArmSoM kindly offered to send me their upcomingAIM7, along with the AIM-IO carrier board, I was thrilled.
Having worked with AI hardware like Nvidia’s Jetson Nano and Raspberry Pi boards, I’m always curious about devices that promise powerful AI capabilities without requiring a large physical setup or heavy power draw.
The AIM7, powered by the Rockchip RK3588, seemed to hit that sweet spot, a compact module with robust processing power, efficient energy use, and versatile connectivity options for a range of projects.
What intrigued me most was its potential to handle AI tasks like object detection and image processing while also supporting multimedia applications, all while being small enough to integrate into custom enclosures or embedded systems where space is a premium.
Here’s my hands-on experience with this exciting piece of hardware.
ArmSoM AIM7 specifications
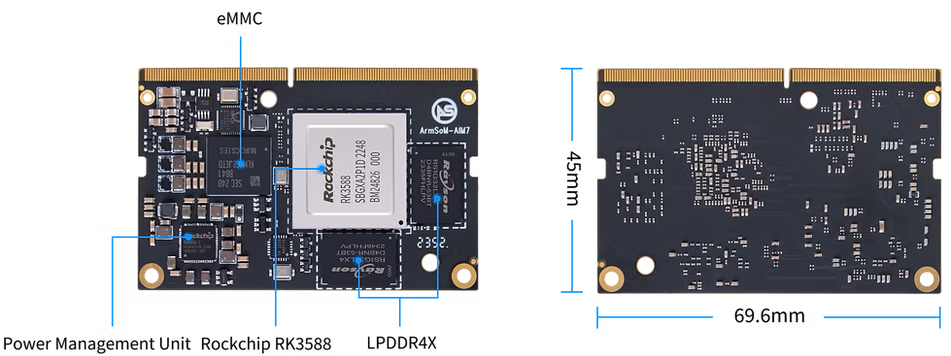
The AIM7 is a compact yet powerful board built around the Rockchip RK3588 SoC, an octa-core processor with a quad-core Cortex-A76 and a quad-core Cortex-A55, clocked up to 2.4 GHz.
Complementing this powerhouse is the ARM Mali-G610 MP4 GPU with a 6 TOPS NPU, making it an excellent choice for AI workloads and multimedia applications.
Its small size and versatile connectivity options make it suitable for embedded applications and development projects.
The unit I received came with 8 GB of LPDDR4x RAM and 32 GB of eMMC storage.
| Feature | ArmSoM RK3588(Rockchip) |
|---|---|
| CPU Cores | Quad-core ARM Cortex-A76 + Quad-core ARM Cortex-A55 |
| GPU Cores | ARM Mali-G610 MP4 |
| Memory | 8 GB/32 GB LPDDR4x, 2112 MHz |
| Storage | microSD card, 32GB eMMC 5.1 flash storage |
| Video Encoding | 8K@30 fps H.265 / H.264 |
| Video Decoding | 8K@60 fps H.265/VP9/AVS2, 8K@30 H.264 AVC/MVC |
| USB Ports | 1x USB 3.0, 3x USB 2.0 |
| Ethernet | 1x 10/100/1000 BASE-T |
| CSI Interfaces | 12 channels (4×2) MIPI CSI-2 D-PHY1.1 (18 Gbps) |
| I/O | 3 UARTs, 2 SPIs, 2 I2S, 4 I2Cs, multiple GPIOs |
| PCIe | 1x 1/2/4 lane PCIe 3.0 & 1x 1 lane PCIe 2.0 |
| HDMI Output | 1x HDMI 2.1 / 1x eDP 1.4 |
| DP Interface | 1x DP 1.4a |
| eDP/DP Interface | 1x eDP 1.4 / 1x HDMI 2.1 out |
| DSI Interface | 1x DSI (1×2) 2 sync |
| OS Support | Debian, Ubuntu, Armbian |
AIM-IO Carrier Board Specifications
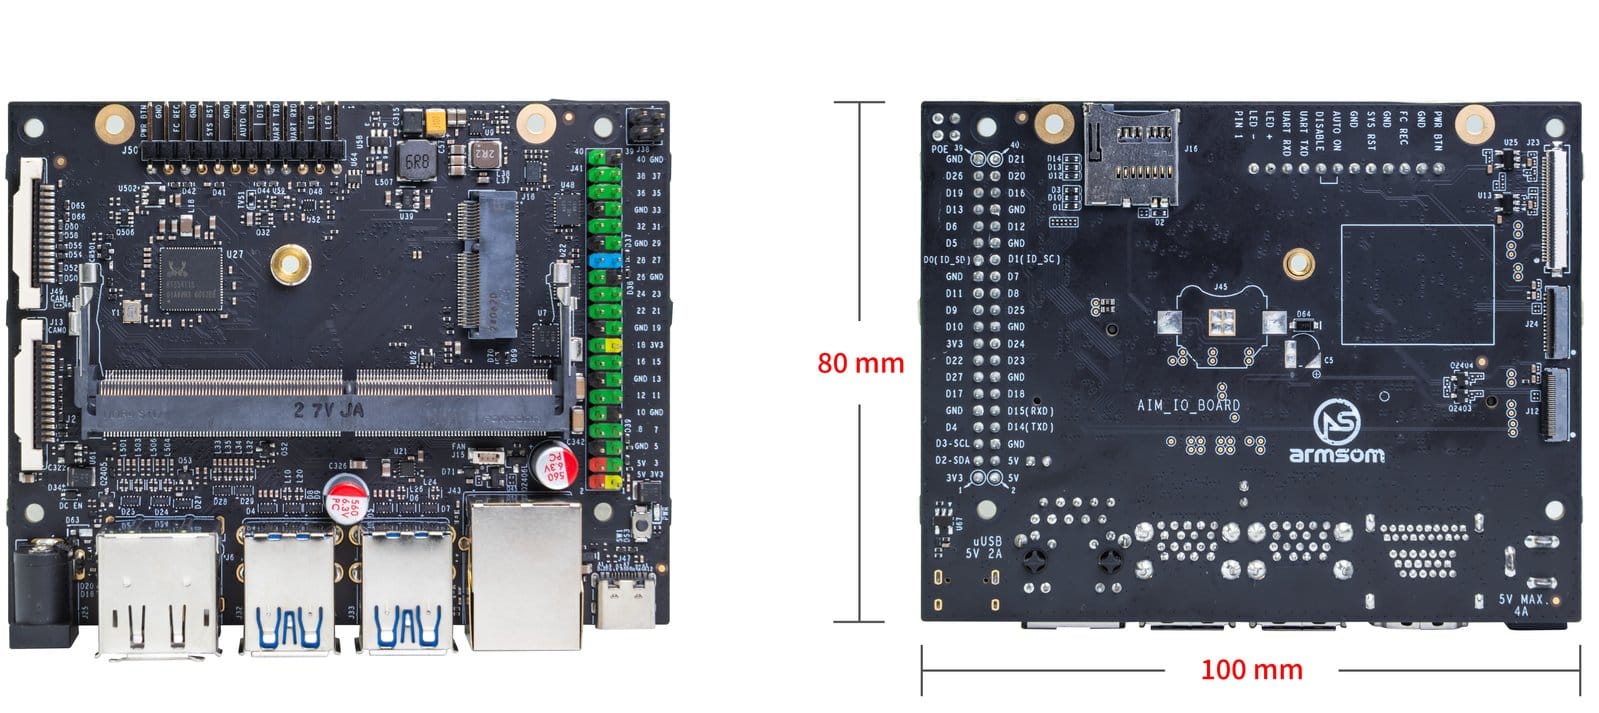
The AIM-IO carrier board is designed to complement the AIM7 AI module. It offers a rich set of features, including multiple USB ports, display outputs, and expansion options, making it an ideal platform for development and prototyping.
| Feature | Specification |
| USB Ports | 4x USB 3.0 Type-A |
| Display | 1x DisplayPort, 1x HDMI-out |
| Networking | Gigabit Ethernet |
| GPIO | 40-pin expansion header |
| Power Connectors | DC Barrel jack for 5V input, PoE support |
| Expansion | M.2 (E-key, PCIe/USB/SDIO/UART), microSD |
| MIPI DSI | 1x 4 lanes MIPI DSI up to 4K@60 fps |
| MIPI CSI0/1 | 2x 2 lanes MIPI CSI, Max 2.5Gbps per lane |
| MIPI CSI2/3 | 1x 4 lanes MIPI CSI, Max 2.5Gbps per lane |
| Firmware | Flashing and device mode via USB Type-C |
| Dimensions | 100 x 80 x 29 mm |
Unboxing and first impressions
The AIM7 arrived in a compact, well-packaged generic box alongside the AIM-IO board, which is essential for getting the module up and running.
At first glance, the AIM7 itself is tiny, measuring just 69.6 x 45 mm—almost identical in size to the Jetson Nano’s core module.
The carrier board, too, shares the same dimensions as the Jetson Nano Developer Kit’s carrier board, making it an easy swap for those already familiar with Nvidia’s ecosystem.
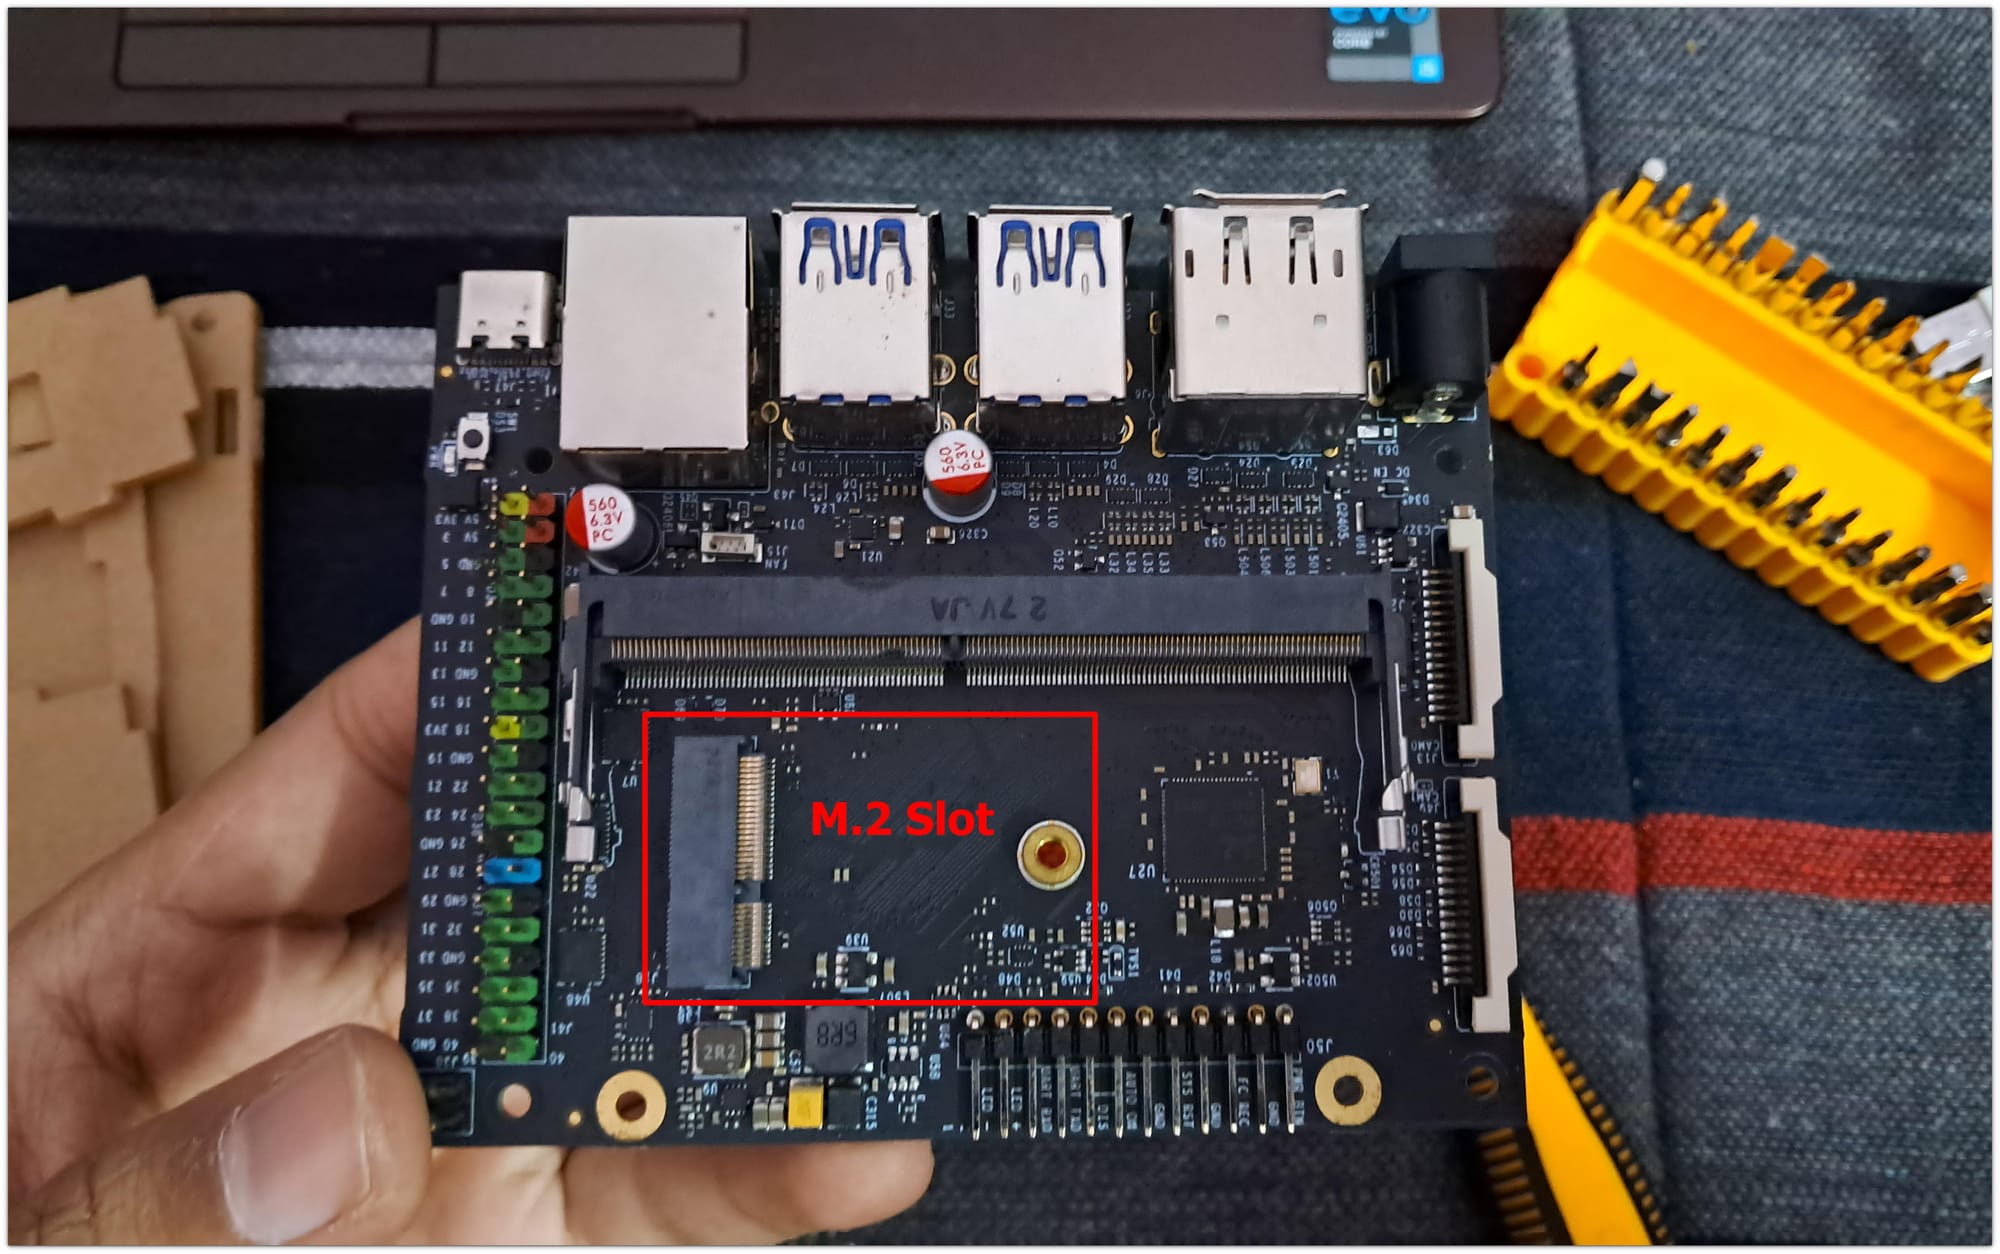
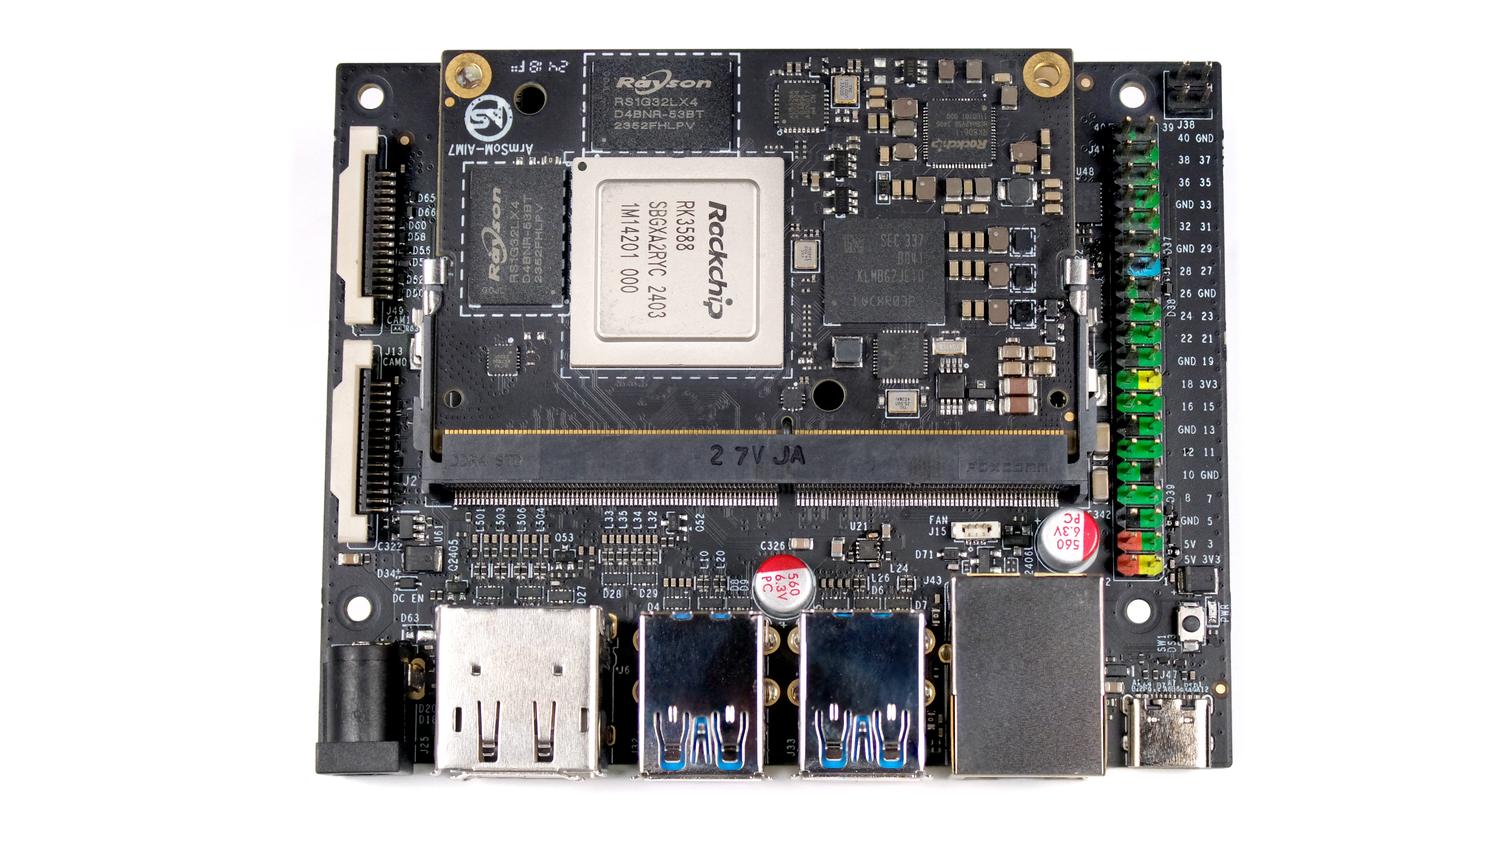
The build quality of both the module and the carrier board is solid. The AIM-IO board’s layout is clean, with clearly labeled ports and connectors.
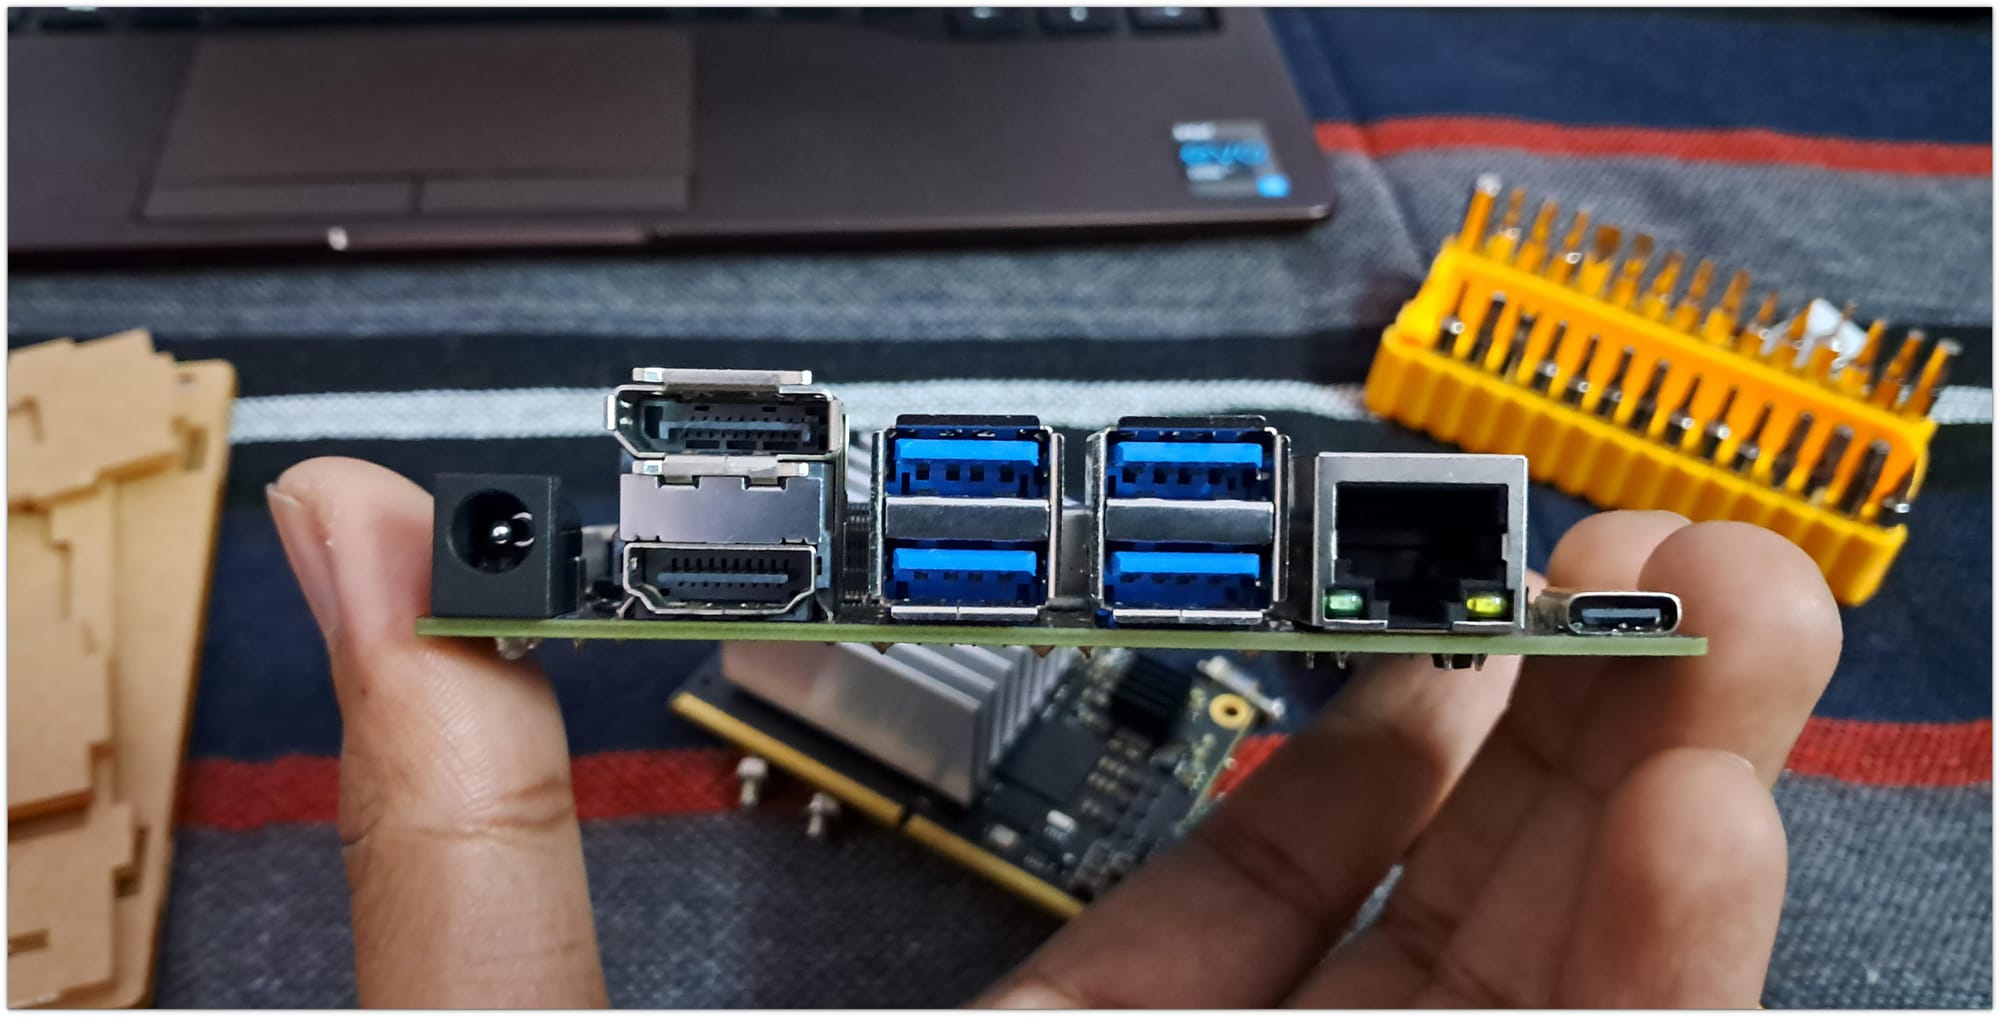
It features four USB 3.0 ports, HDMI and DisplayPort outputs, a 40-pin GPIO header and an M.2 slot for expansion, a welcome addition for developers looking to push the hardware’s limits.
Setting it up
Installing the AIM7 onto the AIM-IO board was straightforward. The edge connector design, similar to the Jetson Nano’s, meant it slotted in effortlessly.
Powering it up required a standard 5V barrel jack.
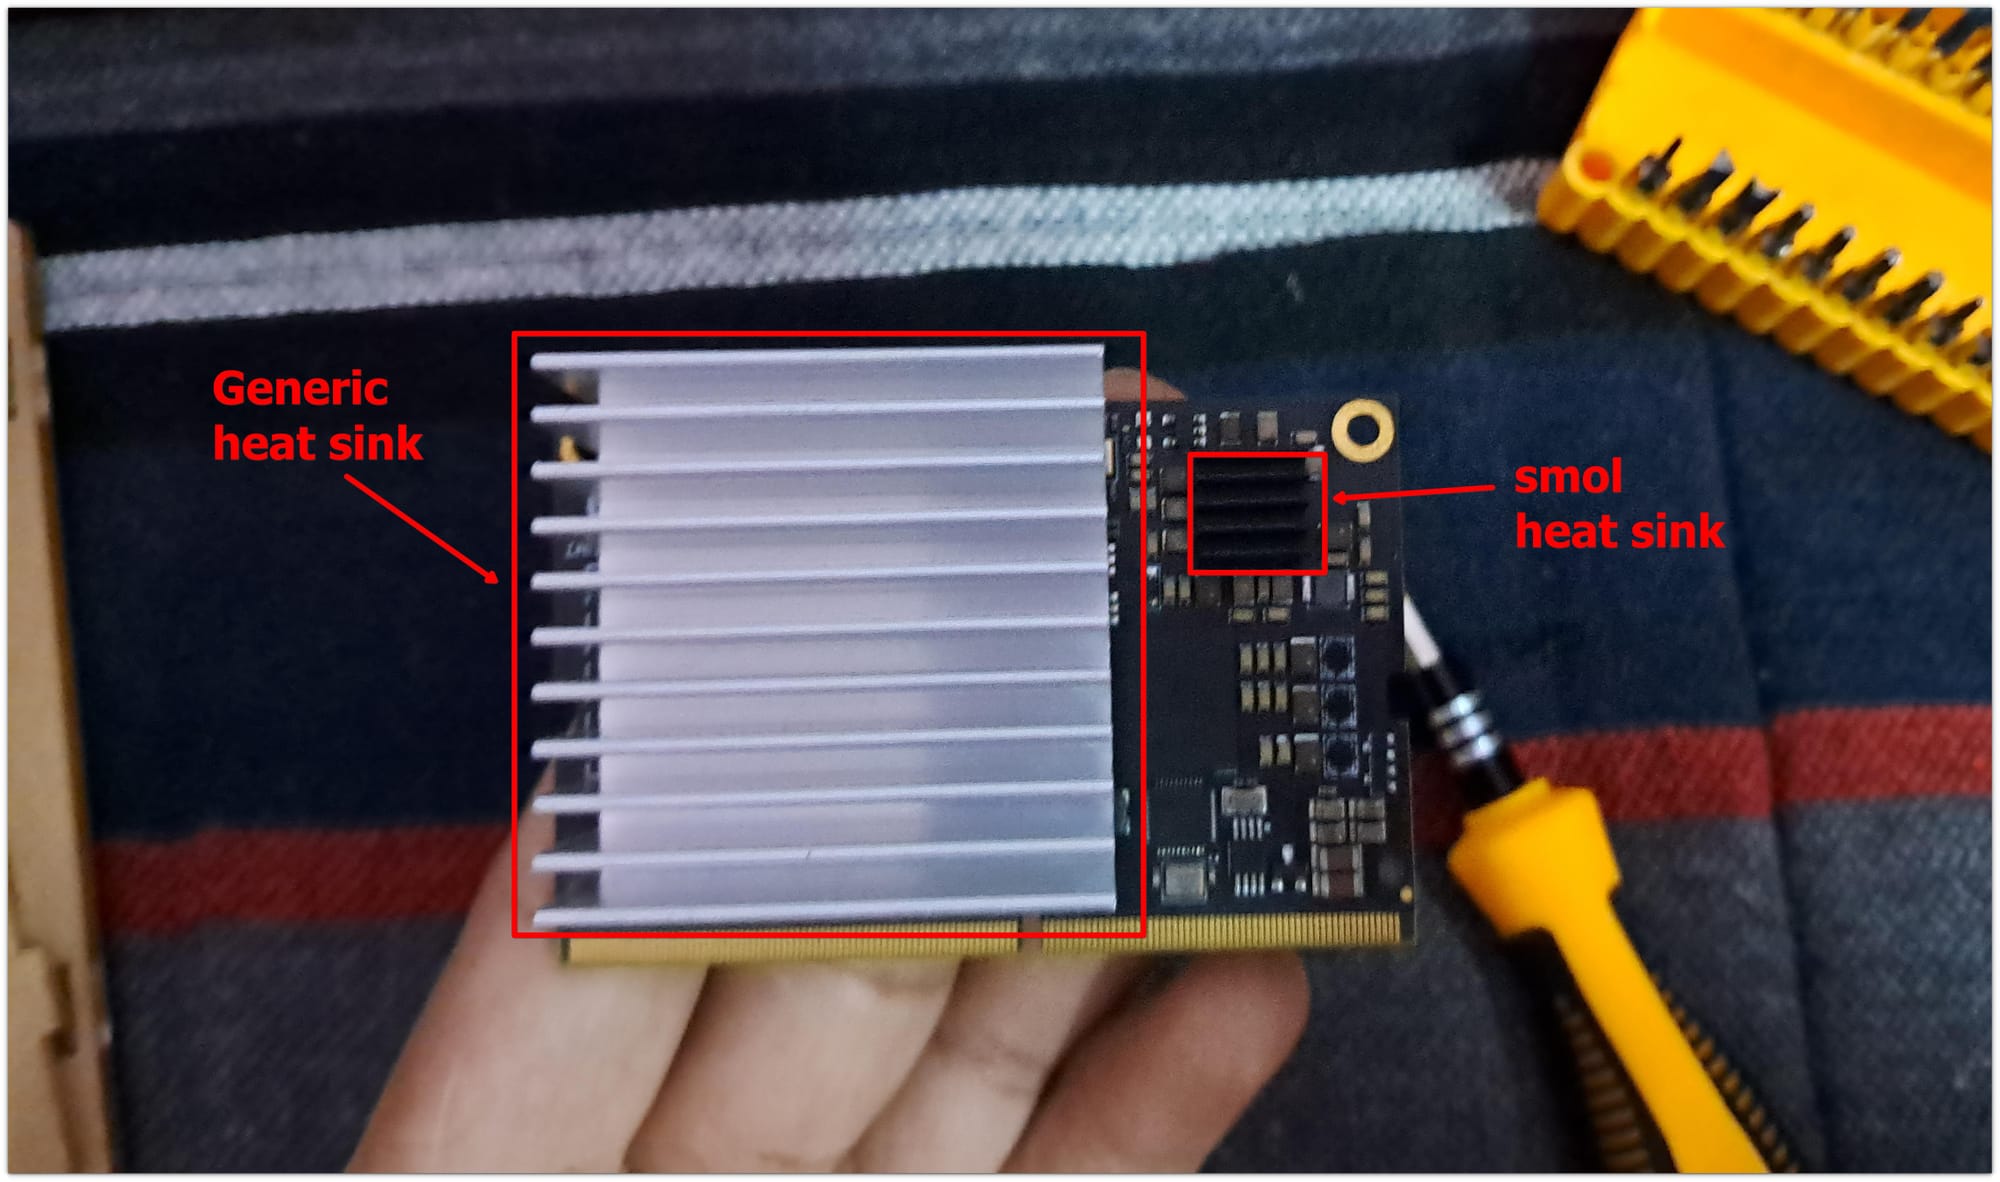
I know these Rockchip SBCs get real hot, so I got a generic passive heatsink. Active cooling options were way too expensive.
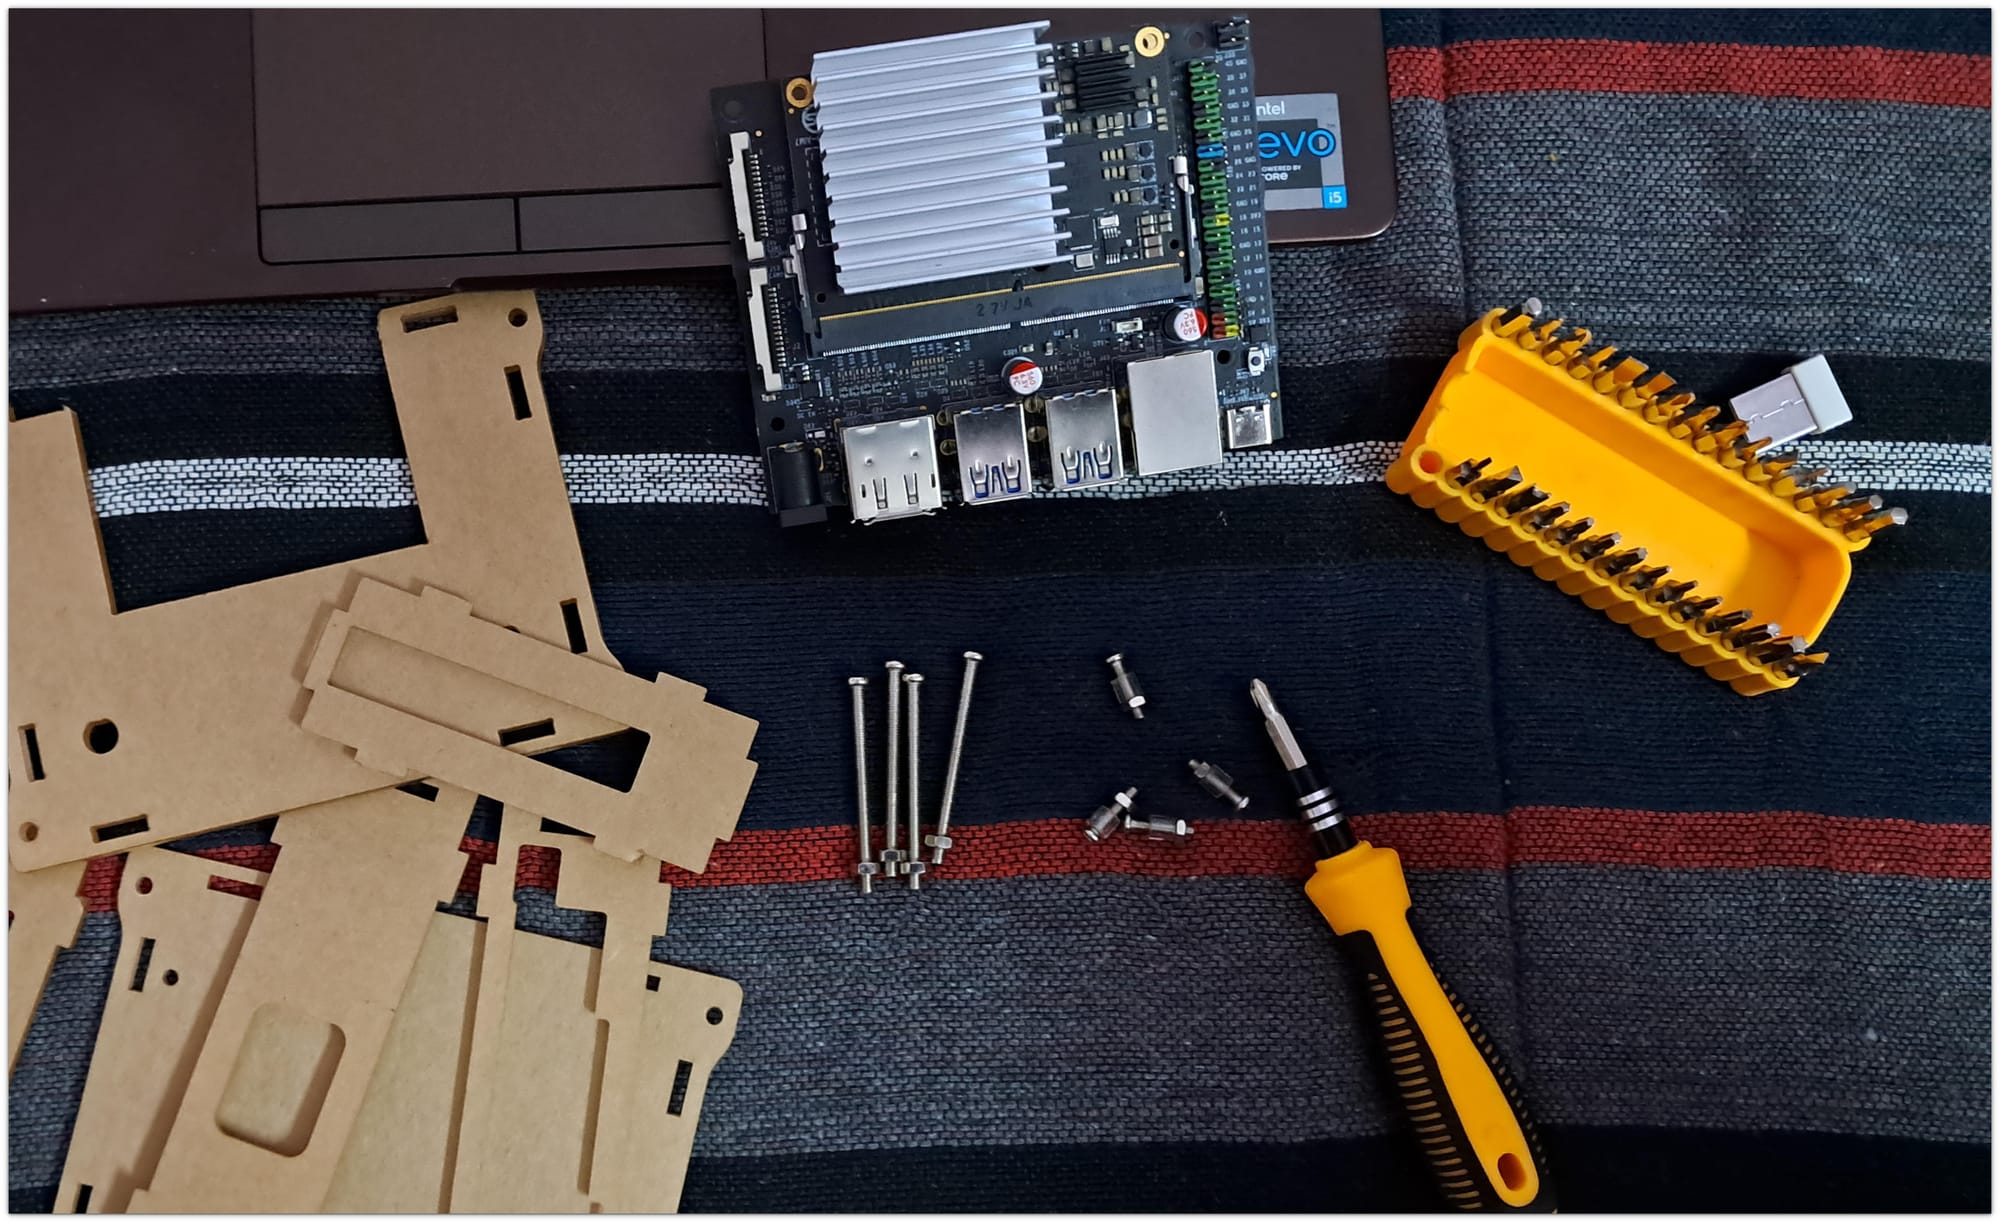
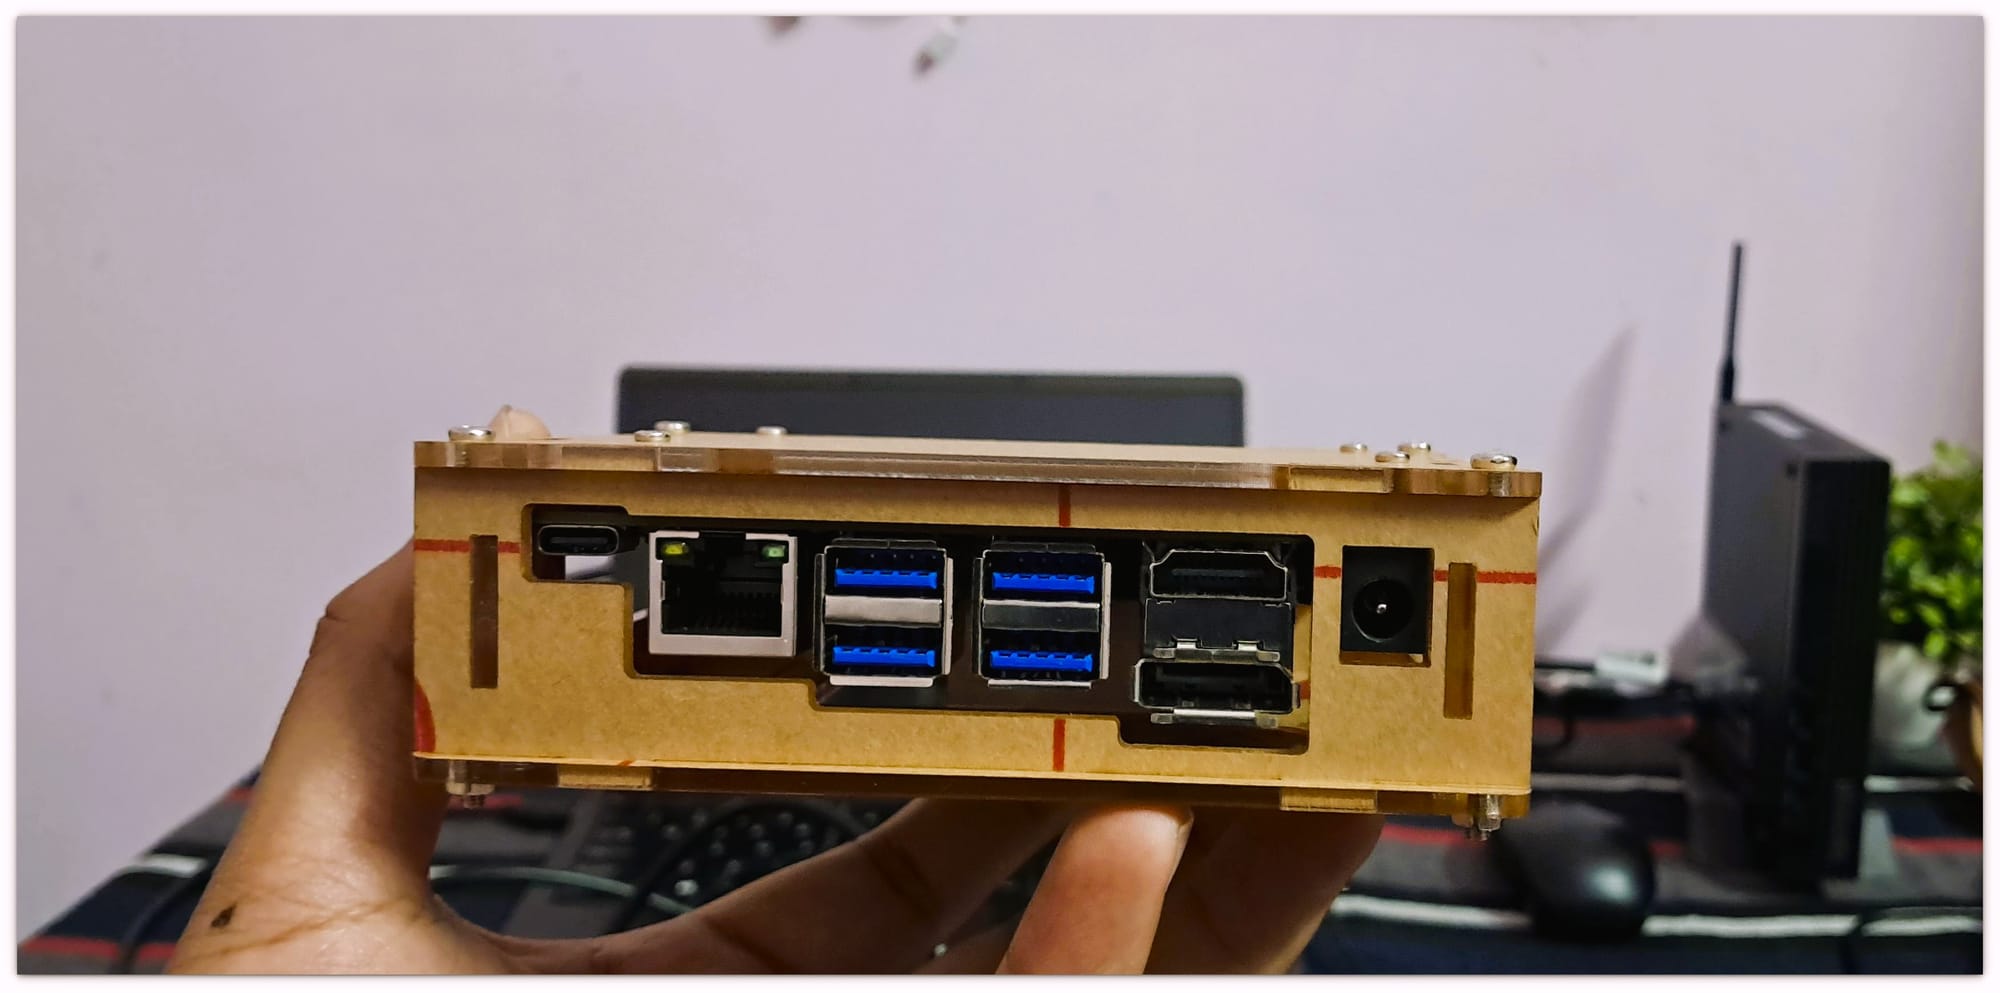
Since I was hoping to use this device for home automation projects, I also got myself a DIY-built case.
OS installation
Now, let’s talk about the OS installation. Spoiled by the ease of the Raspberry Pi Imager, I found myself on a steep learning curve while working with RKDevTool.
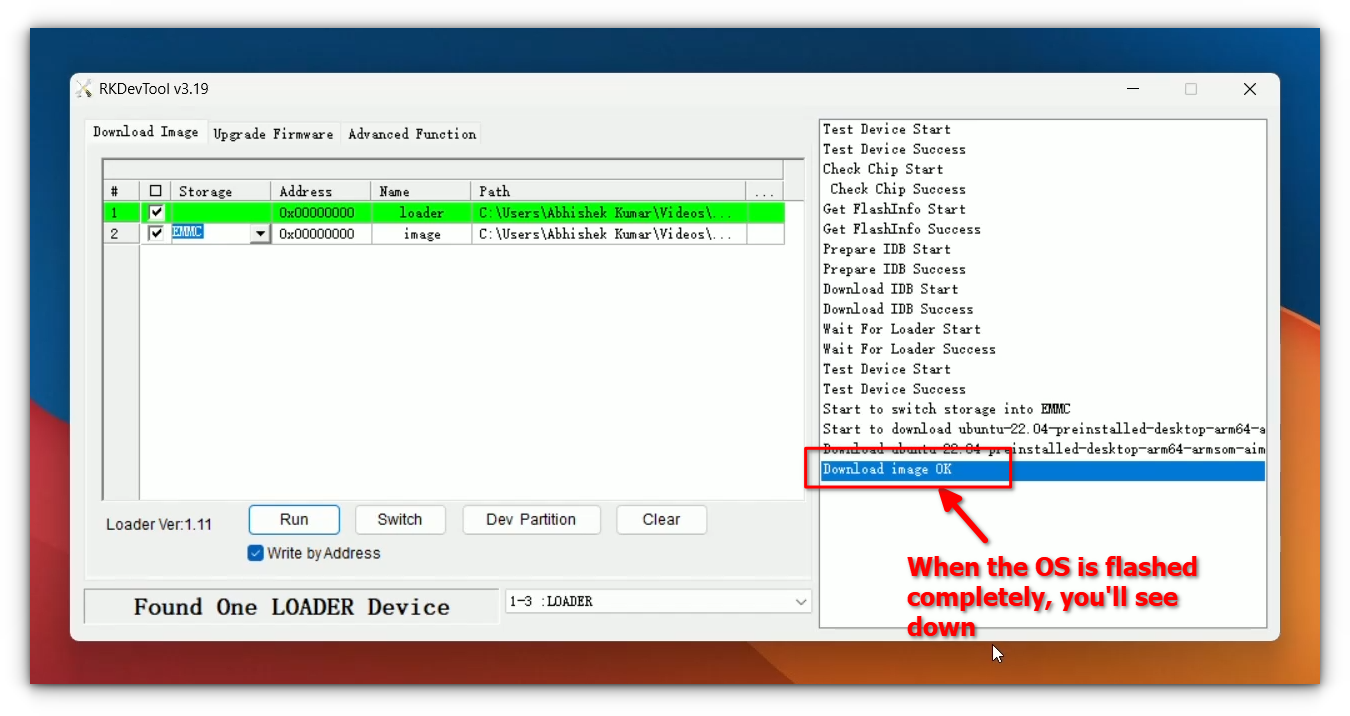
Burning an image for the Rockchip device required me to watch several videos and read multiple pieces of documentation. After much trial and error, I managed to flash the provided Ubuntu image successfully.
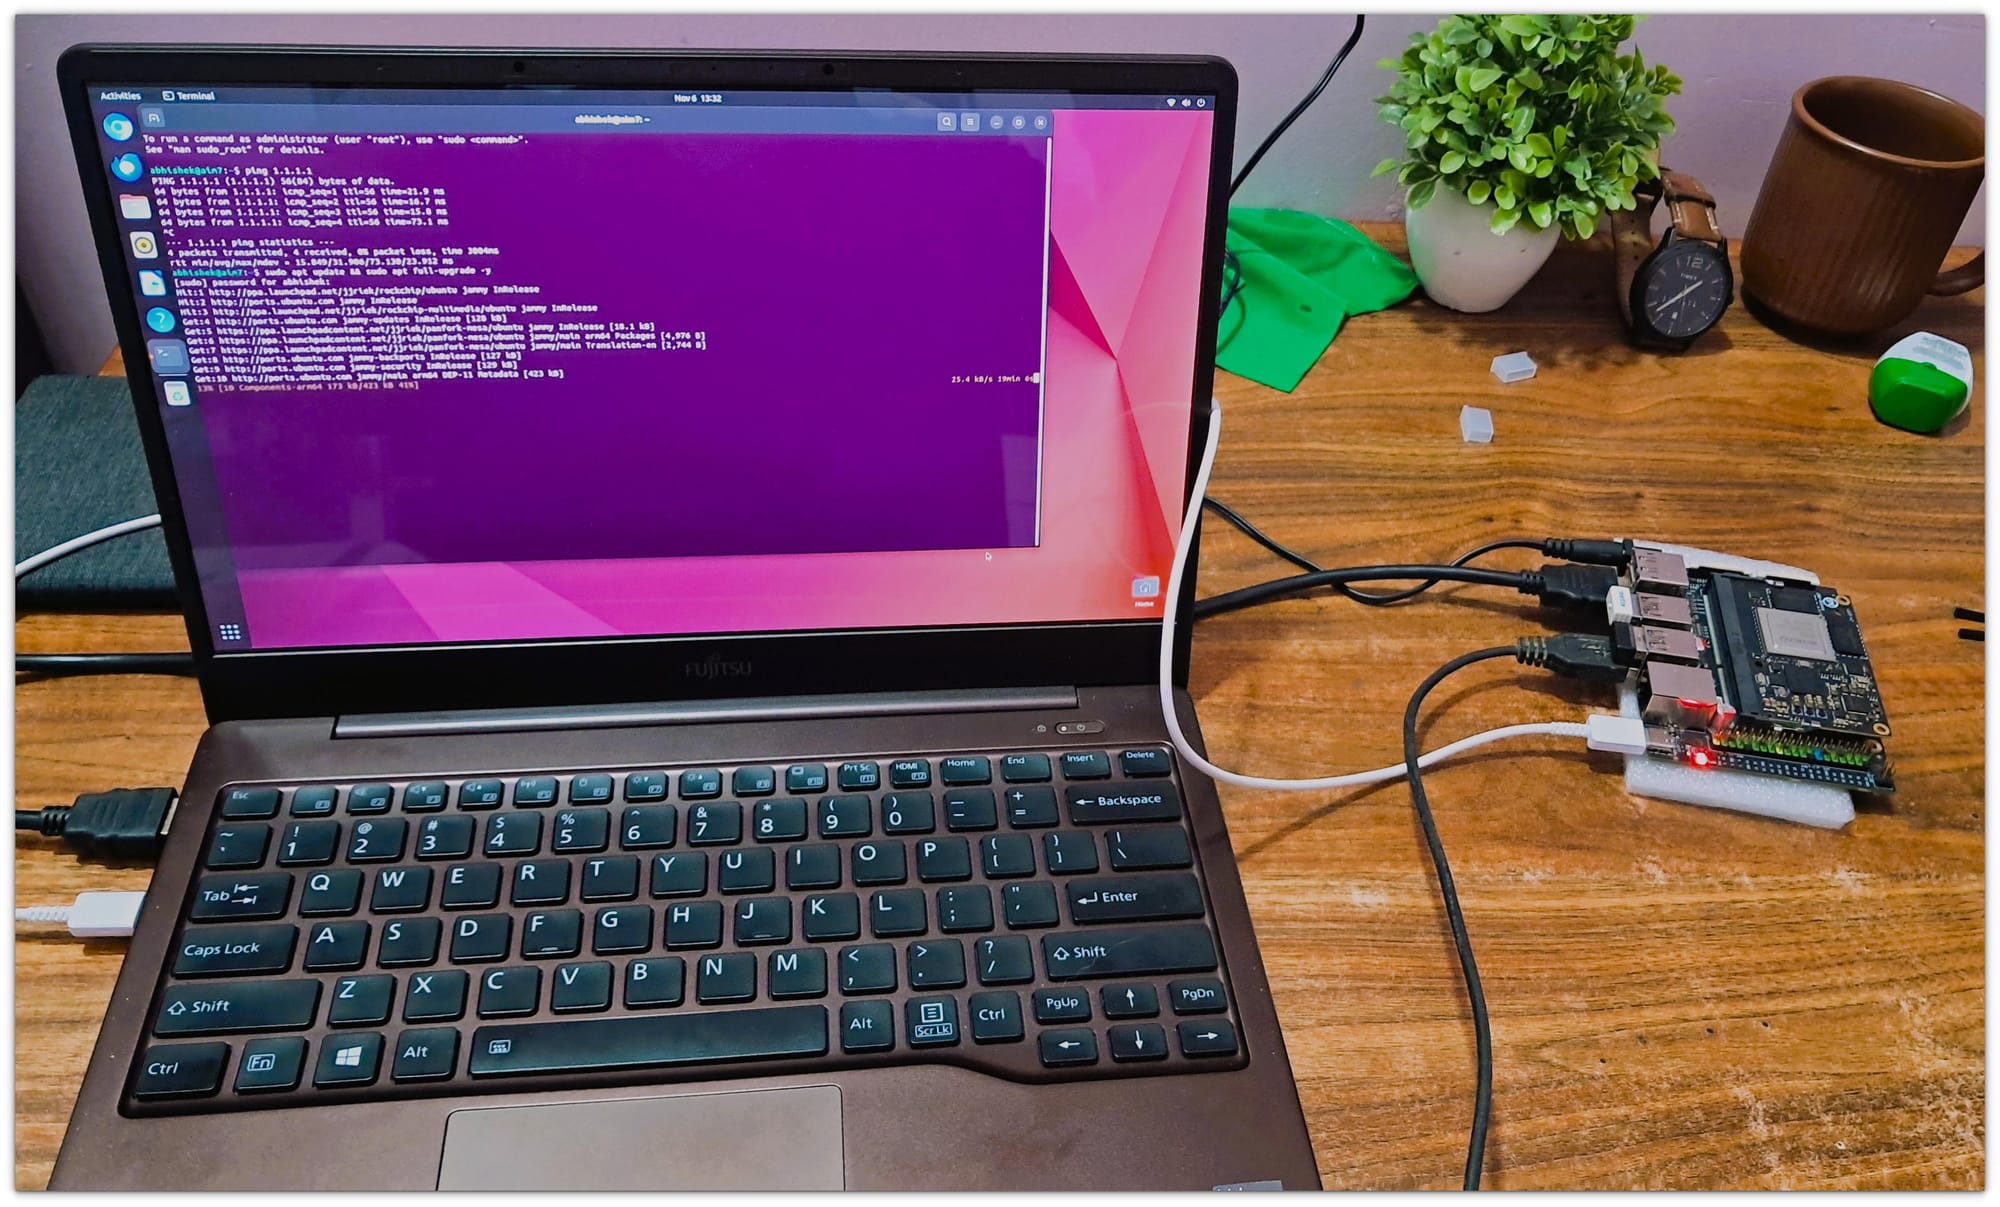
I’ve written a dedicated guide to help you install an OS on Rockchip devices using RKDevTool.
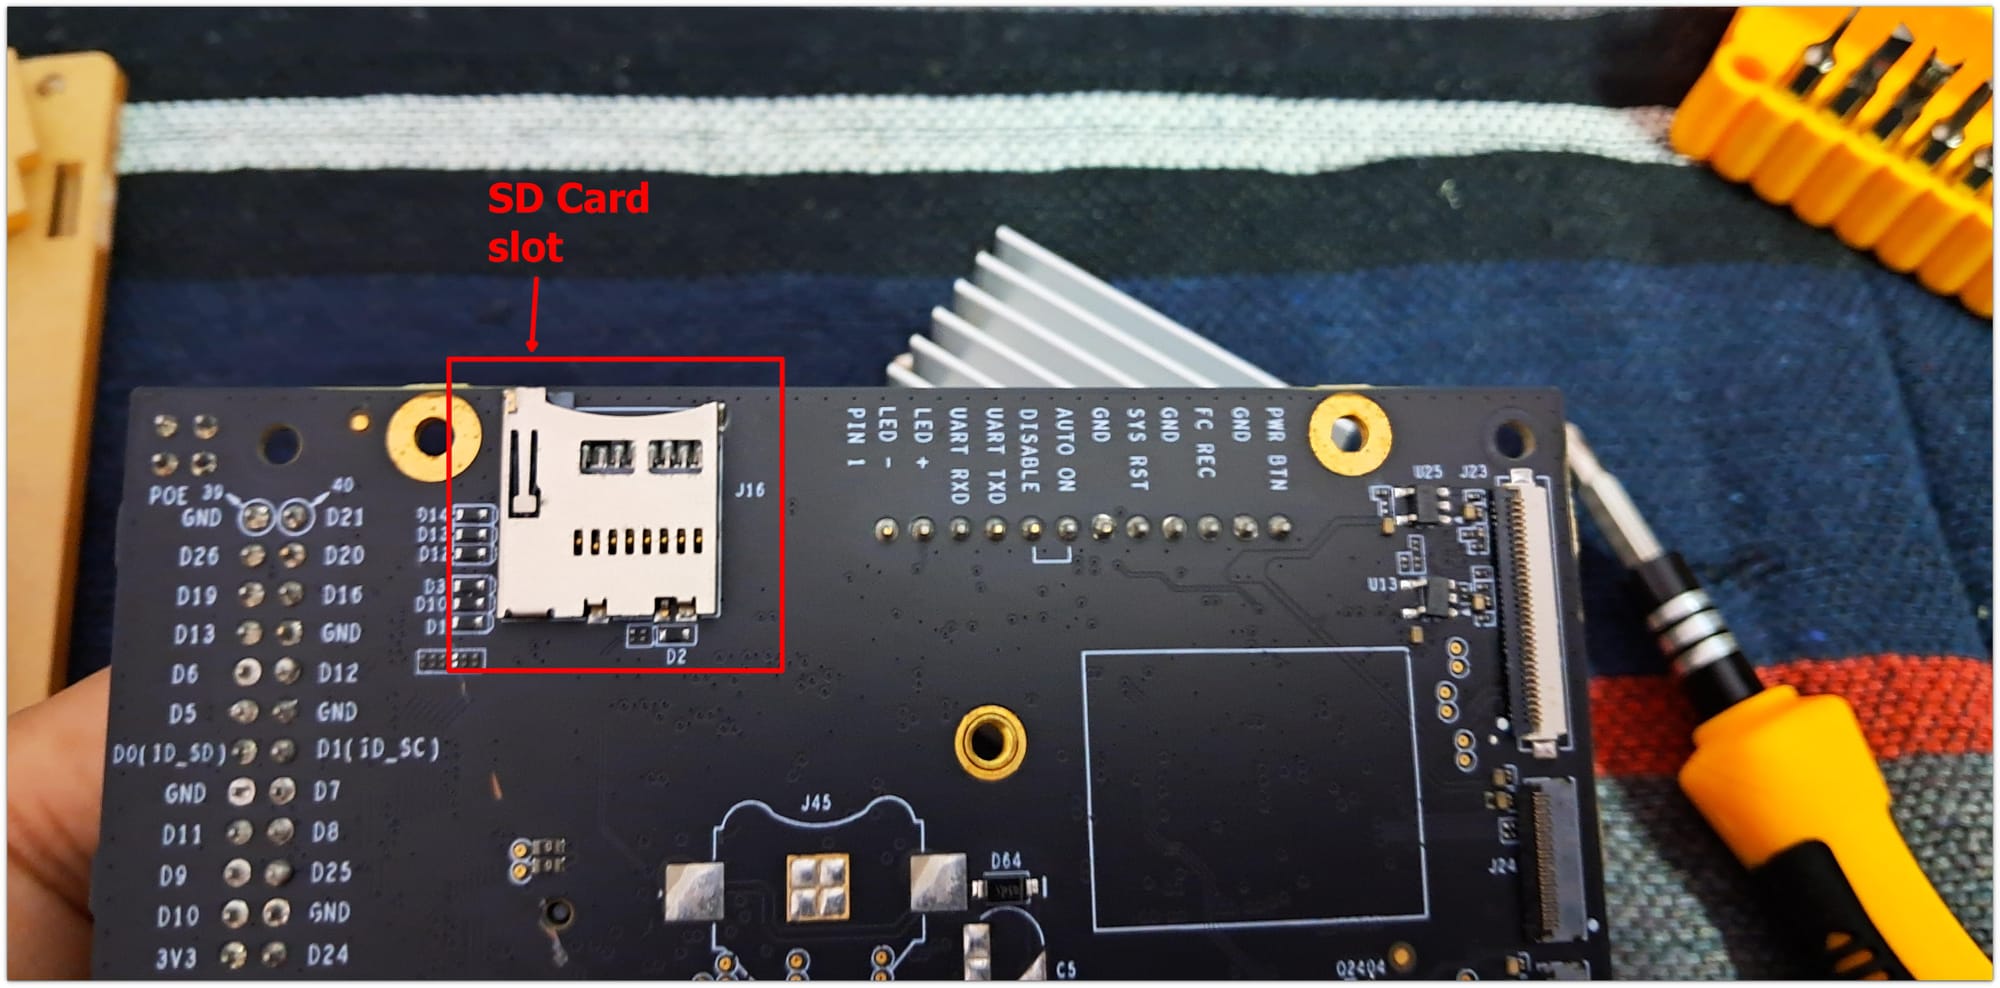
One hiccup worth mentioning: I couldn’t test the SD card support as it didn’t work for me at all. This was disappointing, but the onboard eMMC storage provided a reliable fallback.
Performance testing
To gauge the AIM7’s capabilities, I ran a series of benchmarks and real-world tests. Here’s how it fared:
Geekbench Scores
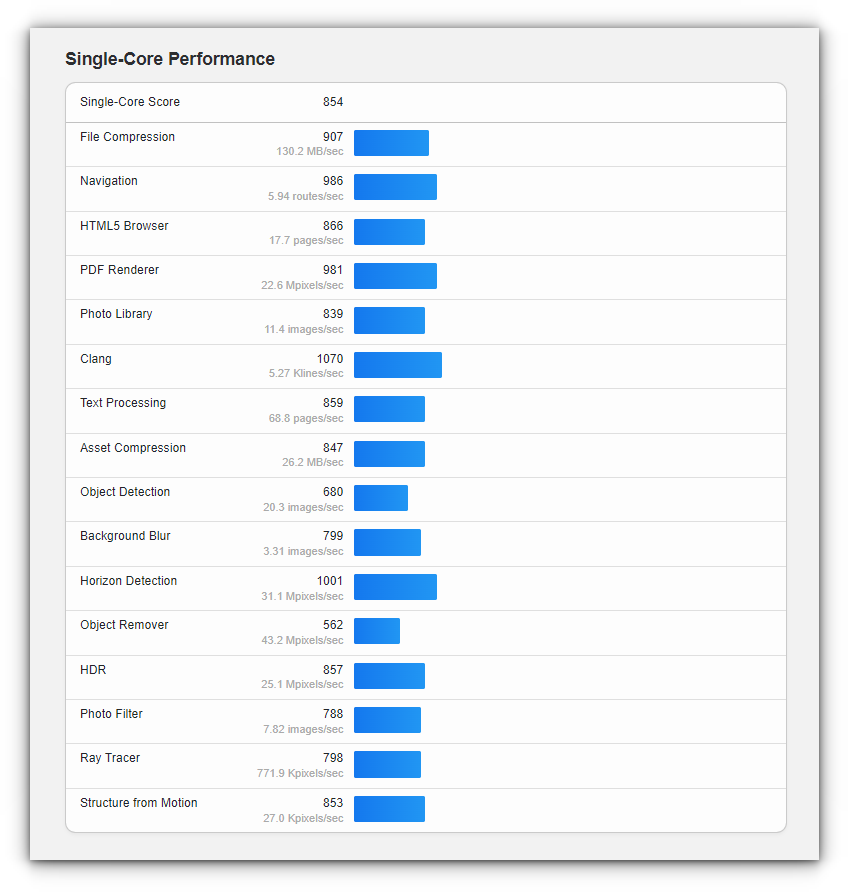
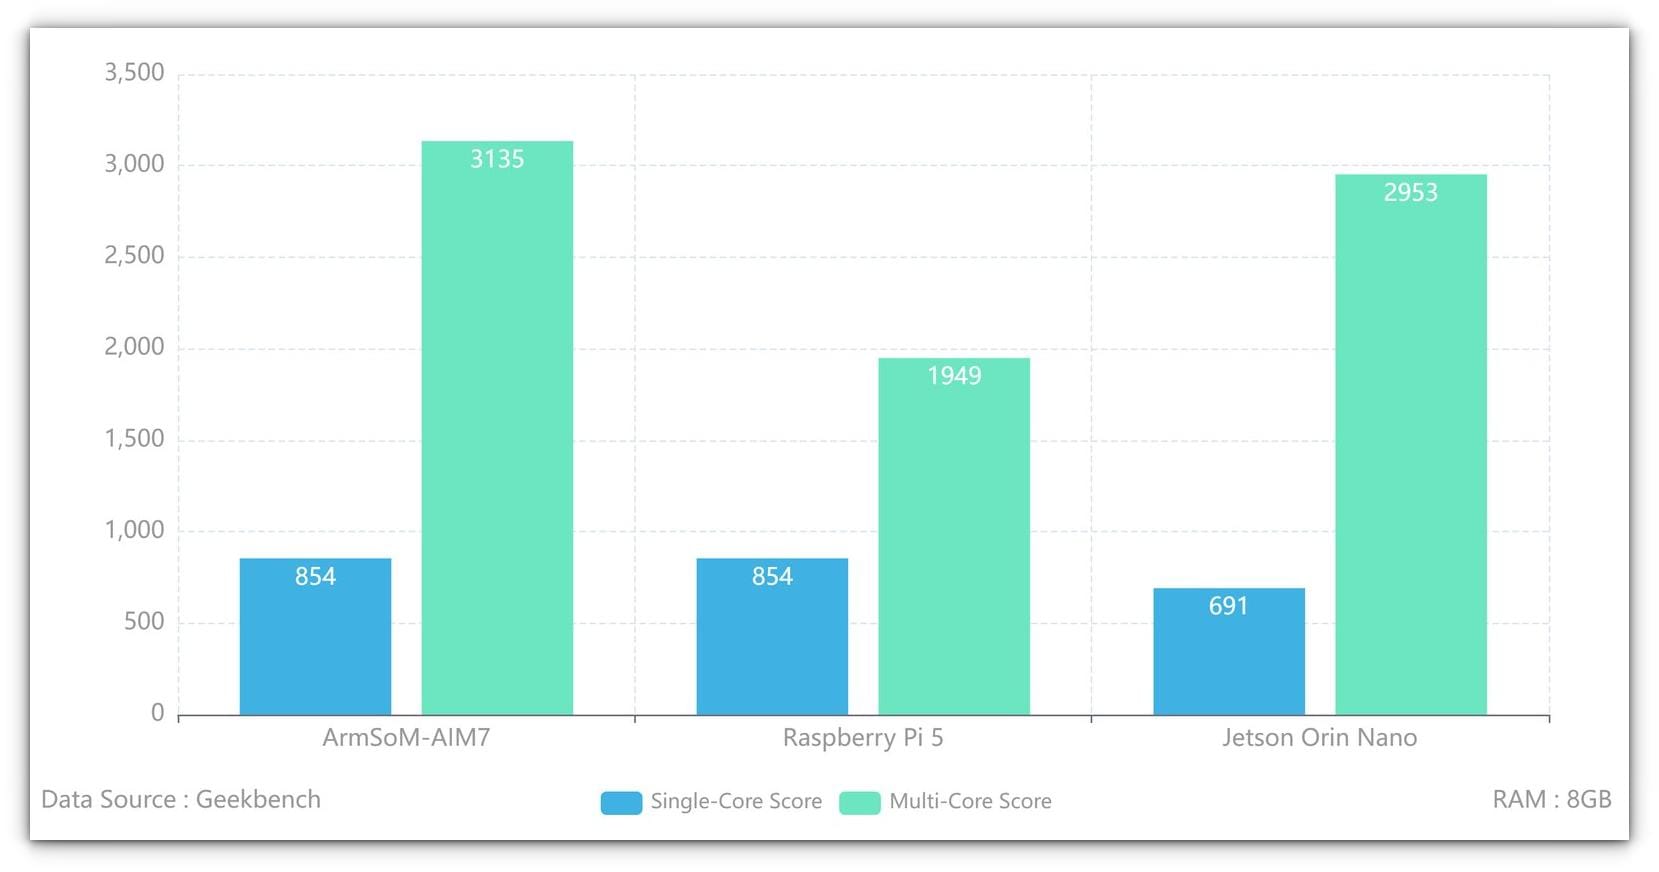
Here you can see the single-core and multi-core performance of RK3588, which is quite impressive. I mean, the results speaks for themselves. The Cortex-A76 cores are a significant upgrade.
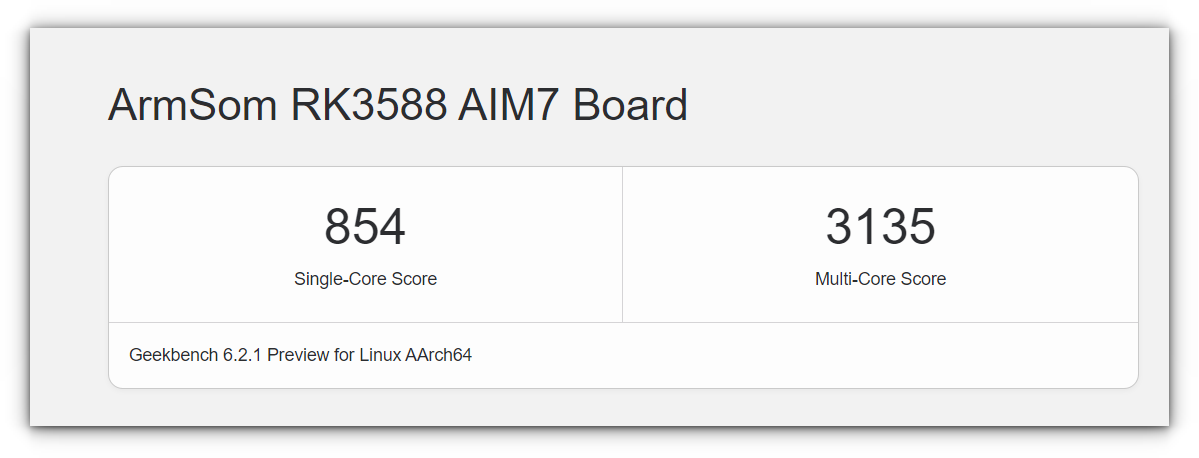
You can see the full single-core performance of RK3588:
Multi-core performance:
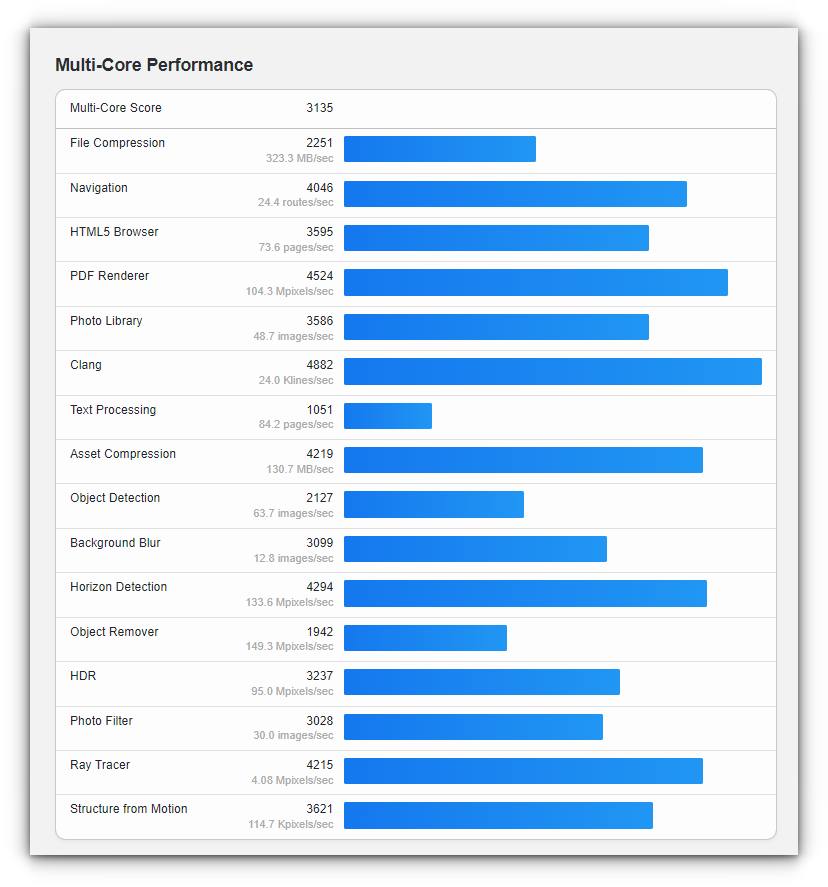
The RK3588’s multi-core performance blew the Raspberry Pi and even Jetson Nano out of the water, with scores nearly double in most tests.
AI Workloads
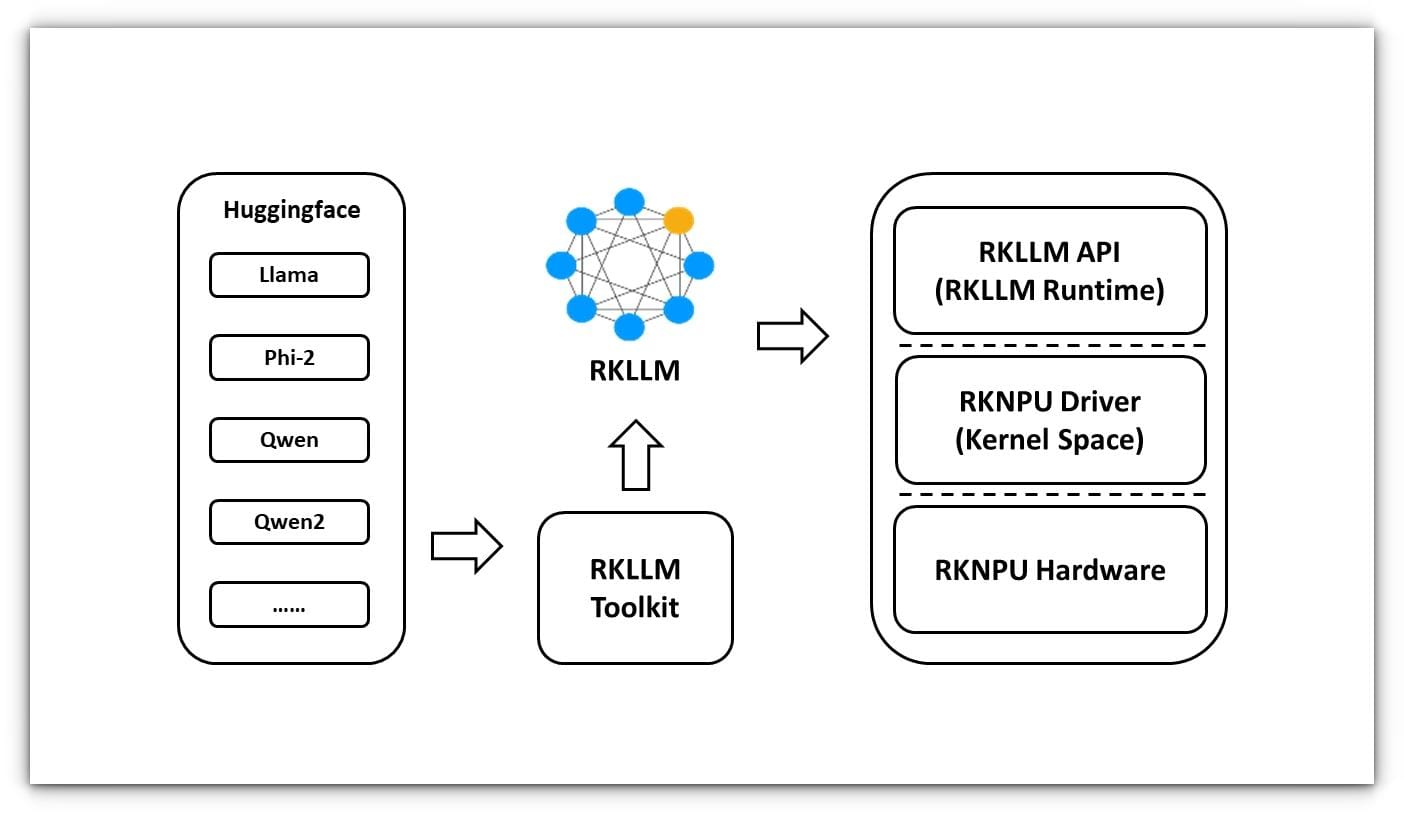
The AIM7’s 6 TOPS NPU is designed to handle AI inference efficiently. It supports RKNN-LLM, a toolkit that enables deploying lightweight language models on Rockchip hardware.
I tested the TinyLLAMA model with 1.1 billion parameters, and the performance was amazing, achieving 16 tokens per second.
Output result:
root@armsom-aim7-io:/# ./llm_demo tinyLlama.rkllm
rkllm init start
rkllm-runtime version: 1.0.1, rknpu driver version: 0.9.6, platform: RK3588
rkllm init success

**********************可输入以下问题对应序号获取回答/或自定义输入********************

[0] what is a hypervisor?

*************************************************************************

user: 0
what is a hypervisor?
robot: A hypervisor is software, firmware, or hardware that creates and runs virtual machines (VMs).There are two types: Type 1 (bare-metal, runs directly on hardware) and Type 2 (hosted, runs on top of an OS). tokens 50 time 3.12
Token/s : 16.01- While I couldn’t test all the other supported models, here’s a list of models and their performance, courtesy of Radxa:TinyLLAMA 1.1B – 15.03 tokens/sQwen 1.8B – 14.18 tokens/sPhi3 3.8B – 6.46 tokens/sChatGLM3 – 3.67 tokens/s
The RKNN-LLM toolkit supports deploying lightweight language models on Rockchip hardware, and the NPU’s efficiency makes it a compelling option for AI workloads.
The performance varies depending on the model size and parameters, with larger models naturally running slower. The NPU also consumes less power than the GPU, freeing it up for other tasks.
Image & video processing
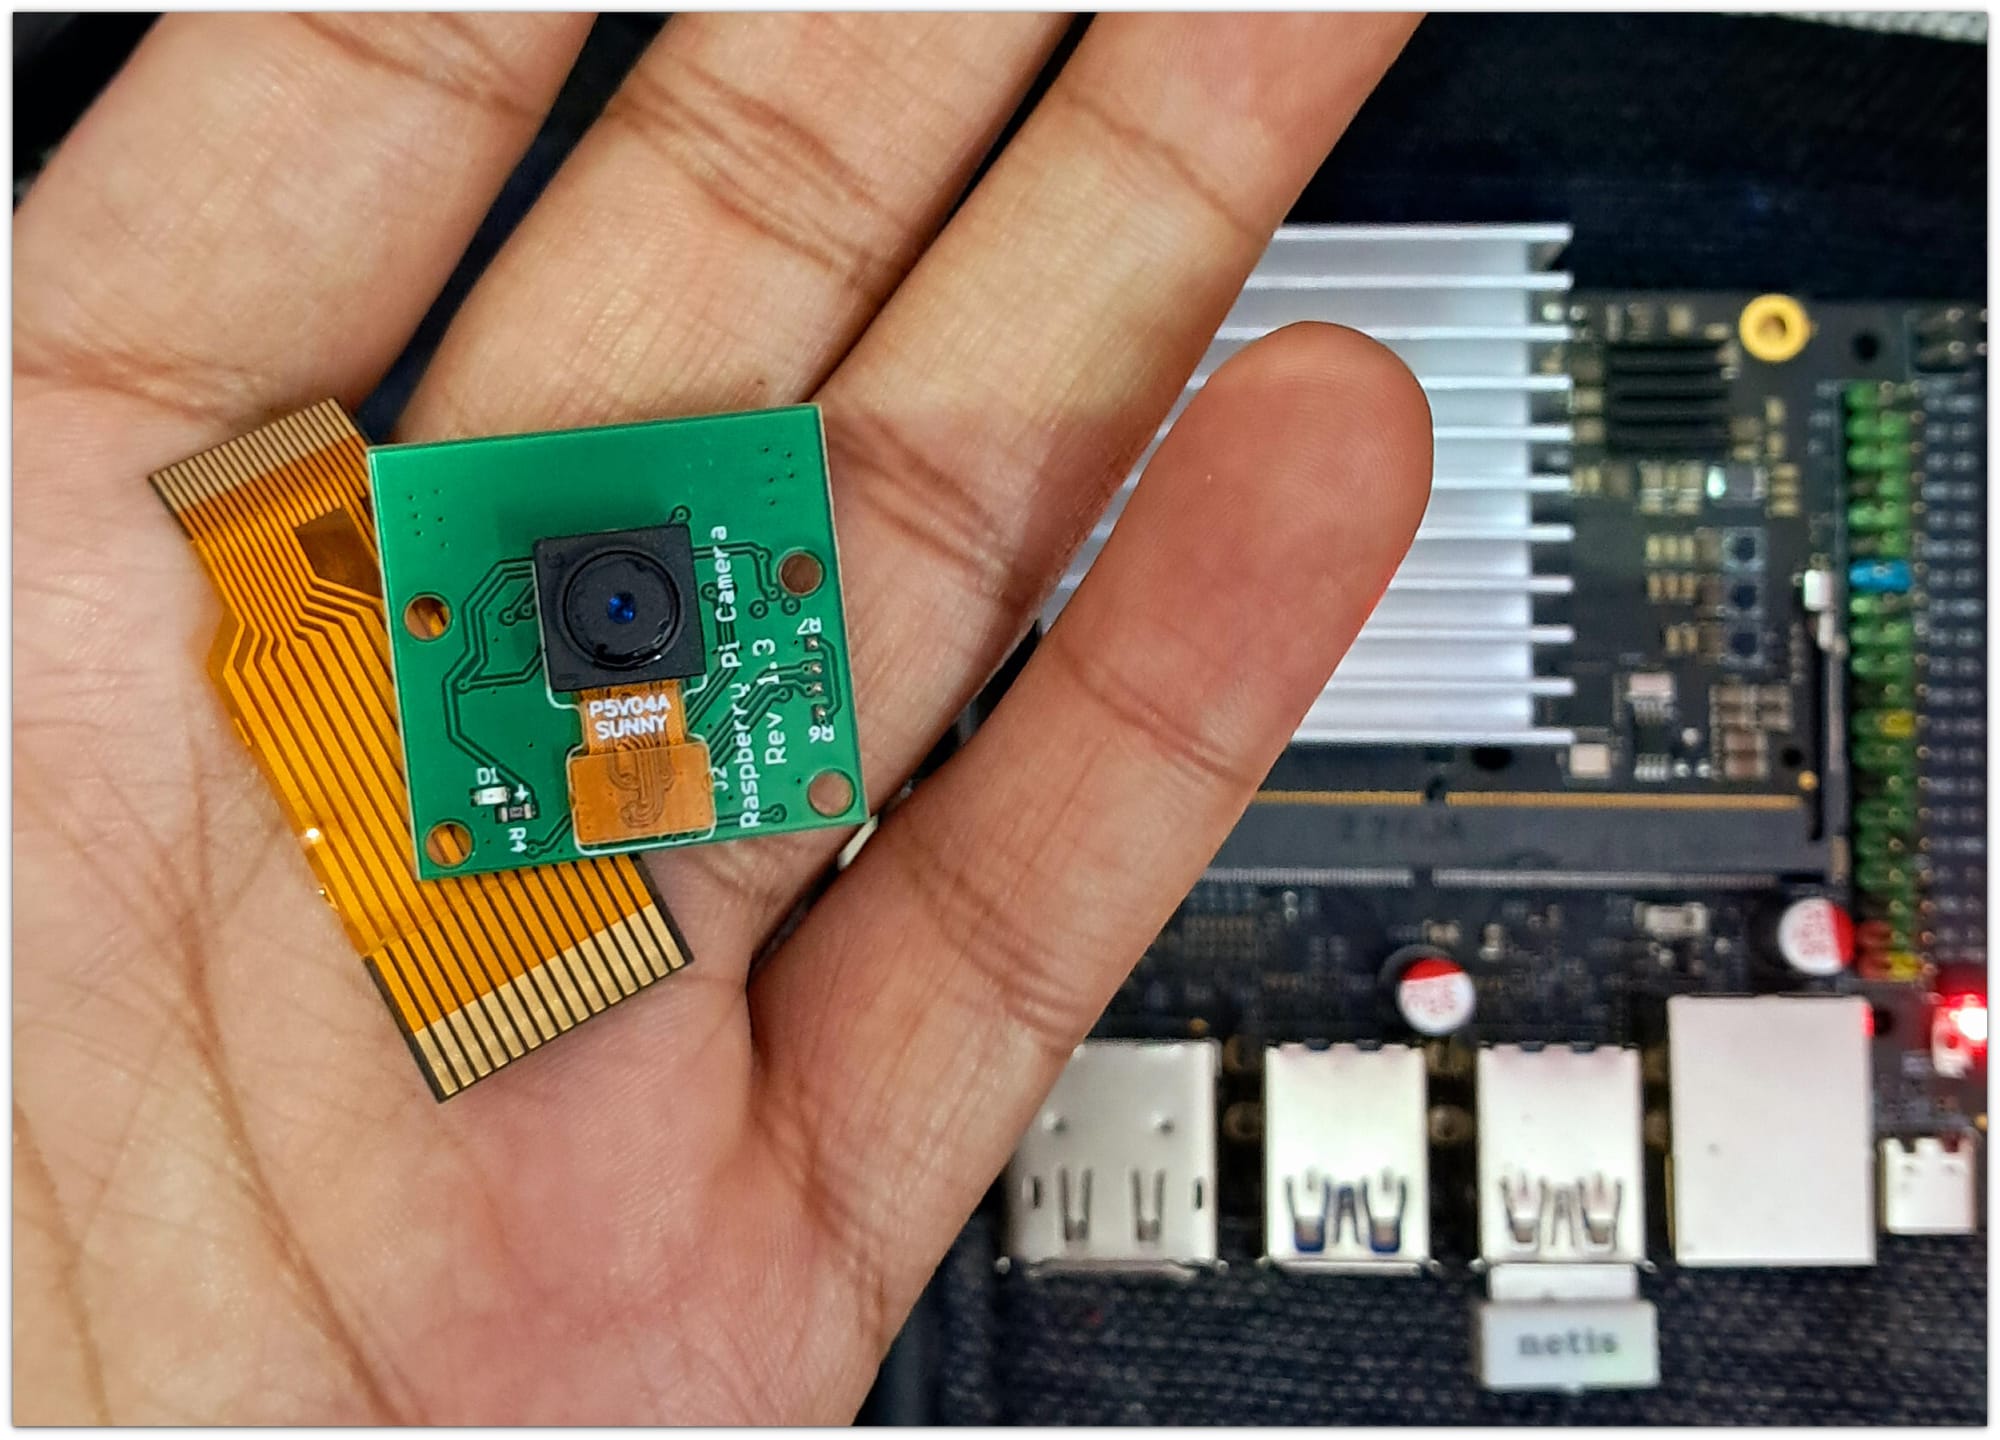
I couldn’t process live video and images as I didn’t have a compatible camera module. I own an RPi camera module but lacked the compatible ribbon cable to connect it to the AIM-IO board.
Despite this, I tested the image processing capabilities using the YOLOv8 model for Object detection on the demo images provided with it.
Took me a lot of time to understand how to use it (will cover that in separate article, hopefully) but thanks to Radxa’s well-structured documentation, which provided a step-by-step guide.

The results were impressive, showcasing the board’s ability to handle complex image recognition tasks efficiently.
What Could It Be Used For?
The AIM7 offers a wide range of potential applications, making it a versatile tool for developers and hobbyists alike. Here are some possible use cases:
- Home Automation: AIM7’s low power consumption and robust processing capabilities make it ideal for smart home setups. From controlling IoT devices to running edge AI for home security systems, the AIM7 can handle it all.
- AI-Powered Applications: With its 6 TOPS NPU, the AIM7 excels in tasks like object detection, natural language processing, and image recognition. It’s a great choice for deploying lightweight AI models at the edge.
- Media Centers: The ability to decode and encode 8K video makes it a powerful option for creating custom media centers or streaming setups.
- Robotics: AIM7’s compact size and versatile connectivity options make it suitable for robotics projects that require real-time processing and AI inference.
- Educational Projects: For students and educators, the AIM7 provides a hands-on platform to learn about embedded systems, AI, and computer vision.
- Industrial Automation: Its robust hardware and software support make it a reliable choice for industrial applications like predictive maintenance and process automation.
- DIY Projects: Whether you’re building a smart mirror, an AI-powered camera, or a custom NAS, the AIM7 offers the flexibility and power to bring your ideas to life.
If you are not interested in all of the above, you can always use it as your secondary desktop, at the end it is essentially a single board computer. 😉
Final thoughts
After spending some time with the ArmSoM AIM7, I can confidently say that it’s an impressive piece of hardware. I installed Ubuntu on it, and the desktop experience was surprisingly smooth.
The onboard eMMC storage really made the experience smooth, it made app launches fast and responsive, offering a noticeable speed boost compared to traditional SD card setups.
Watching YouTube at 1080p was smooth, something that’s still a bit of a challenge for Raspberry Pi in the same resolution. The playback was consistent, without any stuttering, which is a big win for media-heavy applications.
The RKNN-LLM toolkit enabled me to deploy lightweight models, and the NPU’s power efficiency freed up the GPU for other tasks, which is perfect for edge AI applications.
My only gripe is the lack of extensive documentation from ArmSoM. While it’s available, it often doesn’t cover everything, and I found myself relying on Radxa and Mixtile forums to work around issues. ArmSoM told me that documentation will be improved after the crowdfunding launch.
You can follow the crowdfunding campaign and other developments on the dedicate page.
I’m looking forward to exploring more of its potential in my home automation projects, especially as I integrate AI for smarter, more efficient systems.

