Easily Take Full Webpage Screenshots in Firefox and Chrome
Taking screenshots to capture information is pretty common.
But did you know you can take screenshots of an entire webpage in Firefox?
Firefox comes with an in-built screen capture tool that allows you to take screenshots of selected areas, visible screen areas, or even entire web pages.
This means if you want to save a webpage for later reference, you can quickly capture the entire webpage.
Chrome also has the screenshot feature but it is slightly more complicated.
In this tutorial, I will walk you through the following:
- How to take screenshots in Firefox
- How to capture screenshots in Chrome
- Using the Nimbus extension to get more features than the in-built one
So let’s start with the first one.
Taking full-page screenshots in Firefox
Firefox’s in-built tool lets you select the whole screen, the complete page, or even a specific paragraph with a single click.
Step 1: Access the screenshot tool
To start the screenshot utility, you press Ctrl + Shift + s while using Firefox.
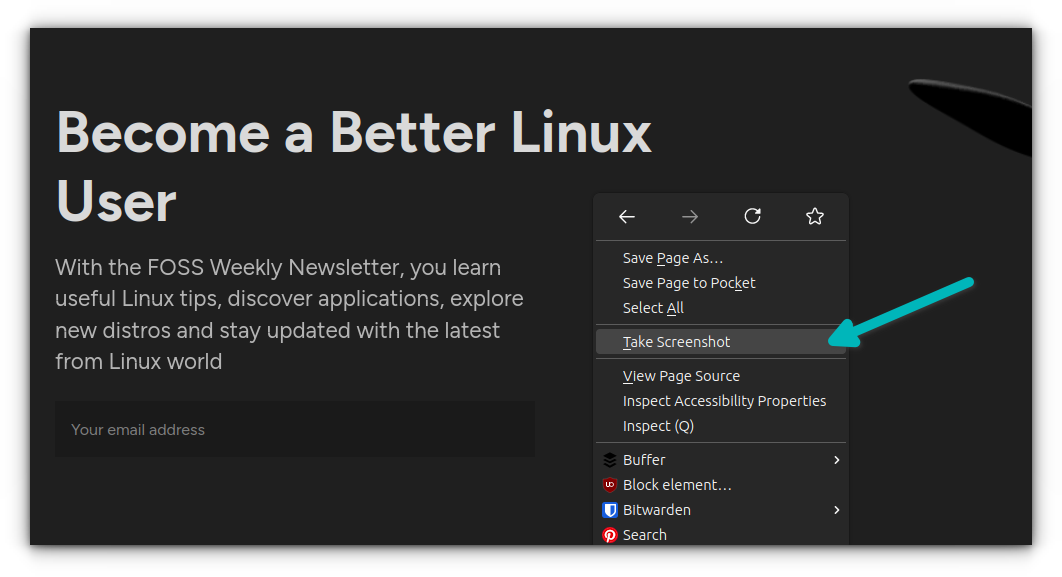
If you don’t always remember shortcuts, you can access the tool from the right-click menu as well.
If you regularly take screenshots, adding the utility to the toolbar would be a good idea. And to do so, you follow the simple three steps:
- First, Right-click on the toolbar and select the option
Customize Toolbar - Find the
Screenshotutility and drag it to the toolbar - Hit the
Donebutton and that’s it
Still confused? Here’s how you do it:
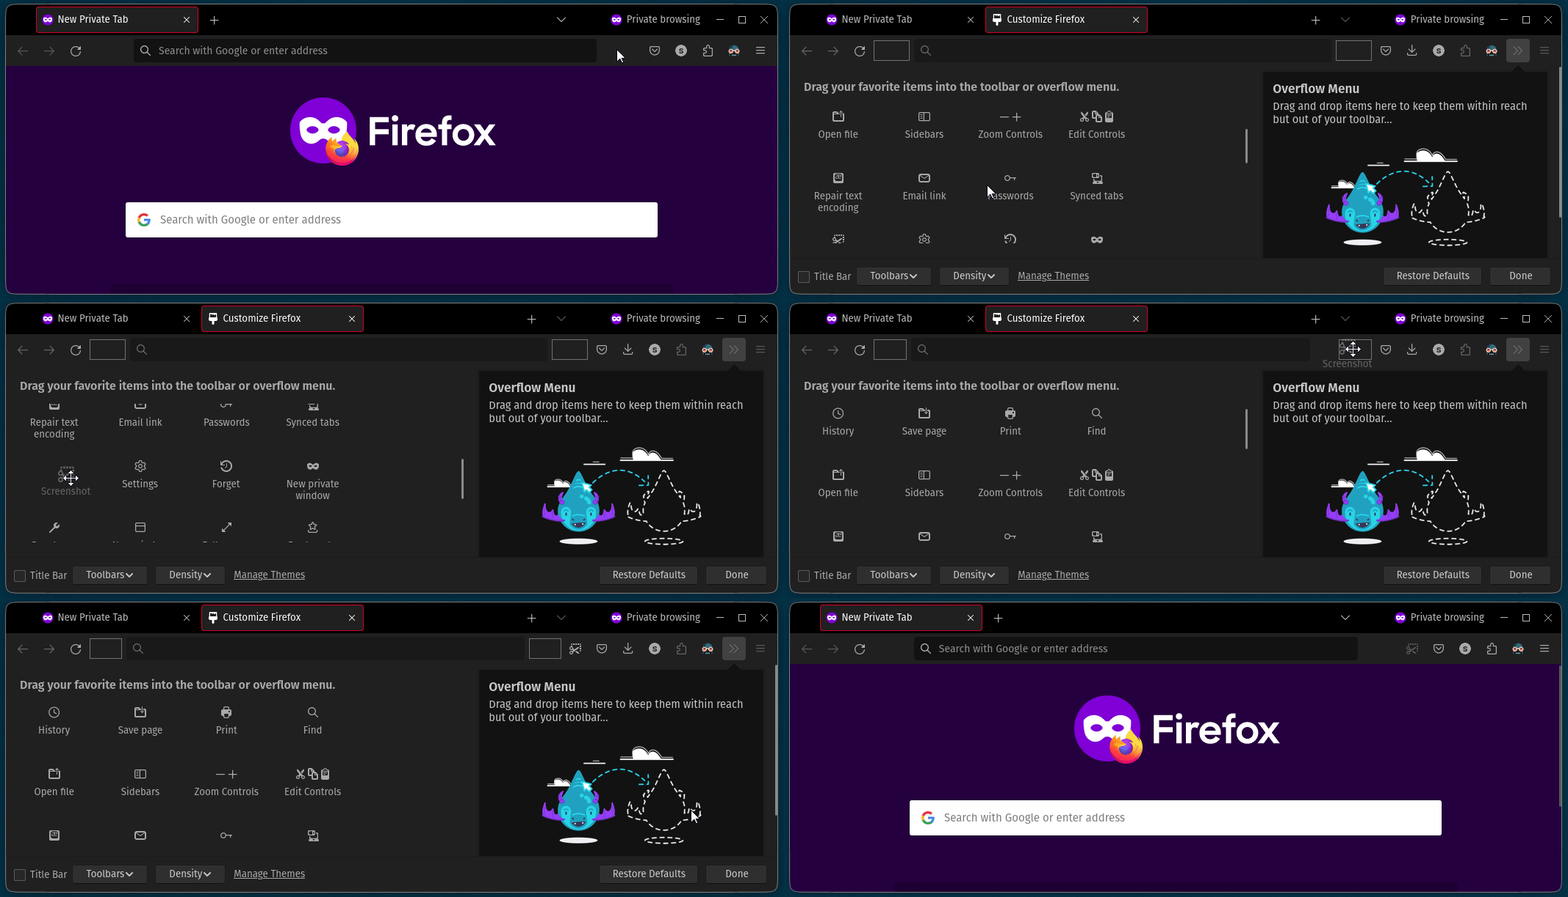
Once enabled, you can click on the screenshot logo that you just dragged to the toolbar.
Step 2: Take a screenshot in Firefox
When you start the screenshot tool, it will prompt with two options: Save full page and Save visible. Here,
- Save full page will capture the entire webpage
- Save Visible will only capture what is visible in the current frame
But if you want to capture a specific part, you can select that part using the mouse cursor and save it:
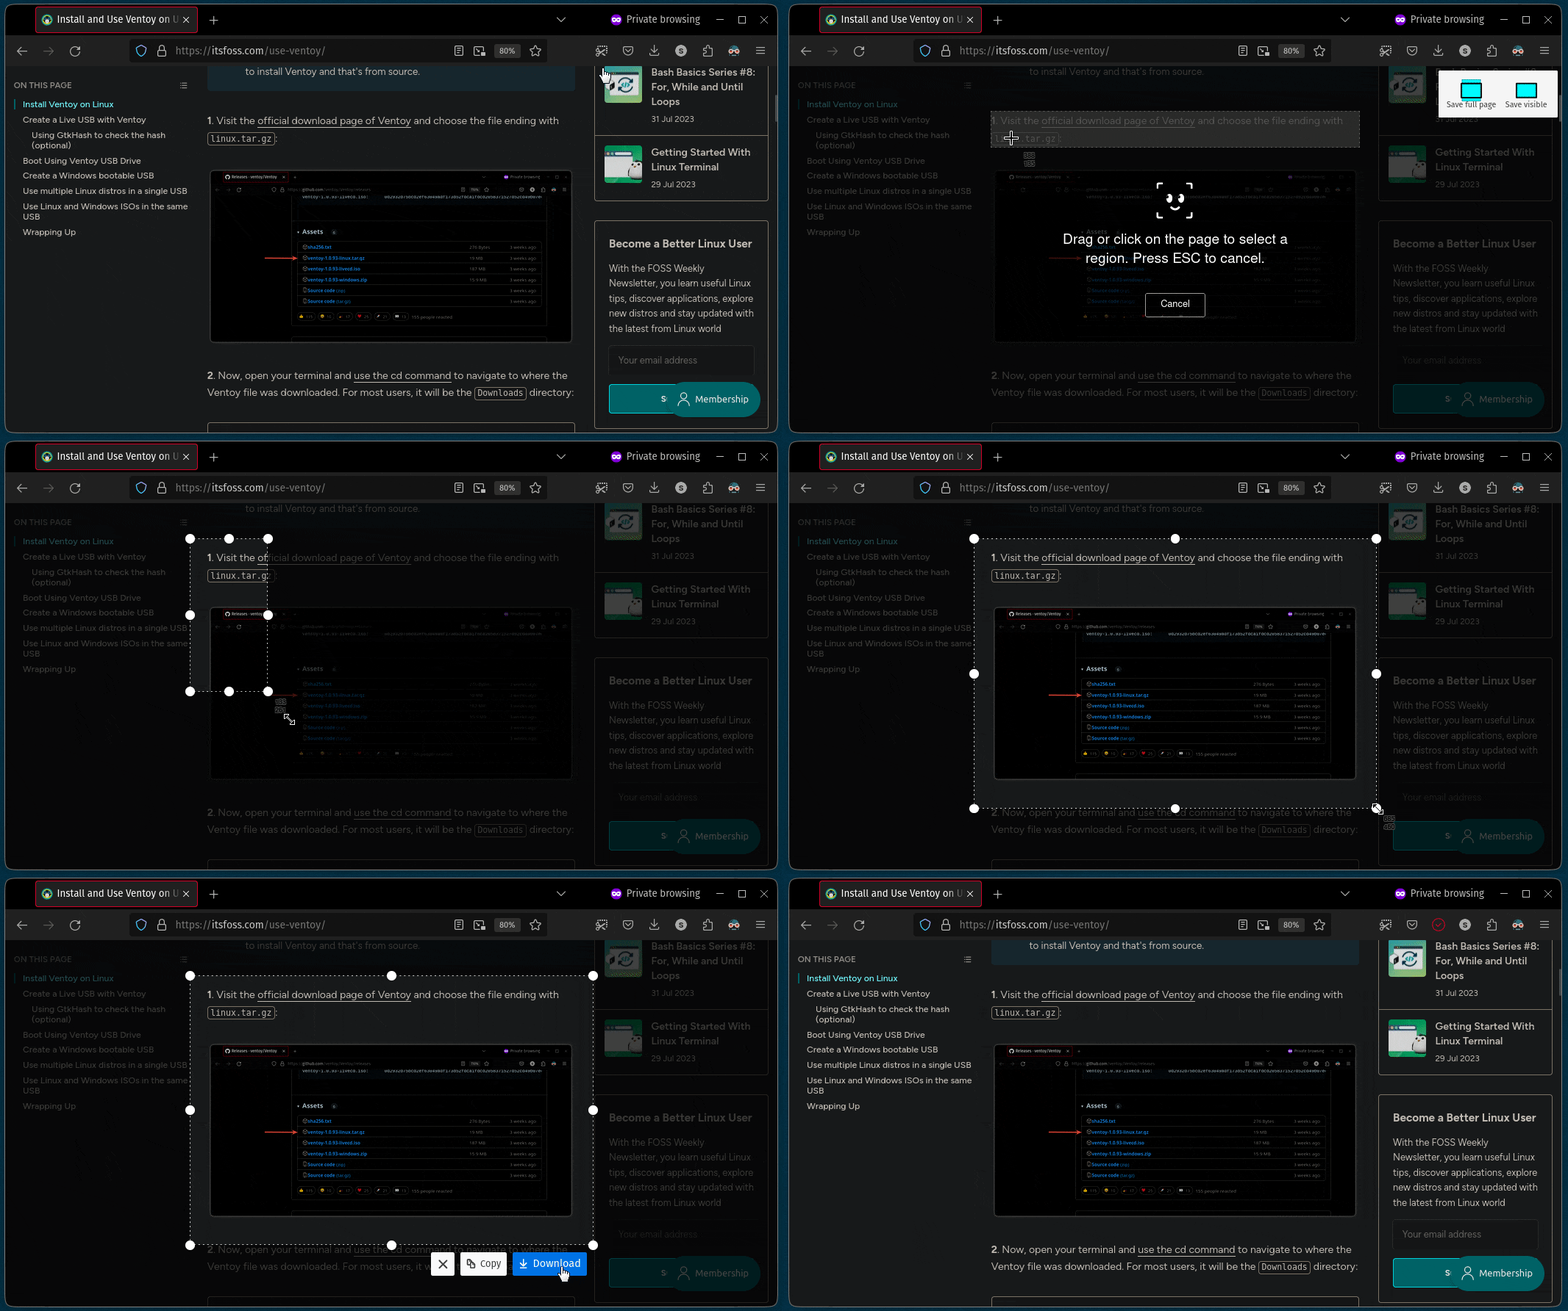
As you can see, there are two options: Save or copy (to clipboard so that you can paste it to a document or editing tool). You can use either as per your use case.
Take full-page screenshots in Chrome
Taking full-page screenshots in Chrome is a little trickier than in Firefox because it is hidden under the developer options.
Worry not! You’ll get there in the following steps:
- Open the menu and go to More Tools-> Developer tools. Alternatively, you can press
Ctrl + Shift + lto directory get into Developer tools. - Press
Ctrl + Shift + pand type screenshot. - Select the area or the entire page and a screenshot will be downloaded.
Let me show you how you do it:
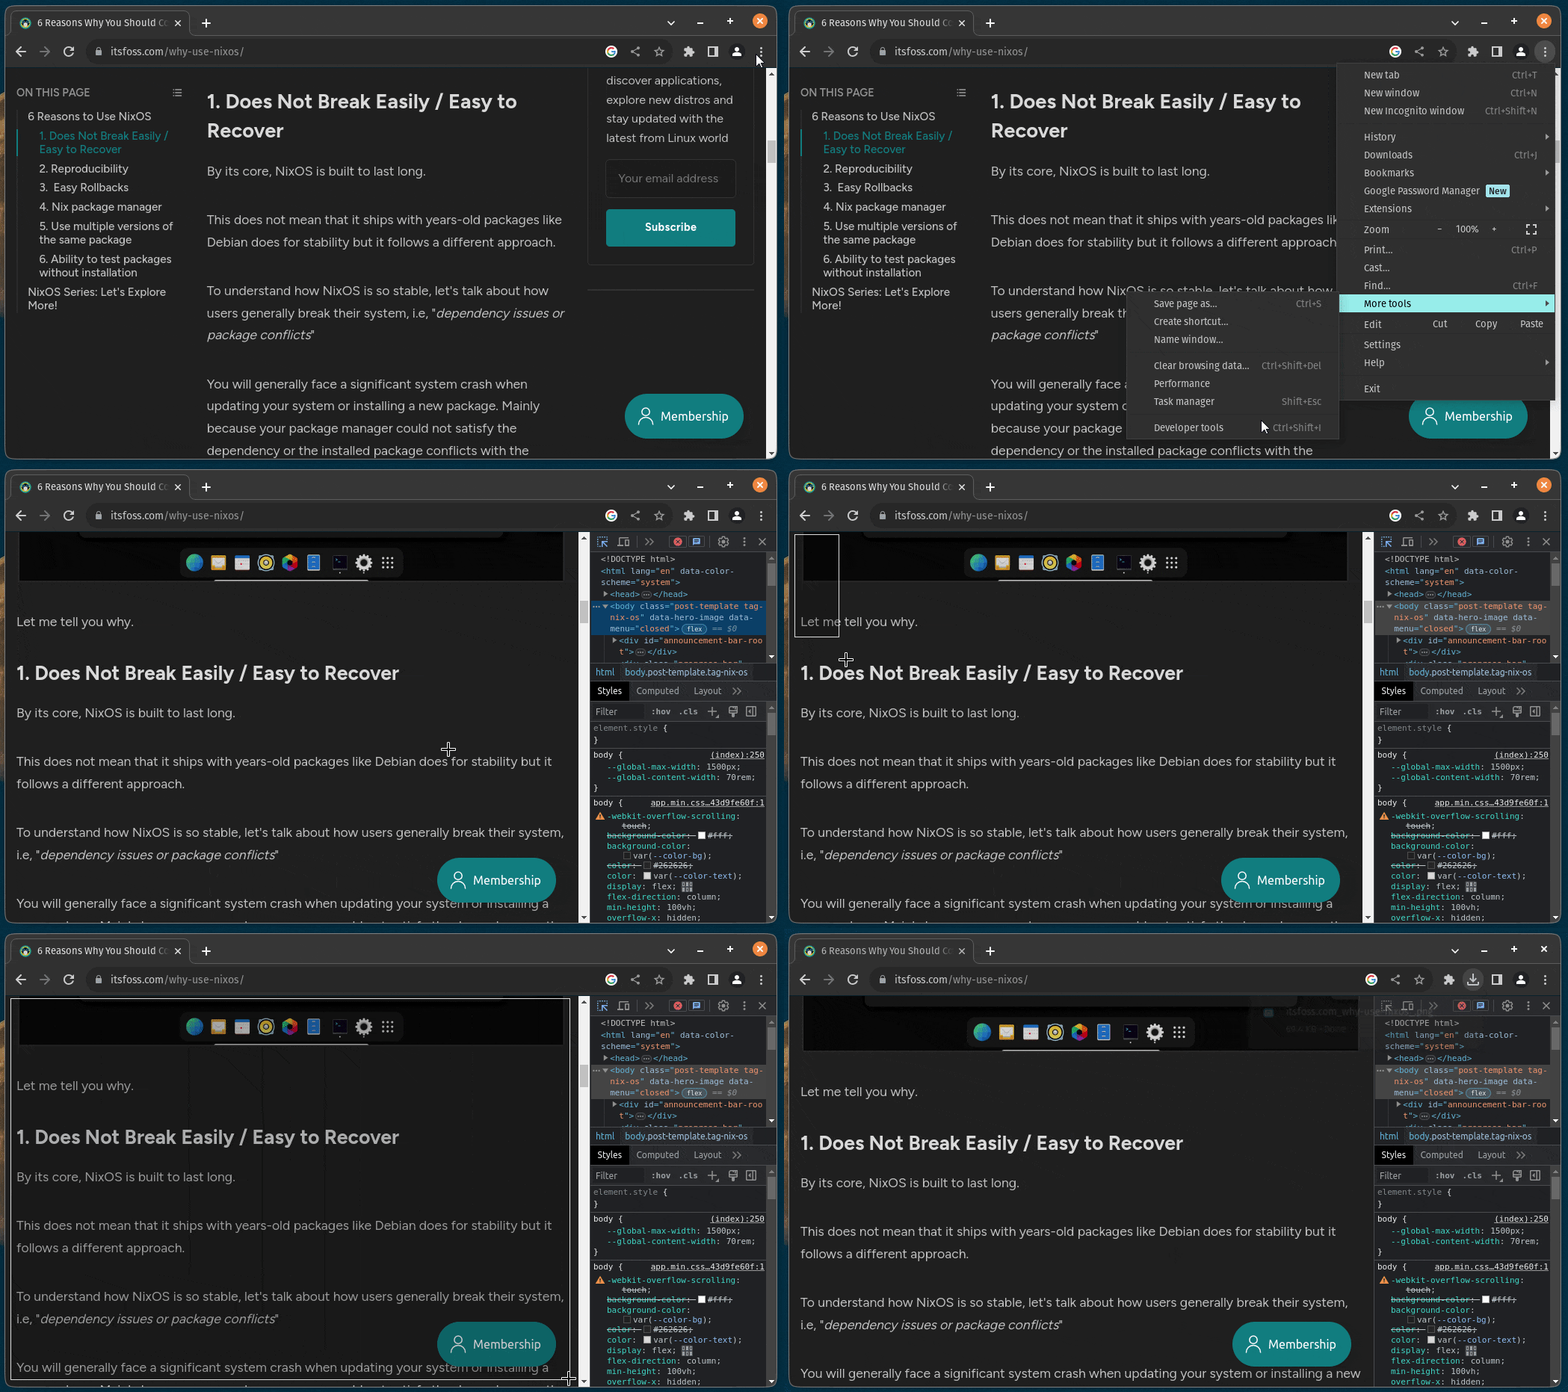
That’s pretty much all you get with Chrome.
How to take screenshots using the extension
If you want more features like adding a delay, watermark, or notations, then you have to use an extension.
And for that purpose, I would recommend using Nimbus which lets you do almost everything that any locally installed screenshot tool lets you do.
Download Nimbus for Firefox:
Download Nimbus for Chrome:
Once you’re done with the installation, make sure to sign-up for Nimbus to enable all the features.
Click on the Nimbus extension logo and you’d see multiple options:
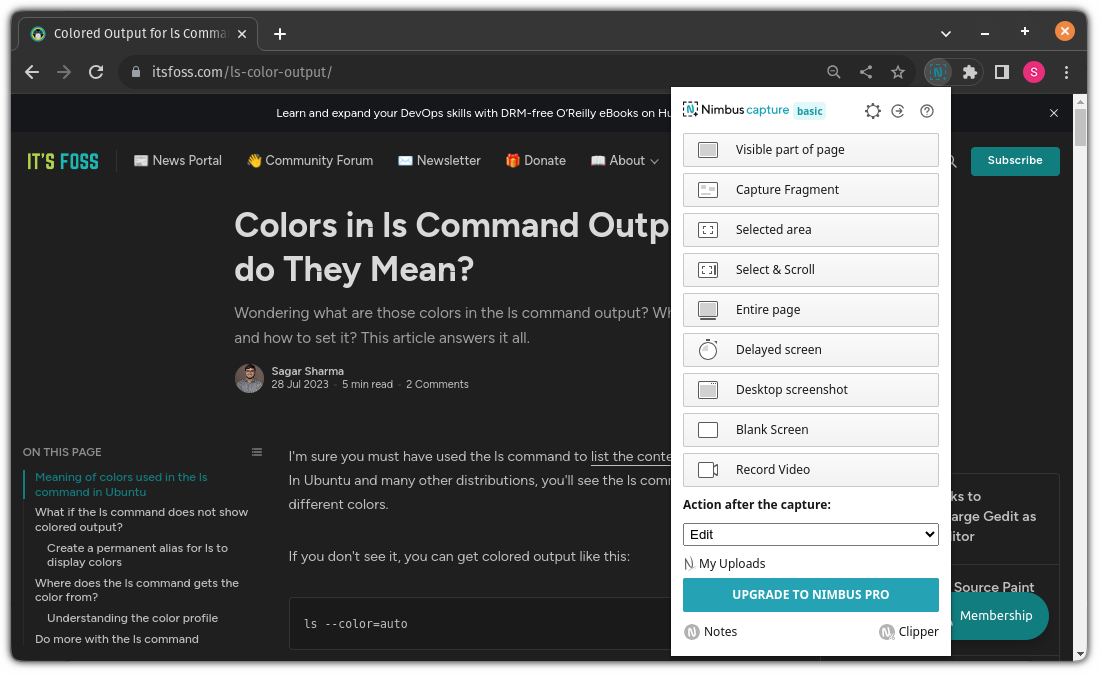
You can choose any of the shown features and once done, based on the action after the capture (mine is an edit) it will download the screenshot directly, open the editor or send it to any of the selected cloud providers.
If you too went with the Edit as an action after capture, then it will open an editor where you can make nominal edits to the screenshot you’ve captured:
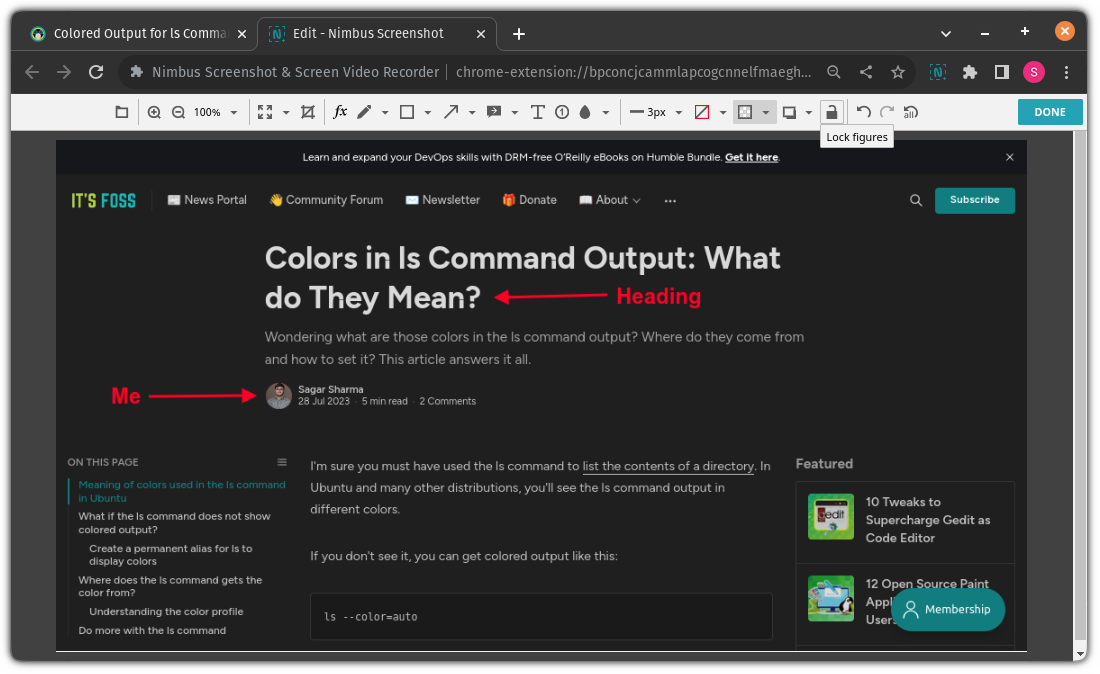
And if you want to add a watermark, know/change shortcuts, change the format of screenshots, and more, then open the Nimbus and hit the little gear button:
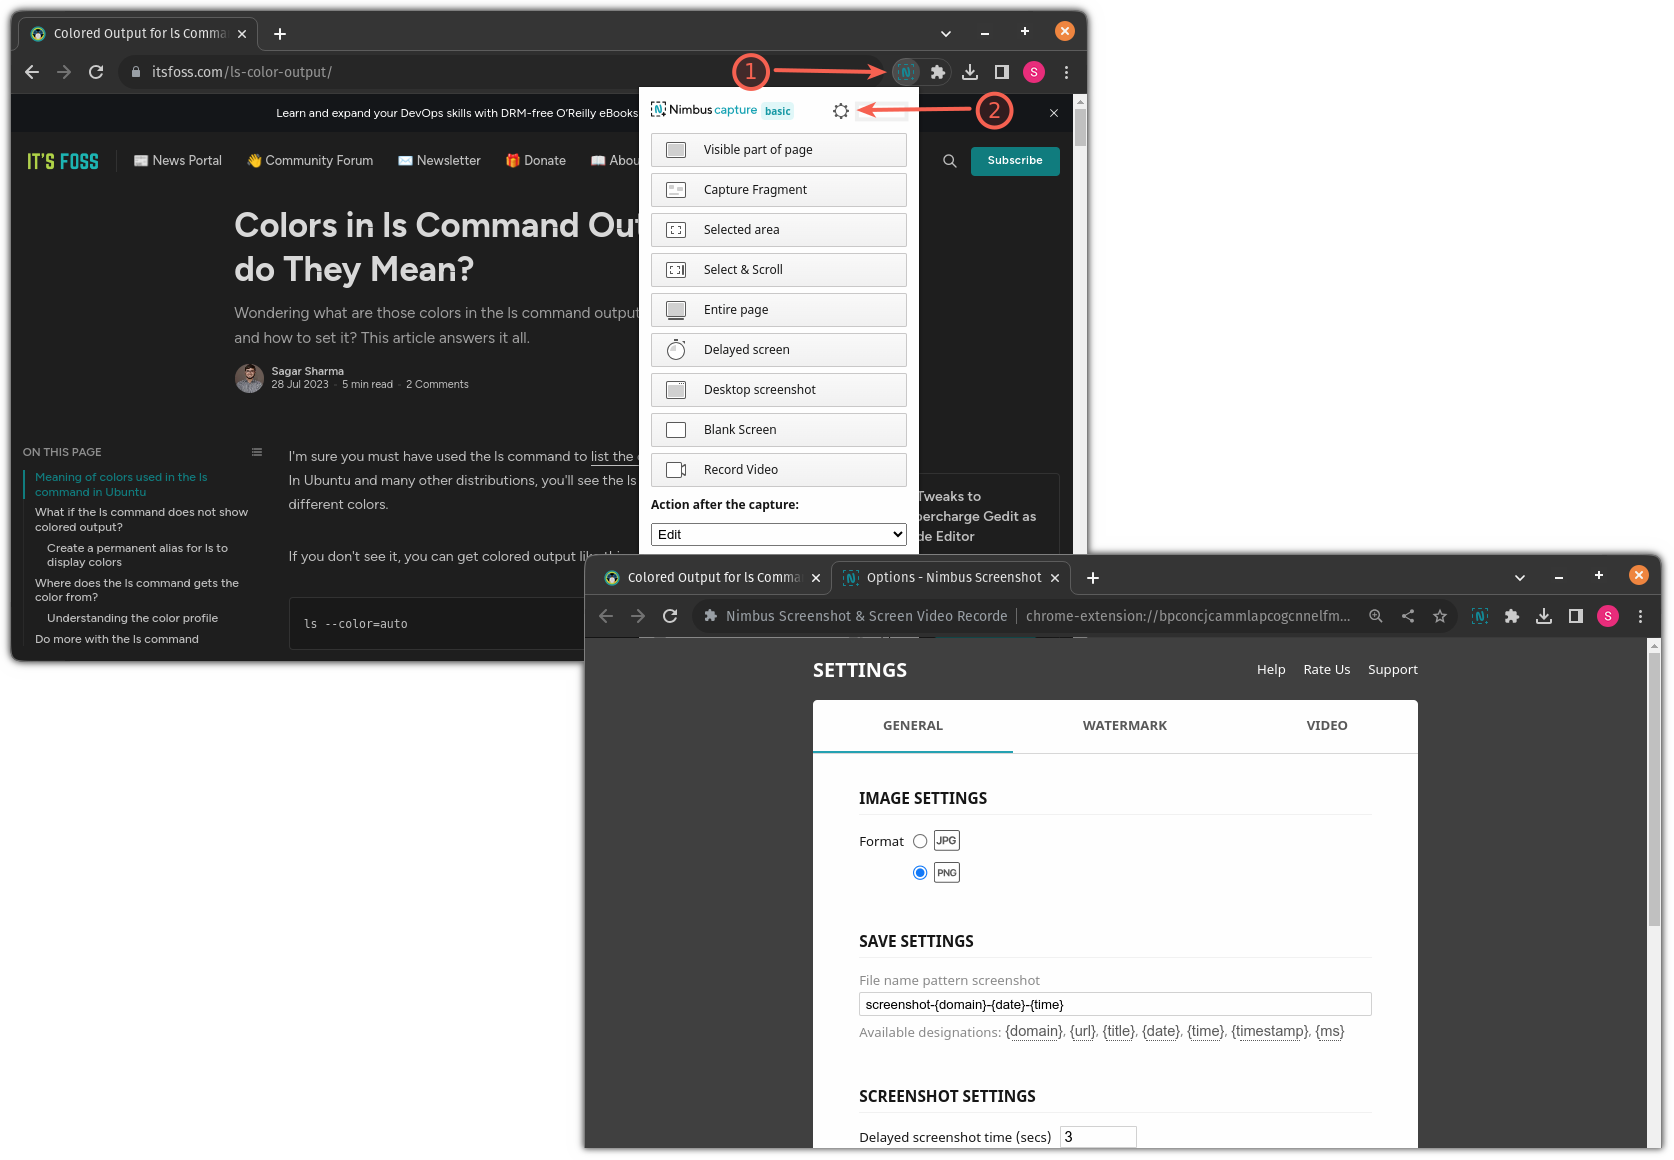
Pretty cool features being just an extension. Isn’t it?
Want more features? Checkout screenshot tools
If you don’t want to be bound by the extension features, you have to try screenshot tools with more features that can be used anywhere across the system.
If you’re a Linux user, then we have a dedicated guide on the best tools for taking and editing screenshots for Linux:

I hope you liked this quick Firefox trick. Keep visiting It’s FOSS for more such learnings.

