
Ghostty Terminal: Never Understood the Hype Until I tried it
When I first started using Linux, I did not care much about the terminal applications. Not in the sense that I was not using the terminal but more like I never cared about trying other terminal application (or terminal emulators, if you want to use the correct technical term.)
I mean, why would I? The magic is in the commands you run, after all. How does it matter if it’s the default terminal that comes with the system or something else?
Most terminals are pretty much the same, or so it feels. But still, there are numerous terminal emulators available for Linux. Perhaps they are more in number than the Arch-based distros.
Last year, HashiCorp founder Mitchell Hashimoto developed another new terminal called Ghostty. And it took the developer world by storm. It seemed like everyone was talking about it.
But that didn’t bother me much. I attributed all the buzz around Ghostty to the Hashimoto’s stature, never cared about trying it until last month.
And when I tried it, I discovered a few features that I think makes it a favorite for pro terminal dwellers. If videos are your thing, this video shows Ghostty features in action.
What makes Ghostty special?
Ghostty is a relatively new terminal emulator for Linux and macOS, that provides a platform native UI and GPU acceleration.
Easy to use configuration
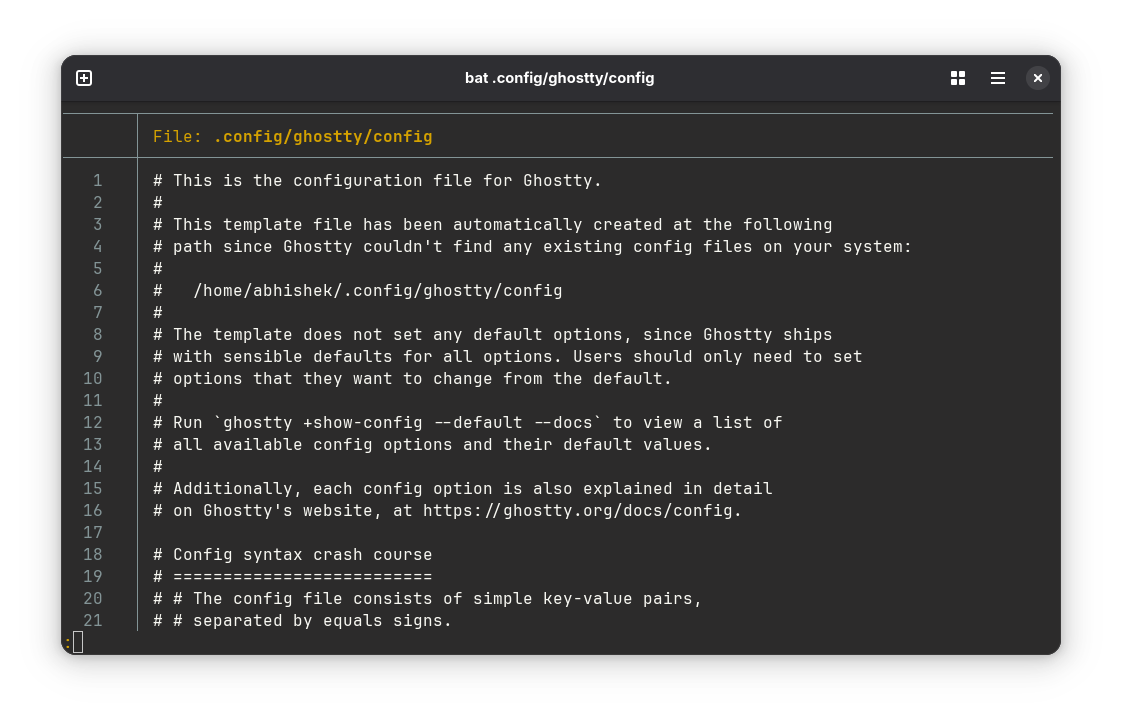
Ghostty does not require a configuration file to work. This is one of the cool features for a terminal emulator that comes with no GUI-based settings manager.
It’s not that you cannot edit the config file. It’s just that the defaults are so good, you can just get on with your commands.
For example, Ghostty supports nerd-fonts by default. So, your glyph characters and funny CLI tools like Starship prompt will just work out-of-the-box in Ghostty.
Editing the configuration file of Ghostty is very simple; even for less tech-savvy people. The configuration file, usually stored at ~/.config/ghostty/config, is just a plain text file with a bunch of key-value pairs.
Let’s say you want to hide the mouse while typing. You just add this line to the config file:
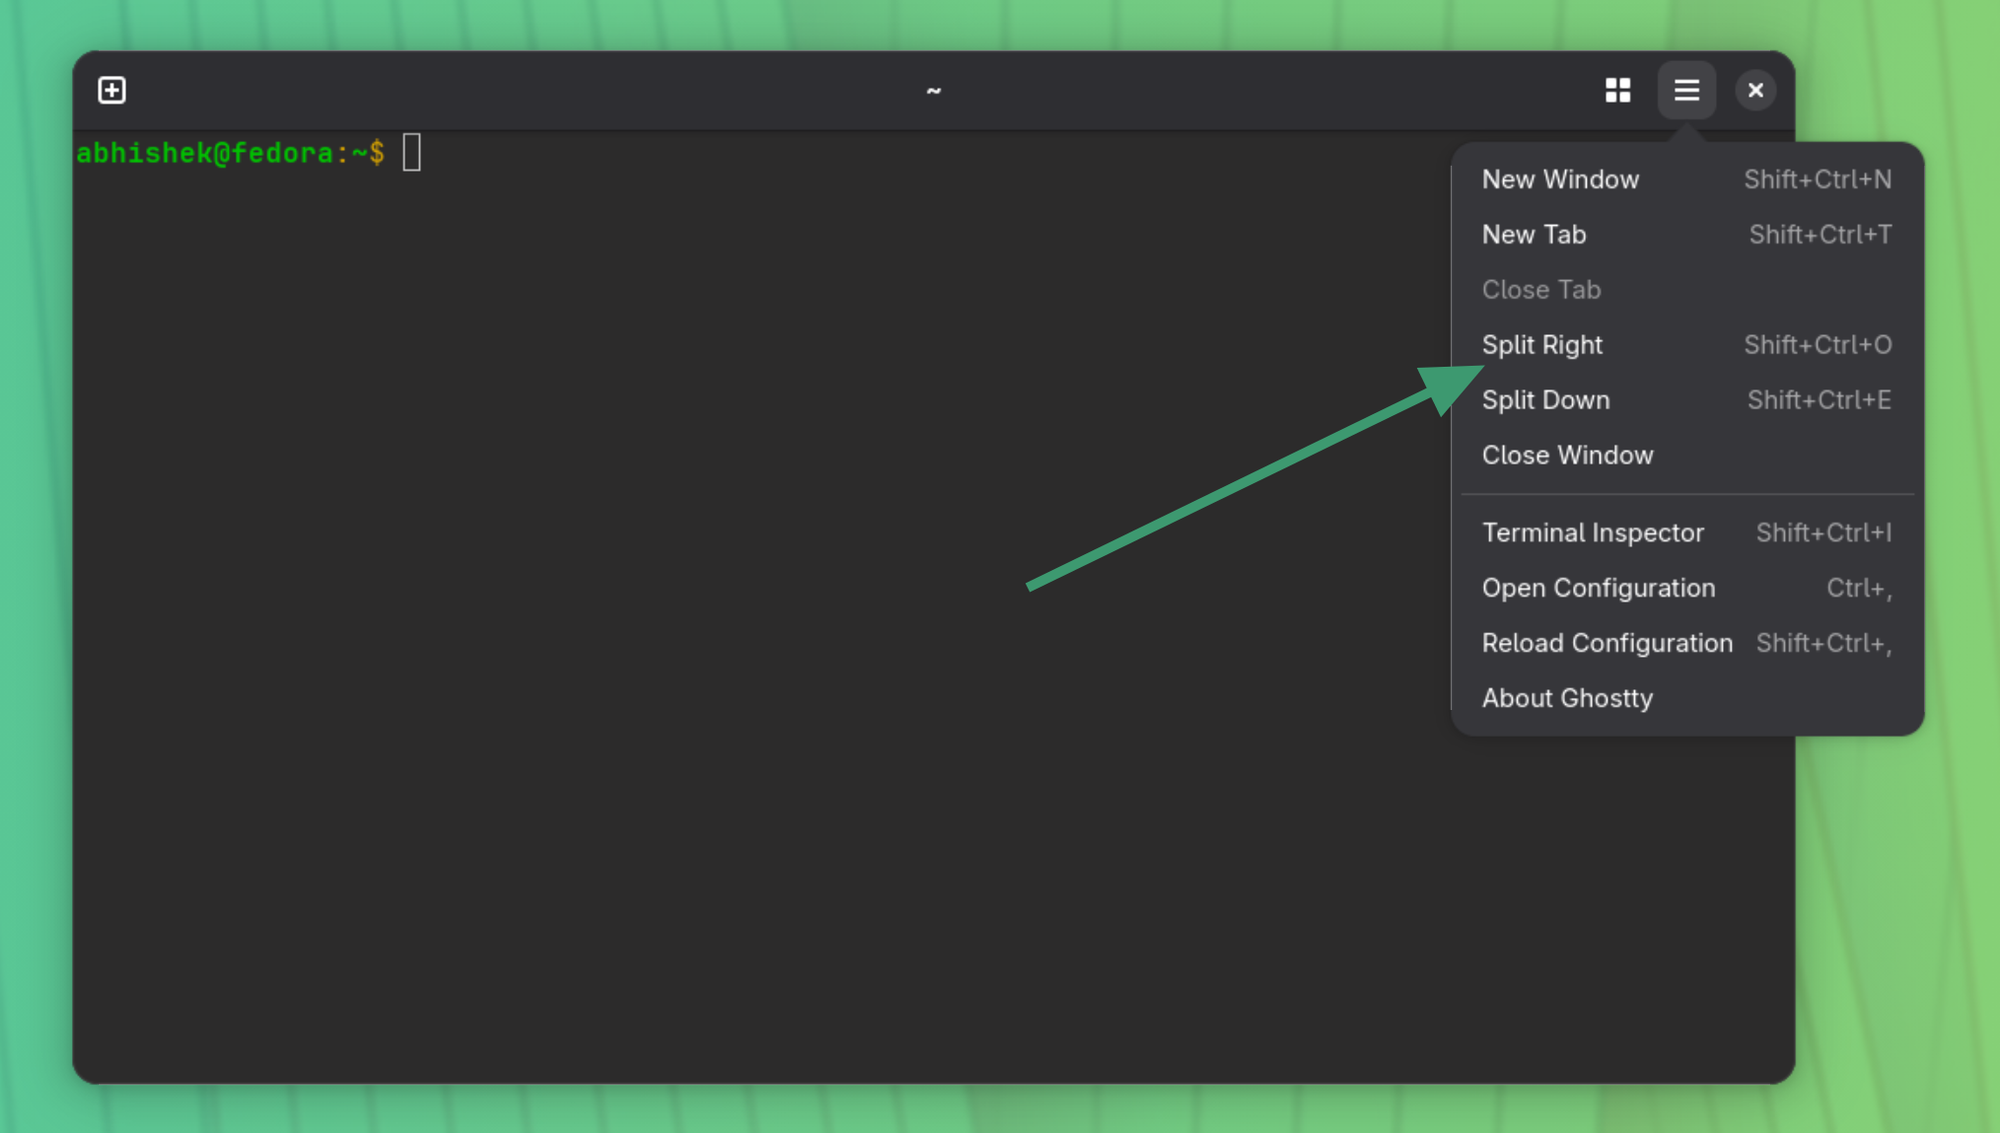
mouse-hide-while-typing = trueAnd reload the config with Ctrl+Shift+, or choosing the option from hamburger menu.
How will you know what key-value you can use in Ghostty? Well, Ghostty keeps a fantastic, easy to understand documentation.
You can start reading this doc, understand what a key is all about, and then add it to the config. It’s that simple!
ghostty +show-config --default --docs | lessWindows, tabs, splits and overview
If you have used Kitty, you probably are aware of the various windows and split options. Ghostty provides a very similar experience. I won’t deny, Ghostty borrows a lot of features from Kitty.
So, here, you have one main window, and can have multiple tabs. Almost every terminal has multiple tab options these days. But Ghostty also allows you to have multiple window splits.
It’s not as effective as using Tmux or screen command but this is good if you want to use multiple terminals in the same screen. A feature that made Terminator a popular choice a decade ago.
This window split is mostly inclined to power users, who want to control multiple things at the same time. You can use keyboard shortcuts or the menu.
Another interesting feature in this section is the tab overview. You can click on the overview button on the top bar.
This is convenient, as this intuitive look introduces some kind of organization to your terminal usage. Somewhat like GNOME overview.

More importantly, you can search tabs as well! As you can see in the above screenshot, there is a proper name for each tab that was automatically assigned based on the last command you ran. So, if you ever reach a point where like browser tabs, you have numerous terminal tabs opened, you can search for it relatively easier 😉
This overview feature is also available through keyboard shortcuts and that is my next favorite Ghostty feature in this list.
Trigger Sequence Shortcuts
There are a whole lot of actions properly documented on the Ghostty documentation for you. These can be assigned to various keybindings of your preference.
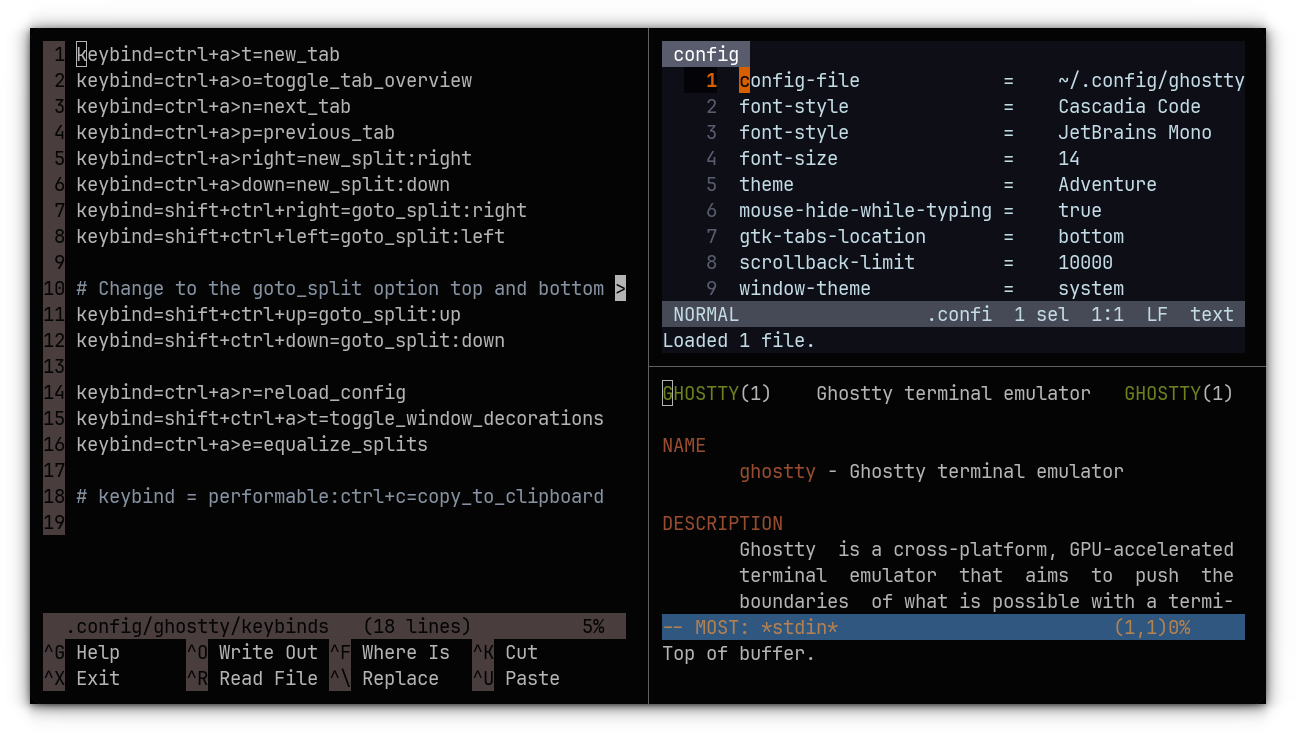
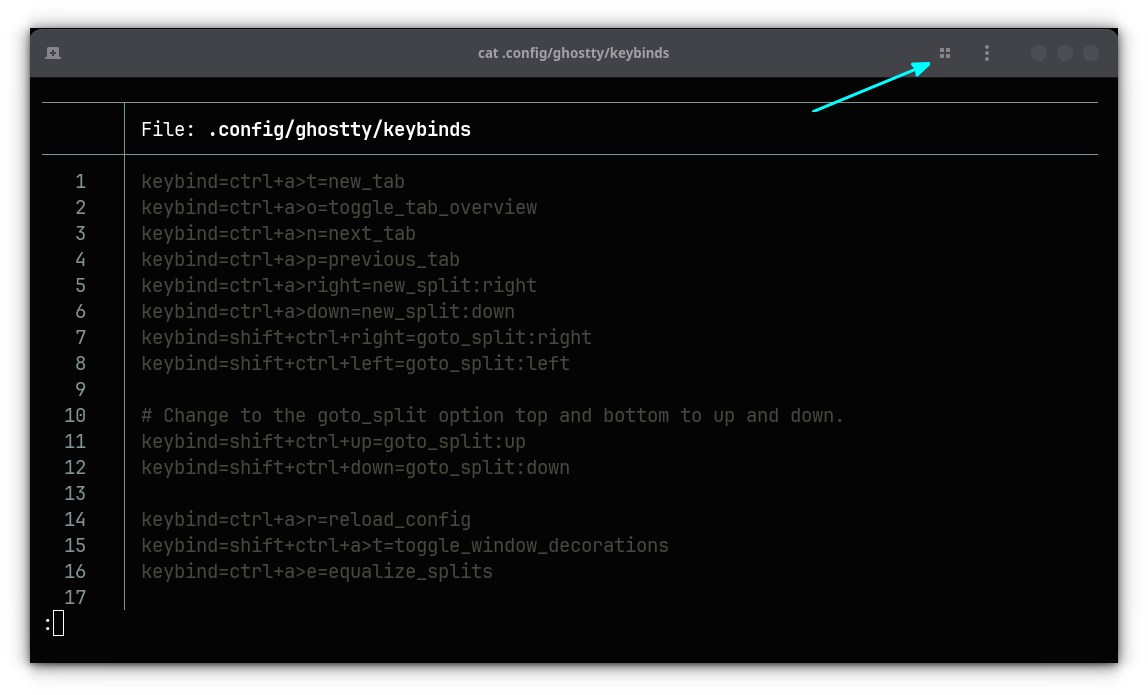
Ghostty keybindings will allow you to assign trigger sequences, which Vim users are familiar with. That is, you can use a trigger shortcut and then enter another key to complete the action. For example, in my Ghostty config, I have set:
keybind = ctrl+a>o=toggle_tab_overviewWhat this does is, I can press ctrl+a and then press o to open the tab overview! How cool is that, to have a familiar workflow everywhere!
Custom keybindings are also placed in Ghostty config file.

Performable Keybindings
This is a new feature introduced in version 1.2.0. With performable keybinding, you can assign a keyboard shortcut to multiple action. But the keybinding is activated only if the action is able to be performed.
The Ghostty team itself provides a convenient example of how this works:
keybind = performable:ctrl+c=copy_to_clipboardWhat it does is, use Ctrl+C to copy text only when there is something selected and available to copy. Otherwise, it works as the interrupt signal! No more accidental interrupts when you try to copy something.
Kind of difficult for me to show it in the screenshot and thus I’ll skip adding any image to this section.
Image support
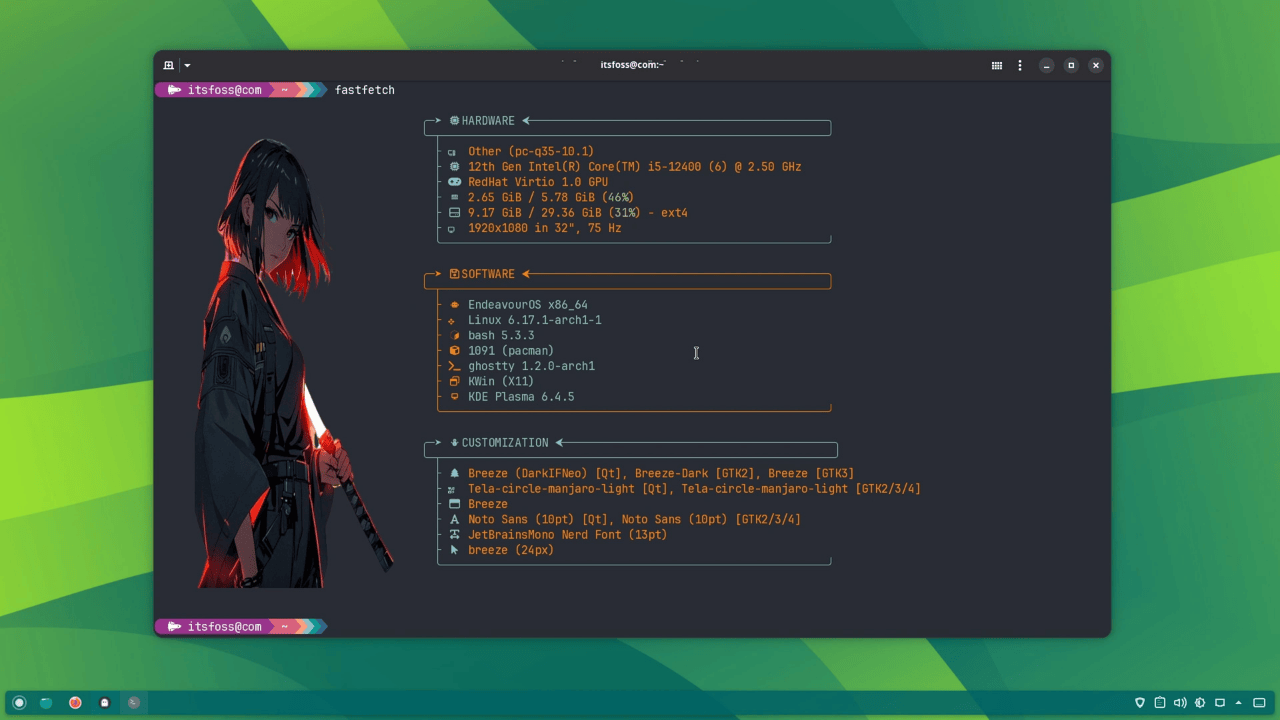
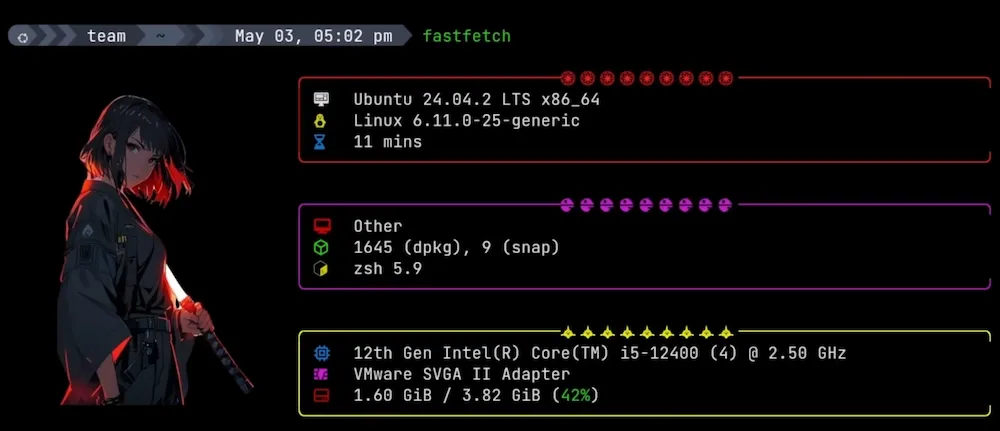
Not all terminals come with image protocol support. Only a few do. One of them is Kitty, which developed its own image rendering protocol, the Kitty Image Protocol. Ghostty implements the same Kitty Image Protocol in the terminal so that you can view images right from the terminal.
Now, a simple user may not find the use of images support in the terminal. But there are a few use cases of image support. Simply speaking, this image rendering helps Ghostty to display images in fun tool like Fastfetch to reading manga right-within the terminal.
Watch our video on fun stuff you can do in Linux terminal.
Ligature and fancy fonts
Ghostty also has ligature support. Now what is the purpose of ligatures, and what is its use within the terminal?
If you are into coding, there are symbols that are a combination of two symbols. Let’s say, “Not equal to”, usually denoted as != but mathematically displayed as ≠ . Now, with a ligature supported terminal, you will get the proper symbol for this operation. See the difference for yourself.
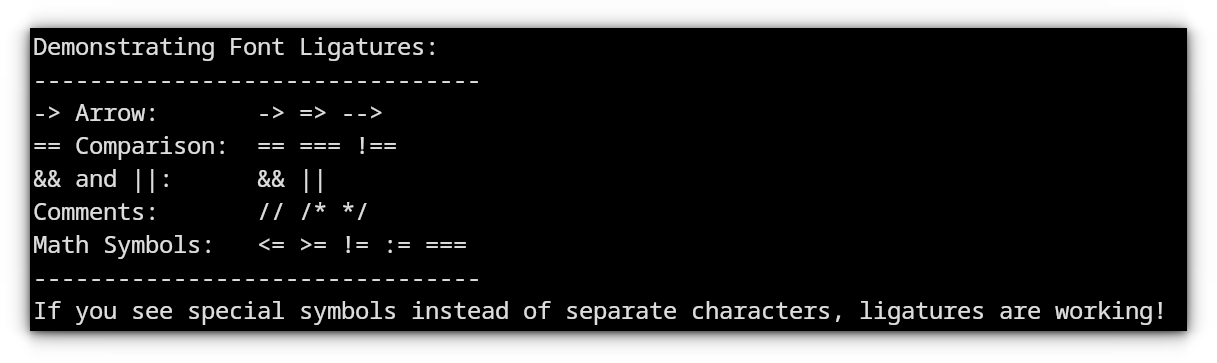
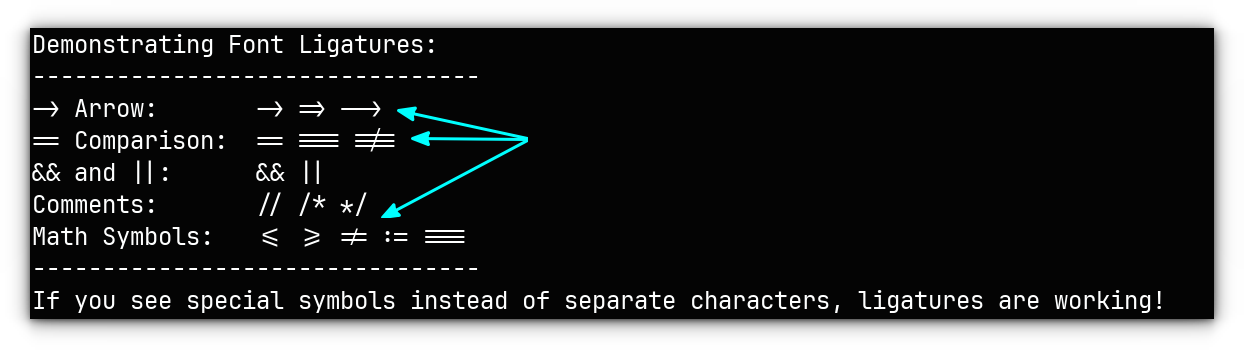
Terminals with NO ligature support and WITH ligature support. (Click to enlarge the image)
This makes code more human readable and understandable.
Built-in themes with light and dark variant
With Ghostty, you have no reason to search the web for color schemes. There is a huge list of color schemes, baked right in to the application. All you have to do is, note its name and use it in the config.
To list all the available color schemes/themes, use the command:
ghostty +list-themesThis new interface lists every theme available, along with a live preview. Note the name of a theme from the left sidebar. Use q to exit the preview.
Let’s say I want to use the Adventure dark theme. All I have to do is to add a line in the config:
theme = AdventureThere are light and dark variants of themes available to choose from. You can define themes for both light and dark mode. So if you system uses dark mode, the terminal theme will be the one you chose for dark mode and vice versa.
theme = dark:Moonkai Pro Machine,light:Catppuccin LatteHow does it matter? Well, operating systems these days also come with feature that automatically switches between dark and light modes based on the time of the day. And if you opt for that feature, you’ll have a better dark/light experience with Ghostty.
Native UI
Many apps use the same frameworks on all the operating system and that might not blend well. This is specially true for applications built on top of Electron framework often look out of place in Linux.
Ghostty for Linux is developed using the GTK4 toolkit, which makes it looks native in various Linux distributions. Popular distributions like Ubuntu, Fedora, etc uses GNOME as their default desktop offering. Thus, you will get a familiar look and feel for the window, along with overall system uniqueness.
On macOS, Ghosttty app is built using Swift, AppKit, and SwiftUI, with real native macOS components like native tabs, native splits, native windows, menu bars, and a proper settings GUI.
Installing Ghostty on Linux
If you are an Arch Linux user, Ghostty is available in the official repository. You can install it using the pacman command:
sudo pacman -Syu ghosttyFor Ubuntu users, there is an unofficial user-maintained repository, offering deb files. You can download it from the releases page.
You can check other official installation methods in the installation manual.
Wrapping Up
If you are new to Ghostty and want to get an overview of the config file format, you can refer to our sample Ghostty configuration. Don’t forget to read the README!
Ghostty indeed is a worthy choice if you are looking for some all-rounder terminal emulators. But only if you are looking for one because most of the time, the default terminal works just fine. With a little configuration tweaking, you could get many of the discussed Ghostty features, too. Take KDE’s Konsole terminal customization as an example.
What’s your take on Ghostty? Is it worth a try or would you rather stick with your current terminal choice? Share your views in the comments please.