How to Create Local Yum/DNF Repository on RHEL 9
Hello techies, recently Red Hat has released its latest operating system RHEL 9. RHEL 9 fulfill all the requirements of hybrid cloud. It can be installed on physical server, virtual machine and inside the container image.
When we don’t have subscription and want to install packages for doing the POCs then setting up local yum or dnf repository will be handy.
In this guide, we will cover how to create local yum/dnf repository on RHEL 9 using DVD or ISO file step by step.
Prerequisites for creating local Yum/DNF repository
- Minimal Install RHEL 9 system
- Sudo User with admin privileges
- RHEL 9 DVD or ISO file
1 ) Mount RHEL 9 ISO File or DVD
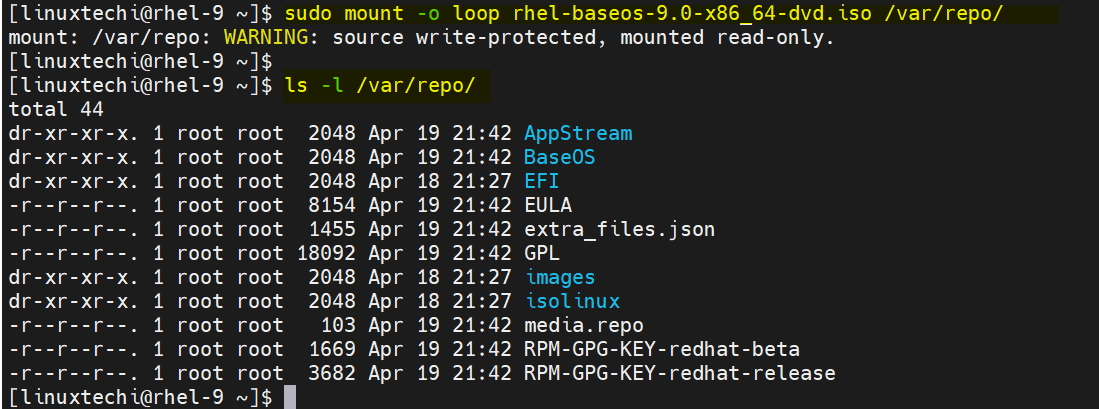
We are assuming RHEL 9 iso file is already copied into the system. Run following mount command to mount ISO file on /opt/repo folder.
$ sudo mkdir /var/repo
$ sudo mount -o loop rhel-baseos-9.0-x86_64-dvd.iso /var/repo/

In case of dvd, run
$ sudo mount /dev/sr0 /var/repo/
2) Create Repo File in ‘/etc/yum.repos.d/’ Directory
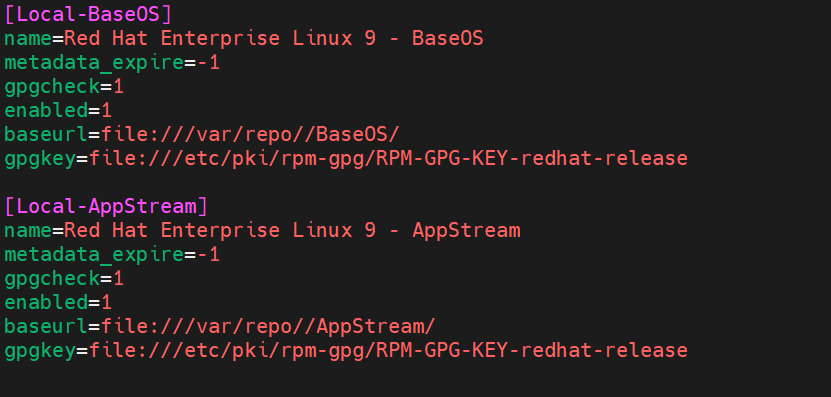
Create a repo file with name ‘rhel9-local.repo’ under the folder /etc/yum.repos.d/ with following content
$ sudo vi /etc/yum.repos.d/rhel9-local.repo
[Local-BaseOS]
name=Red Hat Enterprise Linux 9 - BaseOS
metadata_expire=-1
gpgcheck=1
enabled=1
baseurl=file:///var/repo//BaseOS/
gpgkey=file:///etc/pki/rpm-gpg/RPM-GPG-KEY-redhat-release

[Local-AppStream]
name=Red Hat Enterprise Linux 9 - AppStream
metadata_expire=-1
gpgcheck=1
enabled=1
baseurl=file:///var/repo//AppStream/
gpgkey=file:///etc/pki/rpm-gpg/RPM-GPG-KEY-redhat-release
Save and close the file.

3) Flush Yum/DNF & Subscription Manager Cache
Execute following commands to clean yum or dnf and subscription manager cache.
$ sudo dnf clean all
$ sudo subscription-manager clean

In the above output, we are getting a warning message ‘This system is not registered with an entitlement’. So, to suppress this warning message, edit the file ‘/etc/yum/pluginconf.d/subscription-manager.conf’ , change the parameter ‘enabled=1’ to ‘enabled=0’.
$ sudo vi /etc/yum/pluginconf.d/subscription-manager.conf

Save and exit the file.
4) Install Packages using Local Repository
Now we are all set to test our local repository. Run beneath command to view configure repository.
$ sudo dnf repolist
Output,

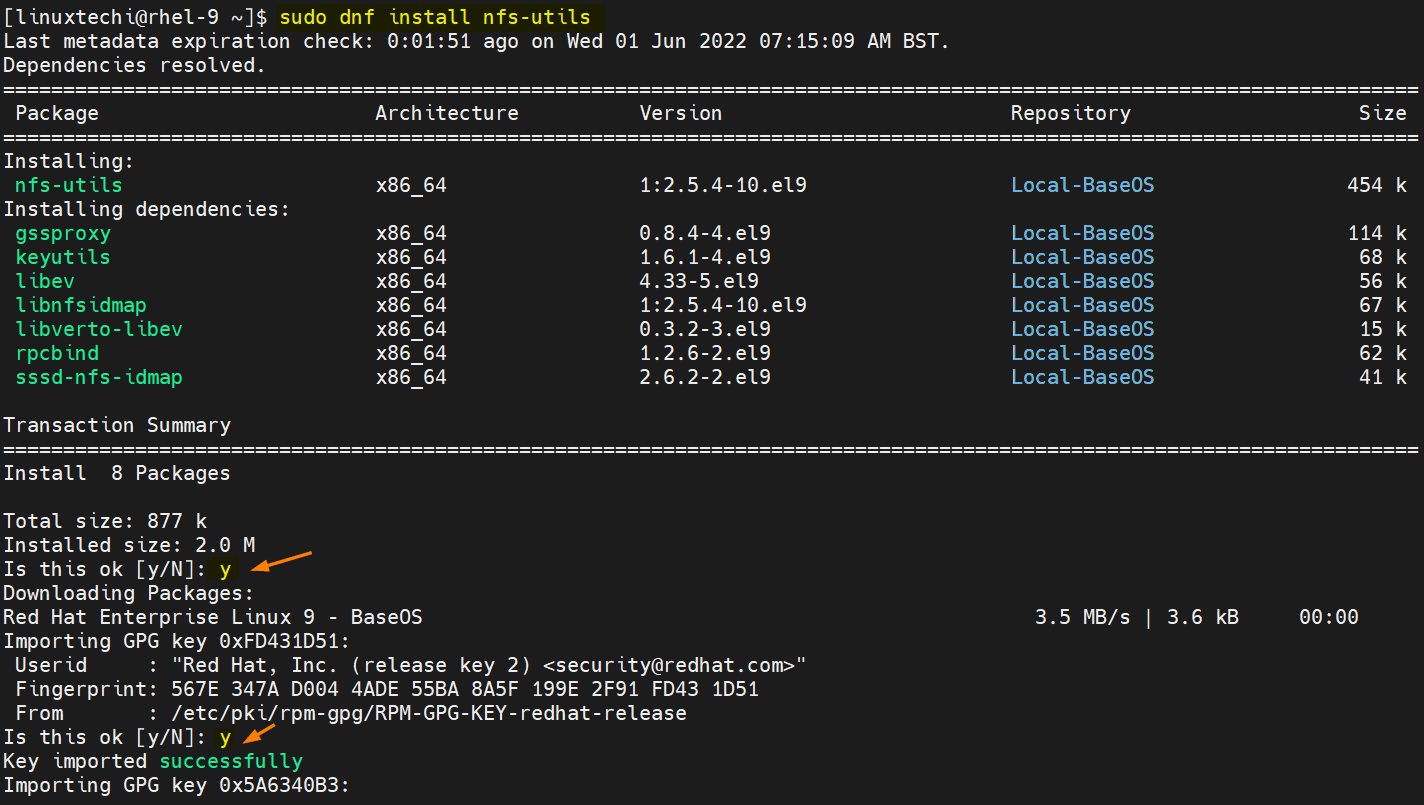
Now, try Install packages using dnf command via above configure local repository.
$ sudo dnf install nfs-utils
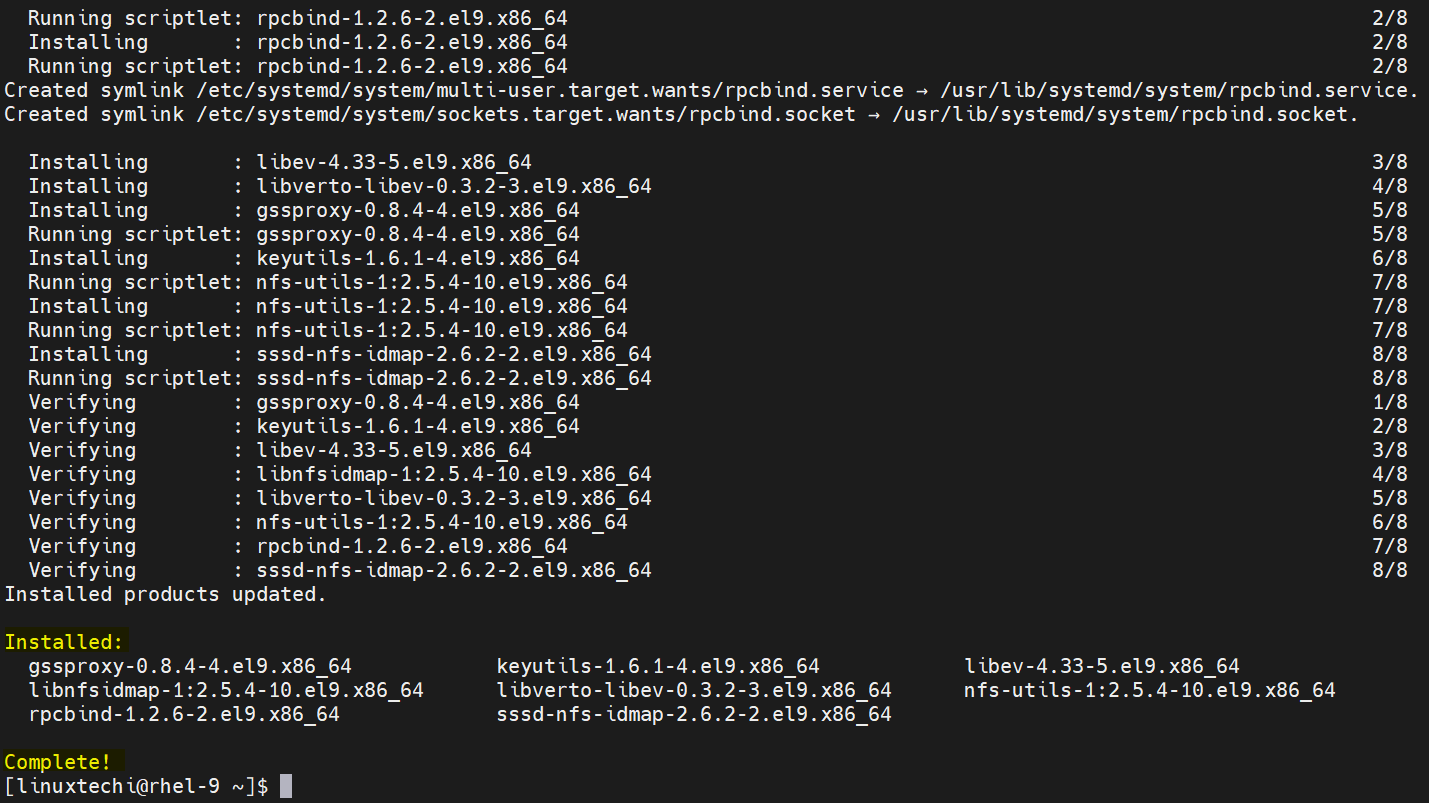
Output,


Perfect, above output confirms that nfs-utils package along with its dependencies are installed successfully via locally configured yum or dnf repository.
That’s all from this guide. I hope you have found it informative. Kindly do post your queries and feedback in below comments section.
The post How to Create Local Yum/DNF Repository on RHEL 9 first appeared on LinuxTechi.
