How to Recover Deleted Files in Linux
Losing data is one of the most unsettling and harrowing experiences that any user can go through. The prospect of not ever finding precious data once it is deleted or lost is what usually inspires anxiety and leaves users helpless. Thankfully, there are a couple of tools that you can use to recover deleted files on your Linux machines. We have tried out a few data recovery tools that can help you get back your deleted files and one that stood out among the rest. This is the TestDisk data recovery tool.
TestDisk is an opensource and powerful data recovery tool that, apart from recovering your data, rebuilds and recovers boot partitions and fixes partition tables. It recovers deleted files from filesystems such as FAT, exFAT ext3, ext4, and NTFS to mention just a few, and copies them to another location. TestDisk is a command-line data recovery tool, and this is one of the attributes that sets it apart from other data recovery tools.
In this guide, we will demonstrate how you can recover deleted files in Linux using the Test disk utility tool. We will demonstrate how TestDisk can recover deleted data from a removable USB drive in Ubuntu 20.04.
Step 1) Installing the TestDisk utility tool
The first step is to install TestDisk. To do so on Debian/Ubuntu distributions, update the package lists and install TestDisk as follows.
$ sudo apt update
$ sudo apt install testdisk

If you are running CentOS 8, RHEL 8, Rocky Linux 8, AlmaLinux 8, you need to , first , install EPEL repository.
$ sudo dnf install https://dl.fedoraproject.org/pub/epel/epel-release-latest-8.noarch.rpm
Next, update the system and install Test disk as follows.
$ sudo dnf update
$ sudo dnf install testdisk
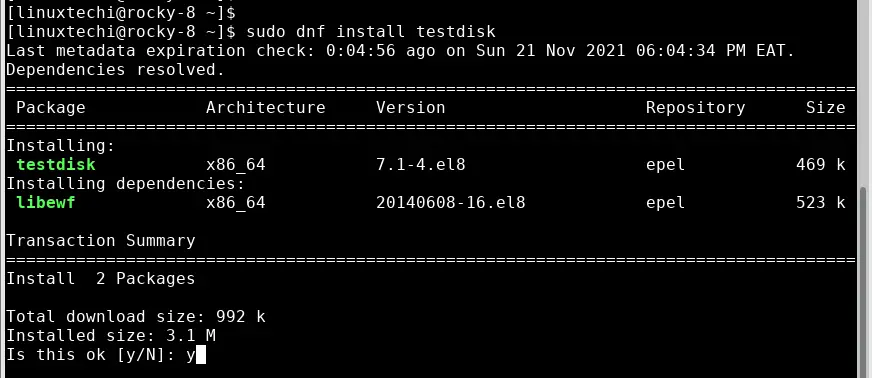
Once installed, you can verify that Testdisk is installed by checking the version of TestDisk as follows.
$ testdisk --version

From the output, you can see that we have installed TestDisk 7.1 Now, let’s simulate how you can recover deleted files from a drive.
Step 2) Recover deleted files using TestDisk
To demonstrate how you can recover files deleted from a Disk, we have deleted two files from a USB drive. The files are not even in the trash bin and our objective is to recover them.
You can have a similar setup where you have deleted a few files on your pendrive/ usb drive. To recover them, follow along.
On your terminal, run the following command to launch TestDisk
$ testdisk
Being a command-line tool, TestDisk provides a list of options as shown. By default, it highlights the most logical option to take as you get started out. So, press ENTER on the ‘create’ option.
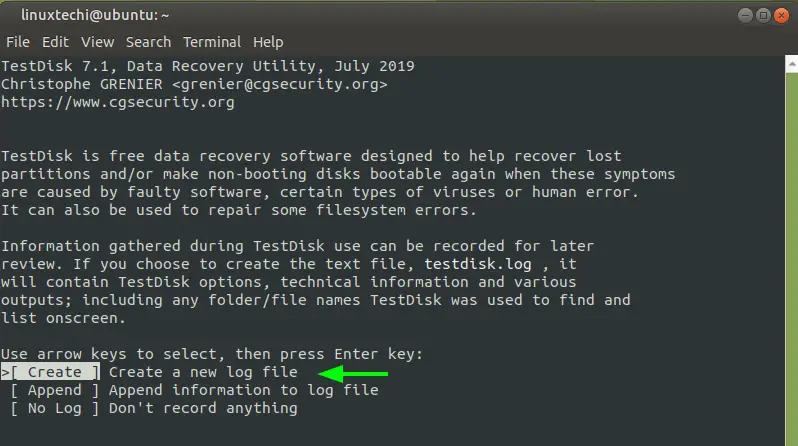
The next screen presents you with the mounted volumes. However, to view all the disks and partitions, you need sudo permissions.
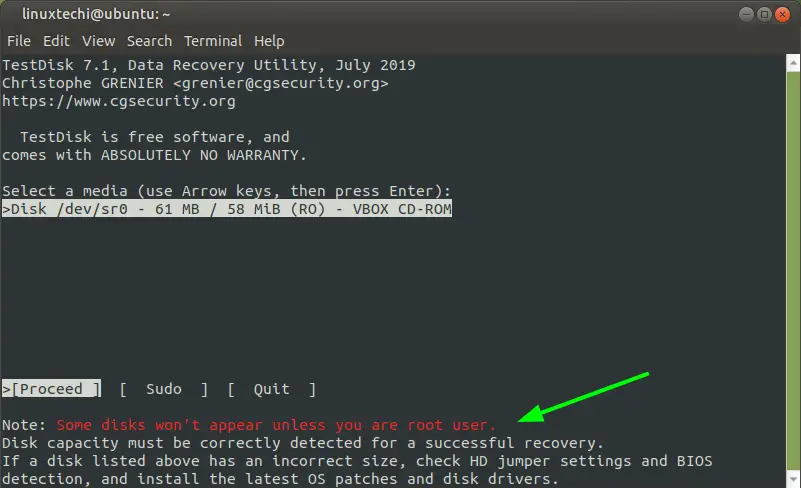
Therefore, using the arrow forward key, select ‘sudo’ and press ENTER.
NOTE: To avoid the hassle, you can simply run testdisk utility as a sudo user from the terminal.
$ sudo testdisk
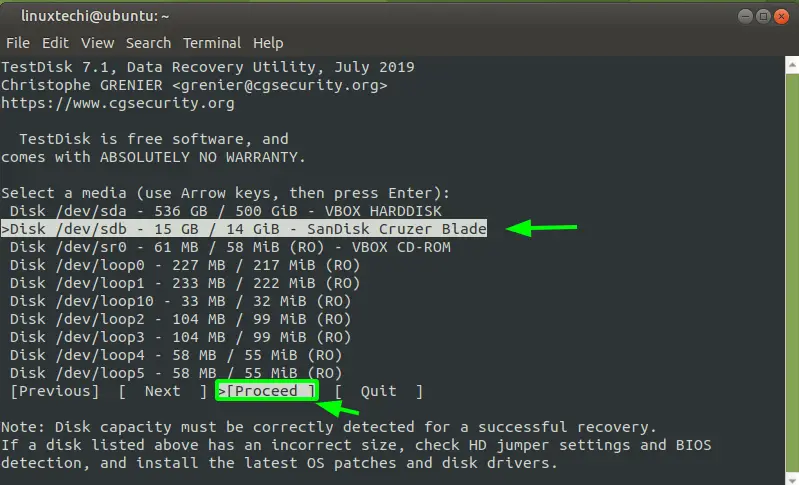
Now, this time around, all the mounted partitions will be displayed. Select your preferred drive. In our case, we have selected out removable USB drive. Using the arrow forward key, select ‘Proceed’ and press ENTER.
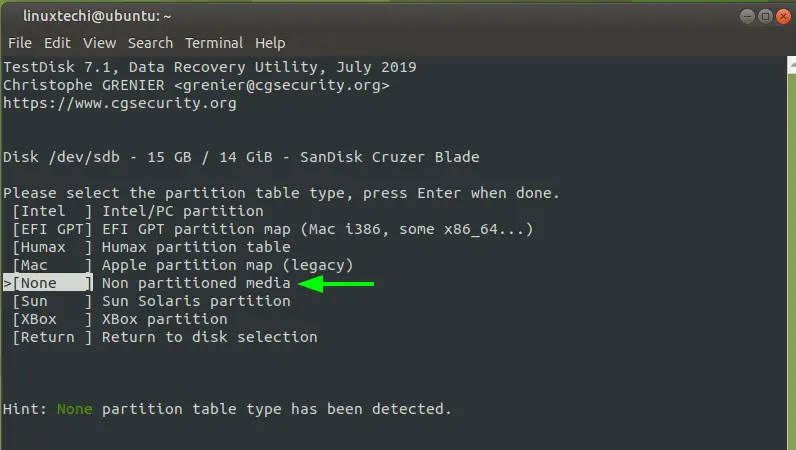
TestDisk automatically detects the partition table type. For non-partitioned disks such as USB drives, a non-partitioned media type will be detected. So, press ENTER.
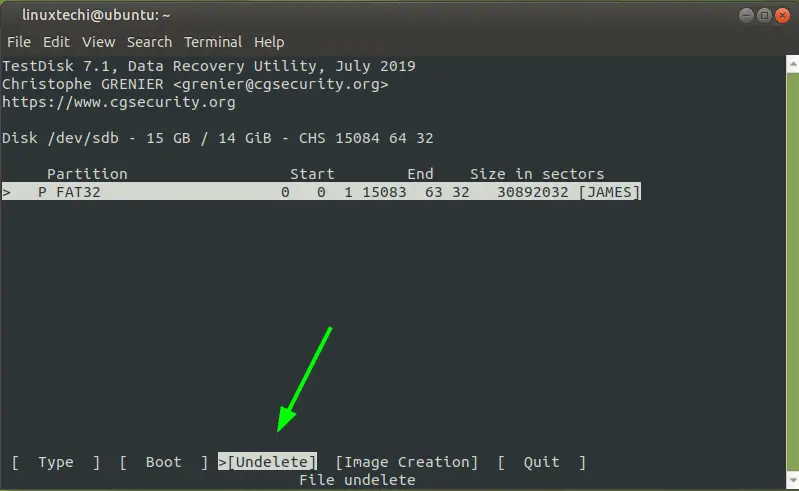
Your removable drive’s partition table will be listed as indicated. At the bottom, select ‘Undelete’
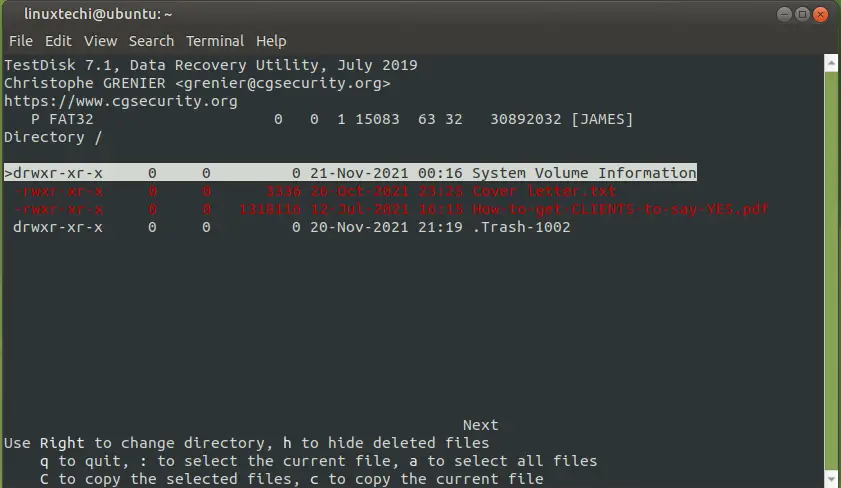
TestDisk scans your drive for undeleted files and highlights them in red.
To recover these files, you need to select them first. So, scroll down and type a full colon (:) for each selection. You will discover that each file is highlighted in green.
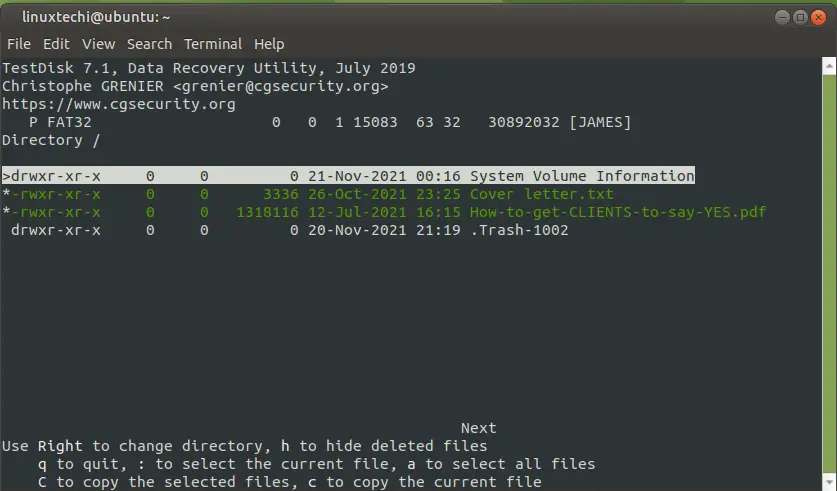
Now press SHIFT + C for capital ‘C’ to copy the files. You will be prompted to select your preferred destination to save the files. In this example, we have chosen to save the files in the ‘Public’ directory. Once you have selected your directory, press ENTER.
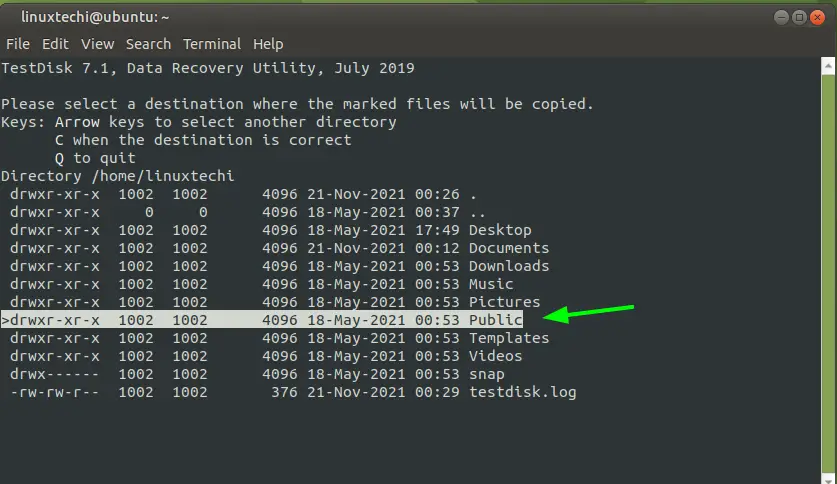
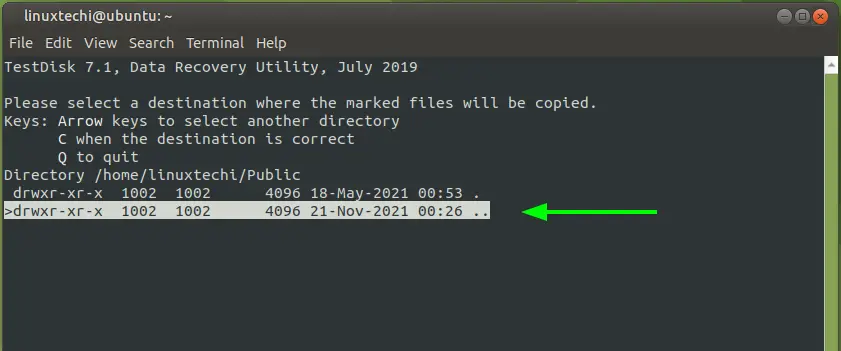
The modification dates of the target directory will be displayed. You can choose any option, and once again, press ENTER.
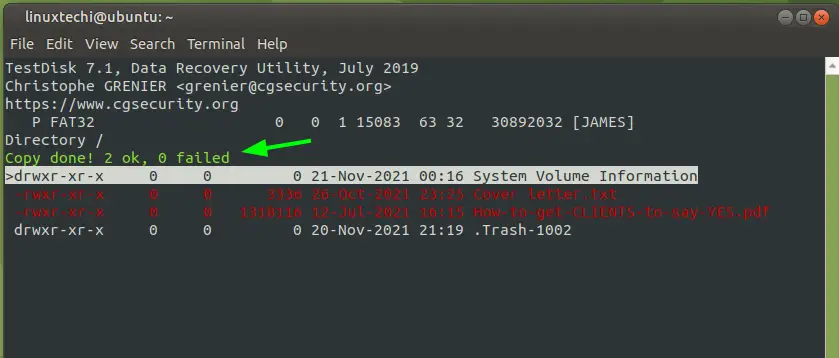
TestDisk will notify you that the files have been successfully copied.
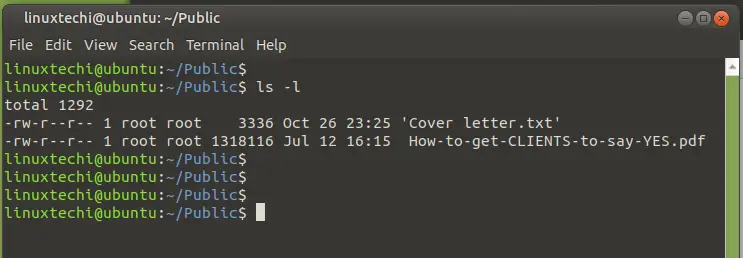
To confirm that the files have been copied, head over to the destination directory and confirm that the files exist.
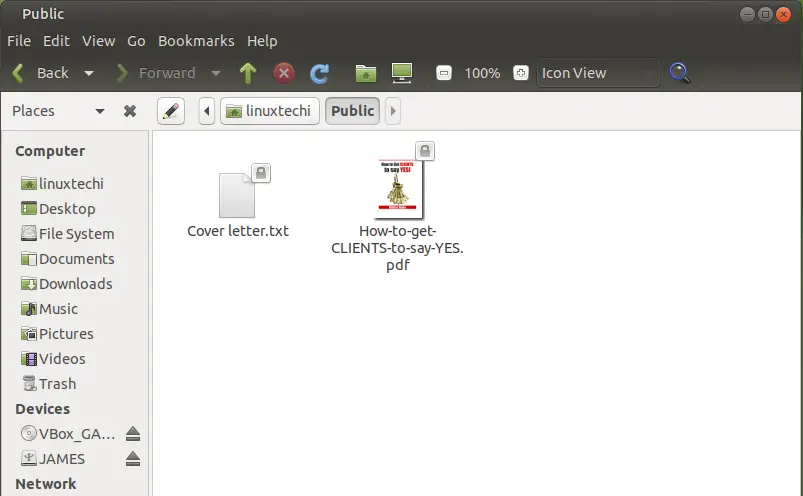
The recovered files are saved with root permissions and ownership. You can change the permissions with chown command.
$ sudo chown linuxtechi 'Cover letter.txt' 'How-to-get-CLIENTS-to-say-YES.pdf'
To exit TestDisk, press ‘q’ repeatedly until your finally go back to your bash shell.
Conclusion
That was a demonstration of how you can recover deleted files in Linux using the TestDisk utility. In case you have a hard disk that you want to recover files from or cannot boot entirely, simply remove the hard disk, and attach it to a USB adapter and plug it in a Linux system with TestDisk installed. We hope you have found this guide useful. We look forward to having your feedback.
Also Read: Top 6 Screenshot Tools for Ubuntu / Linux Mint / Debian
The post How to Recover Deleted Files in Linux first appeared on LinuxTechi.
