Installing the Much Hyped Hyprland on Linux

Hyprland is a dynamic tiling window compositor that is both highly customizable and eye candy.
It is also used the most these days in Linux ricing group. And why not? If you are into customizing the looks of your desktop, Hyprland is surely worth all the hype.
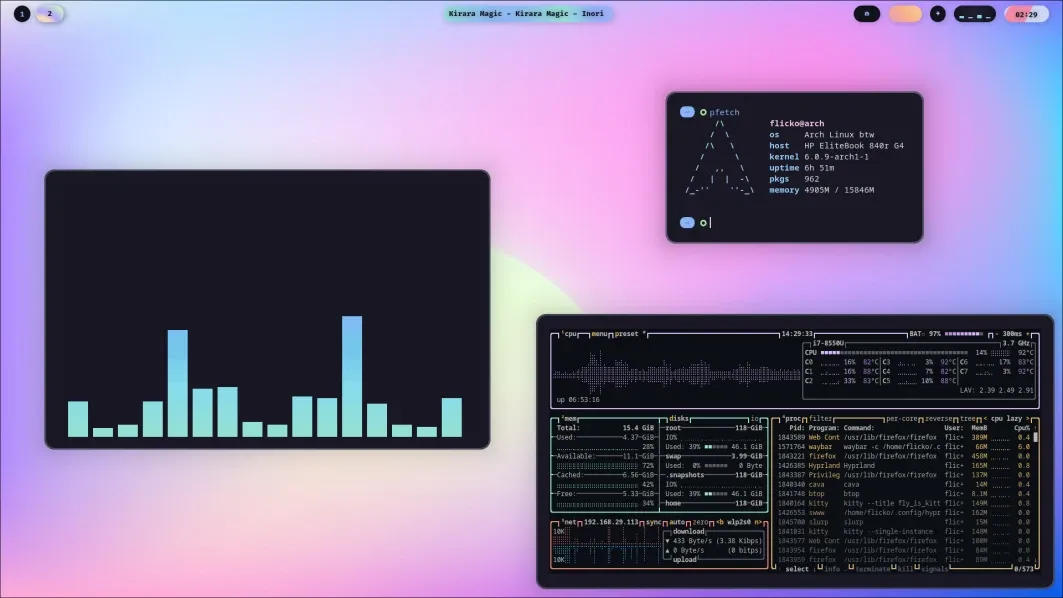
In fact, the official Hyprland video provides more detailed visuals:
Now, I am not trying to discourage you, but these things take a lot of effort if you try to configure on your own. Or, you can use the dot files from someone else and get the same look as theirs.
I believe it’s a good learning experience but something that should be done on a secondary system. At present, it is not officially supported in VMs but it still worked for most in my testing.
Things to note before installing Hyprland
Before starting to install Hyprland, you need to understand a couple of points about stability and compatibility.
- Hyprland is not a beginner-centric window compositor.
- It is Wayland-only. So, not all Xorg-only application will work on Hyprland.
- Nvidia GPUs have limited compatibility due to their proprietary nature.
- It is not officially supported in virtual machines, but works. So, to get a complete result, you should do it in bare metal.
- If you are installing on a virtual machine, like VirtualBox, enable 3D Acceleration. Moreover, allow a RAM of at least 4 GB.
Install Hyprland with Arch Linux using archinstall script
Arch Linux, NixOS and openSUSE Tumbleweed are the most supported distribution when it comes to Hyprland.
In Arch Linux, if you are using the archinstall script, you have an option to select Hyprland as the desktop in Profile → Type → Desktop → Hyprland.
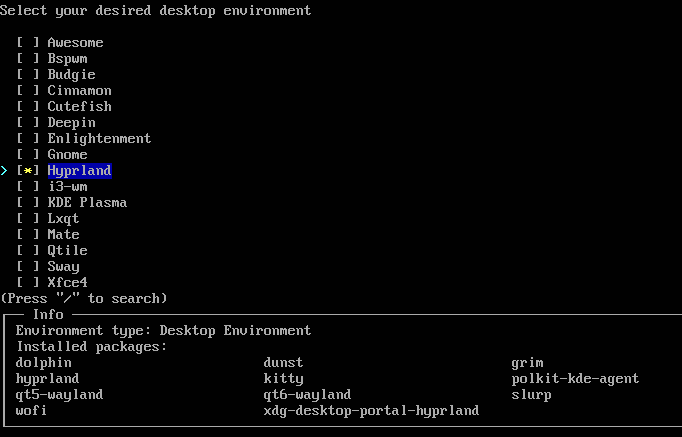
As you can see in the screenshot above, the installer has selected some necessary dependencies for Hyprland to work.
On the next step, it will ask you to have access to hardware. Here, I have gone with Polkit.
Similarly, the greeter will be automatically set to SDDM.
On the additional packages installation prompt, install hyprpaper and waybar. Or do that after install and login.
sudo pacman -Syu hydrpaper waybar
That’s it. You will have a working Hyprland set up.
Install Hyprland in base install
If you have installed Arch Linux base installation following our guide, then you need to install the Hyprland separately. To do that, log in to the base install and run the command:
sudo pacman -Syu hyprland hyprpaper xdg-desktop-portal-hyprland waybar wofi kitty sddm
Then enable the SDDM service using:
sudo systemctl enable sddm.service
Now, restart the system and login to Hyprland session.
Install Hyprland in Ubuntu
Hyprland is also available in the default repo of Ubuntu since 24.10 Oracular Oriole. But it is highly not recommended to install Hyprland from this package.
Instead, I will discuss another method, through which you can set up a working Hyprland on Ubuntu.
Things to keep in mind before proceeding
- You should back up your system and important data before start installing.
- Ensure an active, uninterrupted internet connection.
- Version older than 24.04 won’t work.
- Do not install SDDM.
Once you are ready, let’s install.
Install Hyprland in Ubuntu 24.04
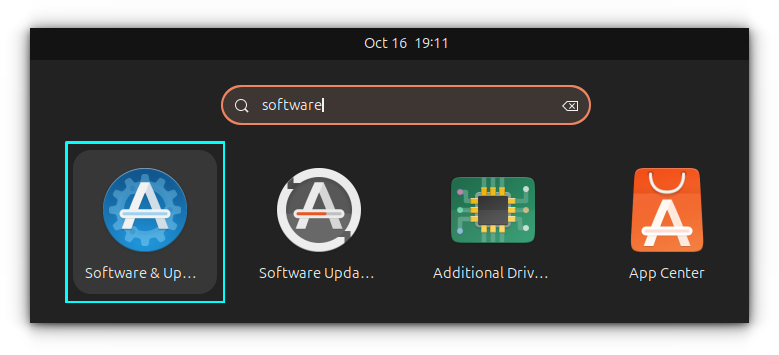
First, you need to enable the source packages repo in Ubuntu. Search for Software and Updates and open it.
Go to the tab and enable the checkbox near sources.
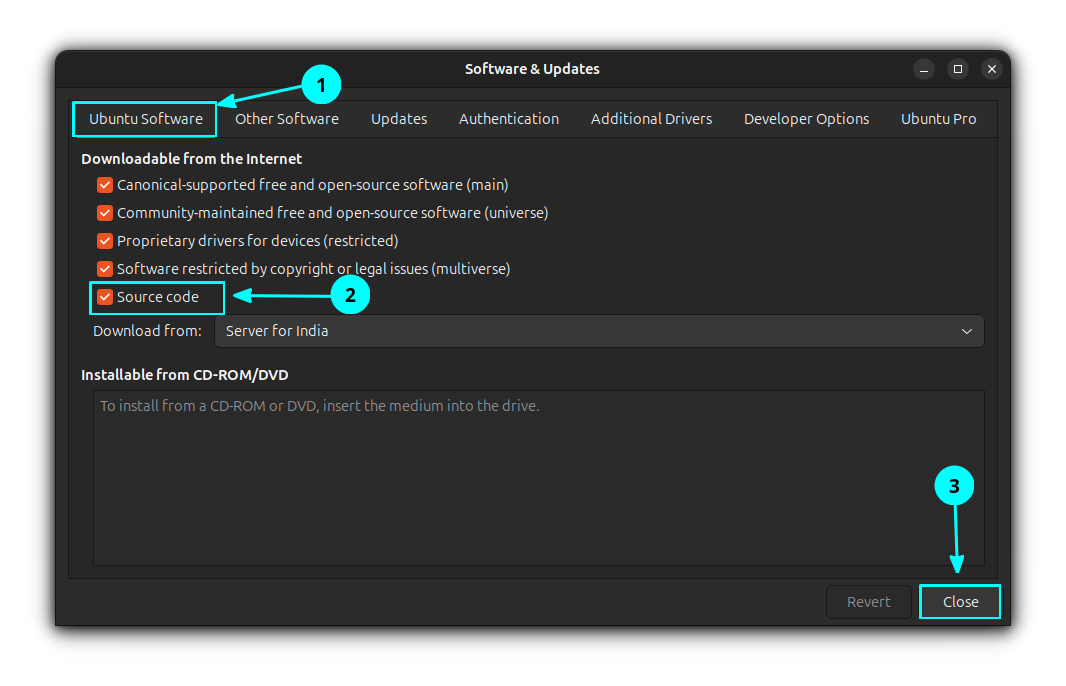
Click on close, and then use the Reload button. Now, update your system and install all pending updates.
sudo apt update && sudo apt upgrade
We use the Automated Hyprland Installer for Ubuntu to install Hyprland on Ubuntu. This offers a fast method to get started with Hyprland.
Clone the Hyprland installer third-party repository.
git clone -b 24.04 --depth 1 https://github.com/JaKooLit/Ubuntu-Hyprland.git ~/Ubuntu-Hyprland-24.04
Now, move inside the directory and give the installer file (install.sh) execution permission.
cd ~/Ubuntu-Hyprland-24.04
chmod +x install.sh
Run the installer.
./install.sh
This will start the installer.
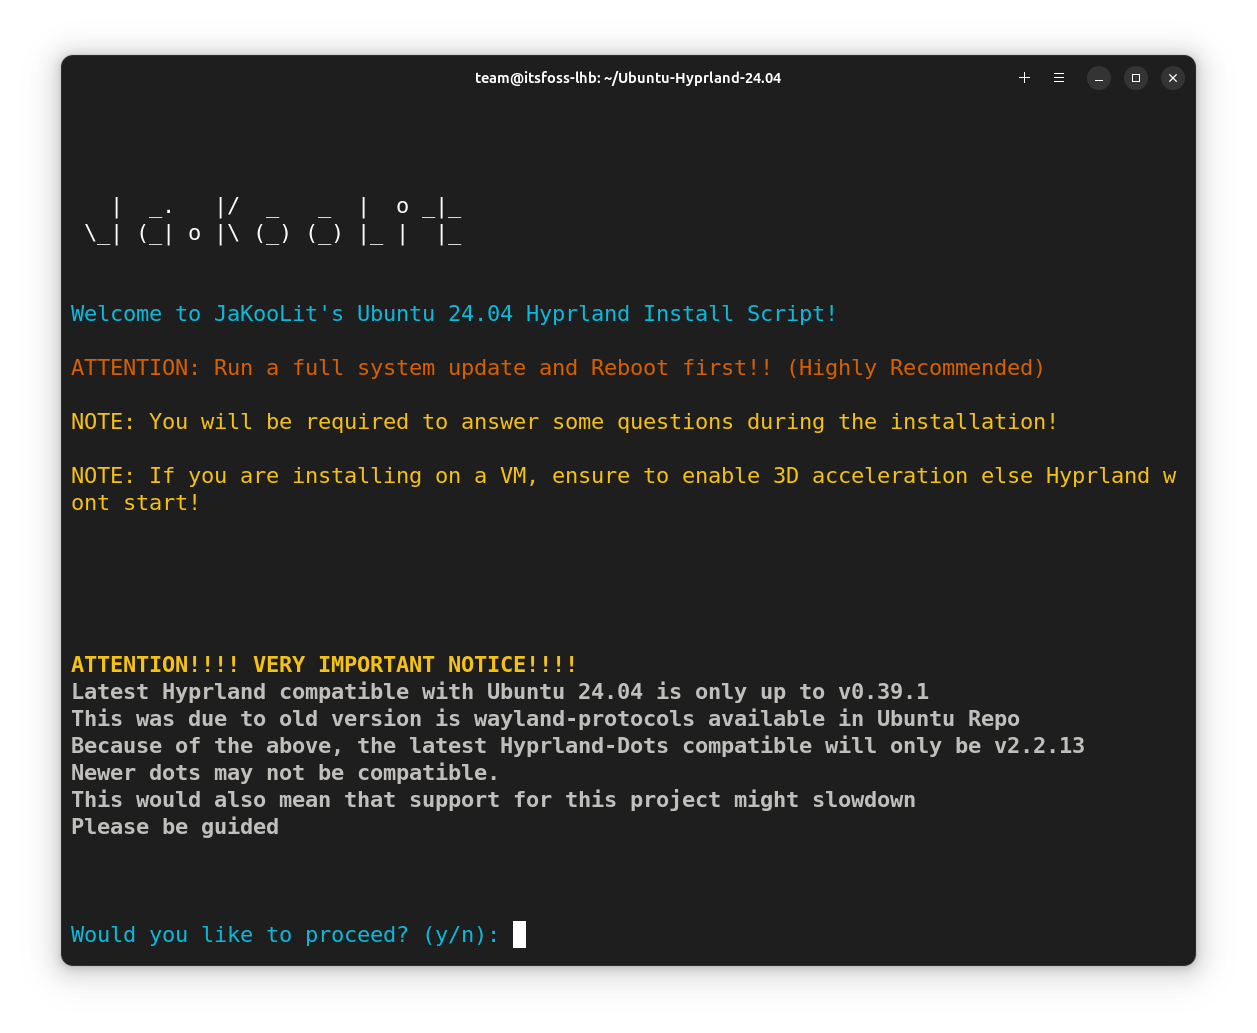
Read the note carefully and proceed by entering y.
Now, some questions will be asked on the topics:
- NVIDIA GPU: Hyprland may not work properly with NVIDIA, as said in an earlier section.
- Install GTK Themes for Dark Light function.
- Configure Bluetooth
- Install Thunar file manager.
- Install SDDM: This should be NO (n). Since Ubuntu has GDM and it works well.
- Install XDG-DESKTOP-PORTAL-HYPRLAND: This should be YES (y).
- Install ZSH
- Install nwg-look: This is for GTK Theming. It will take a long time to build. So you can skip (n) this.
- Installing on Asus ROG Laptops.
- Preconfigured Dot files: Yes (y), if you don’t want to configure the looks from scratch.
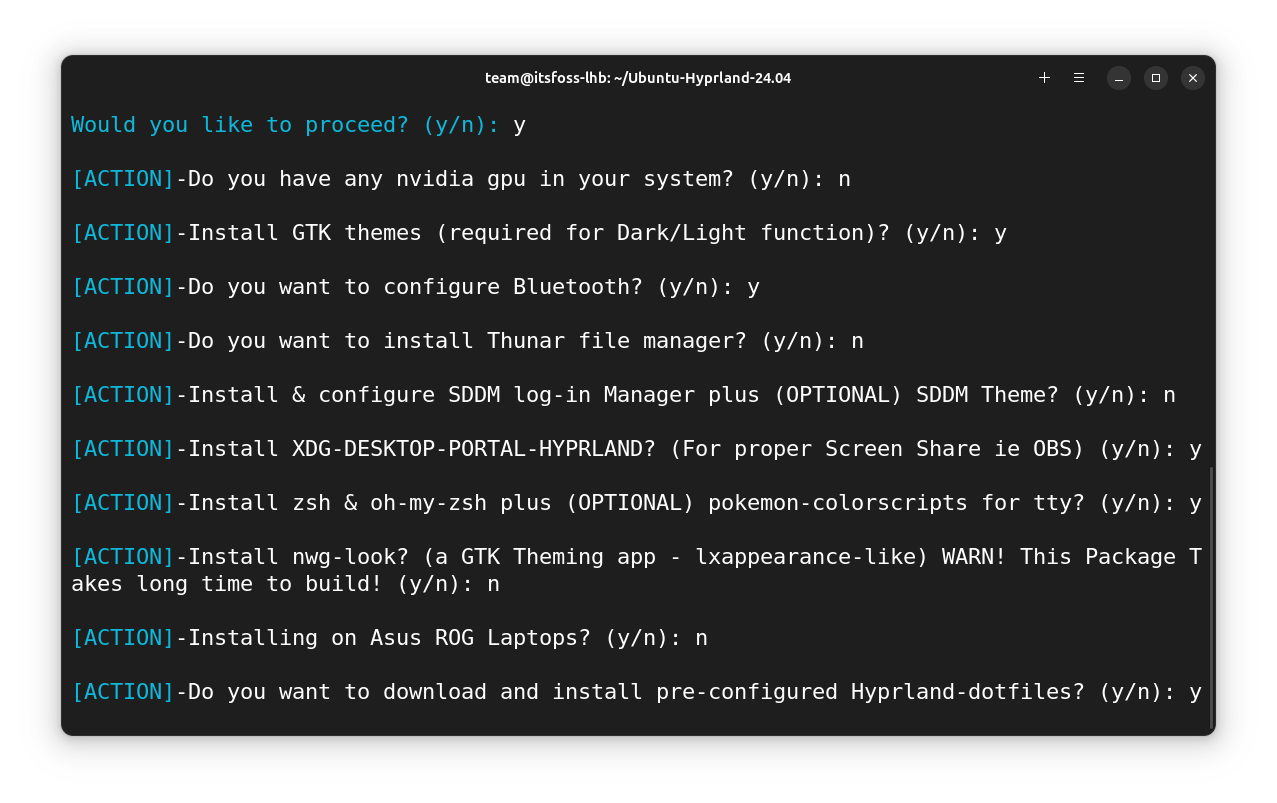
When asked, enter the sudo password to start installation.
Sit back and wait, while the installer completes the set-up process.
When asked, “Would you like to try to remove other XDG-Desktop-Portal-Implementations?”, give no.
Similarly, at the last stage, you will be asked to add yourself (the current user) to the input group. This might be necessary for some waybar functionalities.
If you are running in a VM and/or selected dot file install option, you will be asked more configuration options like:
- Select keyboard Layout
- Set Monitor resolution
- Set time format
- Keep/disable rainbow border animation.
These are shown in the screenshot below.
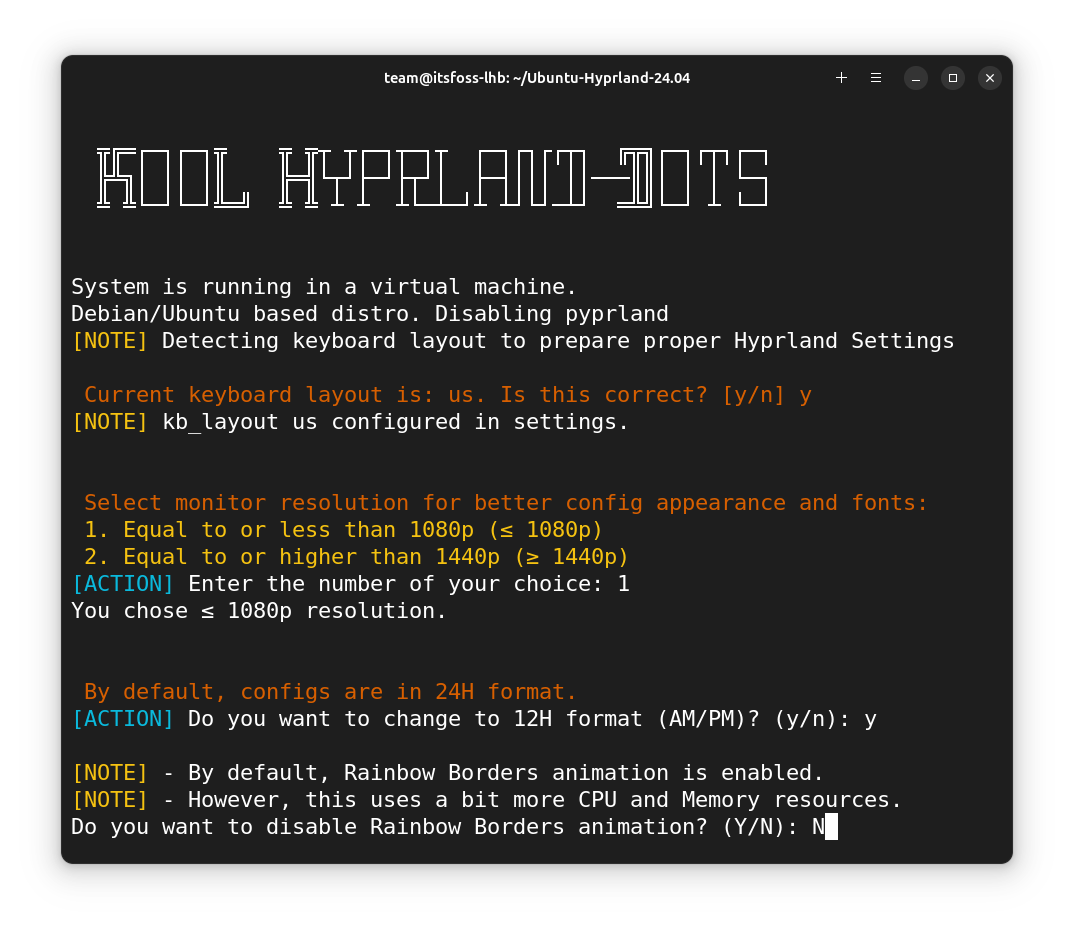
It also provides an option to download more wallpapers, but the size is greater than 600 MB.
Once all queries are answered properly, it will set the configuration accordingly.
Reboot the system.
When the system is rebooted, select the Hyprland session and Log in using your password.
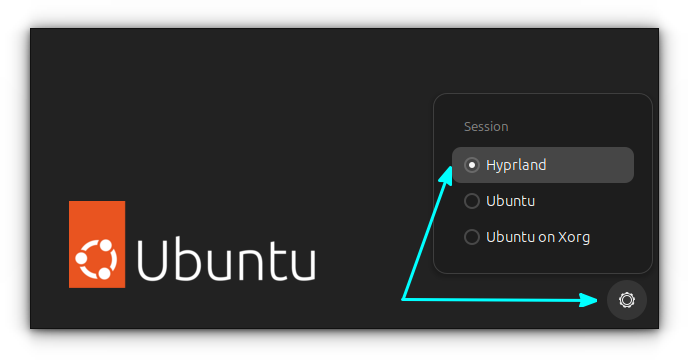
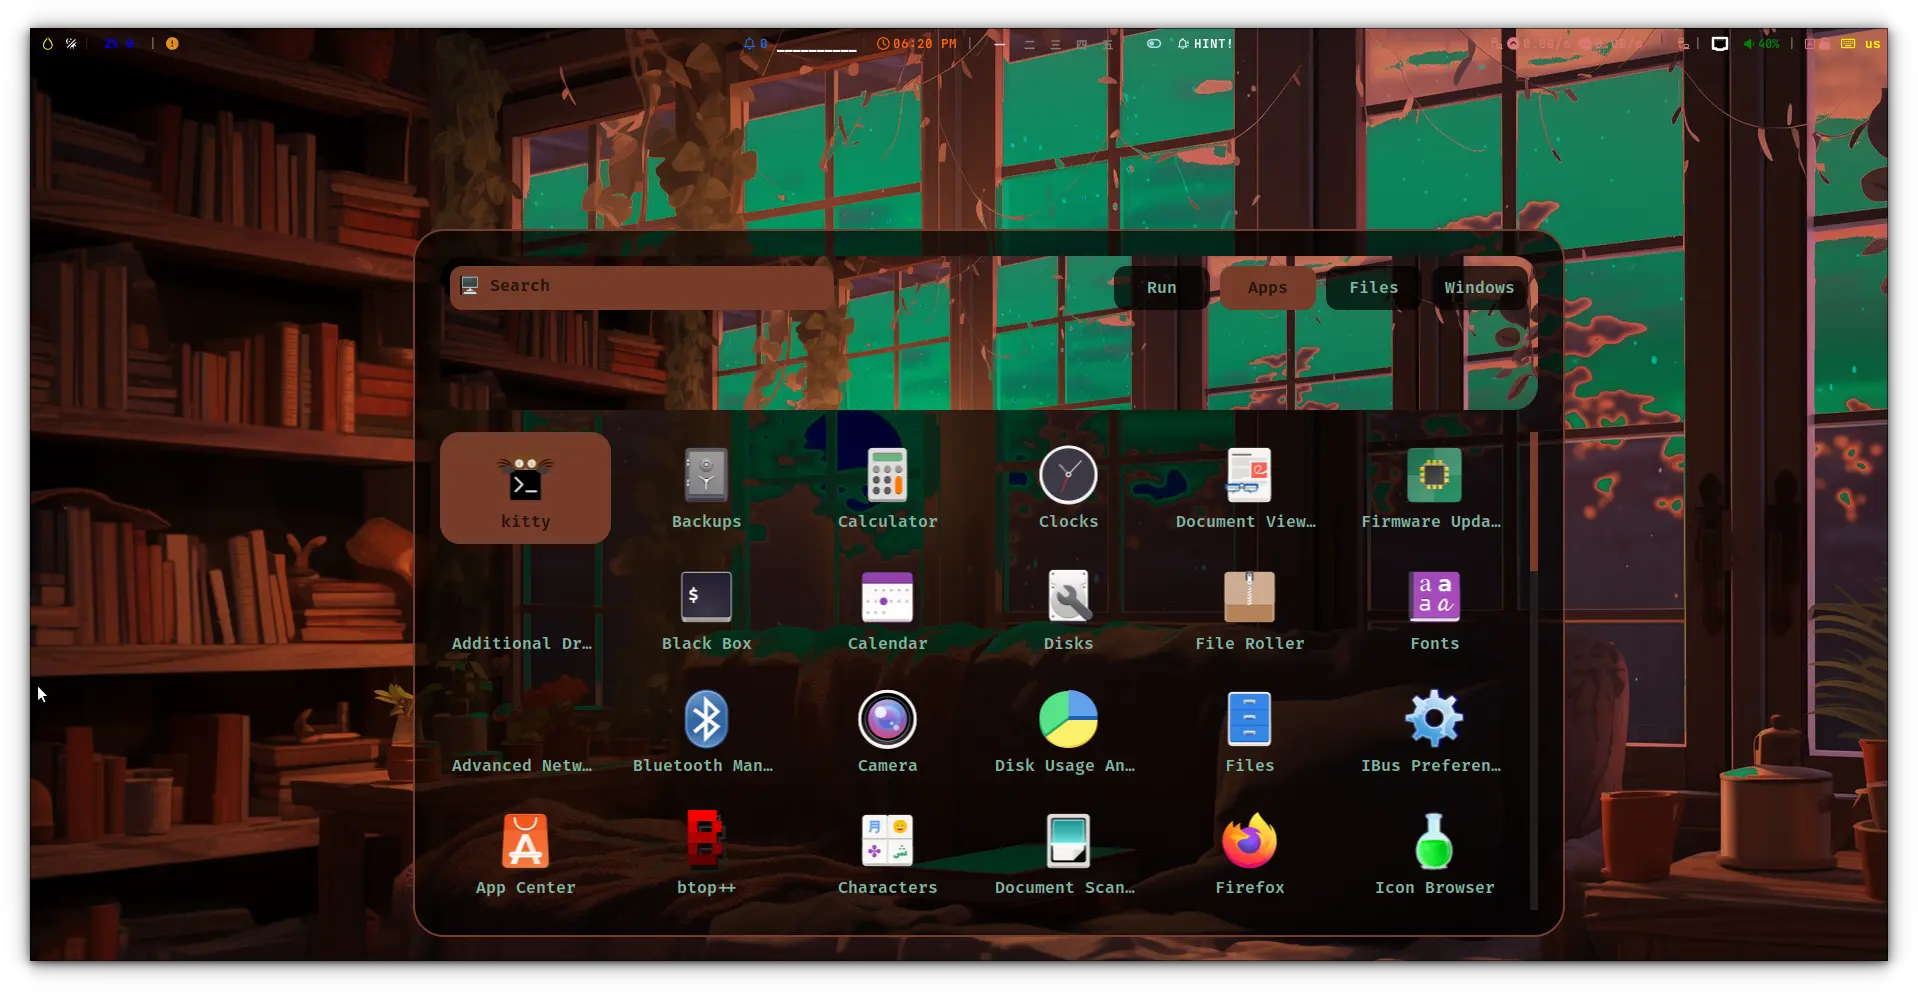
You will be logged into the Hyprland desktop session.
Installing Hyprland in other Distributions
Hyprland is available in the repos of many other Linux distributions like openSUSE, Fedora, etc. The basic installation can be performed on these devices using:
- In Fedora,
sudo dnf install hyprland
There is also a COPR repository for Fedora users for more updates.
- In openSUSE
sudo zypper in hyprland
You can read the official detailed installation manual for other distribution.
I’ll be covering the waybar configuration and Hyprland customization tips in future articles. Stay tuned and subscribe to our FOSS Weekly newsletter so that you don’t miss them.
