13 Super Useful Tips on Organizing Notes Better With Obsidian

The huge amount of data and knowledge spread across the internet makes managing important data a cumbersome task these days. Finding the correct information in the massive pool of data needs careful organizational skills.
That’s where the Knowledge management tools like Obsidian, Logseq and Notion comes in. Compared to Notion, Obsidian has several advantages, especially in the Linux environment because it has a native app. Moreover, it relies on Markdown as a base for note management.
I am not going to discuss if you should use Obsidian. That’s not the intent of this article.
As an ardent Obsidian user, let me use my experience to share some tips to boost your data storage and make the retrieval more efficient if you are already using Obsidian.
1. Make use of in-built table of contents
Obsidian has an in-built interactive table of contents, that aligns with the level of heading on the document. So, if you have a properly created headings and subheadings, then this ToC is very effective.
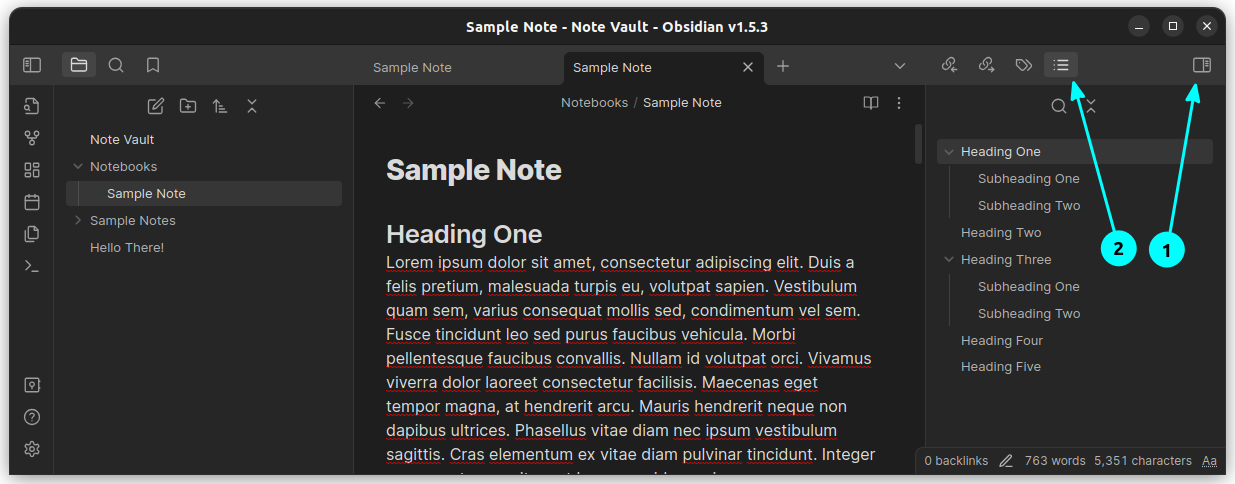
Click on the top right panel button. Now, you can click on the outline button to get the current document outline. If you want to hide this view, simply click on the panel button again, on the top-right.
2. Tweak the link system
Obsidian’s main selling point is its interlinking of documents and knowledge graphs. A casual note-taking user will get confused here.
Furthermore, some default settings on Obsidian will make it hard for migrating to another app later.
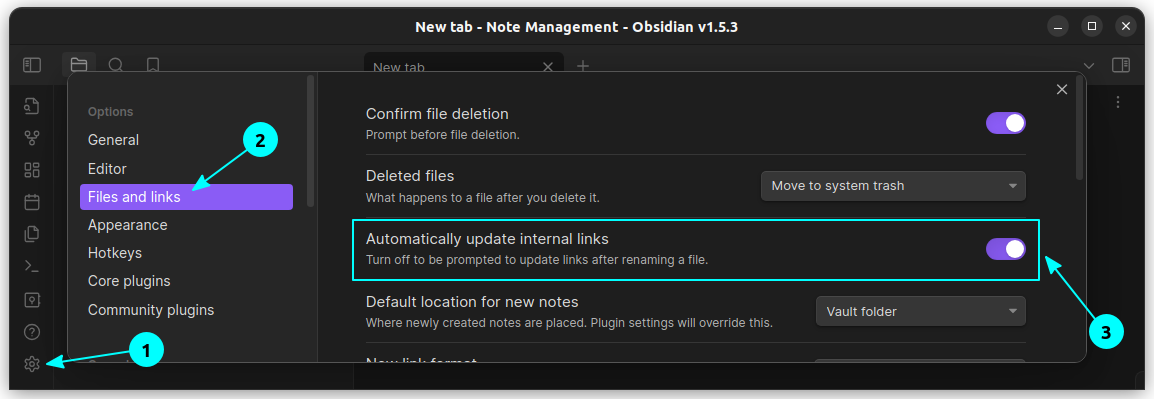
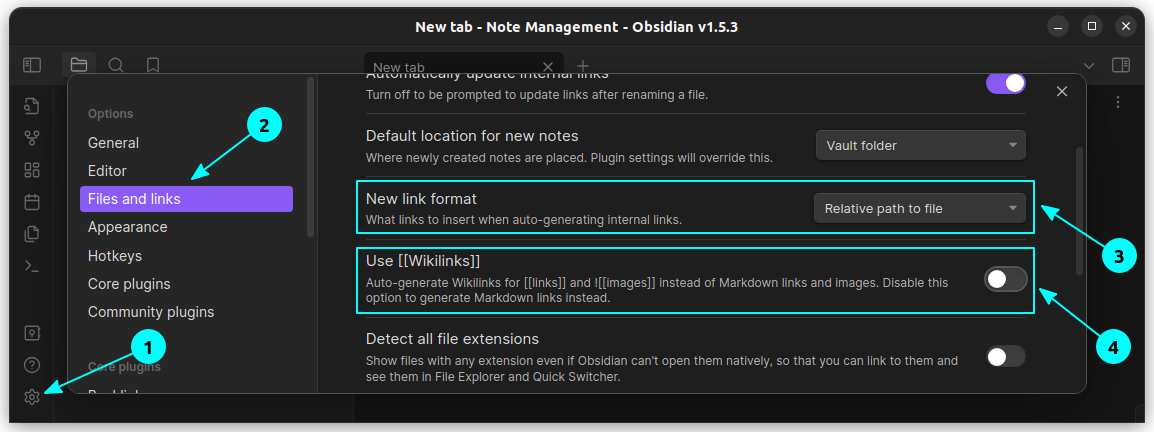
The tweaks mentioned below can be found in Settings Gear → File and Links.
Modify link automatically upon file rename
What it does is, whenever you rename a file inside your note vault, any link to that file is automatically updated. Else, you will get a prompt each time, which is easy to miss sometime.
Enable the “Automatically Update Internal Links” button.
New link format
Setting the New Link format to “Relative path to the file” and turning off Wikilinks will be good if you expect your notes to work well with other Markdown editors.
Suggested Read 📖

3. Get familiar with the hotkeys
Obsidian has some pre-set hotkeys for some actions. It will be pretty handy, memorizing some important ones.
| Function | Hotkey |
|---|---|
| Open Command Palette | CTRL + P |
| Create a New Note | CTRL + N |
| Delete a Paragraph | CTRL + D |
| Open Graph View | CTRL + G |
| Insert Markdown Link | CTRL + K |
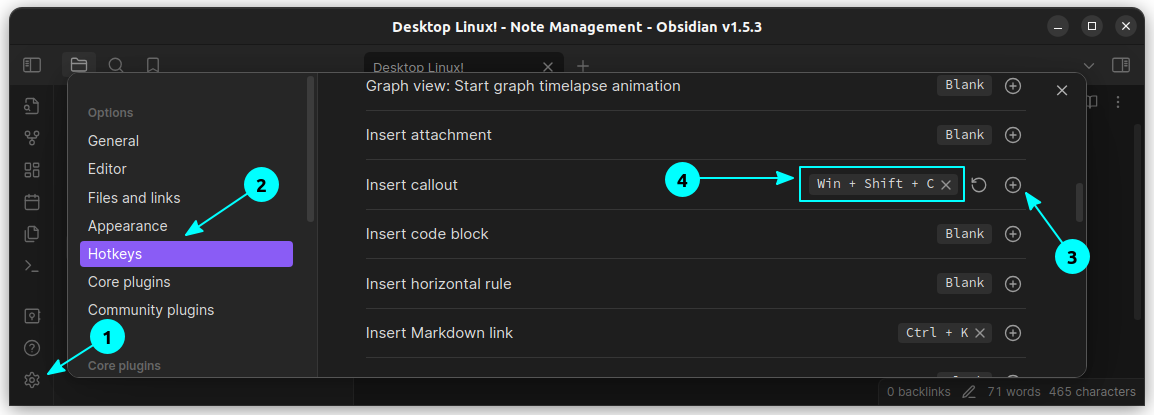
Similarly, it’s better to set some accessible hotkeys as per your preference for the following items:
- Adding tags
- Exporting to PDF
- Inserting attachments and callouts
- Inserting tables
- Toggling highlight
- Zooming in and zooming out
To add a hotkey, you can just press the “Plus” button adjacent to an entry and press the key combination that you want to set to that action.
4. Use slash key to get in-line commands
Like Notion and other popular editors, you can make Obsidian show the available commands by pressing the forward slash key.
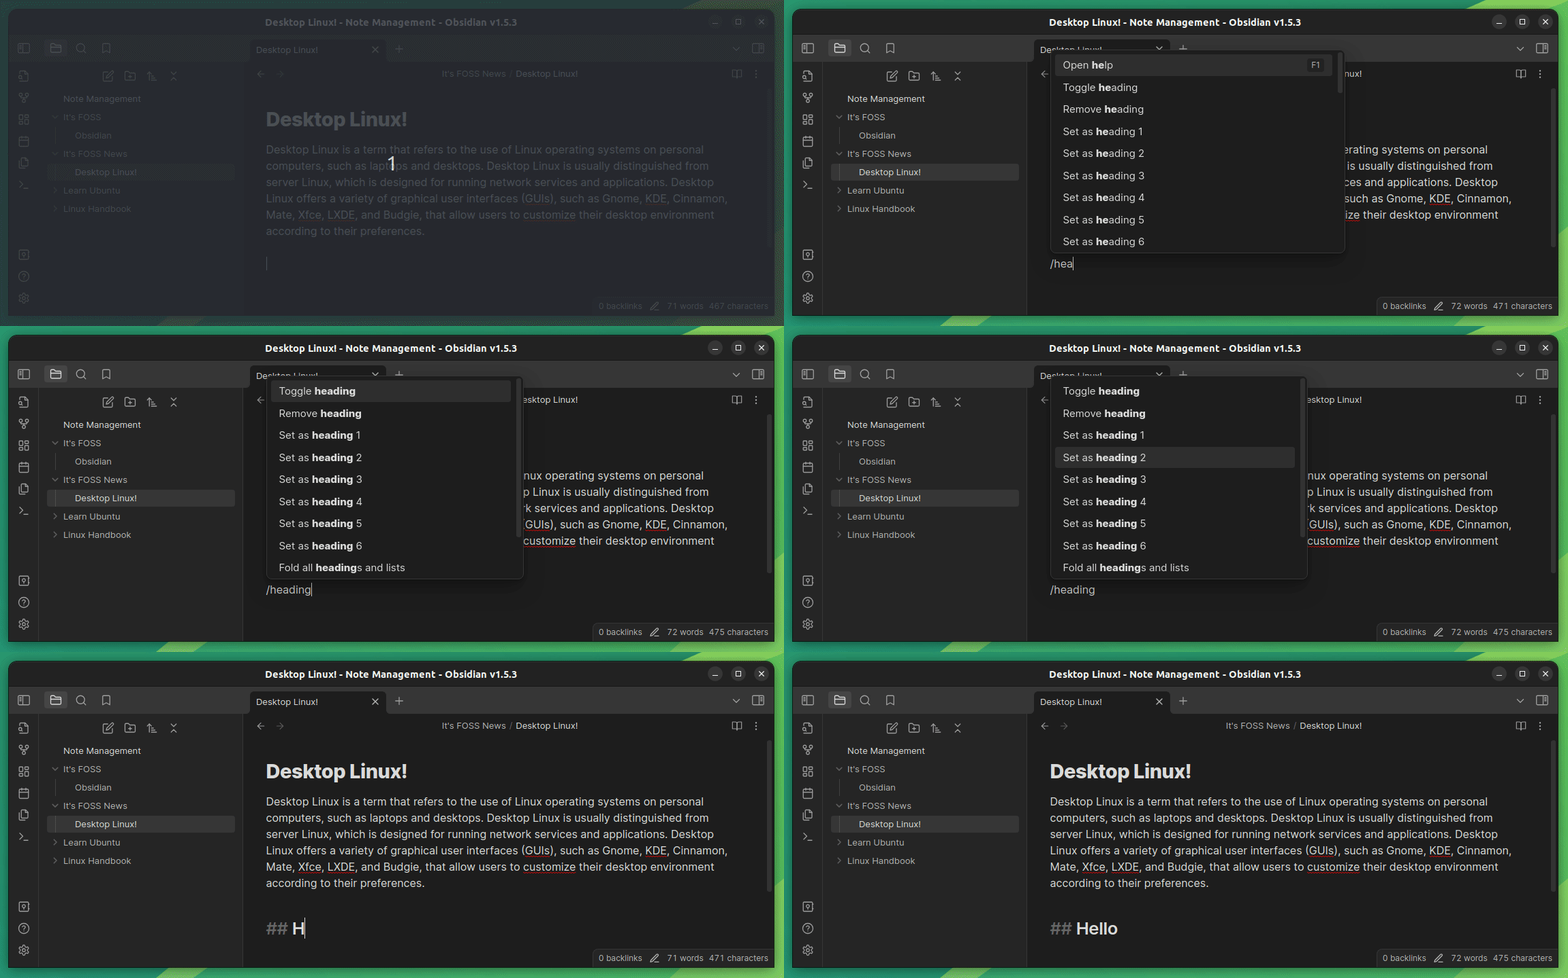
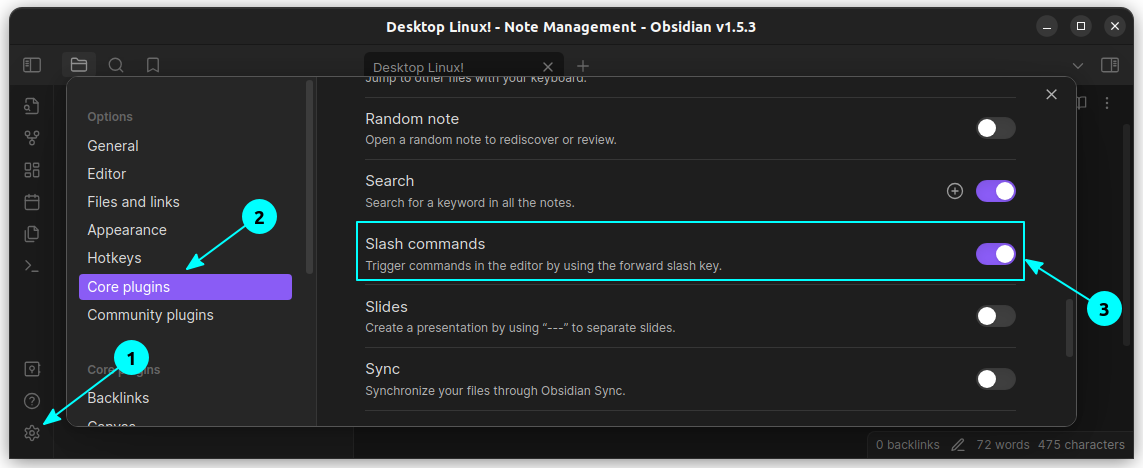
To enable this, go to Settings → Core Plugins and there, enable the Slash Commands option.
5. Use Obsidian Canvas for brainstorming
If you want a brainstorming session, you can make use of the Obsidian canvas. Here blocks, images, existing notes, link preview, etc. can be shown. Furthermore, it is possible to connect the blocks and group them as needed.
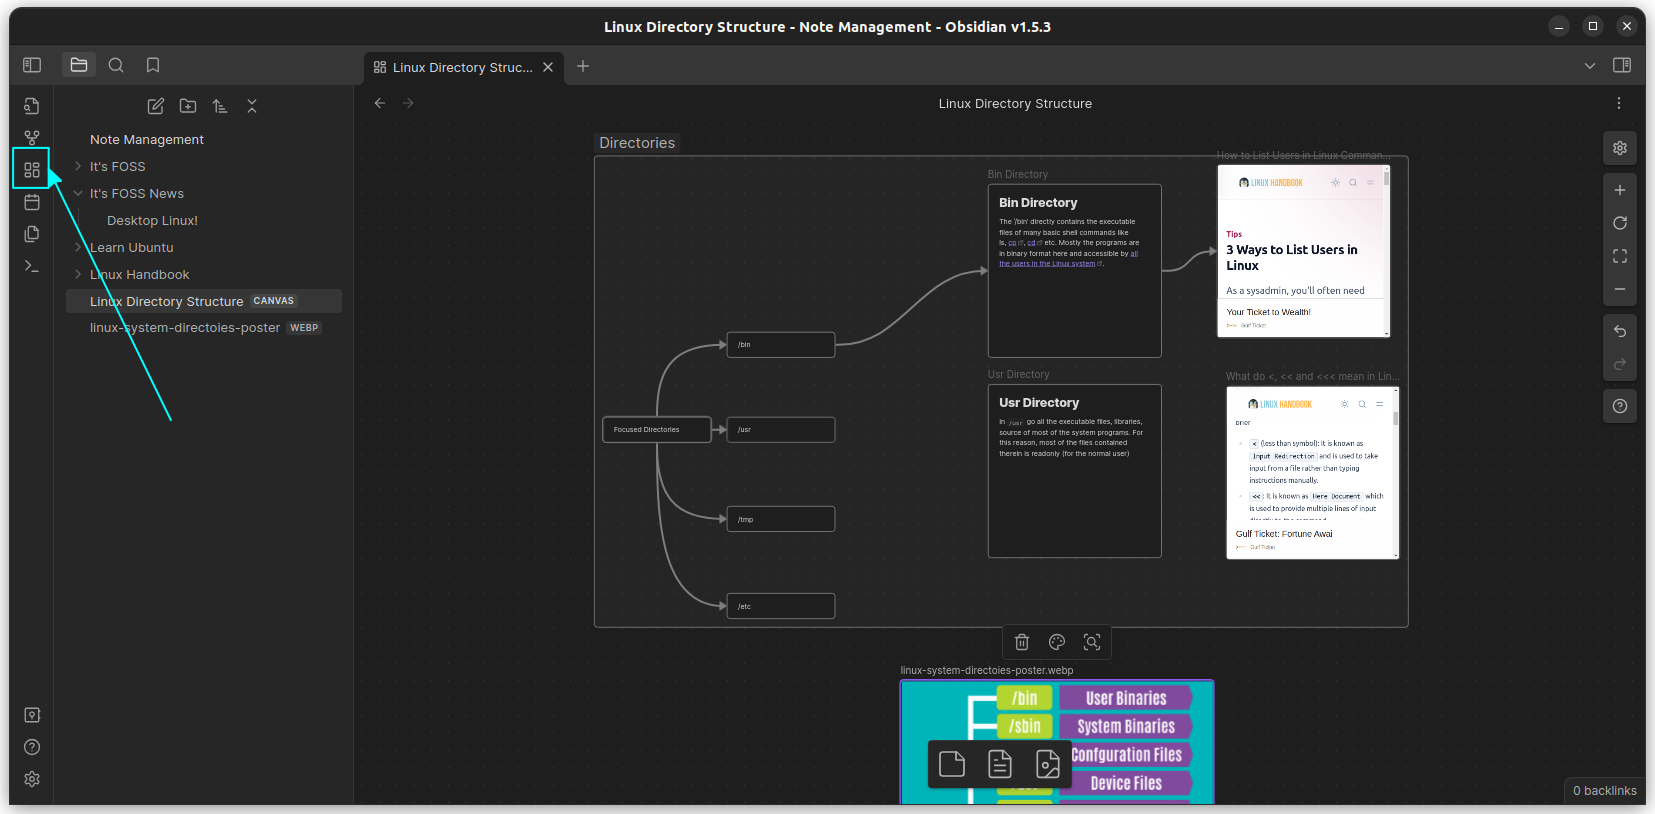
Use CTRL+scroll to zoom in and zoom out of the view. For moving around the area, press the Space key and then left click and drag.
6. Add properties to documents
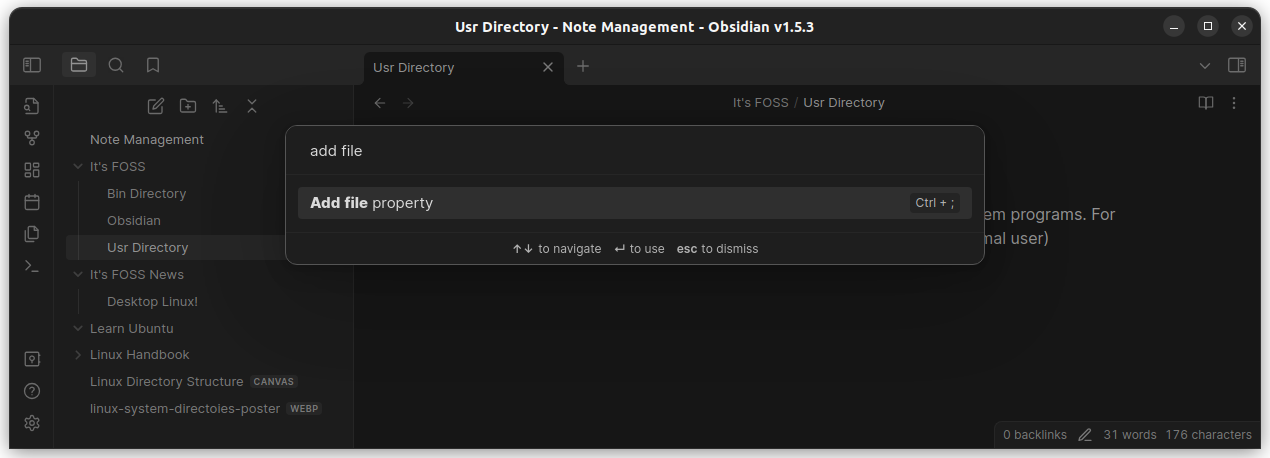
Inside the documents in your vault, you can add file properties like Date, tags, etc. Properties appearing at the beginning of a document makes management easier.
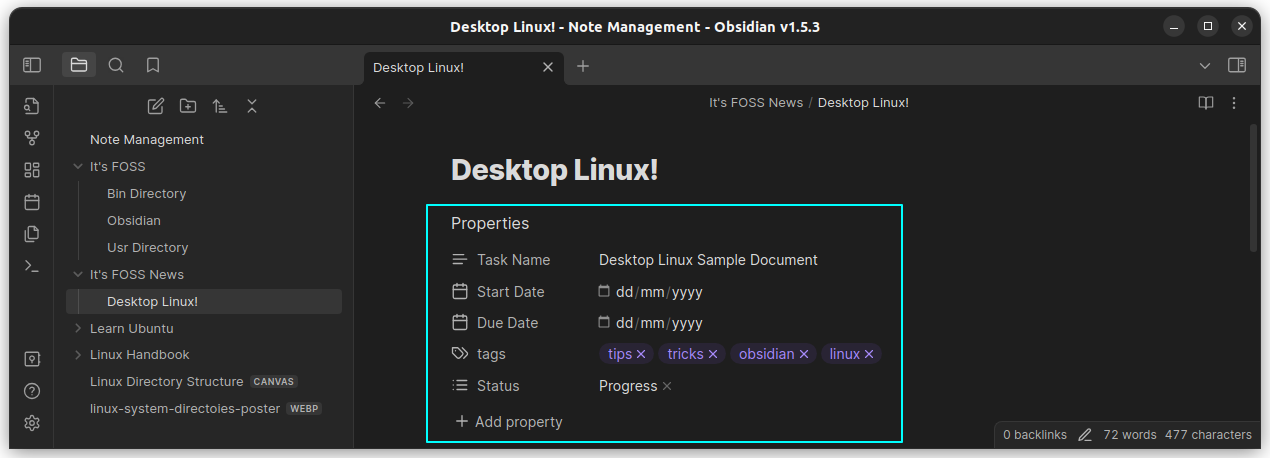
To add properties, press CTRL+P on the document to open the command panel. There, search for “Add File Property”.
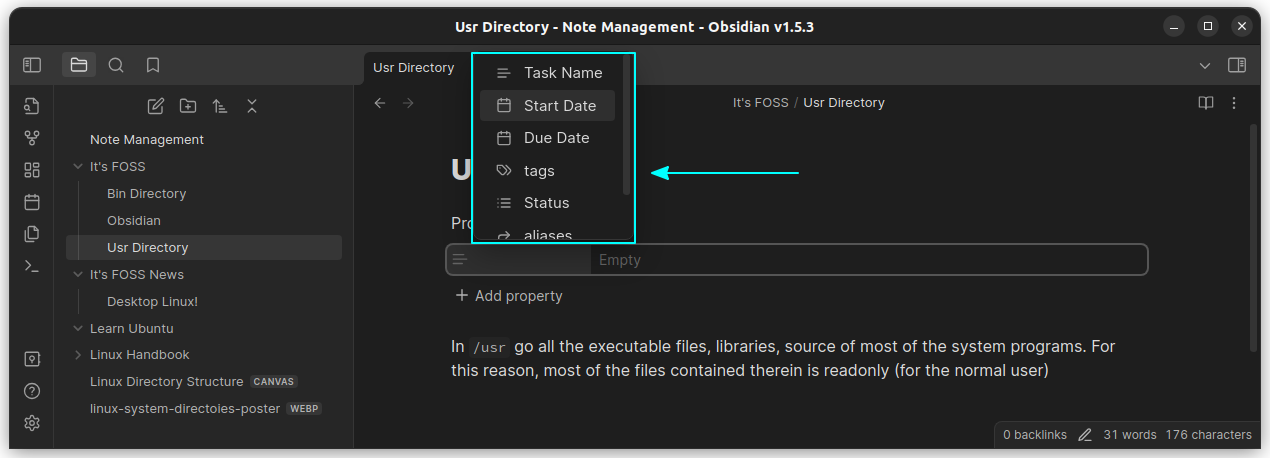
You can add more than one property to a block by using the Add Property button. Once you have added several properties, whenever you add a property to another document, you will get the fields you already created.
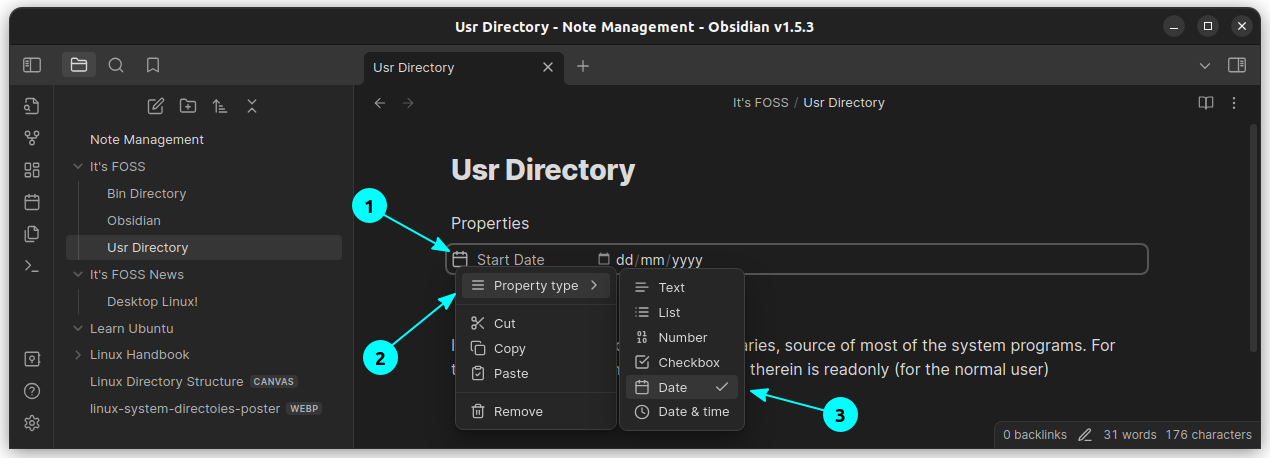
You can right-click on the icon of a property and change its type to an available type.
7. Access the tag information from the panel menu
You can add several tags to your notes and those tags can be used to retrieve data later. Click on the top-right panel button and then select the tags button. It will display all the tags and the number of notes on each tag.
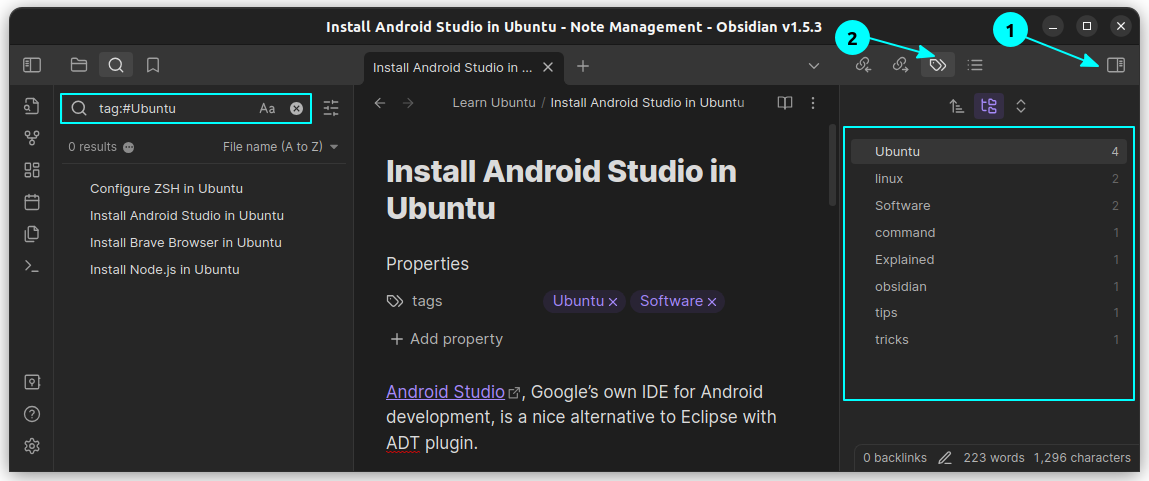
Clicking on these tag on the right side panel will list all the notes in that tag on the left search panel.
8. Use Callouts to write better documents
Obsidian has a callout feature, that allows you to mark points that need special attention. See the screenshot below.
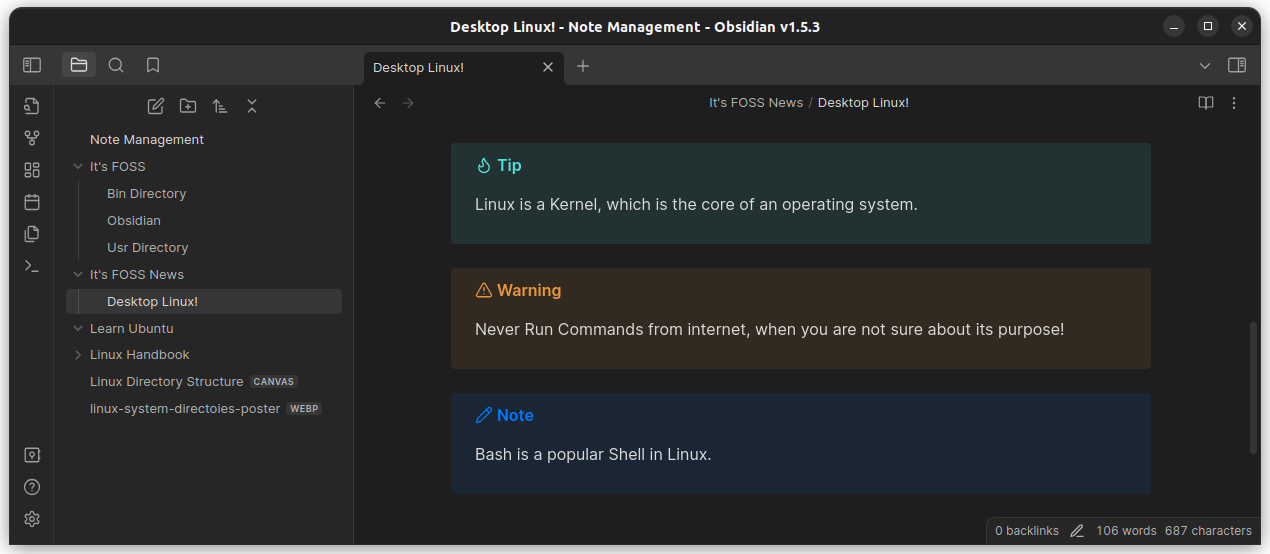
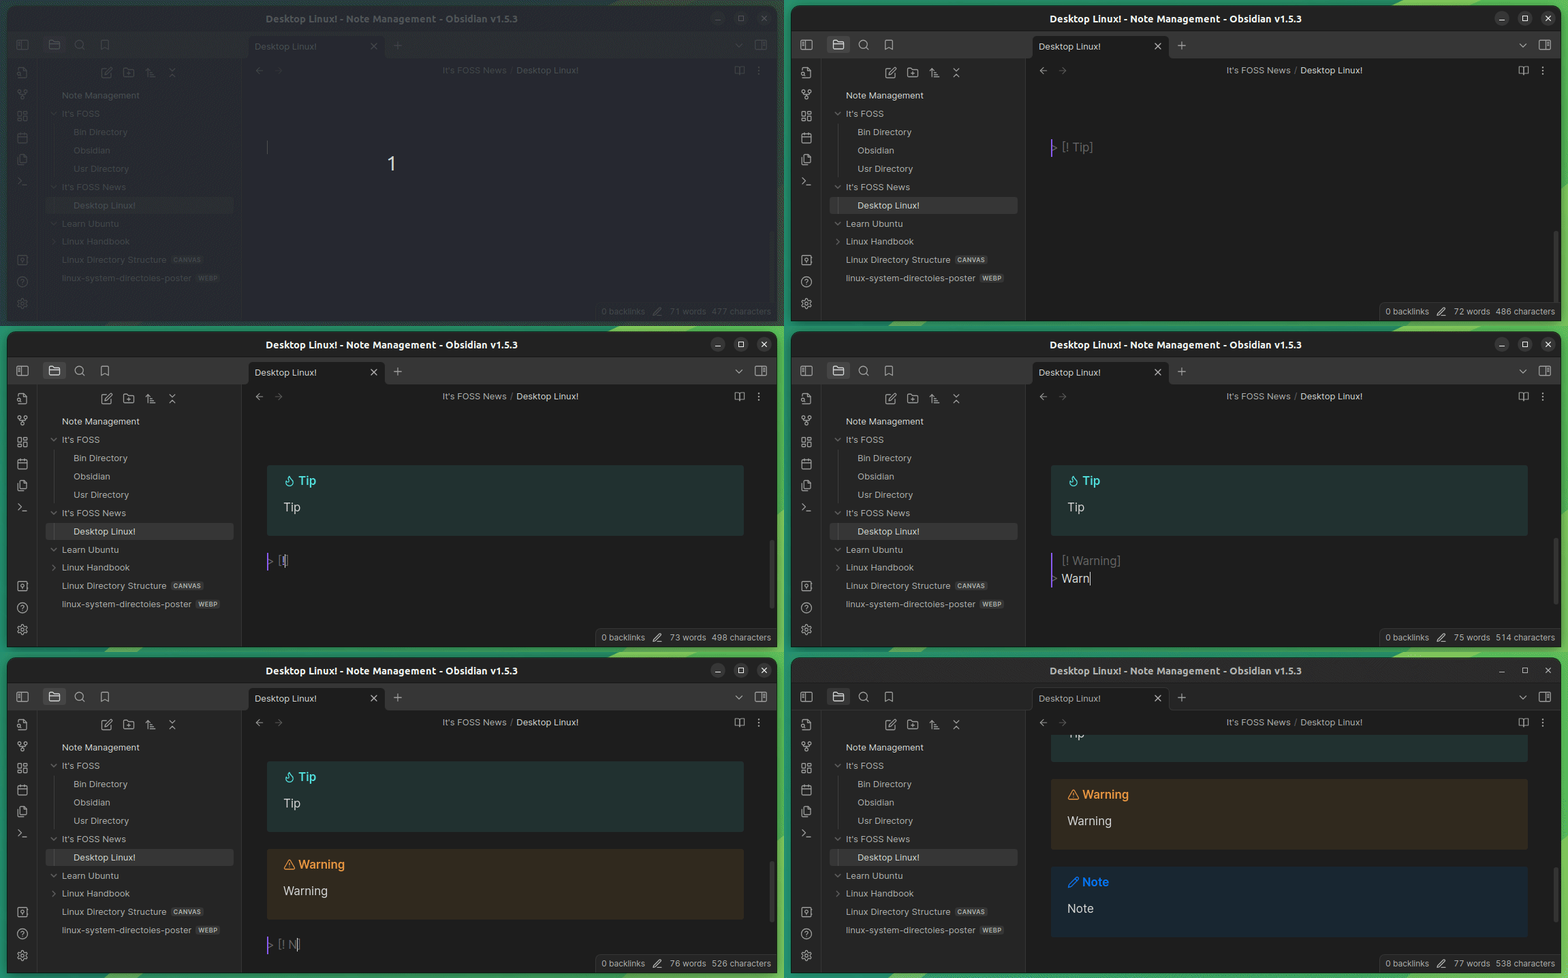
Here, I have added callouts like Tip, Warning, Note etc. To make this appear inside the document, use the format below:
9. Keep attachments neatly
In a markdown-based app like obsidian, it is easy to get confused about the location of an added attachment.
First, go to Settings → Files and Links. Here, scroll down a bit to get to the Default Location for New Attachments. Set it to “In subfolder under current folder”. On the Subfolder Name option, type a name for the attachments folder. That’s it!
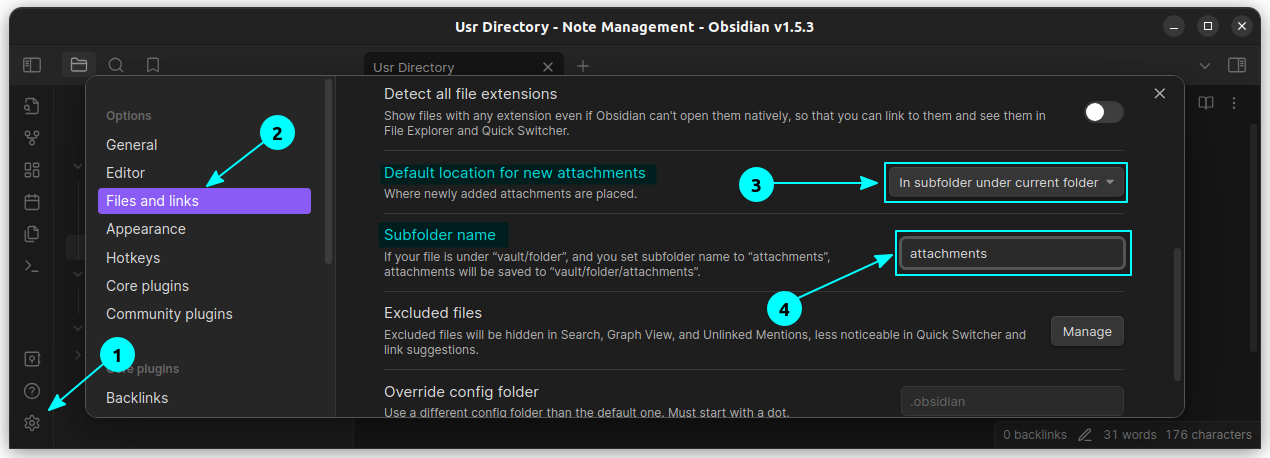
Now, whenever you copy and paste a file to a note, that attachment file will be saved to the attachments folder per directory.
10. Work with interlinking and graph View
The knowledge graph is one of the main focuses of Obsidian. These are visual representation of the links of an article. The feature is particularly helpful, if you are using interconnected notes and need to know to which notes a particular note is connected to.
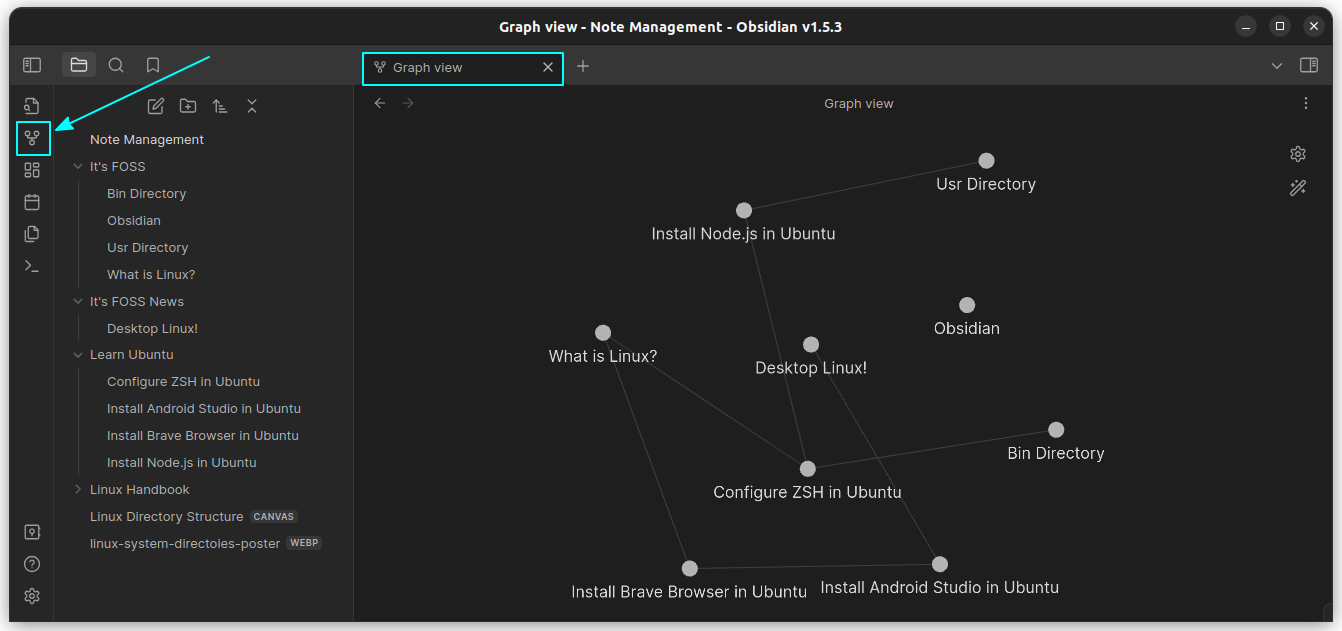
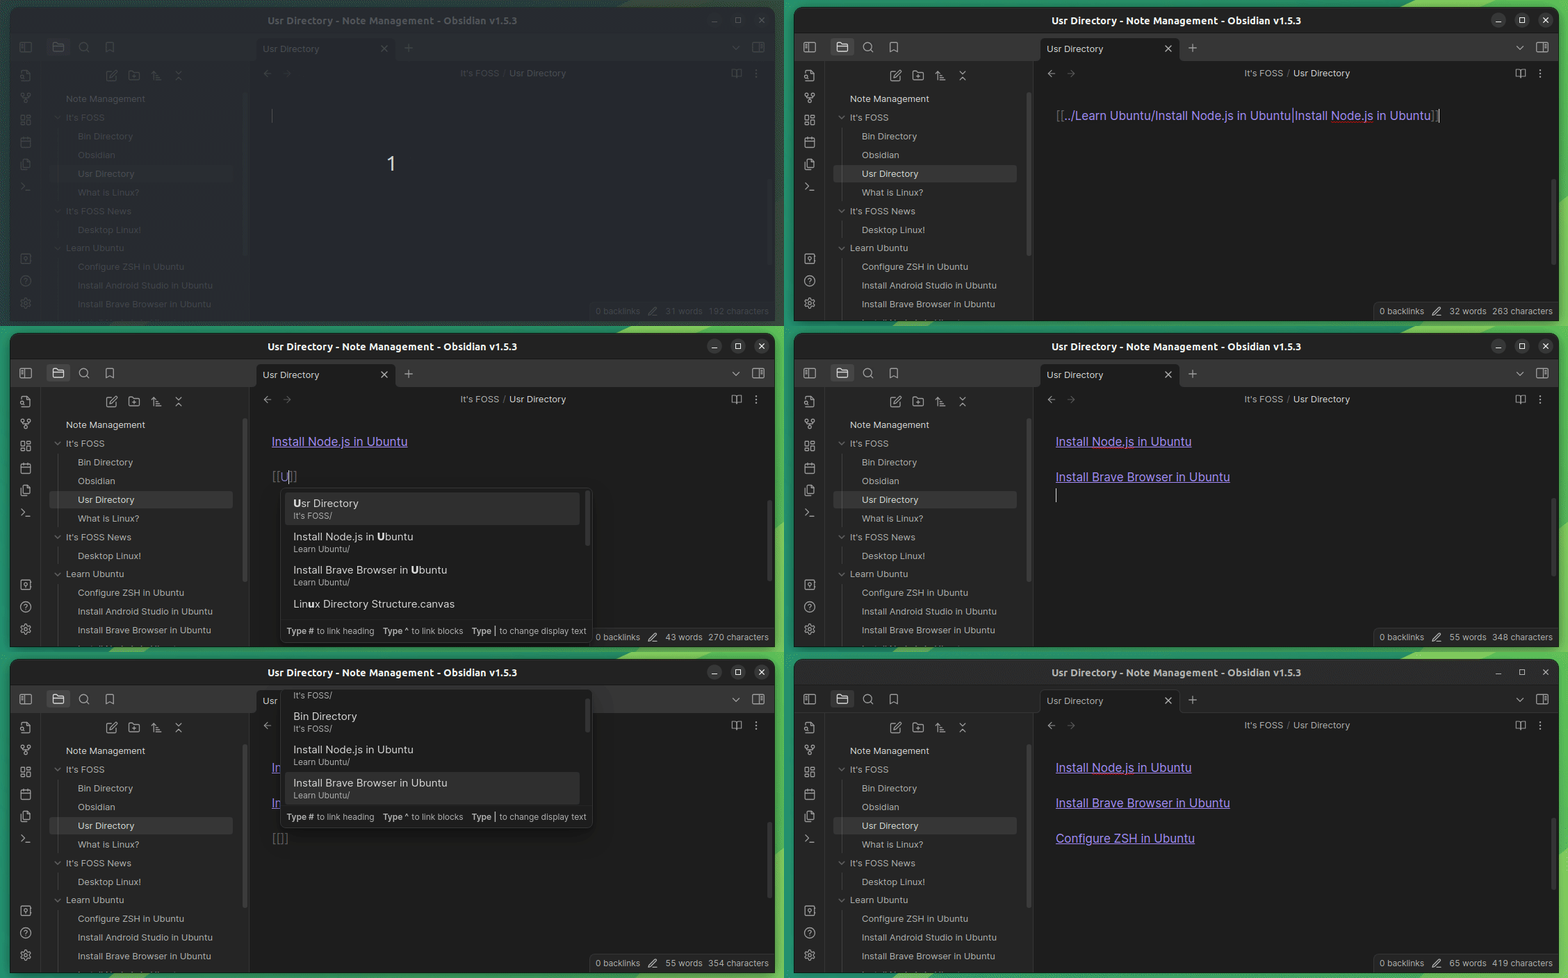
You can either click on the Graph view button on the left panel, or use the shortcut CTRL + G. In order to link an article to another, make use of the quick links creation. Just type [[ and then search for the note in the appearing box.
11. Install plugins
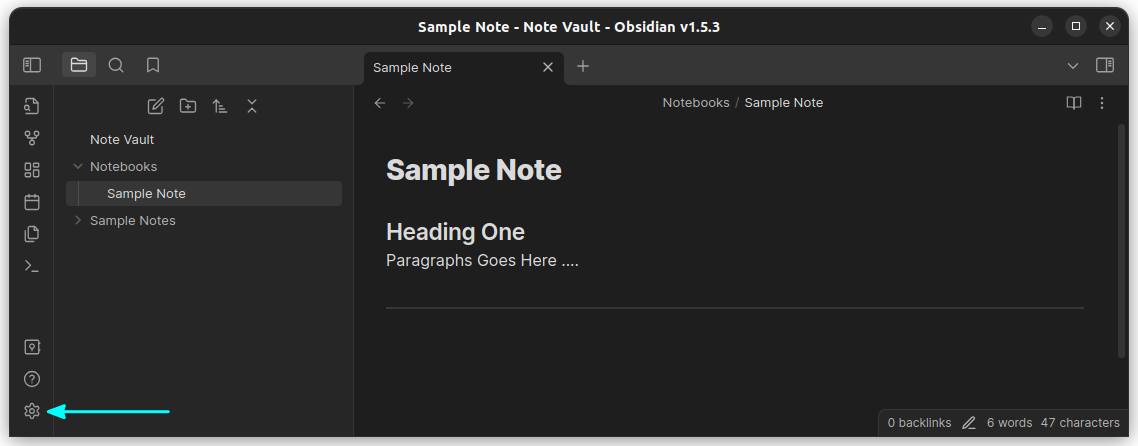
Plugins make Obsidian ever more powerful. So, you should use them frequently. First, click on the settings button.
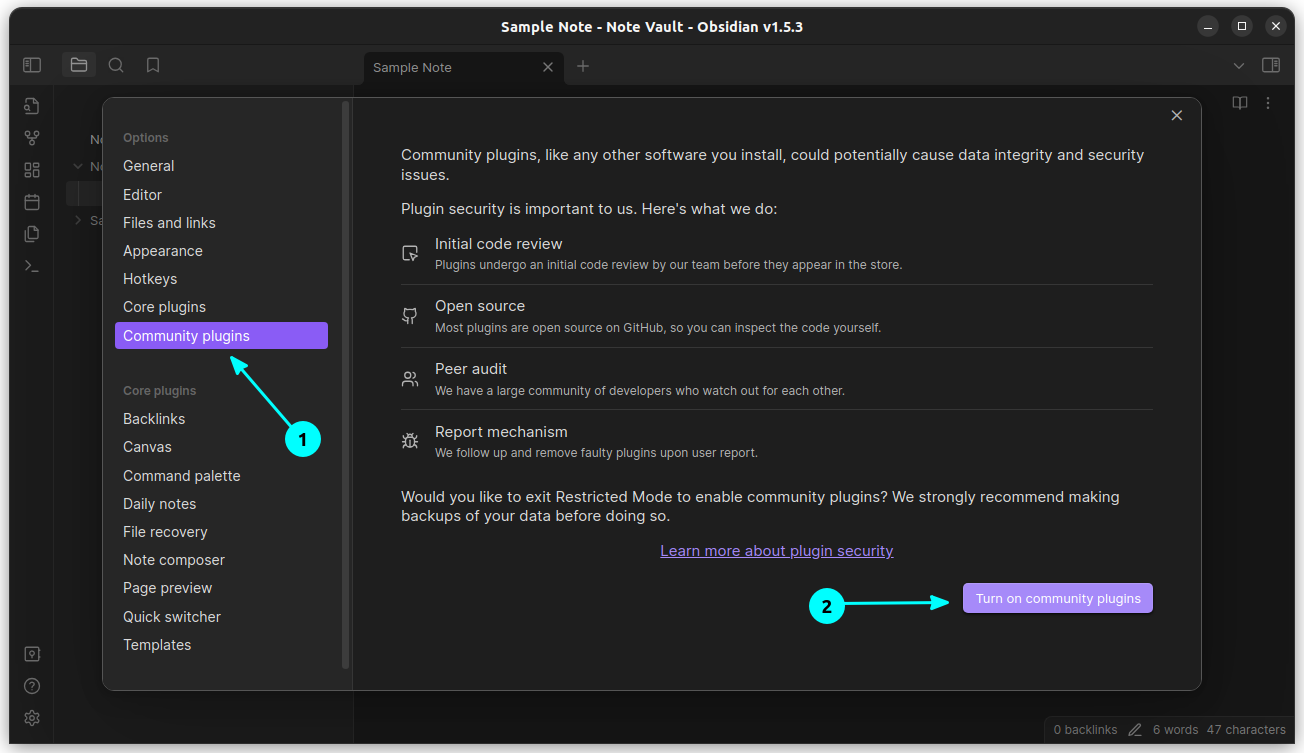
This will open the preferences window. Go to the Community Plugins tab and then click on the Turn on Community Plugins button.
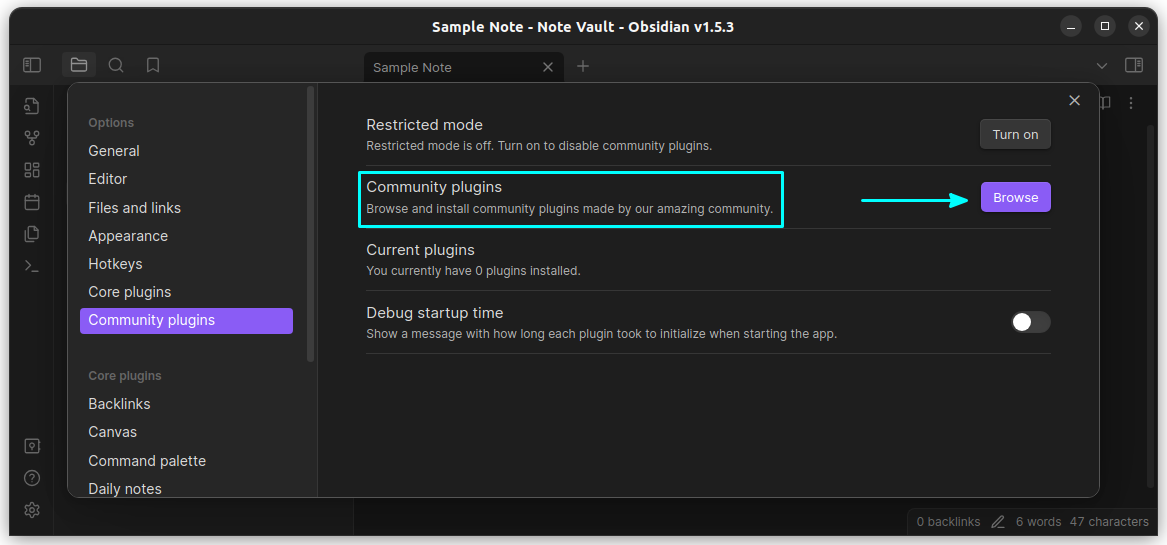
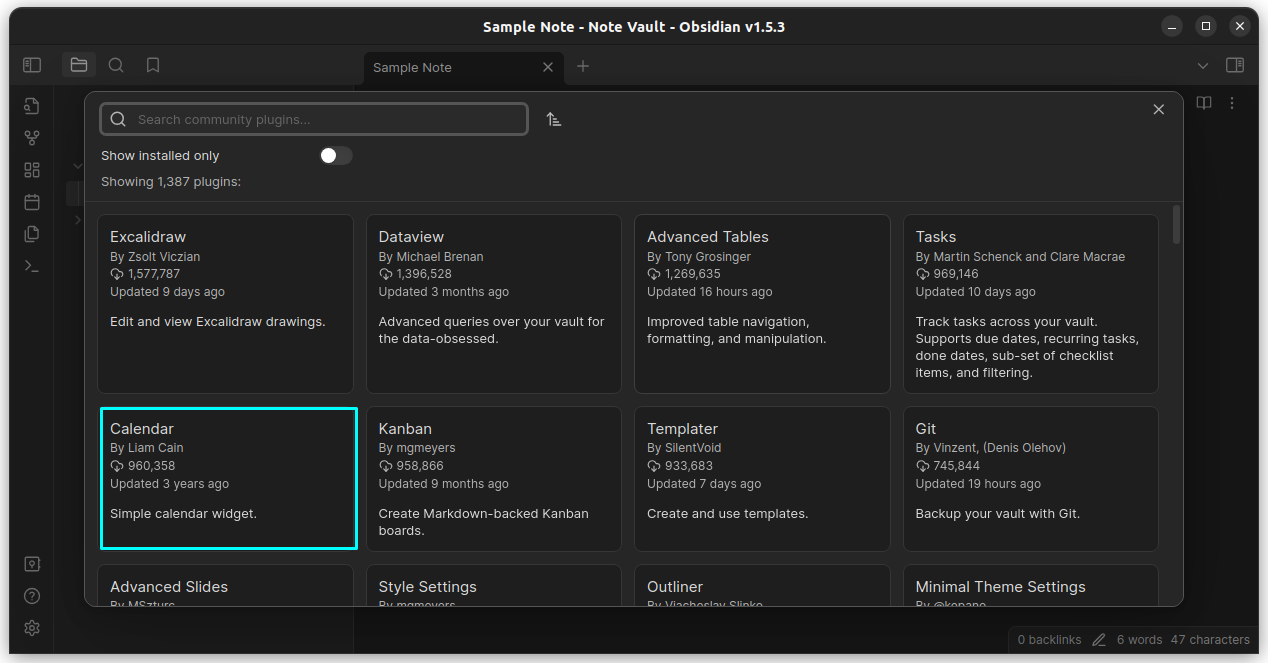
In the next window, click on the browse button to browse various community plugins.
You can click on any item to go to its installation page.
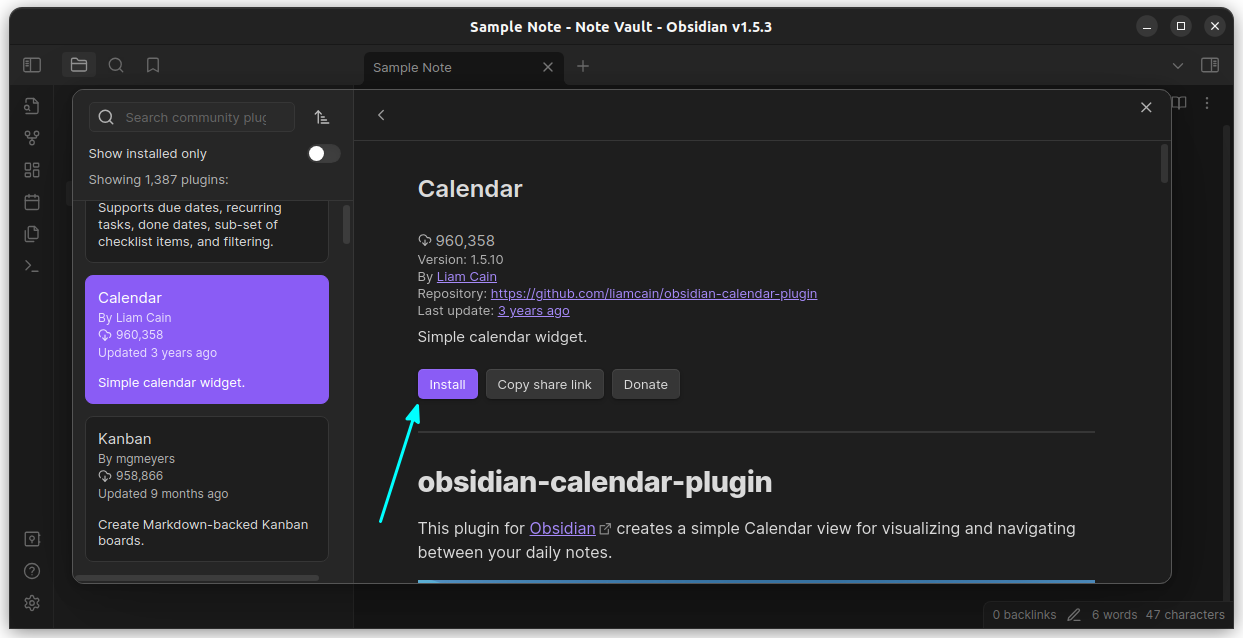
Press the installation button there to install that plugin to your Obsidian version.
.obsidianin the local storage, where you created the vault. When you copy the whole vault and open that copied vault using Obsidian in another system, all the extensions will be installed there as well. It will ask, “Do you trust the author” while opening such a copied vault. So, you don’t need to handpick extensions every time, you migrate from one system to another.12. Enable LanguageTool
LanguageTool is an open source proofreading software. You can use it to avoid spelling and grammatical mistakes.
You can easily set up LanguageTool on Obsidian so that it just works inside the app.
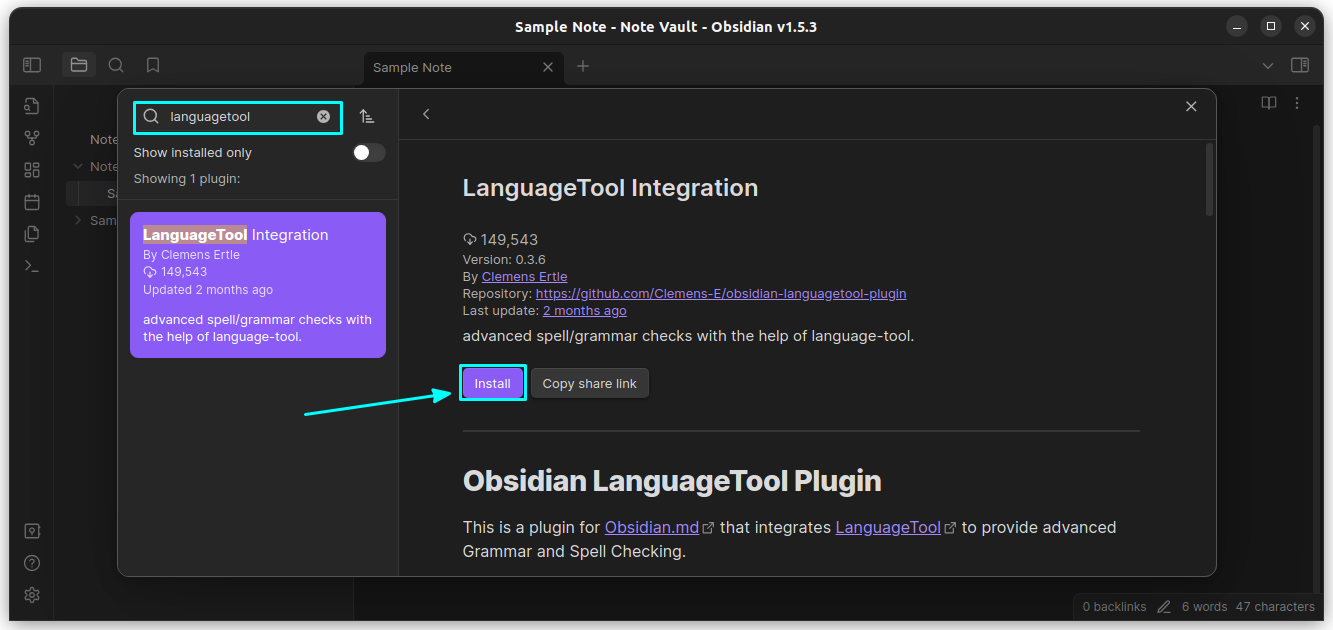
First, install the obsidian community plugin for LanguageTool.
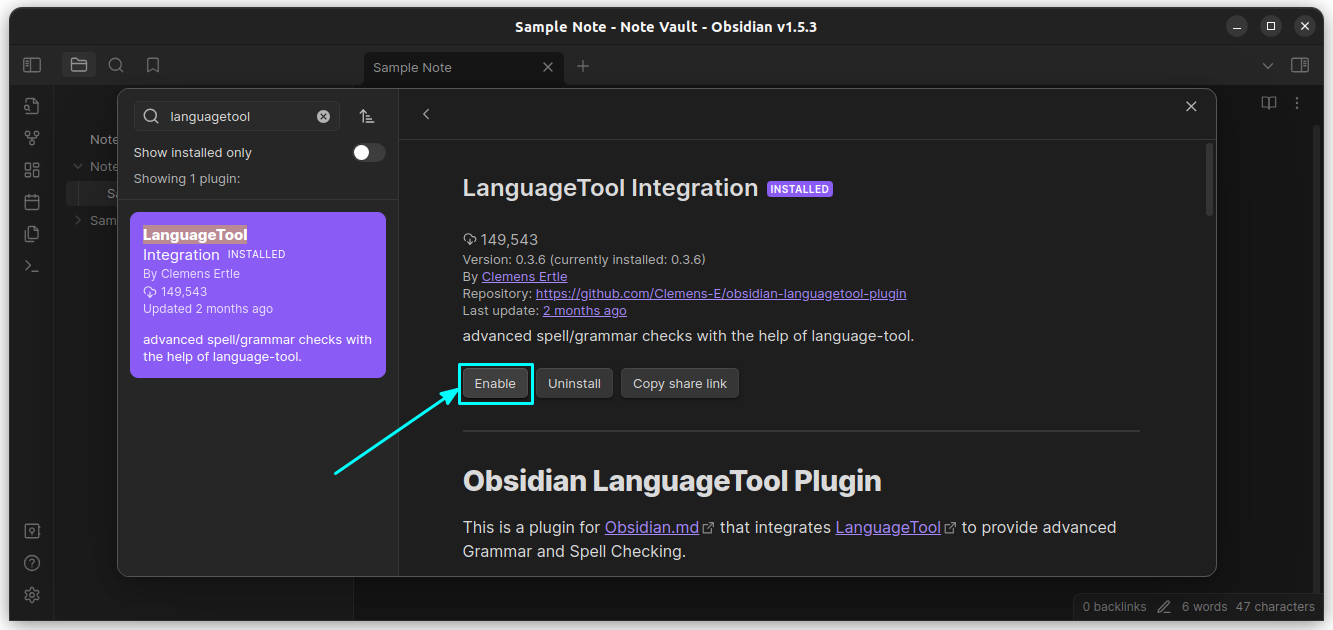
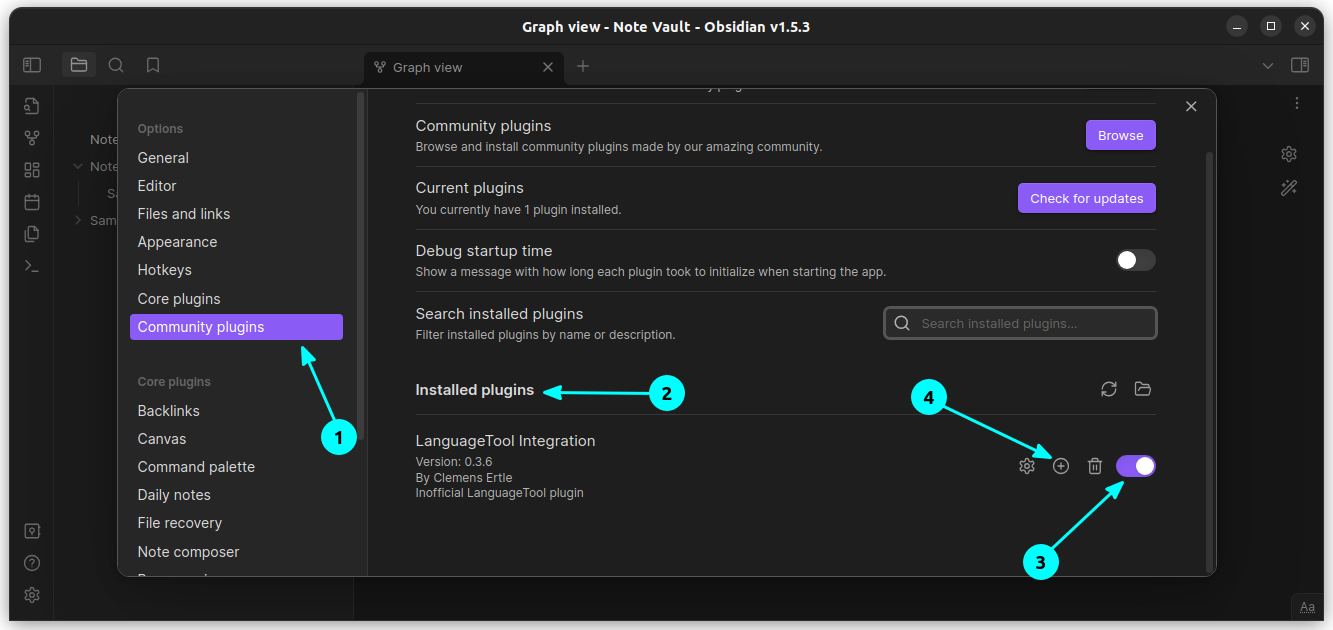
You can enable the plugins one installed using the enable button.
The plugin can be enabled from the Community Plugins page on Obsidian Settings as well.
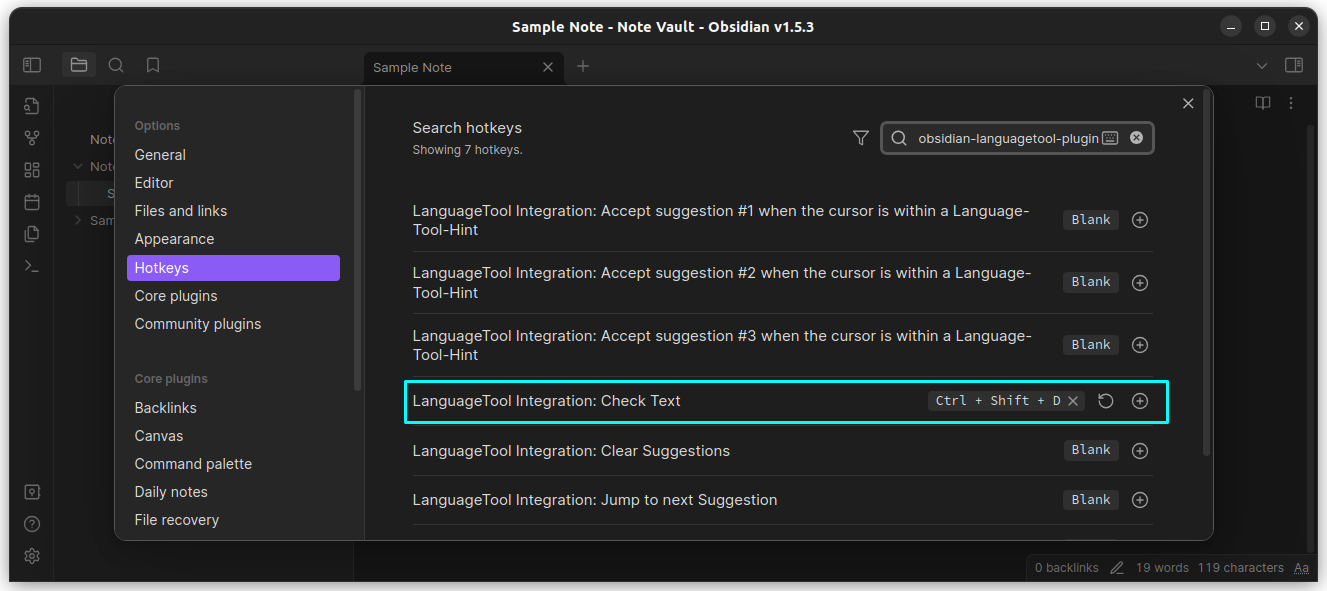
You need to set a hotkey for the Language tool. For that, click on the Plus button as shown in the above screenshot. On the next screen, set some non-conflicting shortcut keys. You should set a hotkey for at least the Check Text function.
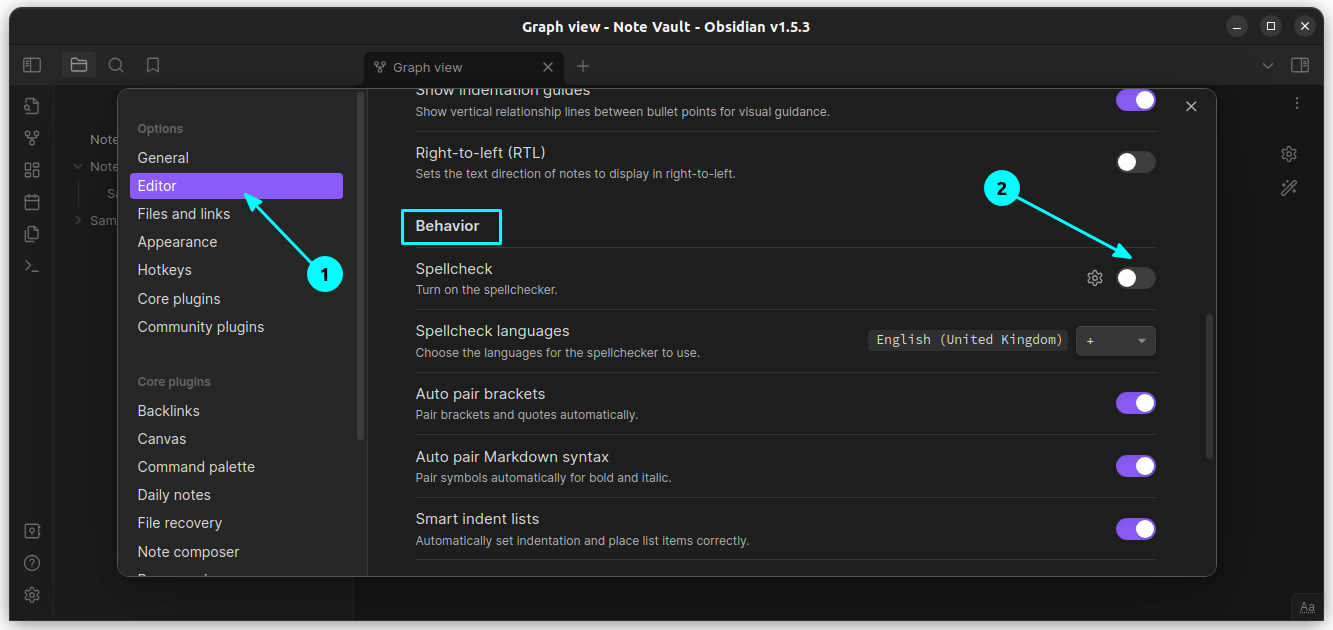
You can now disable the spell check by Obsidian since it’s not necessary.
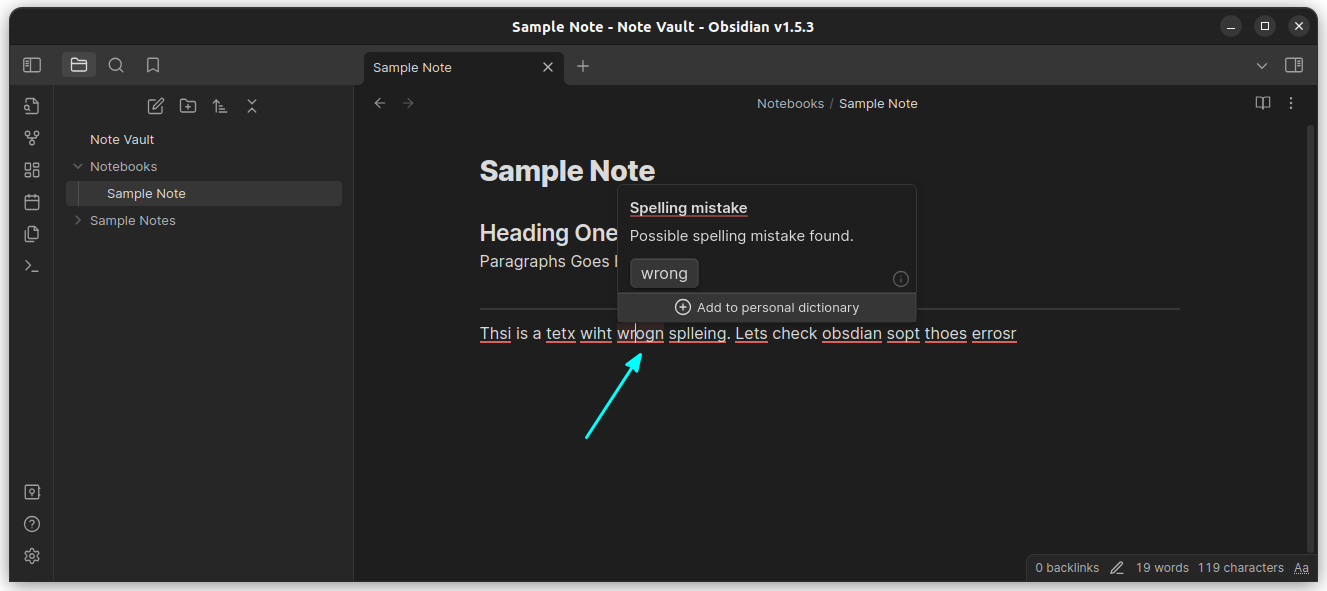
That’s it. Now, when you need to check a text manually, press the hotkey you set.
13. Set an icon for Obsidian AppImage (only for Linux users)
If you are using Obsidian AppImage on GNOME, you will notice that, the Obsidian Icon is missing from the GNOME Dash. You can make it appear on the dash by placing the contents given below to a file called Obsidian.desktop in the ~/.local/share/applications/ directory.
[Desktop Entry]
Type=Application
Name=Obsidian
Comment=Knowledge Management Application
Exec=</path/to/the.obsidian/appimage/file>
Icon=</path/to/the/required/icon/file.png>
Terminal=false
StartupWMClass=obsidian
Conclusion
Even though Obsidian uses Markdown, and it is accessible through any platform that has Markdown support, there is a small amount of vendor lock in involved here. It is in the form of plugins and some built-in content blocks.
It is not a specific issue to Obsidian. Even open-source editors like Joplin have such issues. When you install plugins and other tools specific to an editor, you may not find it accessible on other editors, that do not support these plugins.
You may already be familiar with some of these Obsidian tips that I mentioned here. I am eager to know if you ‘discovered’ something new. Please let me know in the comment section.

