Change Configuration of Existing VirtualBox Virtual Machines
One of the biggest advantages of a virtual machine is that you can always configure it later after creating it.
The configuration may include:
- Adjusting disk size
- Allocating more RAM or CPU
- Tweaking display options
- Mounting a new disc
- Changing the connected network
- Connecting/Disconnected peripherals/devices from host
- Adding a shared folder
Of course, depending on the virtualization software, the process of customizing things will differ. But it is more or less the same if it allows you to do that.
Here, I shall use VirtualBox to highlight how to customize and configure some of these options. This should also be applicable to users who want to run virtual machines on Windows.
Tweaking allocated RAM and CPU
It is true that the virtual machine may not be able to provide the same performance that you expect on bare metal.
However, if you allocate enough memory (RAM) and processors (CPU) for the virtual machine, you can get a smooth experience. If you do not give the VM enough resources, it may not be a fast user experience.
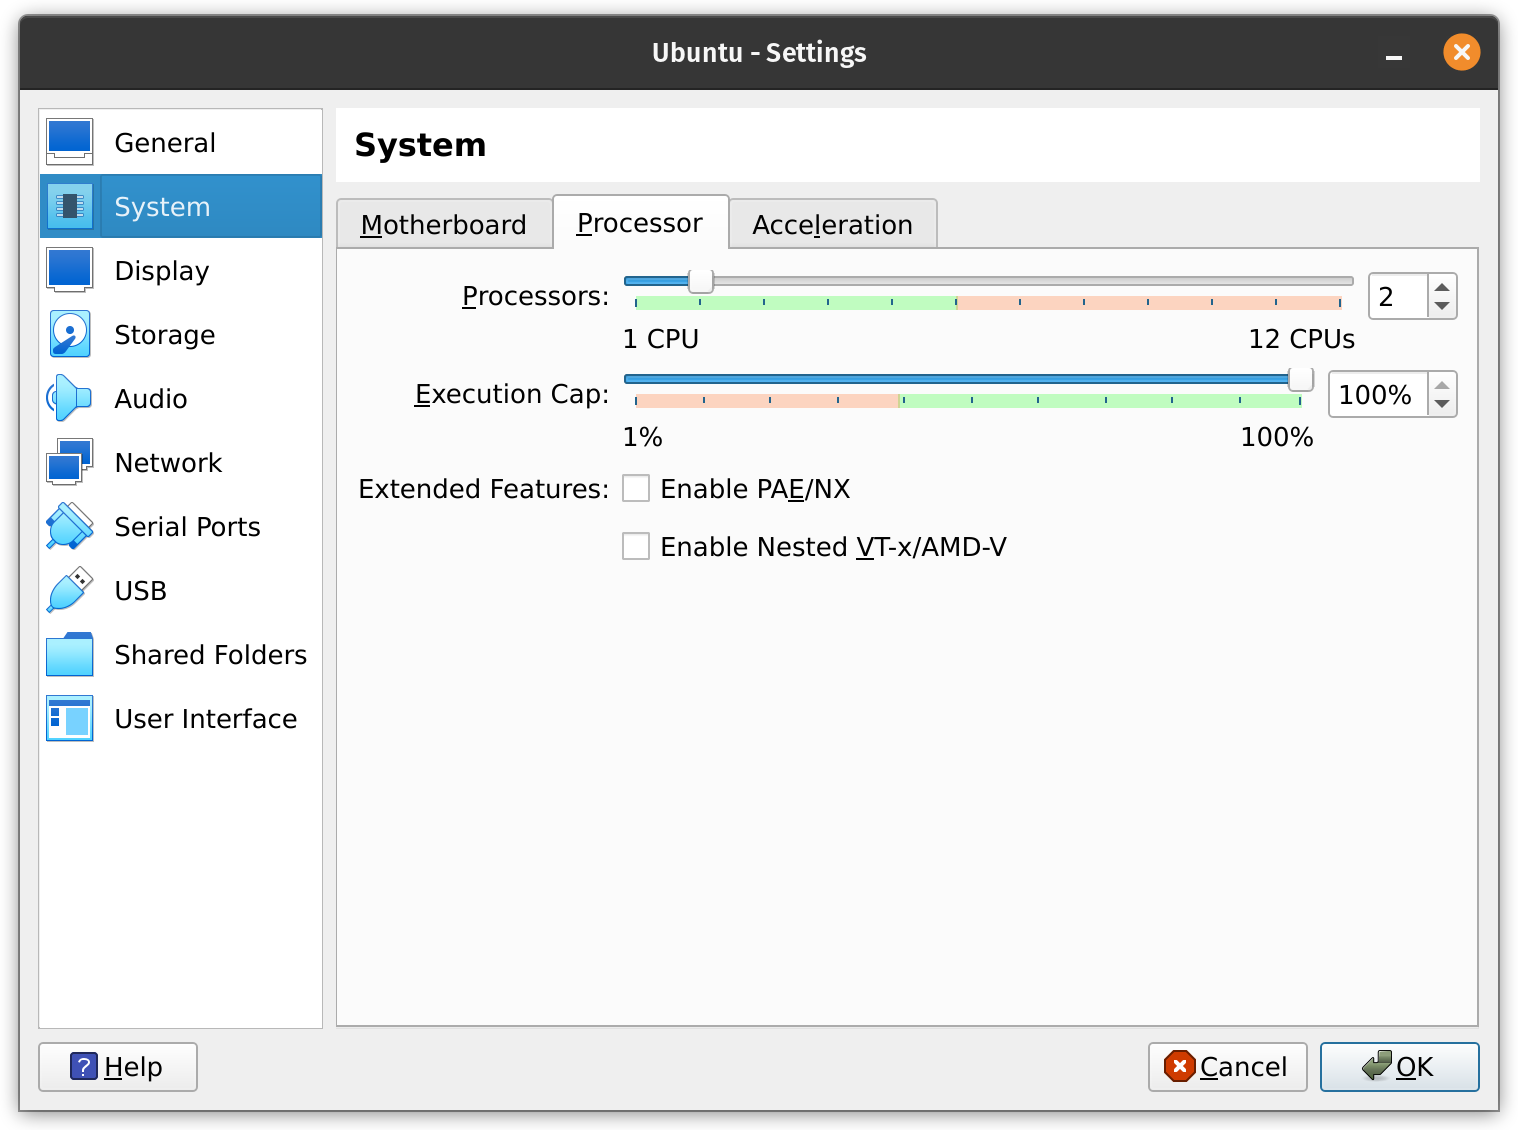
So, head to the “System” settings of the VM you created and then adjust the memory and processors.
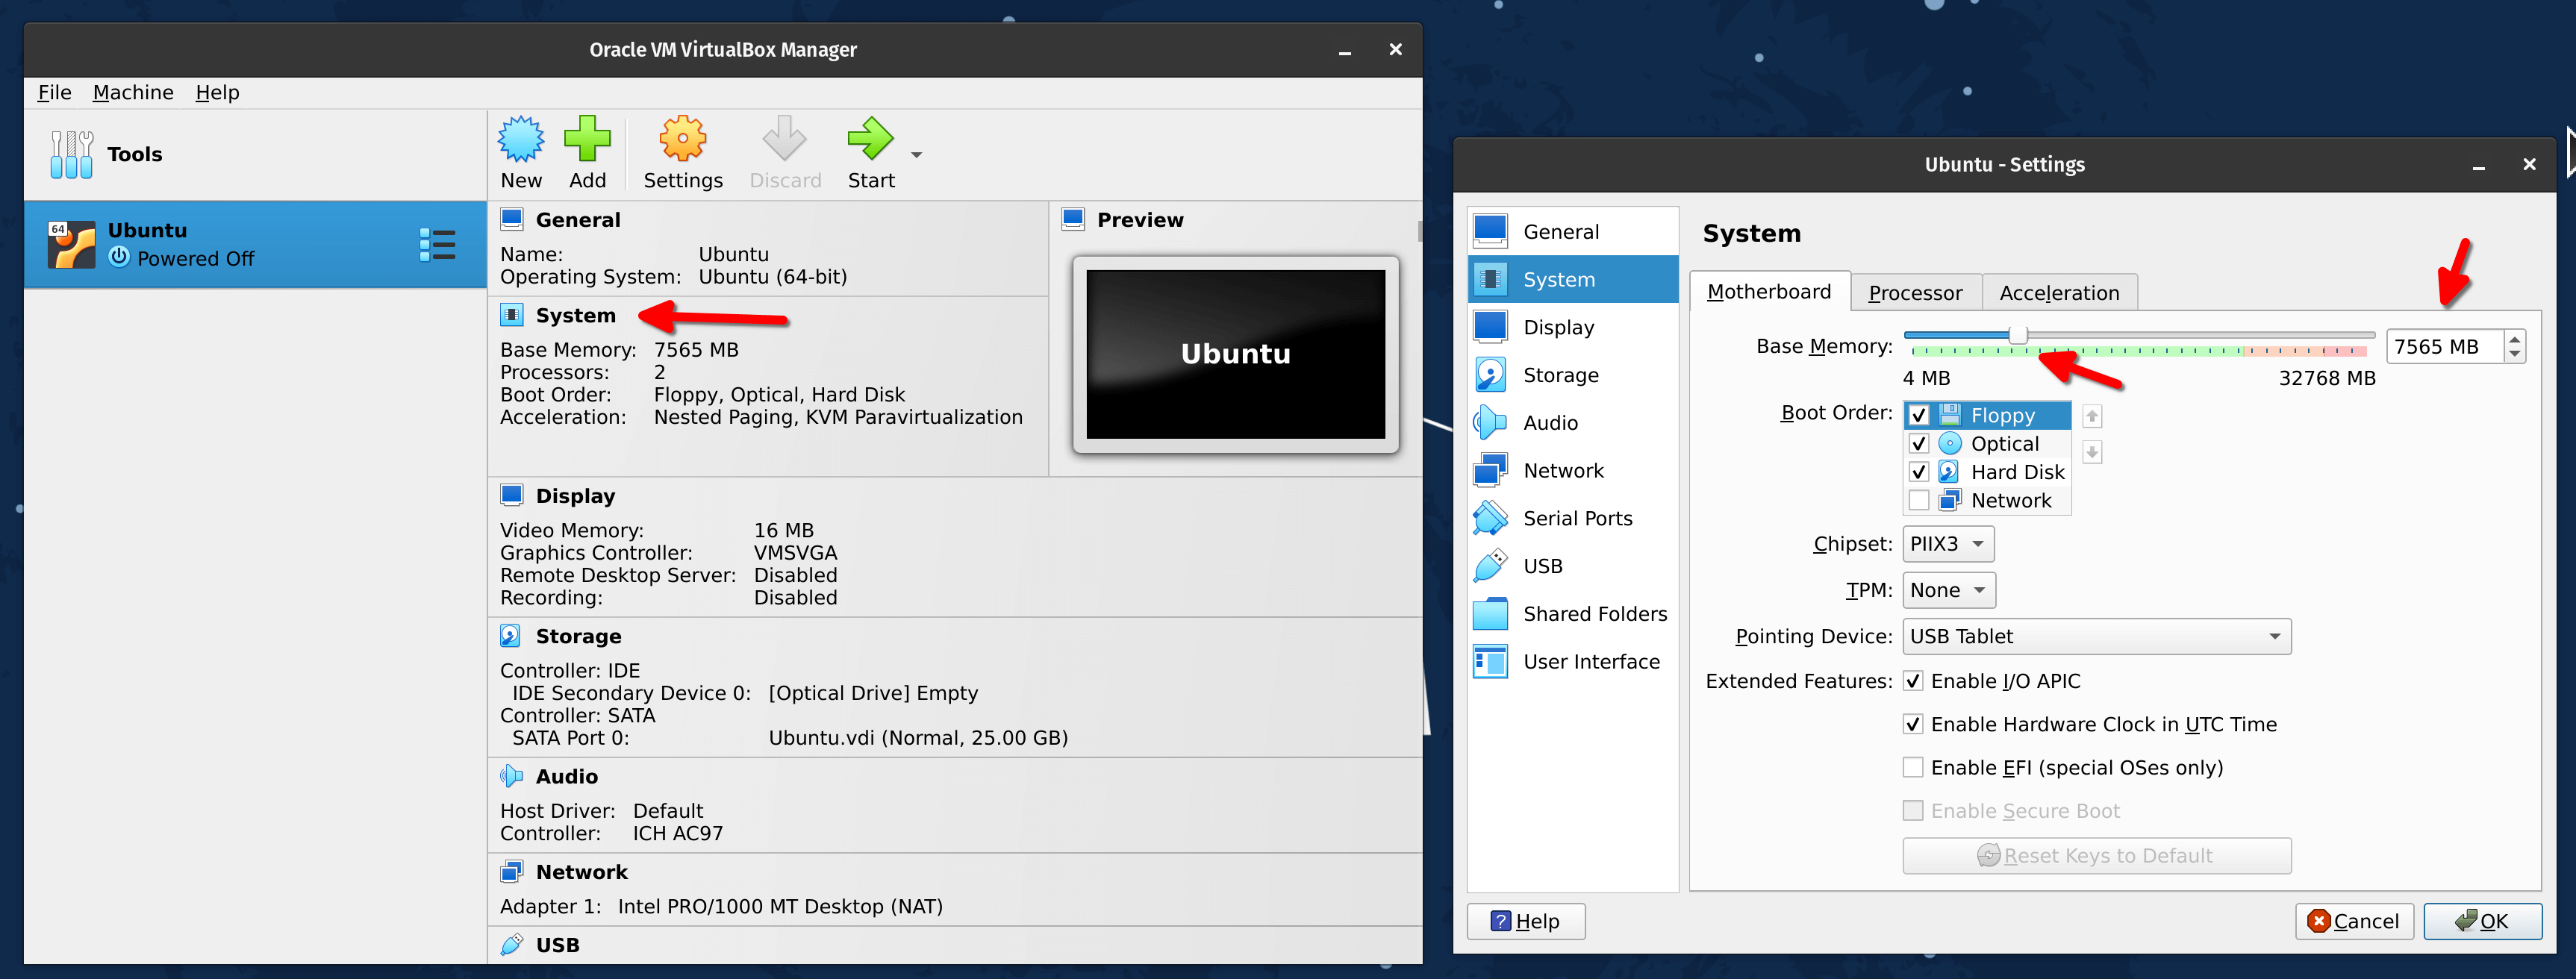
It is ideal to provide at least 8 GB of memory to the VM (considering you have at least 16 GB of host memory), and two CPUs at the very least for a decent performance.
Increasing disk size
Unlike tweaking the memory, you cannot find the option to increase disk size the same way.
You will have to utilize VirtualBox’s virtual media manager, which you can quickly access using Ctrl + D from the app.
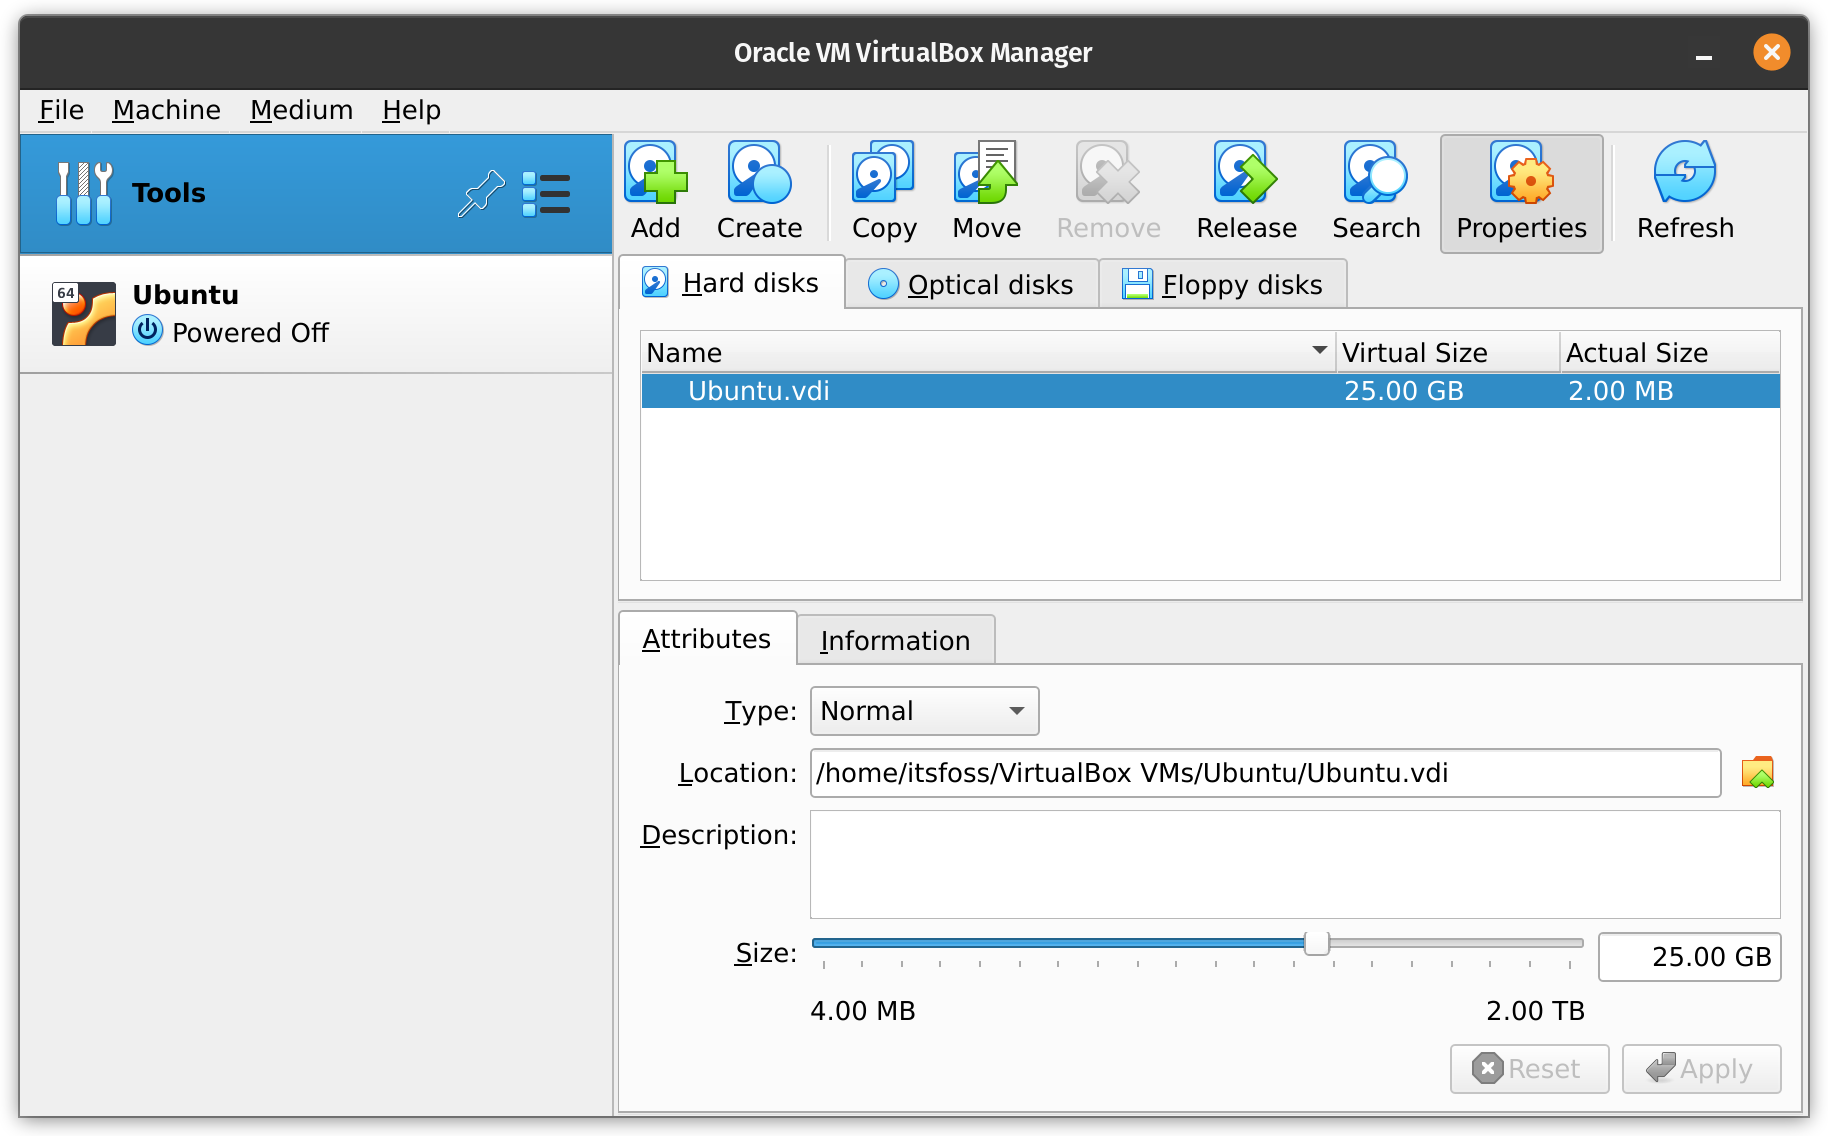
And, then change the disk size as per your requirements from the “Properties” option. If you have a dynamically allocated disk, you might have to utilize the GParted ISO.
Fret not, we have a detailed guide to help you increase VirtualBox disk size. Follow it step-by-step to get it done:
Adjusting display settings
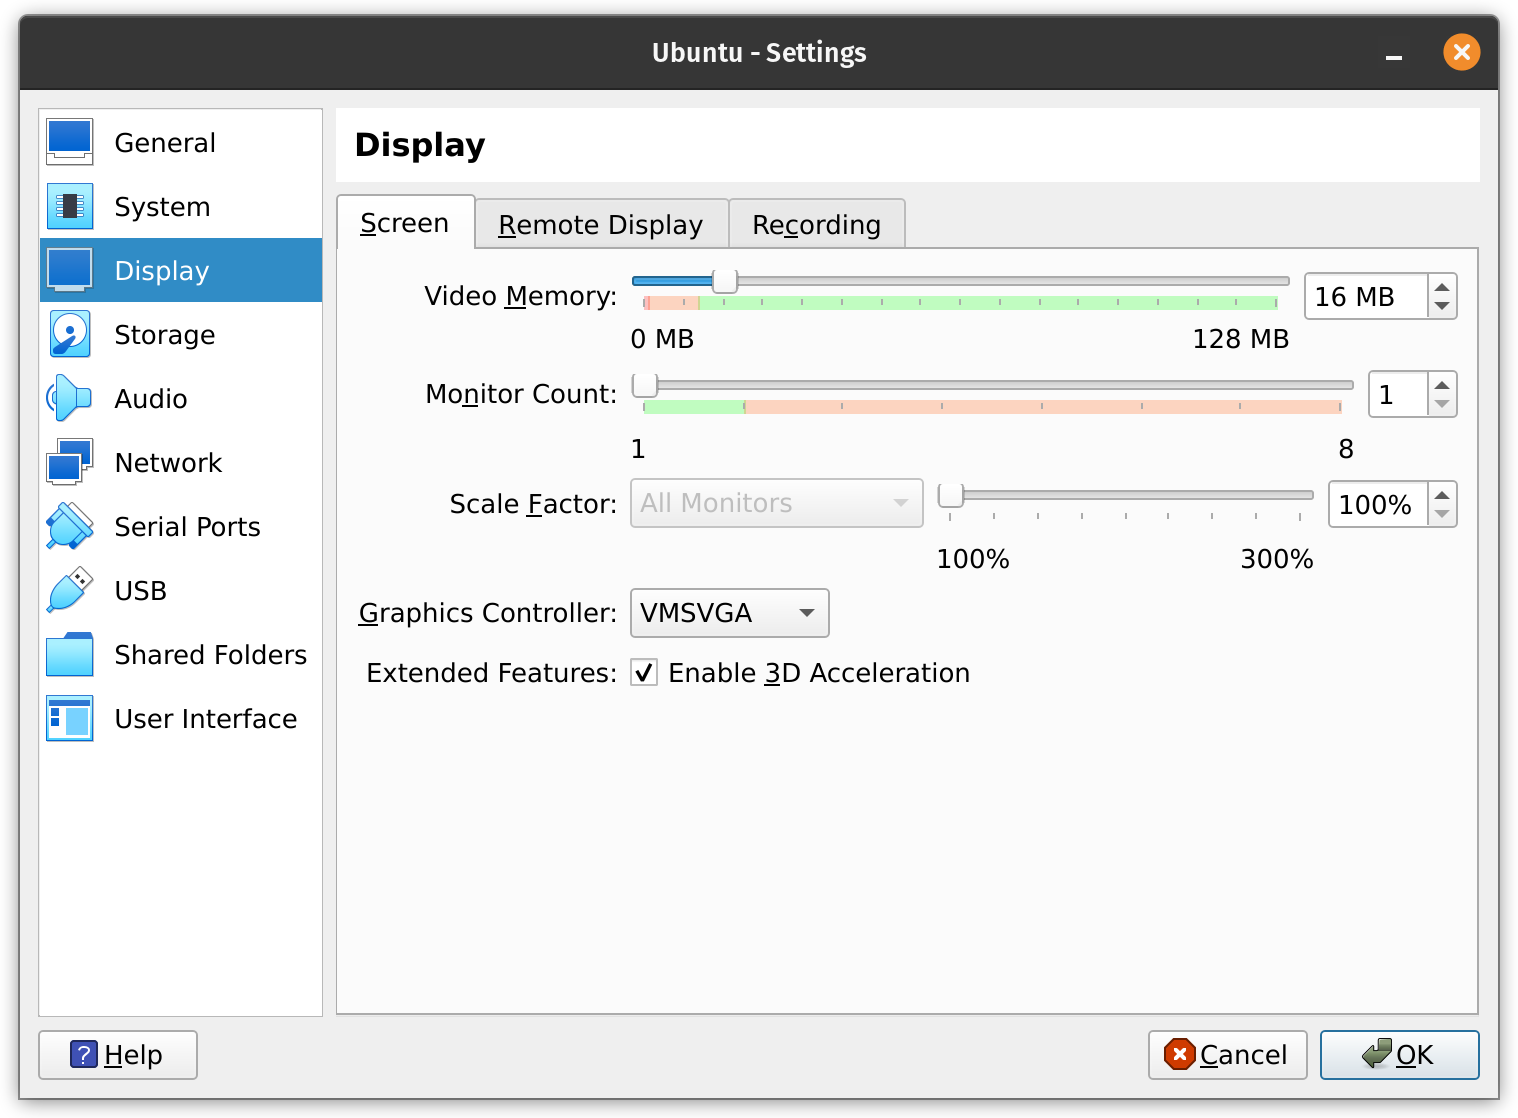
When it comes to the VM user experience, the display setting is often ignored but remains an important part.
Occasionally, all you have to do is “Enable 3D Acceleration” and the VM works fast enough. And, if you do not, it may stutter.
Furthermore, you can tweak the rest of the available options if you have a problem getting a visual to a newly created virtual machine. If you want to simply record the virtual machine, you can enable screen recording as well.
While the VM is running, you can always head to the “View” menu to adjust the window size or scale the VM display.
Suggested Read 📖
Mounting a disc or changing drive
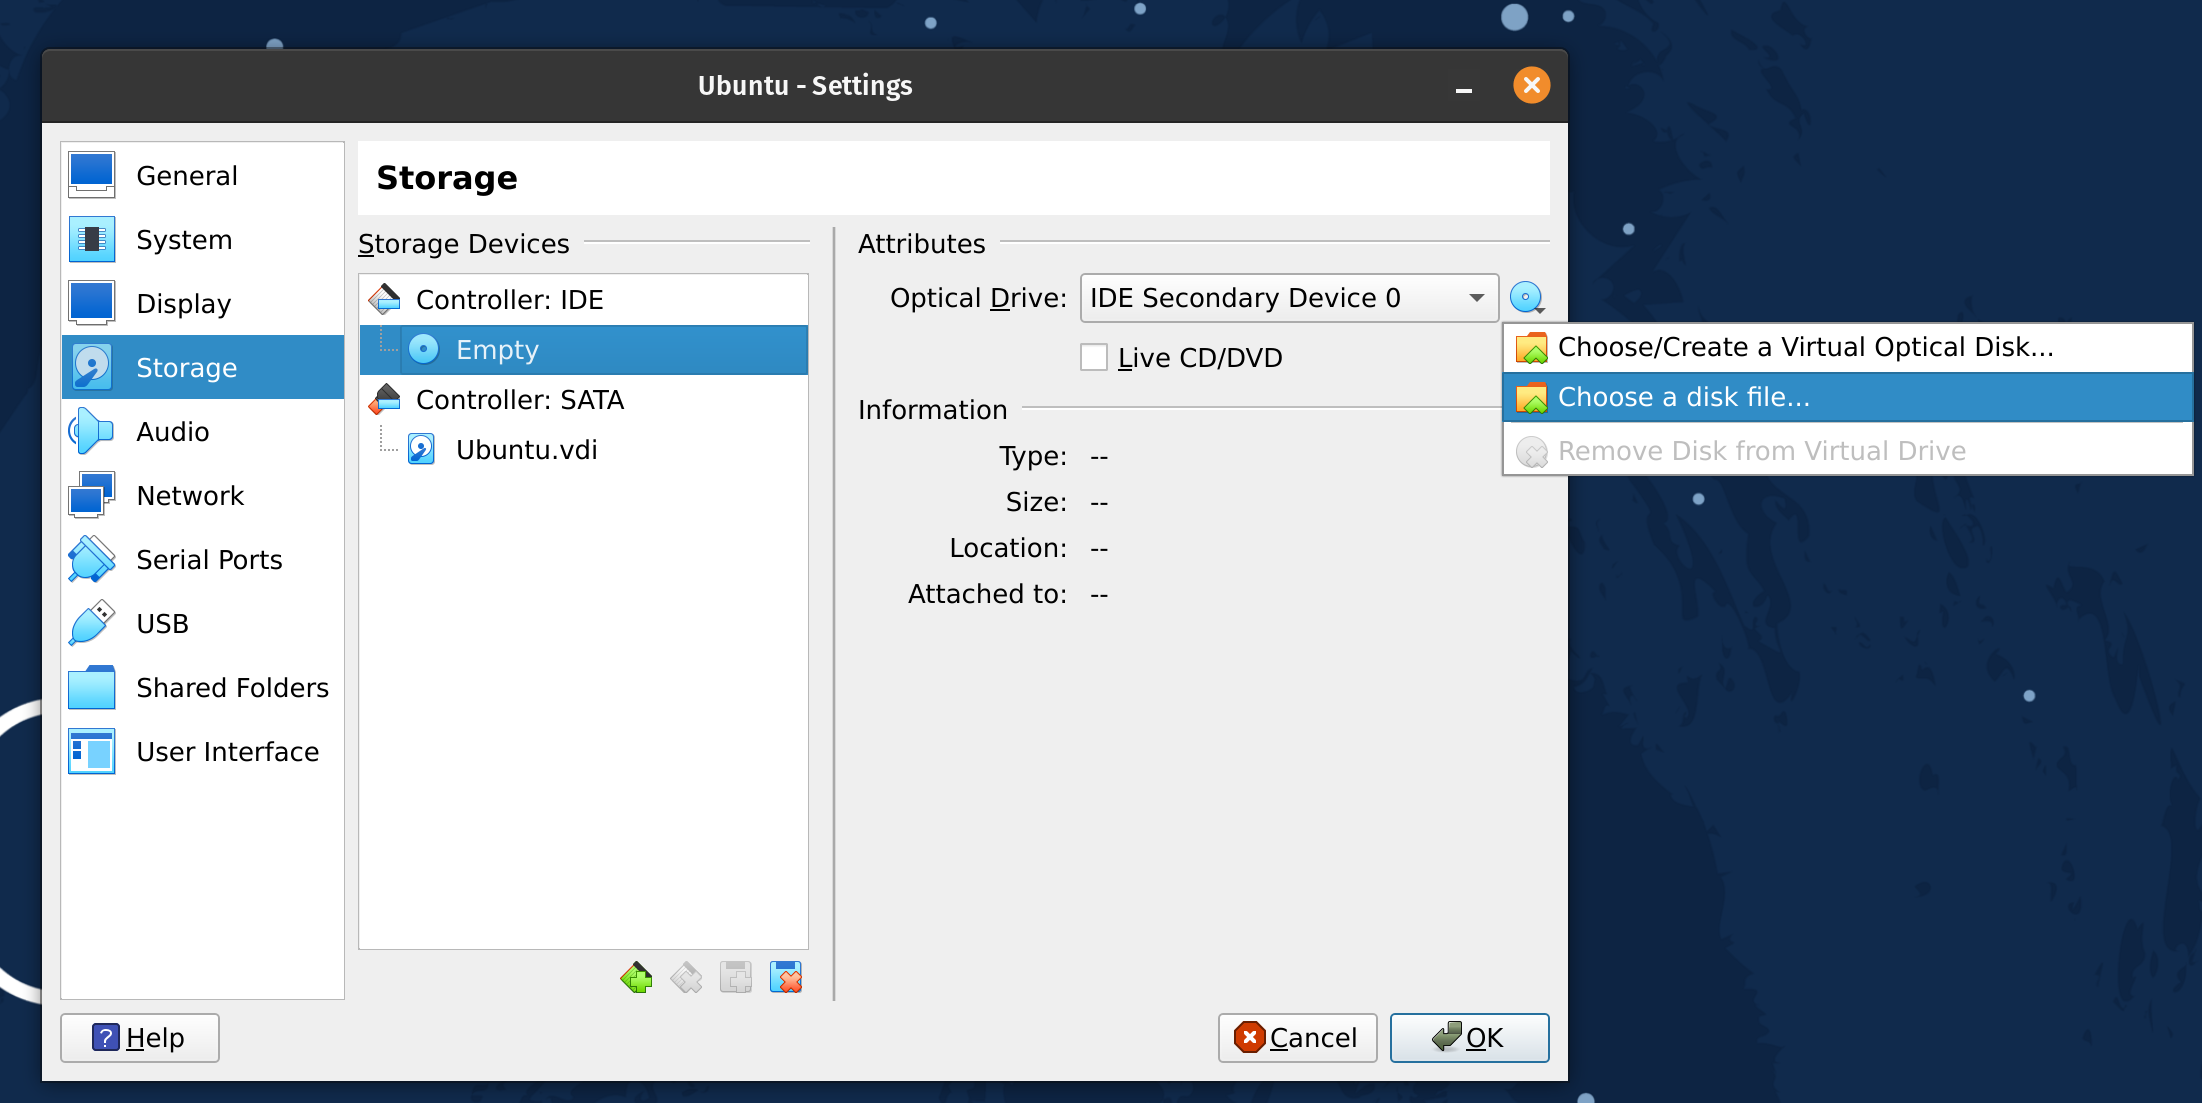
Sometimes you want to access a disk or an ISO from within the virtual machine.
For instance, mounting a disk image to install some drivers or similar. You can do that through the Storage options. You can also choose to create a new virtual hard disk or open an existing one if you created one earlier.
Changing network connections
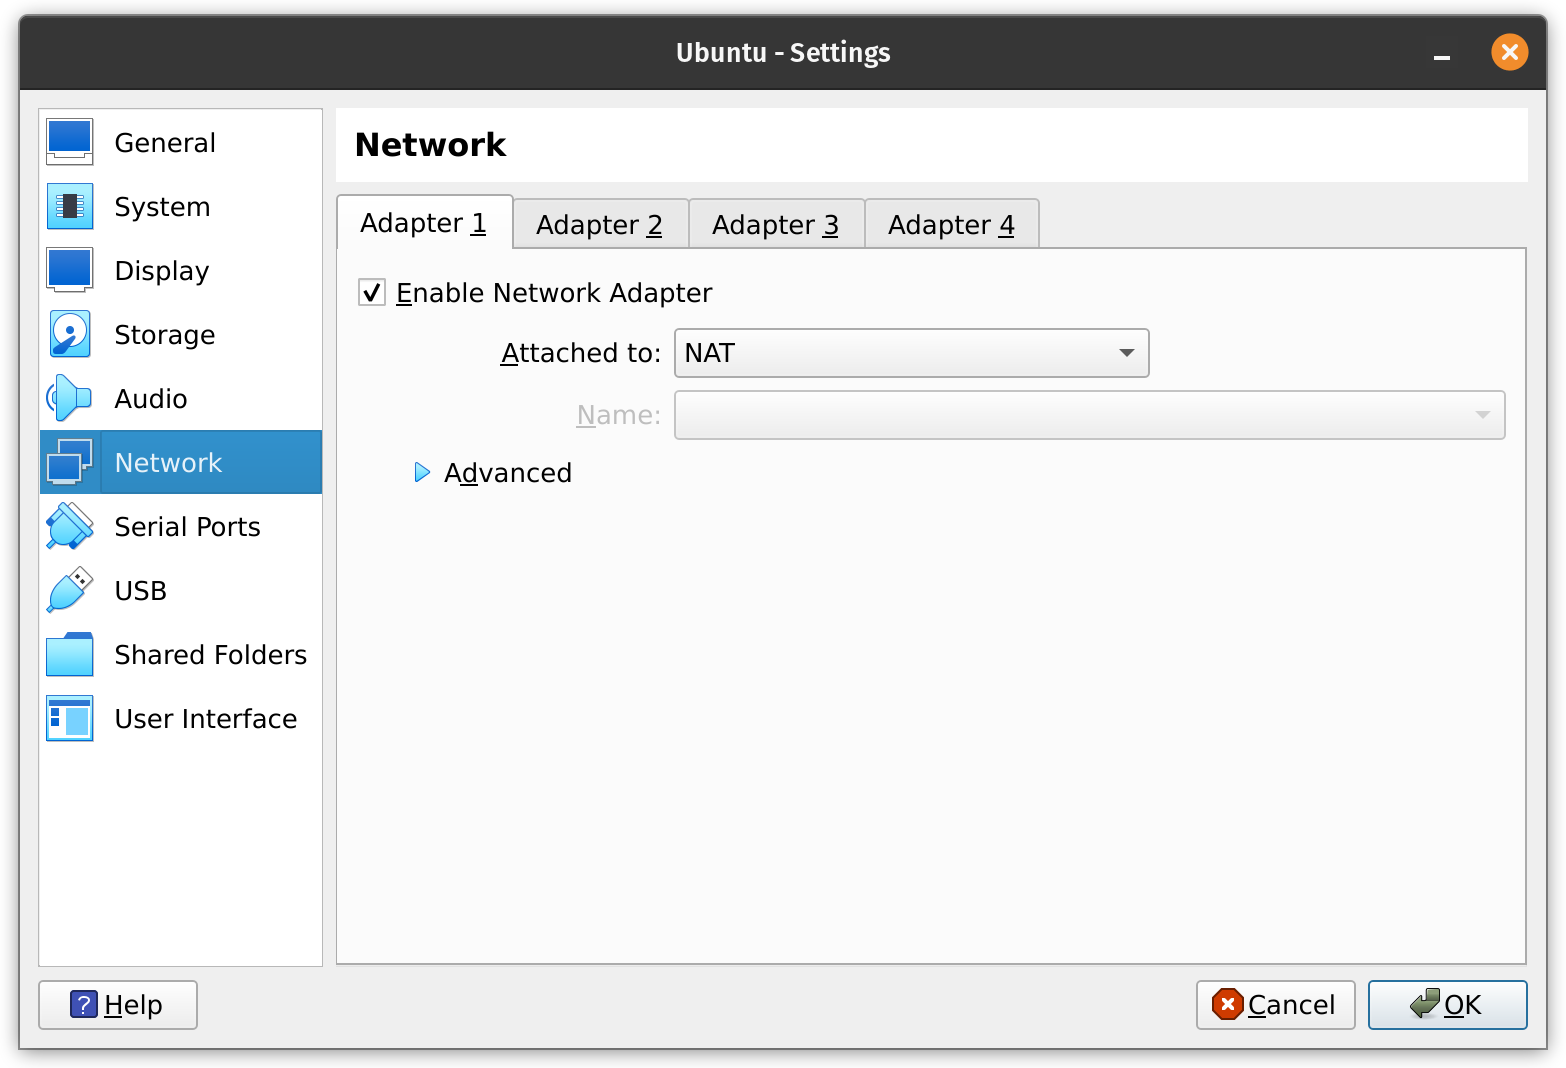
By default, the network adapter is enabled and set to as “NAT” type. So, the virtual machine shares the host’s network without hassle.
You do not have to set up a network connection manually for most distros created as a virtual machine.
However, if you have trouble connecting to the internet inside the VM, you can tweak around the network connections, change the connection type, adapter type, and other options that you see in the screenshot above.
Suggested Read 📖
Connecting and disconnecting devices
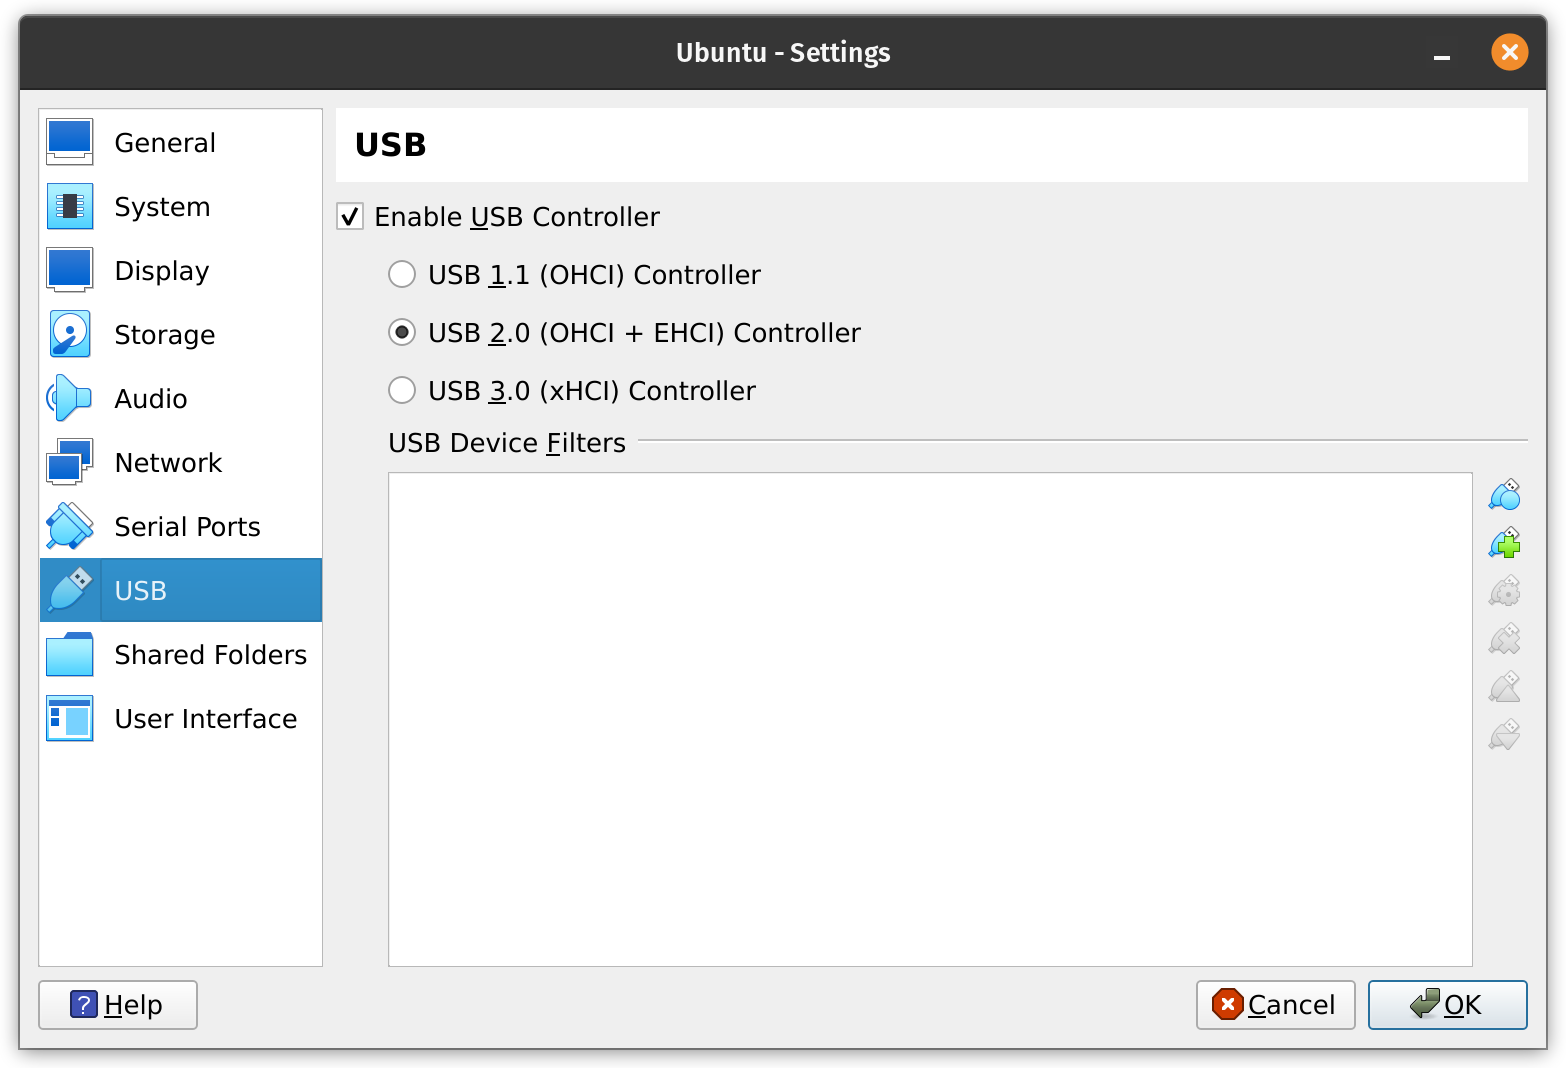
You can always connect any of your devices to the VM or disconnect them as you need, even when it is running.
When the VM is not running, you can go to the USB settings to add/remove devices.
And, when the VM is running, you head to the “Devices” menu from the top of the VM window and click/untick on the devices to connect or remove as you require.
Adding a shared folder
You should always utilize the “Guest Additions” feature of VirtualBox to utilize abilities like having a shared folder between host and the VM, sharing the same clipboard, and more.
Simply head to the VM settings, and add a shared folder with your custom path.
You can refer to our VirtualBox Guest Additions guide to know how to add shared folders to your VM and more:
Wrapping Up
By now, you must have realized that there are so many things that you can do with the free and open-source virtualization program “VirtualBox“.
Configure your virtual machine to get the best experience!
💬 What is the first thing that you do after creating a virtual machine? Is VirtualBox your preferred choice of virtualization program? Share your thoughts in the comments below.

