
Booting Raspberry Pi 5 from NVMe SSD

Looking to give your Raspberry Pi an SSD boost? The good news is that it is a lot easier to boot from NVMe SSD with Raspberry Pi 5.
Raspberry Pi OS has built-in tool that allow you to easily copy existing OS from the SD card on the SSD.
This way, you switch the existing operating system on to the SSD without changing anything. You have the same applications, same configuration, same everything.
In this tutorial, I’ll share the steps I used to switch from SD card and boot from a NVMe SSD on my Raspberry Pi 5.
What do you need?
Here are the accessories that you are going to need to follow this tutorial with your Raspberry Pi 5.
- The tutorial uses Raspberry Pi as a desktop, so you’ll need the usual accessories like keyboard, mouse, monitor etc.
- You should have Raspberry Pi OS installed on a micro SD card.
- Raspberry Pi 5 doesn’t have a built-in NVMe SSD slot. You need an external plugin or device that gives you access to NVMe. I am using the Pironman 5 case which comes with NVMe slot among many other stuff. You can use this or a HAT with NVMe support.
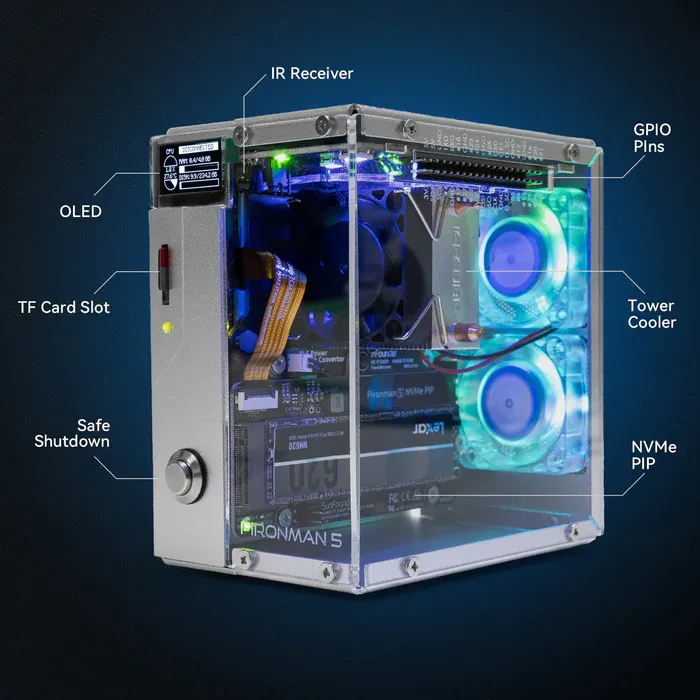
Pironman 5 Case With Tower Cooler and Fan
This dope Raspberry Pi 5 case has a tower cooler and dual RGB fans to keep the device cool. It also extends your Pi 5 with M.2 SSD slot and 2 standard HDMI ports.
Explore Pironman 5
The official Raspberry Pi M.2 HAT will be the cheaper option here.


Step 1: Format your SSD
First thing, plug in your SSD to the NVMe HAT and power on the Raspberry Pi.
Please ensure that Raspberry Pi can see the plugged-in SSD. Check it with the following command:
lsblk -f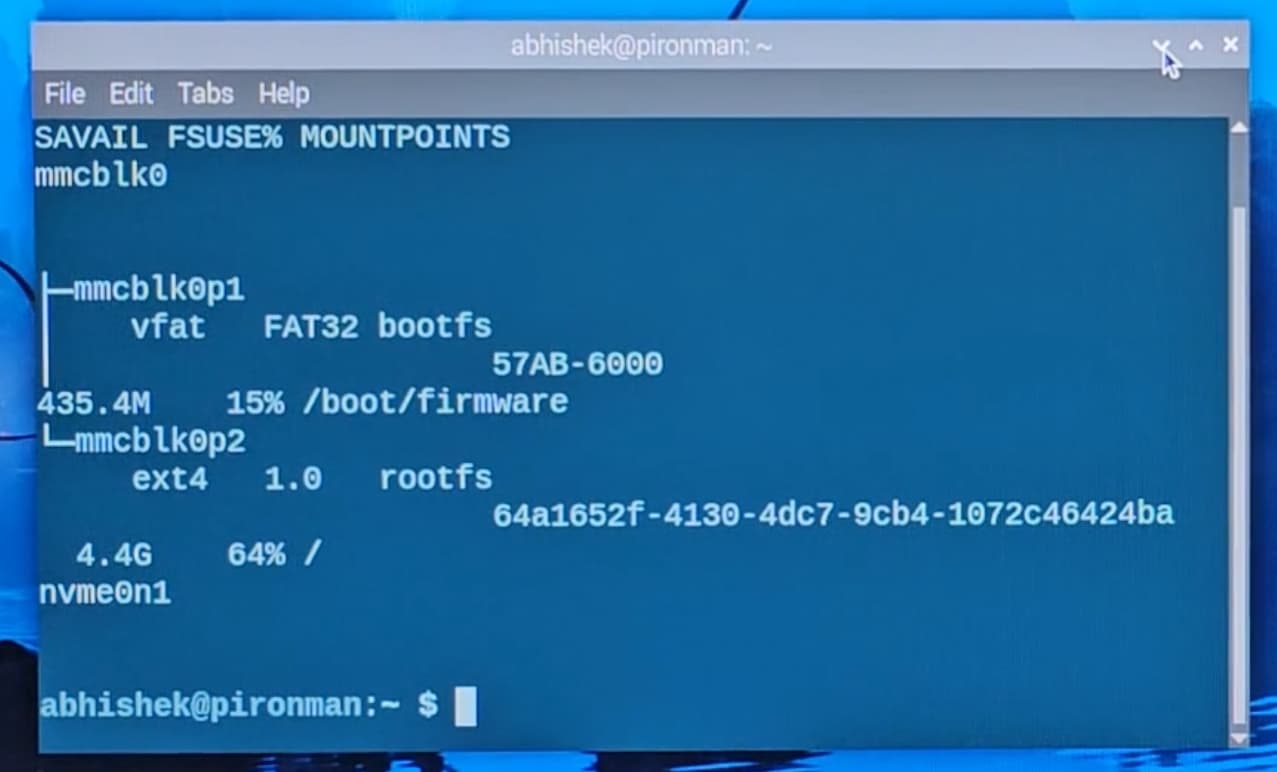
As you can see, although my SSD is recognized, there are no details about it. That’s because I have a brand new SSD and it didn’t have any partitions on it.
If you are in the same situation, install Gparted first:
sudo apt install gpartedAnd then use it to create a new partition on the SSD.
Run Gparted. Make sure you have chosen the correct disk from the top right corner.
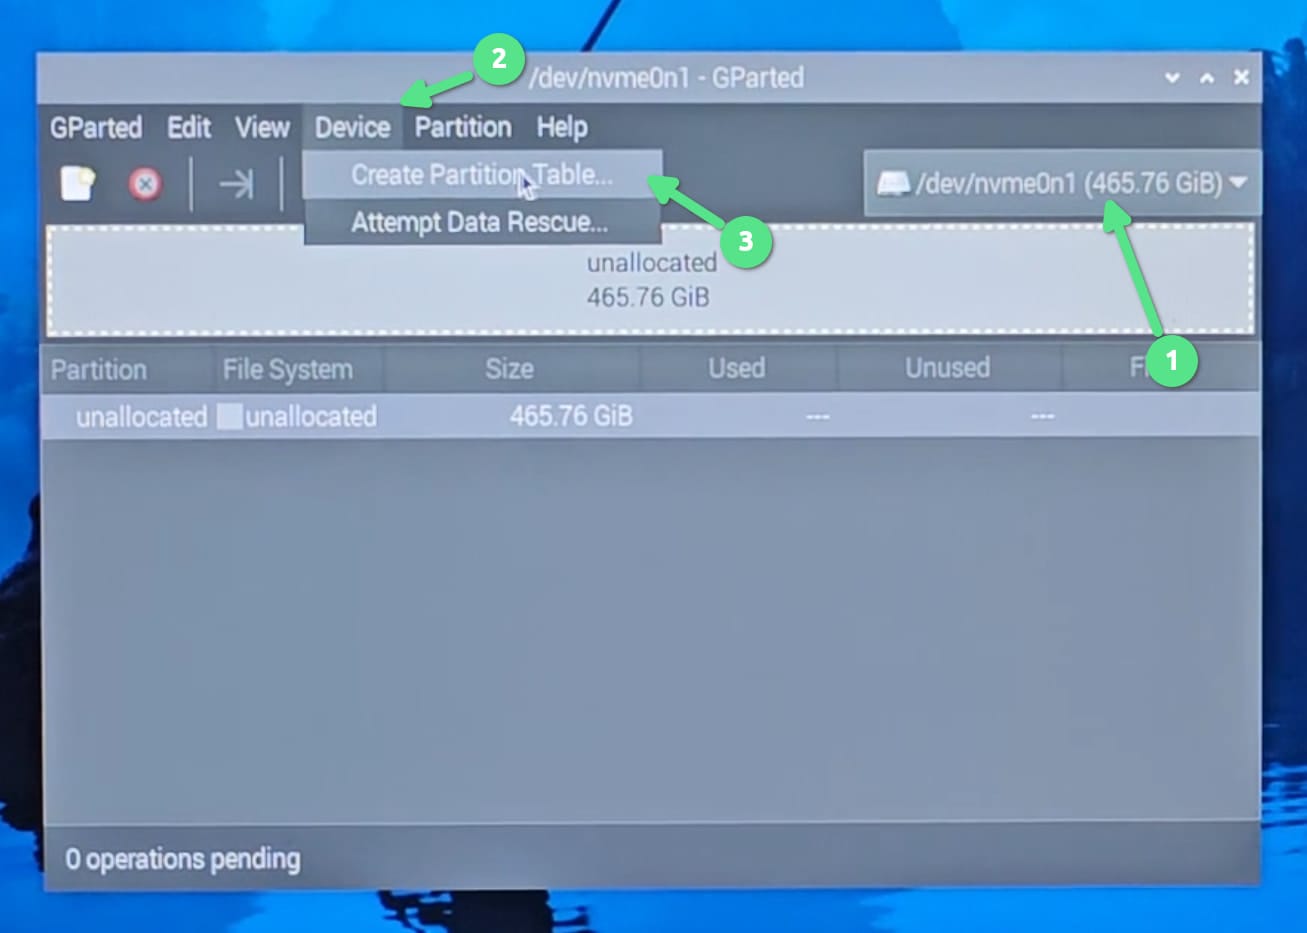
You can go with MSDOS when you see a screen like this:
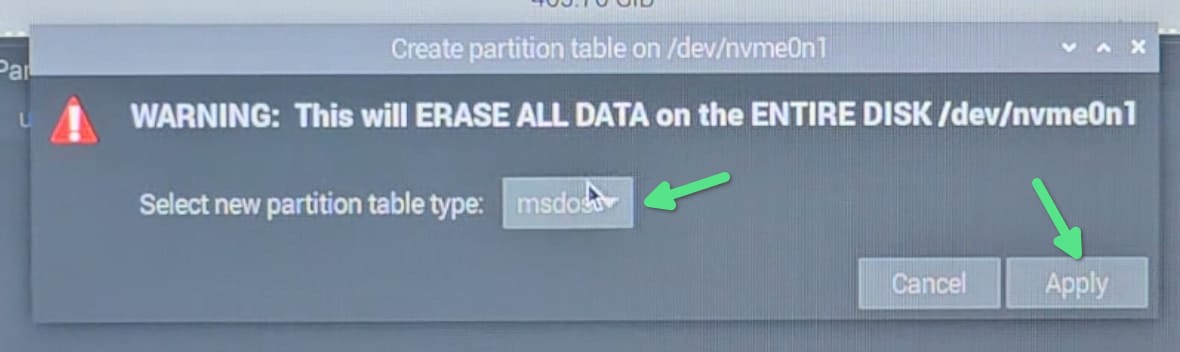
Next, click on the + sign on the top left to create a new partition and create a single partition of the entire disk size. You can choose Ext4 filesystem although it should not matter as your SSD will be formatted again during SD card copying. Click Apply and then press on the ✔️ to confirm the changes.
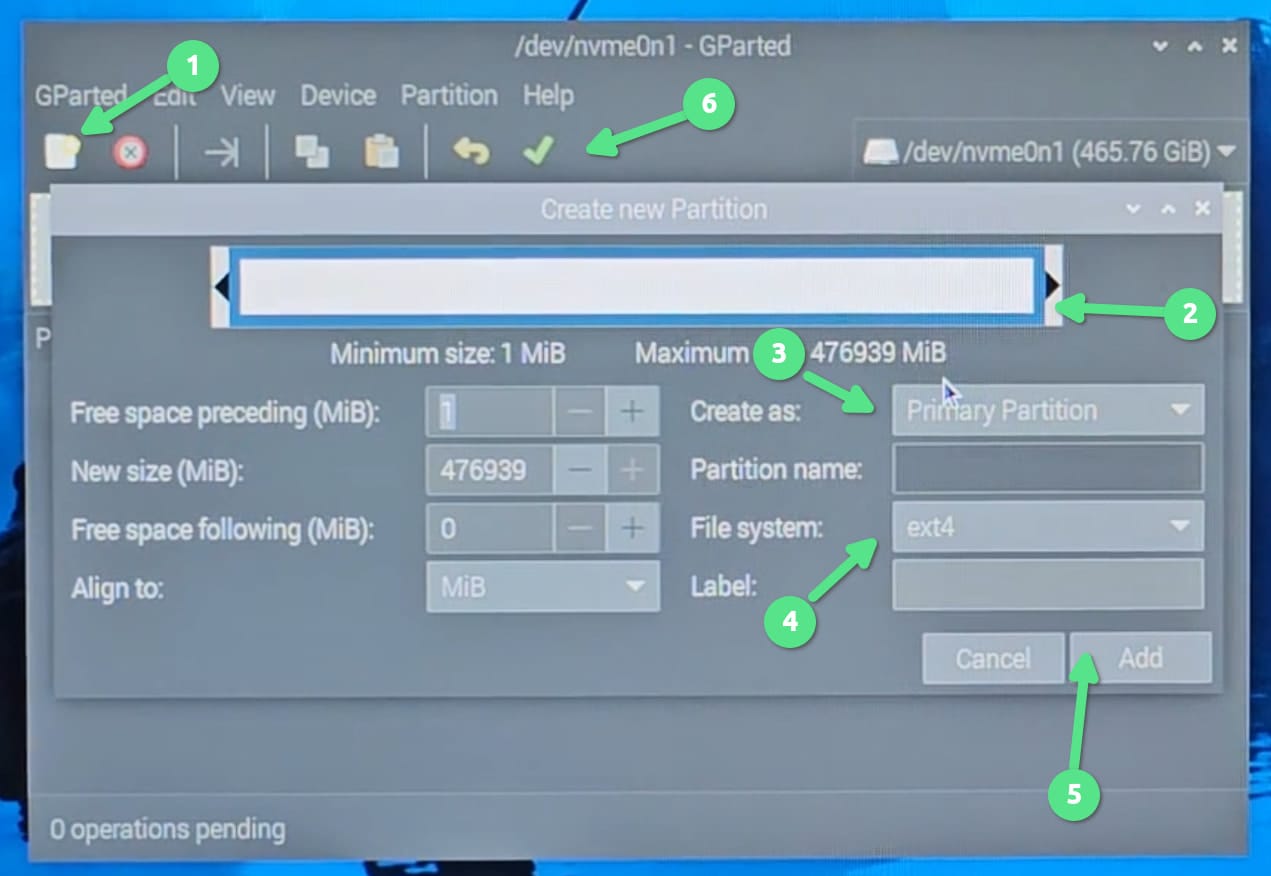
You can verify the partitions by running the lsblk -f command again.
Step 2: Copy the SD Card to SSD
Raspberry Pi has a built-in tool for copying the content of the SD card to the USB/SSD.
This makes things much more convenient as it will just duplicate the SD Card onto the SSD. This means that your current configurations, applications, everything will remain the same even when you are booting from the SSD. Now that’s super, isn’t it?
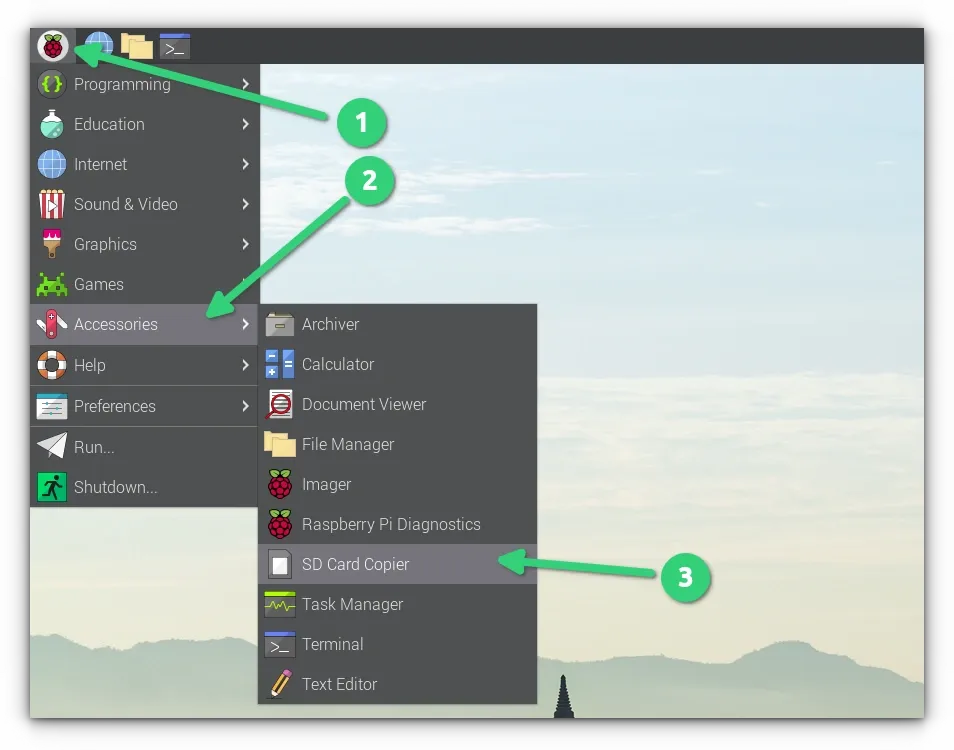
Open up the menu and go to Accessories->SD Card Copier.
In the Copy From Device, choose SD Card and in the Copy To Device, choose the SSD.
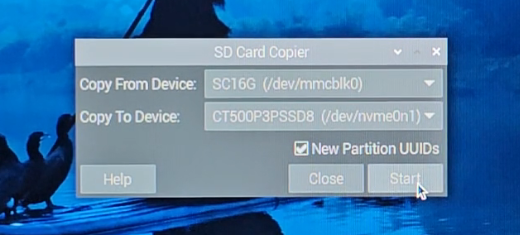
Click start and wait for the process to finish. It will take some to finish copying the data on the SSD.
Once the data is copied on the SSD, move on to the last stage of this process and that is to change the boot order.
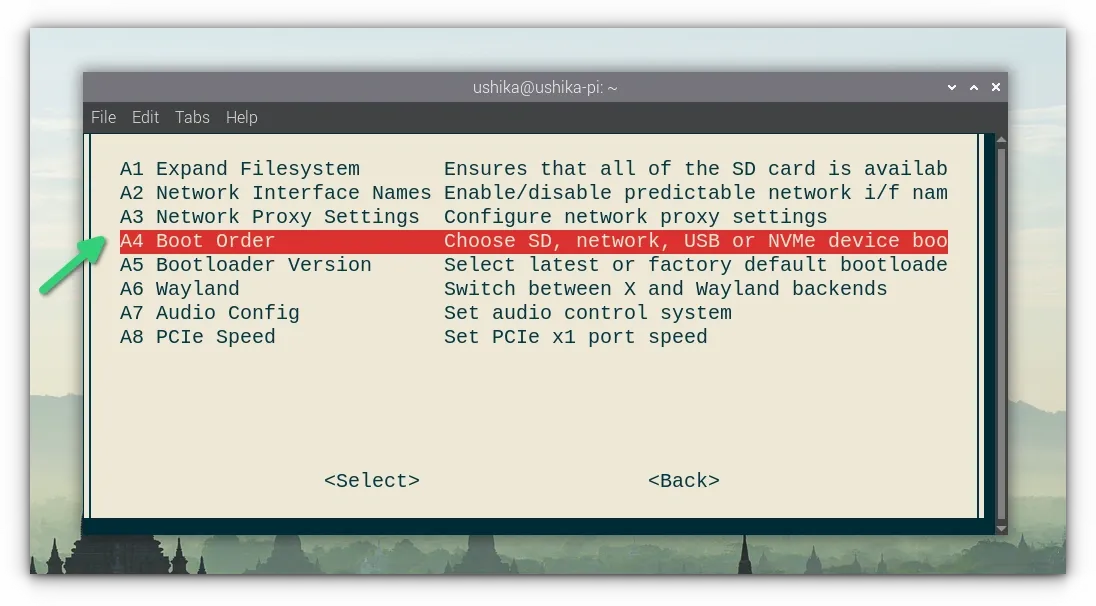
Step 3: Change the boot order
In the terminal, run the following command:
sudo raspi-configYou’ll see a terminal user interface like the image below and you have to use the arrow keys to select Advanced Options here and press the enter key.
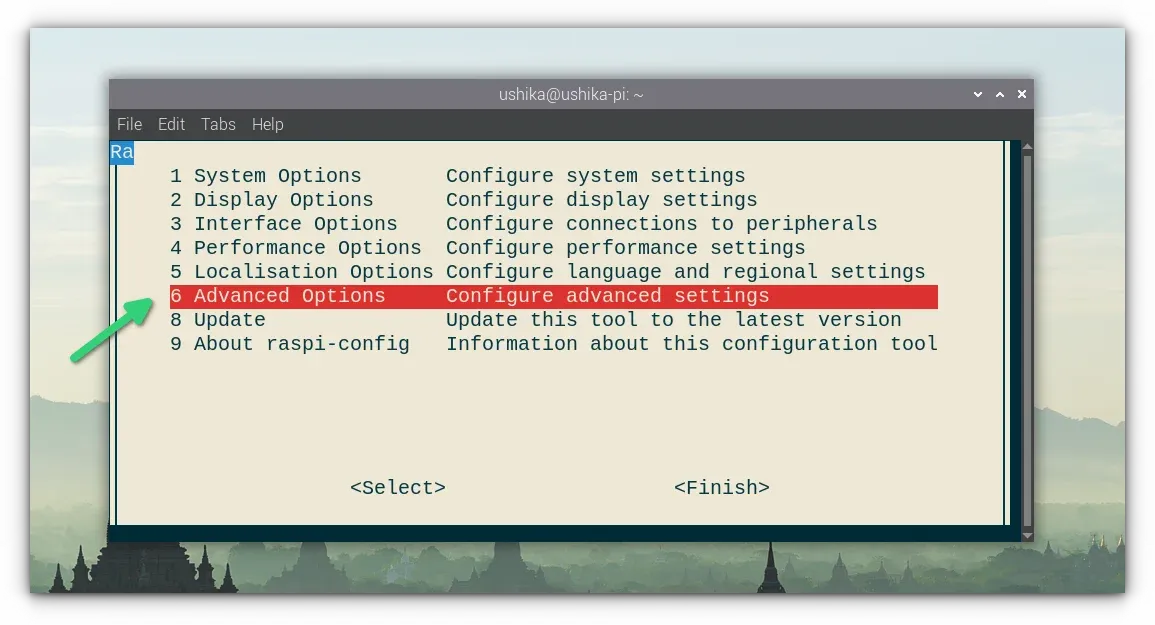
In the next screen, select Boot Order.
You’ll see a few options here. Choose the middle one that says ‘NVMe/USB Boot’ and press enter key.

You’ll see some output in the terminal and then the following screen notifying you that your boot order has been changed.
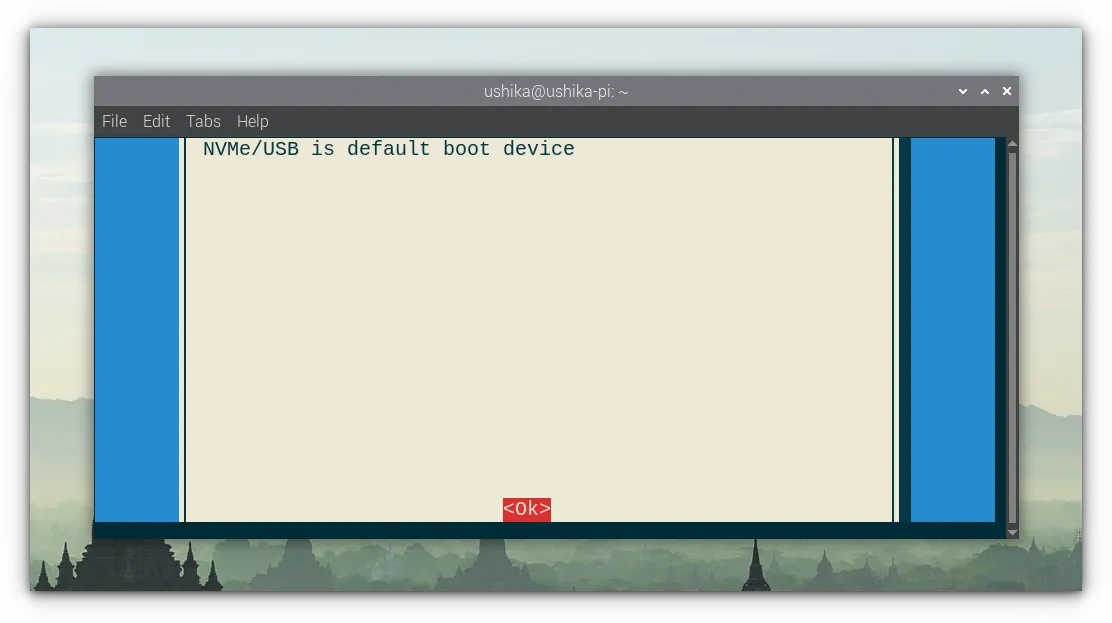
When you press enter key on the last step, it will ask you to reboot your system. You can do that or continue your work.
Step 4: Booting from the NVMe SSD
If you reboot in your Pi 5, you’ll be booting from the SSD and your SD Card will be mounted as an external disk with two partitions on it.
Still, if you want to ensure that it is actually booting from the SSD and not from the SD card, power off the Pi and take out the Micro SD Card. Turn on the Pi again and see if it boots as before.
Conclusion
Does SSD provide a performance benefit over SD Card? I don’t know. I didn’t do any benchmarking. I didn’t notice faster boot time. Perhaps if there are any programs that do a lot of read and write on the disk could benefit from the SSD.
I think there is another way to boot the Pi from SSD. If the SSD can be connected to the regular computer (there are UBS-based connectors) and then burn the Raspberry Pi OS image directly on the SSD. Not sure if the boot order needs to be changed or not. I’ll try this method some other day and share my experience.
For now, enjoy the fact that you can easily switch to SSD from SD Card on your Raspberry Pi 5 device.
Please let me know if you have questions or suggestions on this topic.