
How to Build Docker Image with Dockerfile (Step by Step)
Hello Techies, in our previous articles we have learned how to Install Docker on CentOS 8 / RHEL 8 and Docker on Ubuntu 20.04.There are thousand of docker images available on docker hub registry which we can easily pull and spin up container using those images.
But there are some circumstances and use cases that we want to make some configuration or changes in the docker image and those changes should be present whenever we run container. This can be achieved by building a docker image with Dockerfile.
Dockerfile is a text file which contains keywords and set of Linux commands which are executed automatically whenever we build the Docker Image. Creating docker image using Dockerfile is similar to template concept of virtualization world.
In this post, we will cover how to build docker image from a Dockerfile step by step. Let’s assume we want to build Jboss EAP docker image. Some of the Keywords which are generally used in a Dockerfile are listed below:
FROM
From keyword specify the name of image that will be used as base image while building the Docker Image, Docker command will search this image locally and if it is not found in local registry then it will try to fetch it from docker hub registry.
Example:
FROM jboss-eap:7
MAINTAINER
Name of the community or owner who maintains docker image is specified under MAINTAINER Keyword.
Example:
MAINTAINER Linuxtechi Team <info@linuxtechi.com>
RUN
Commands mentioned after RUN keyword will be executed during creation of Docker image
Example :
RUN  apt-get update
RUN apt-get install apache2 -y
RUN echo 'Web site Hosted inside a container' > /var/ww/html/index.html
RUN echo 'apache2ctl start' >> /root/.bashrc
WORKDIR
WORKDIR is used to defined working directory of a container for executing COPY, ADD, RUN, CMD and ENTRYPOINT instructions.
Example:
WORKDIR /opt
CMD
Commands mentioned after CMD keyword will executed when a container is launched (run) from a docker image
Example:
CMD /bin/bash
CMD wget {url}
Whenever we use multiple CMD keywords then the latest one will get the preference. If you have noticed when we run a container we get a bash shell, because of CMD keyword (CMD /bin/bash).
ENTRYPOINT
ENTRYPOINT is similar to CMD, Commands after entrypoint will take arguments from CMD or in other words we can say that CMD is the argument for ENTRYPOINT. Commands in ENTRYPOINT will always be executed.
Example:
ENTRYPIONT ["curl"]
CMD ["www.google.com"]
ENV
With ENV keyword we can set the environmental or shell variables as per requirement, let’s suppose I want build Docker image where I will install java and need to set JAVA path, this can be achieved by using ENV keyword.
Example:
ENV JAVA_HOME= /usr/jdk/jdk{version}VOLUME
With VOLUME keyword we can attach a folder from Docker host to a container.
Example:
VOLUME /opt/storage /data
EXPOSE
With EXPOSE keyword we can expose application port from a container
Example:
EXPOSE 8080
COPY
Using COPY keyword we can copy the files from docker dost to a container.
Example:
COPY jboss-eap-7.2.0.zip /opt
ADD
Functionality of ADD keyword is almost similar to COPY. ADD supports two additional features like we can use URL instead of local file or directory and tar file can extracted from source directly into the destination.
Example :
ADD ./jdk-10.0.2.1-linux-x64_bin.tar.gz /usr/local/
Note: To view the keywords and command that are being used for building docker image use “docker history” command. Let’s see the keywords and commands of a docker image mariadb:latest
$ docker history mariadb:latest
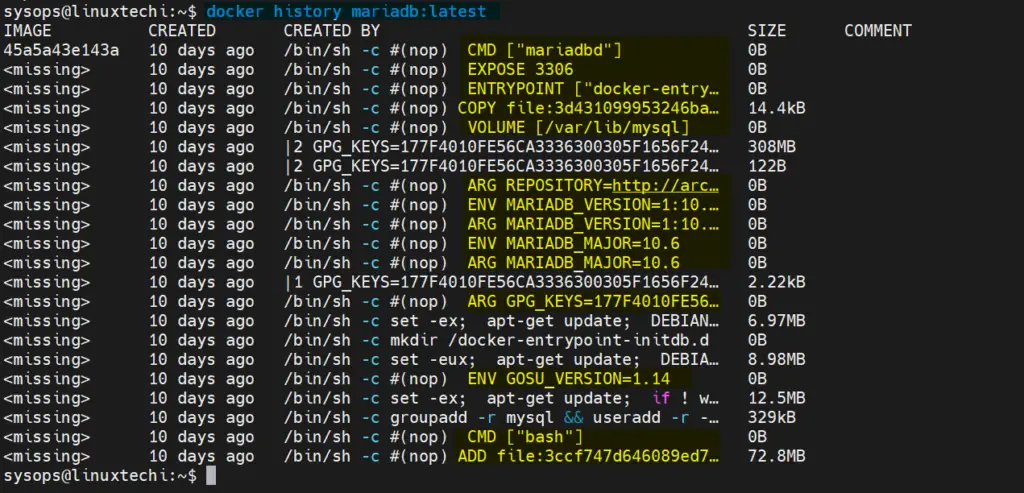
In the above output if keyword is not mentioned in the commands then these commands will be executed in RUN keyword.
Let’s jump into the steps for building a docker image with Dockerfile. As we have stated above we would be building Jboss-eap docker image.
1) Create a Dockerfile
Let’s first create a folder with the name mycode under user’s home directory and then create Dockerfile.
$ mkdir mycode
$ cd mycode/
$ touch Dockerfile
Note : Name of docker file must be “Dockerfile”, if we don’t follow this convention our docker build command will not work.
2) Add Keywords and Commands to Dockerfile
Open the Dockerfile with vi editor and add the following keywords
$ vi Dockerfile
FROM jboss-eap:7
RUN mkdir -p /opt/jboss
COPY ./jboss-eap-7.2.0.zip /opt/jboss/
ENV JBOSS_HOME=/opt/jboss/jboss-eap-7.2
WORKDIR /opt/jboss/
RUN unzip -qq jboss-eap-7.2.0.zip
RUN $JBOSS_HOME/bin/add-user.sh admin Jobss@123# --silent
EXPOSE 8080 9990 9999
ENTRYPOINT ["/opt/jboss/jboss-eap-7.2/bin/standalone.sh", "-b", "0.0.0.0", "-bmanagement", "0.0.0.0"]

Save and exit the file.
Note: Don’t forget to place ‘jboss-eap-7.2.0.zip’ in mycode directory. This zip can be downloaded from below url:
https://developers.redhat.com/content-gateway/file/jboss-eap-7.2.0.zip
3) Build image with ‘docker build’ command
From mycode folder, run the beneath docker build command, -t option is used to set tag name of docker image. In example below,I am setting tag as “jboss-eap:v1”
$ docker build -t jboss-eap:v1 .
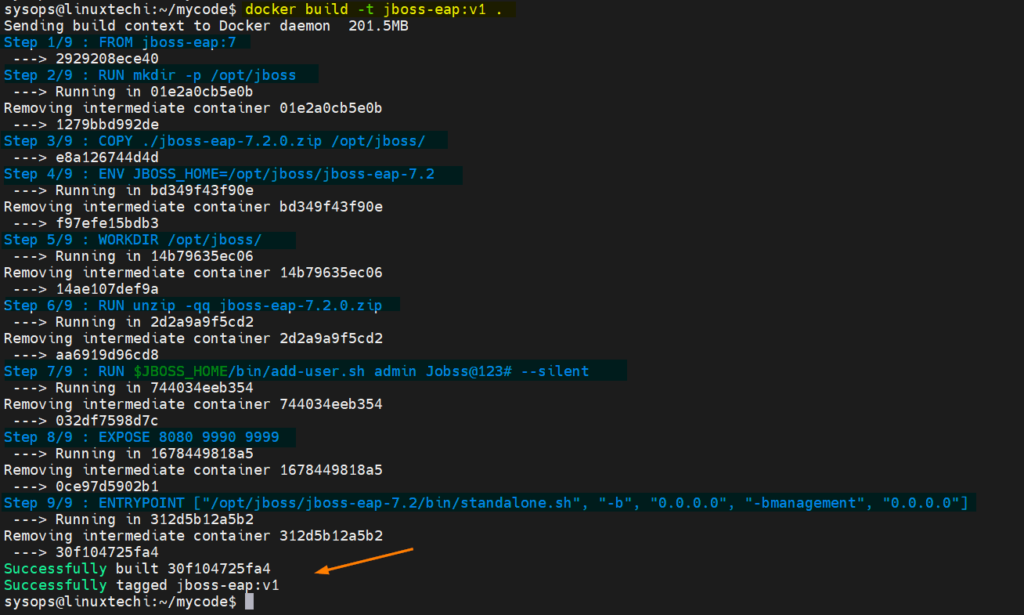
Great, above output confirms that docker image has been build successfully. In next step, try top run jboss container using newly build docker image.
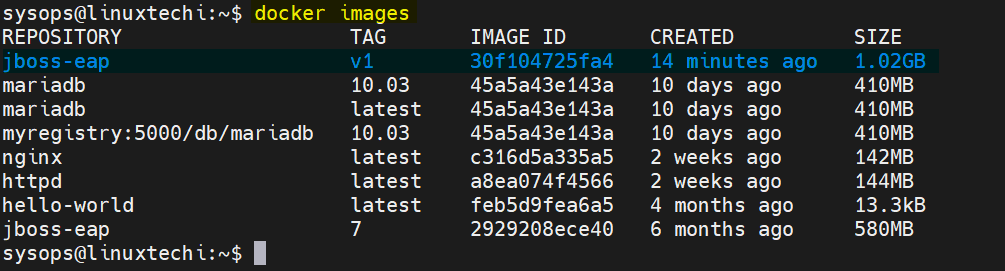
4) Verify and Test Docker Image
Let’s first see whether newly build docker image is available in local image repository, run following command
$ docker images
Now run a container using docker image ‘jboss-eap:v1’
$ docker run -d -it --name=jboss-eap -P jboss-eap:v1
$ docker ps

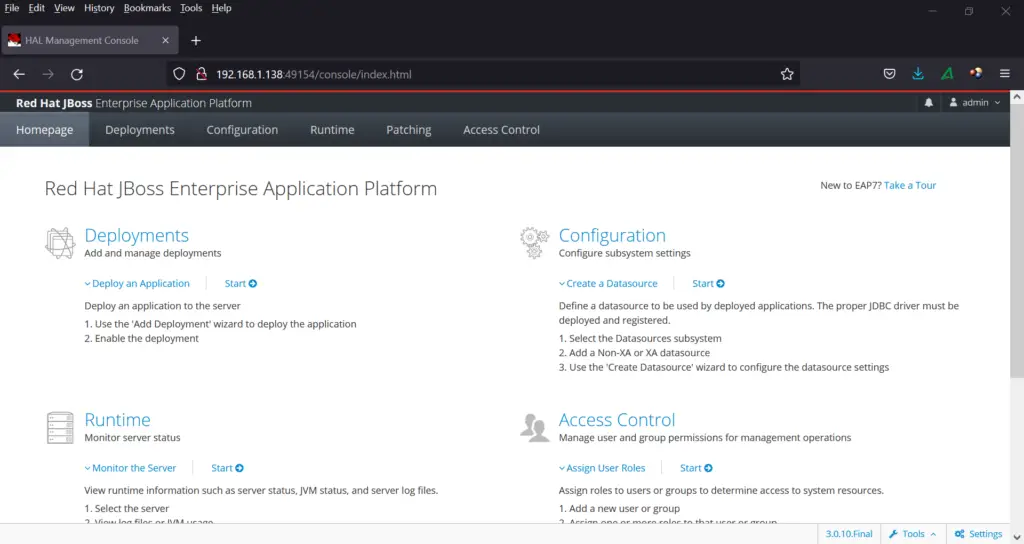
Now access jboss application using the following url:
http://<Docker-Host-IPAddress>:49154
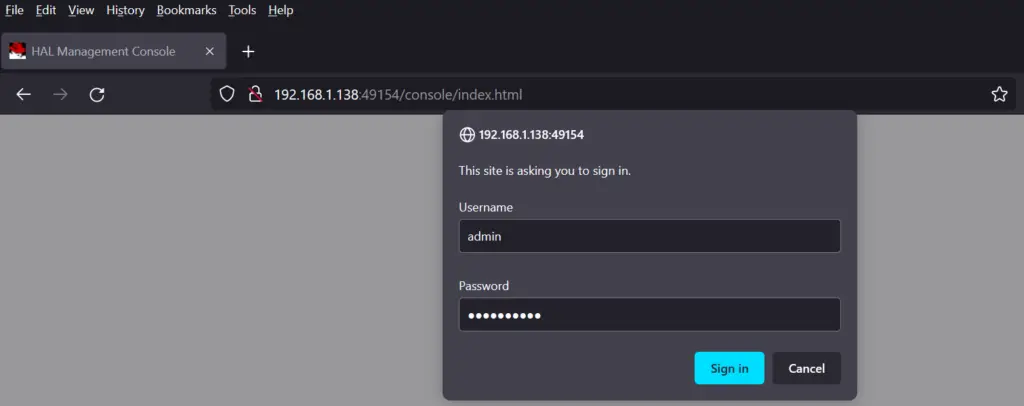
Use the same user name and its that we define in Dockerfile while building docker image.
That’s all from this post. I hope you have found it informative. Please do share your queries and feedback in below comments section.
The post How to Build Docker Image with Dockerfile (Step by Step) first appeared on LinuxTechi.