
How to Configure DHCP Server on RHEL 9 / Rocky Linux 9
DHCP, an acronym for Dynamic Host Configuration Protocol, is a network protocol that auto-assigns IP addresses to client systems in a computer network. It assigns clients from a DHCP pool or range of IP addresses specified in its configuration. While you can manually assign a static IP to client systems, a DHCP server simplifies this and dynamically assigns IP addresses to the client systems on your network.
In this post, we will demonstrate how to install and configure DHCP Server on RHEL 9 / Rocky Linux 9
Prerequisites
- Pre-Installed RHEL 9 or Rocky Linux 9
- Regular User with sudo sdmin rights
- Locally Configured YUM/DNF Repo or Red Hat Subscription for RHEL 9
- Internet Connectivity
Without any further delay, let’s jump into DHCP server installation steps.
1) Configure Static IP address on RHEL 9 / Rocky Linux 9
As you get started, it’s imperative to set a static IP address on your RHEL or Rocky Linux system. There are various ways of doing this, but the easiest and most intuitive one is using the nmtui or nmcli utility.
Read Also : How to Set Static IP Address on RHEL 9
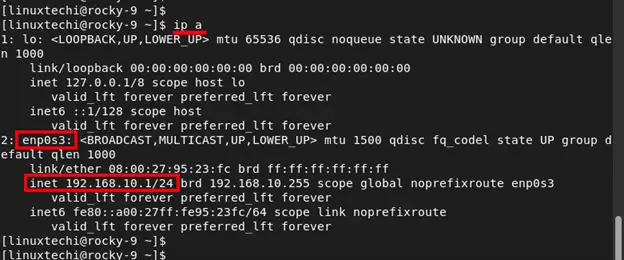
To confirm the IP address of your linux system, run below ip command
$ ip a
2) Install and Configure DHCP Server
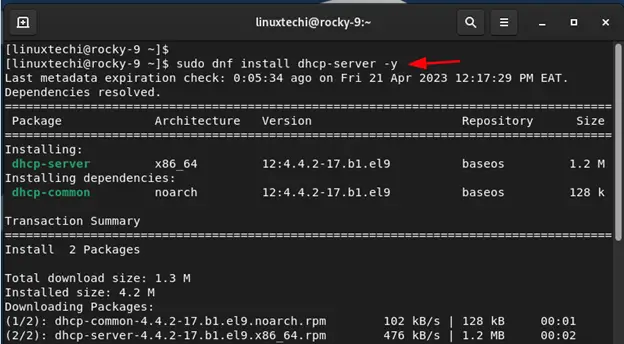
Once you have configured a static IP, the next course of action is to install a DHCP server. RHEL 9 or Rocky Linux 9 repositories (BaseOS) provide the dhcp-server package by default and you can install it as shown.
$ sudo dnf install dhcp-server -y
Post dhcp server installation, we need to go a step further and configure the settings. So, open the DHCP configuration file.
$ sudo vi /etc/dhcp/dhcpd.conf
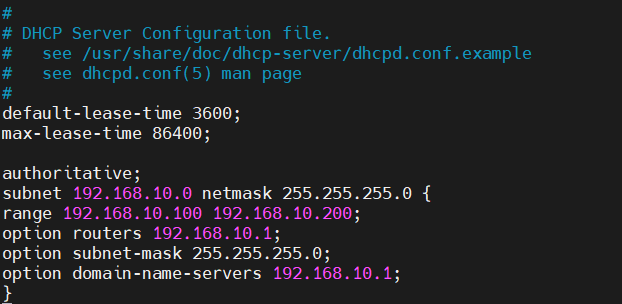
Paste the following lines of code into the configuration file. Be sure to configure the subnet to your preferred values.
default-lease-time 3600;
max-lease-time 86400;
authoritative;
subnet 192.168.10.0 netmask 255.255.255.0 {
range 192.168.10.100 192.168.10.200;
option routers 192.168.10.1;
option subnet-mask 255.255.255.0;
option domain-name-servers 192.168.10.1;
}
Save & close the file.
Let’s take a look at some of these values:
- The default-lease-time value specifies how long the DHCP server will lease an address to a client. In this case, the default-lease-time value is 3600 seconds or 1 hour. The max-lease-time is the maximum duration that the IP will be leased to a client. In our case, this is set to 86400 seconds or 24 hours.
- The next section is the subnet configuration. In this setup, 192.168.10.0, is the subnet and 255.255.255.0 is the subnet mask. The IP address range starts from 192.168.10.100 right through 192.168.10.200.
- The option router option defines the default gateway. In this case, 192.168.10.1.
- The option subnet-mask option determines the subnet-mask assignment to each client or host. In this case, 255.255.255.0.
- Lastly, domain-name-servers specifies the DNS servers. In this case 192.168.10.1.
Once done, save the changes and exit. Then enable and start the DHCP service.
$ sudo systemctl enable --now dhcpd
$ sudo systemctl status dhcpd

PLEASE NOTE
At this point, the DHCP service should be dishing out IP addresses. In case you have another DHCP server or router in your LAN, it’s prudent to turn it off to prevent a conflict of IP address assignment. This would lead to some clients getting the IP assignment from the RHEL or Rocky Linux server and the rest from the router which is certainly not what you want to happen. So, remember to turn off any other DHCP server in your LAN setup.
3) Test DHCP Server installation
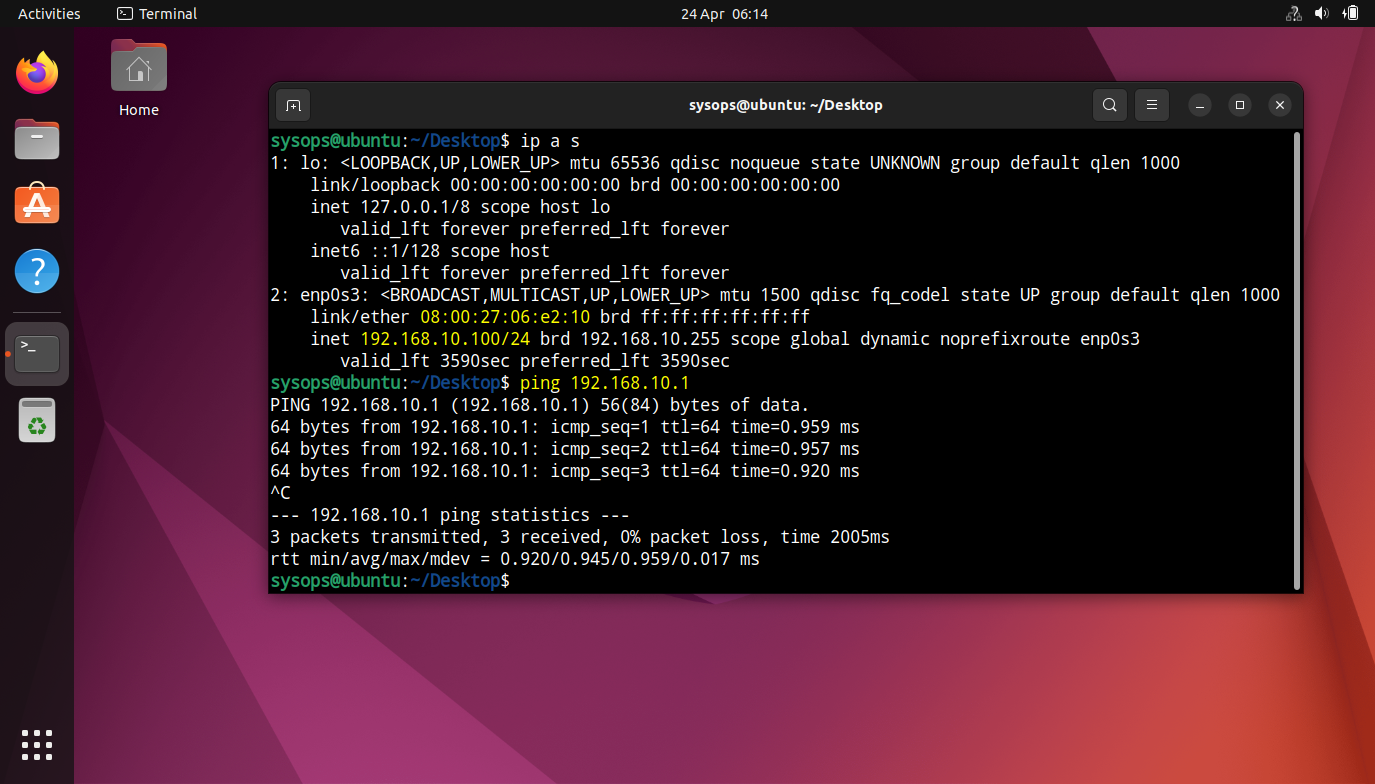
In our simulated LAN setup, you can see that Ubuntu system has already picked an IP from the RHEL or Rocky Linux DHCP server.
Head back to our dhcp server and search the Ubuntu machine ip address in /var/log/message file
$ sudo tail -50 /var/log/messages | grep -i 192.168.10.100

Perfect, output above confirms that Ubuntu machine got the IP server from our DHCP server.
Conclusion
This draws this post to a close. In this guide, you have learned how to install and configure the DHCP server on RHEL 9 / Rocky Linux 9. Kindly do post your queries and feedback in below comments section.
The post How to Configure DHCP Server on RHEL 9 / Rocky Linux 9 first appeared on .