
How to Configure IP Networking with nmcli Command in Linux
Nmcli (network manager command-line interface) is a command-line utility used to control the NetworkManager daemon which is used to configure network interfaces.
With the nmcli utility, you can display, create, edit, enable and disable network interfaces or connections. It is especially handy for servers and headless systems which do not have a GUI.
In this tutorial, we focus on how you can configure IP networking with the nmcli command in Linux.
Basic Syntax
The nmcli command takes the syntax shown below:
$ sudo nmcli [OPTIONS] OBJECT {COMMAND | help }
Where Object can be any of the following:
- Device or network interface managed by NetworkManager
- NetworkManager’s connection.
- NetworkManager’s stats
Let us now check out how you can configure IP networking with the nmcli command in Linux
Display active and inactive network interfaces
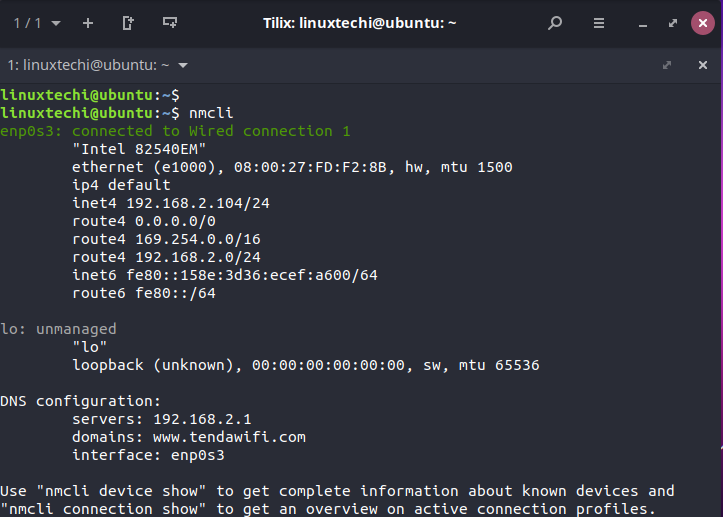
Without any command arguments, the nmcli command displays detailed information about all the network interfaces – both active and inactive.
$ nmcli
Some of the information displayed includes the state of the network connection, hardware type of the network adapter associated with the interface, MAC address, IPv4 and IPv6 addresses and default routes.
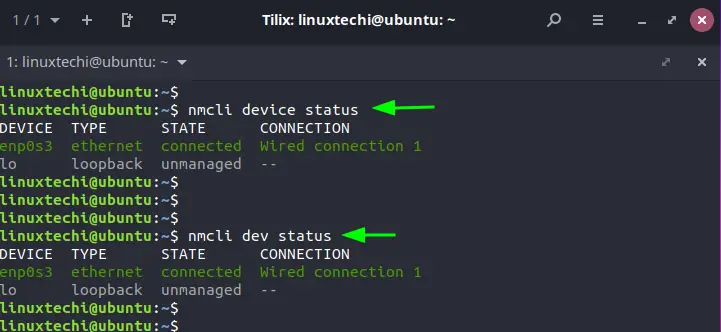
To get a brief summary of the network interfaces run the command:
$ nmcli device status
OR
$ nmcli dev status
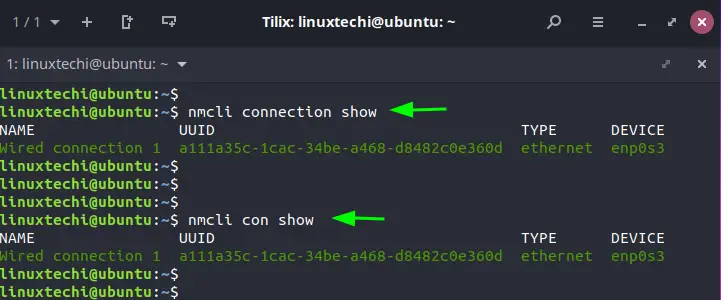
To list all the active interfaces on your system, execute the command:
$ nmcli connection show
OR
$ nmcli con show
The output displays the name of the connection, UUID, the type of connection (Wired or WiFi) and the device (network interface)
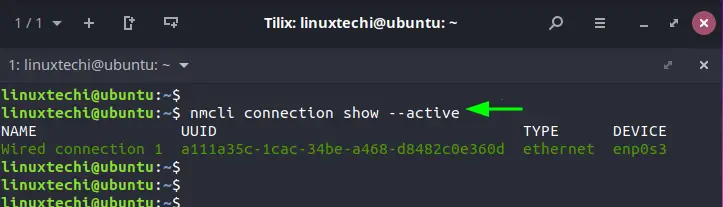
Alternatively, you can run the command:
$ nmcli connection show --active
Specify output fields in the output
You can specify what fields you want to be displayed on the terminal. Valid fields include DEVICE, TYPE, CONNECTION, CONN-UUID, STATE, IP4-CONNECTIVITY, and IP6-CONNECTIVITY.
In the example below, we have chosen to display the DEVICE and DEVICE TYPE only.
$ nmcli -f DEVICE, TYPE device
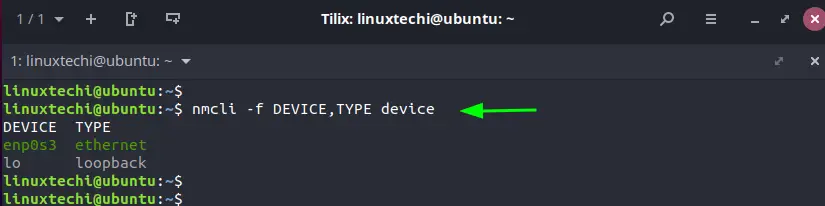
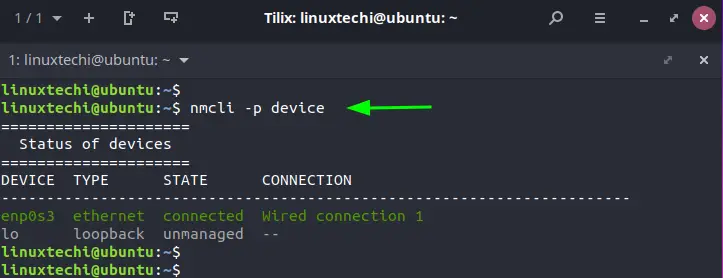
Using the -p (pretty) option, you can display the output in a more human-readable format where the values and headers are well aligned.
$ nmcli -p device
Configuring a static IP using the nmcli utility
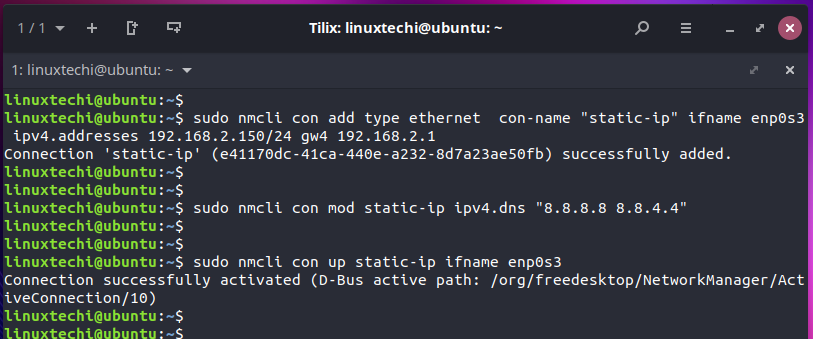
In this section, we will demonstrate how you can configure a static IP address with the following values:
- IP address: 192.168.2.150/24
- Default gateway: 192.168.2.1
- Preferred DNS: 8.8.8.8, 8.8.4.4
- IP addressing static
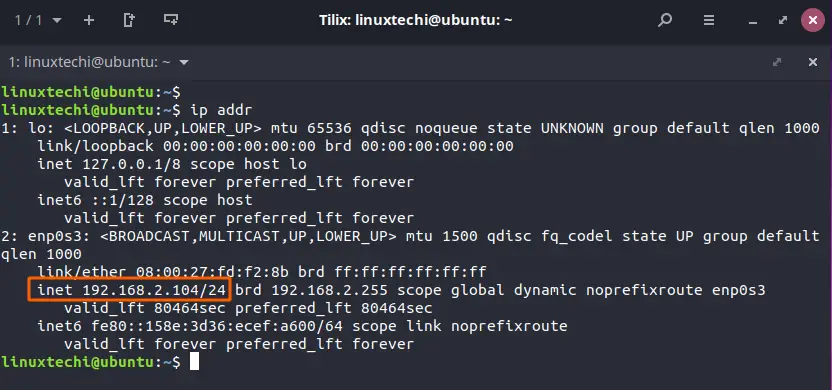
Before we assign a static IP, let us check the current IP address of our system which is 192.168.2.104 as indicated.
To set the static IP address with the connection name or profile called static-ip, IPv4 address 192.168.2.150, and default gateway 192.168.2.150 we will run the command:
$ sudo nmcli con add type ethernet con-name "static-ip" ifname enp0s3 ipv4.addresses 192.168.2.150/24 gw 192.168.2.1
Next, we will configure the DNS server as follows.
$ sudo nmcli con mod static-ip ipv4.dns "8.8.8.8 8.8.4.4"
To activate the connection we will run the command:
$ sudo nmcli con up static-ip ifname enp0s3
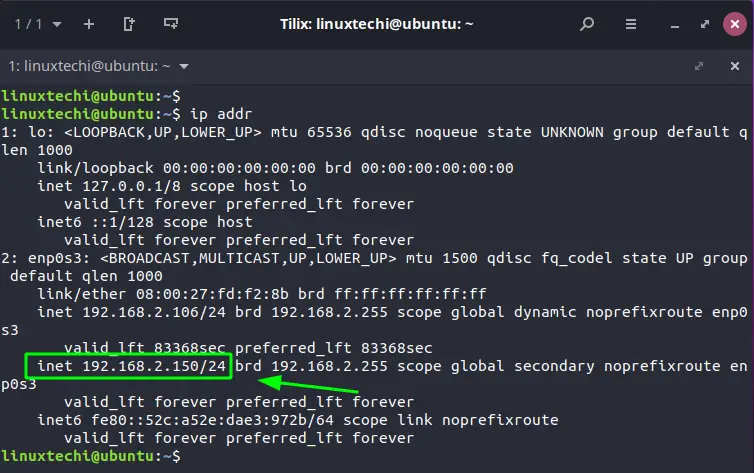
We have simply added another IP address to our network interface enp0s3. To confirm that the IP address was successfully added, we will run the ip command:
$ ip addr
Enabling / Disabling a network connection
In this section, we will explore how you can manage the connection by either activating or deactivating them. To disable or deactivate a connection, run the command:
$ sudo nmcli con down id "static-ip" ifname enp0s3
You can also simply leave out the ifname enp0s3 parameters.
$ sudo nmcli con down id "static-ip"

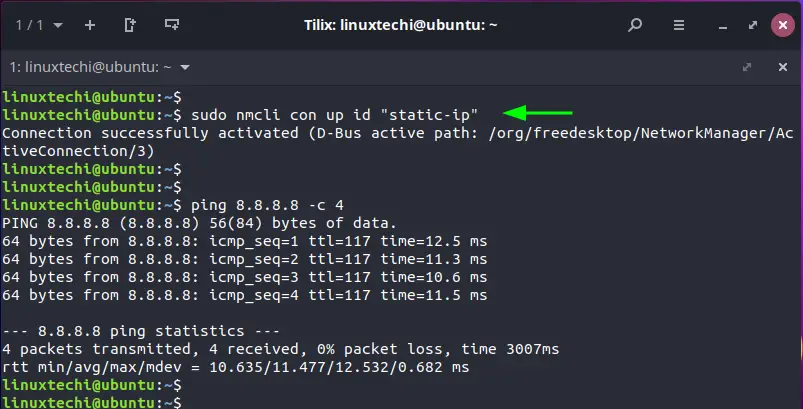
To bring up or enable a connection, run the command:
$ sudo nmcli con up id "static-ip" ifname enp0s3
Alternatively, you can truncate the command as follows:
$ sudo nmcli con up id "static-ip"
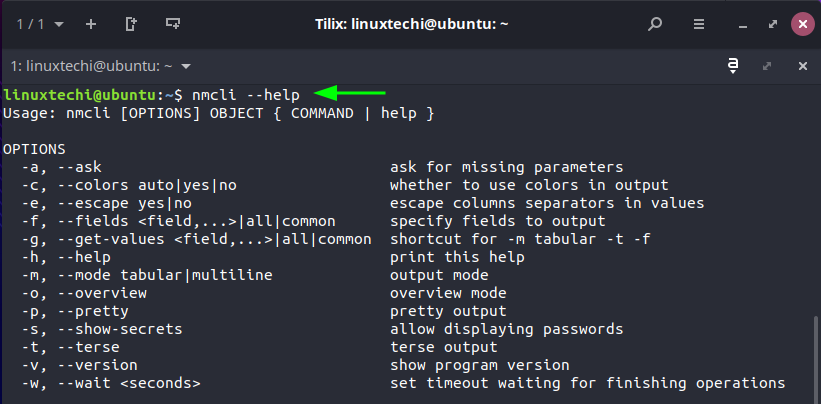
To check out more on nmcli command options, simply run the command:
$ nmcli --help
Conclusion
The nmcli utility is a useful tool for adding and managing network connections on Linux systems. It provides easy command-line options to help you configure networking particularly on headless servers. In this guide, we have demonstrated how you can add and manage network connections with the nmcli command in Linux.
Also Read: 9 tee Command Examples in Linux
The post How to Configure IP Networking with nmcli Command in Linux first appeared on LinuxTechi.