How to Create VPC Peering Across Two AWS Regions
Many a time, resources of two AWS regions communicate each other over the internet (or public network). This is not the recommended way as communication is happening over the internet which is not secure and also it leads to unnecessary billing.
To overcome this, we can setup VPC peering connection between two AWS regions. After the vpc peering setup, resources of those two AWS regions can communicate over the AWS private network.
In this guide, we will learn how to create VPC peering connection across two AWS regions step by step.
For the demonstration, I have first VPC named vpc-a in eu-west2 region and second VPC named vpc-b in us-west-2. In region eu-west-2, we have a VM named ‘VM 1’ inside vpc-a, this VM will communicate to vm-2 created in us-west-2 region inside vpc-b over private network.
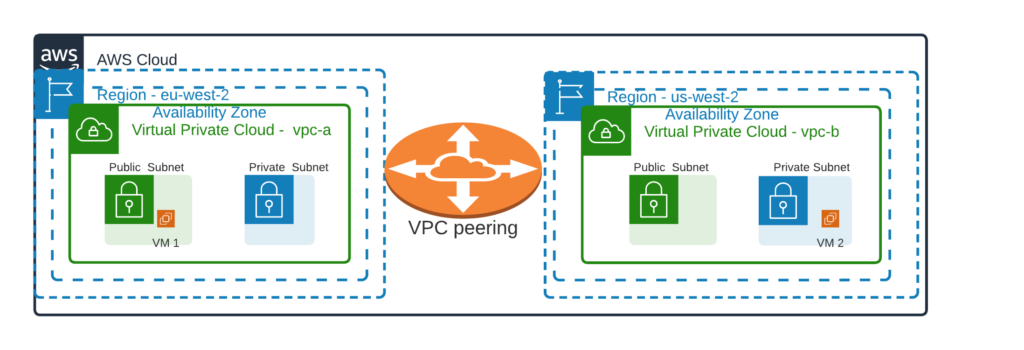
Note: VM 1 is launched in public subnet and VM 2 is launched in private subnet. Private IP of VM-1 and VM-2 is ‘10.20.1.11’ and ‘10.40.1.39’ respectively.
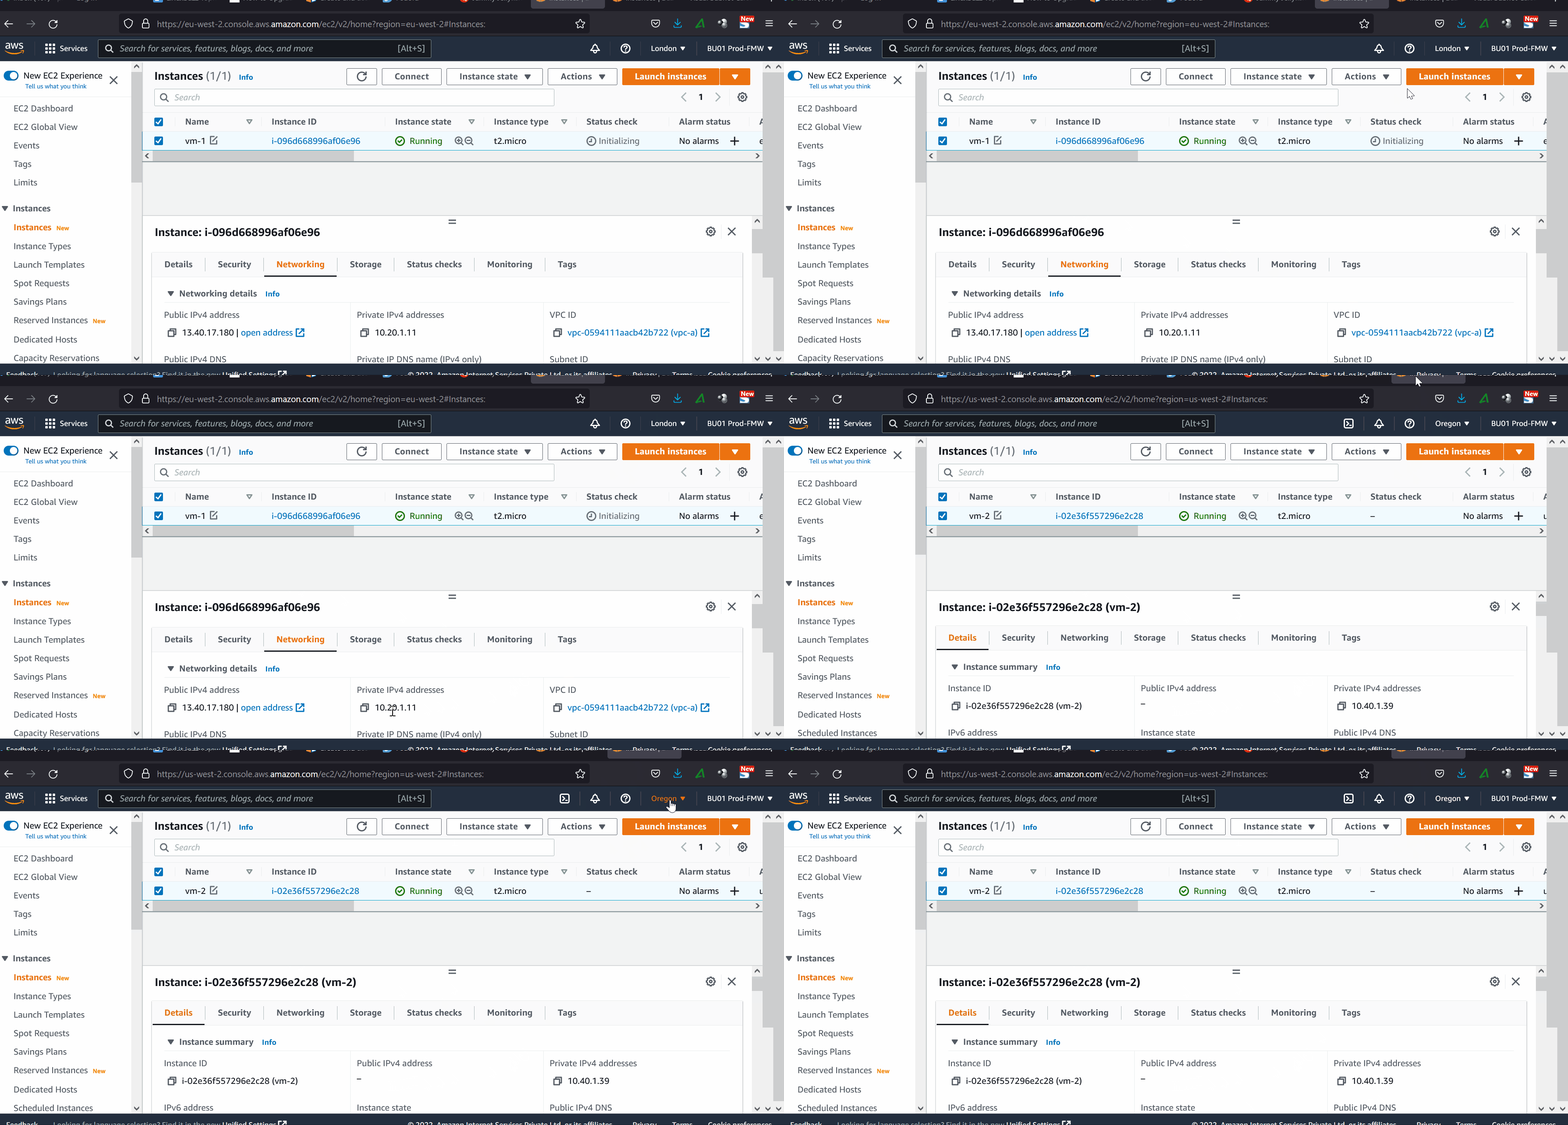
Login to VM-1 and try to ping VM-2 private IP. I have already attached required security group to these two VMs.
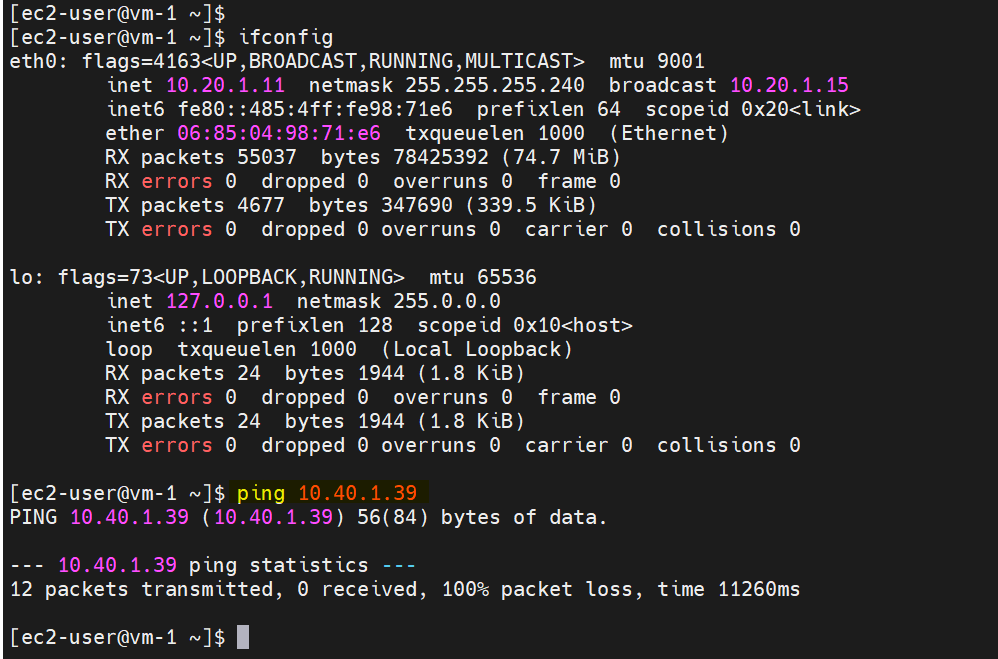
There is no ping connectivity over the private IPs because VPC peering connection is not configured yet. Let’s create VPC connection using following steps.
1) Go to VPC console page
https://console.aws.amazon.com/vpc/
Switch to the region eu-west-2
2) Choose Peering Connections from VPC Navigation Pane
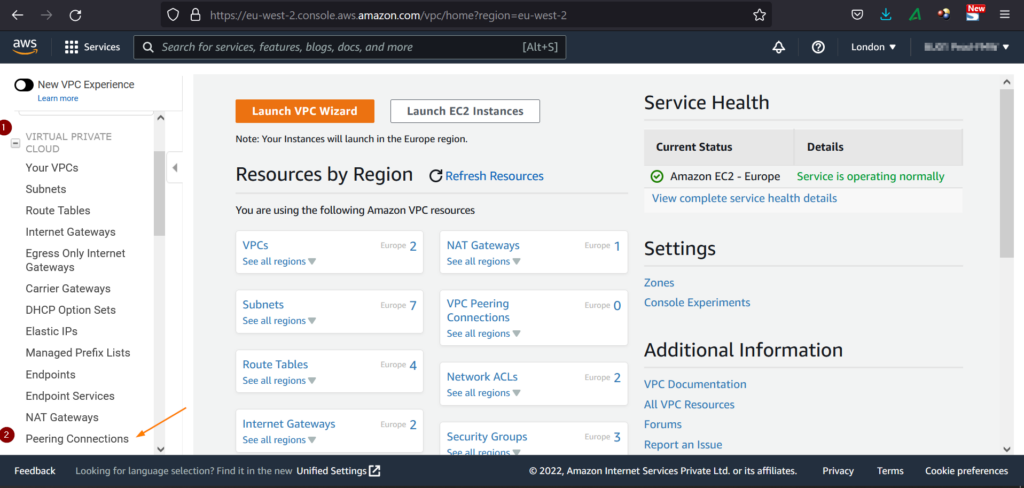
Click on ‘Peering Connections’
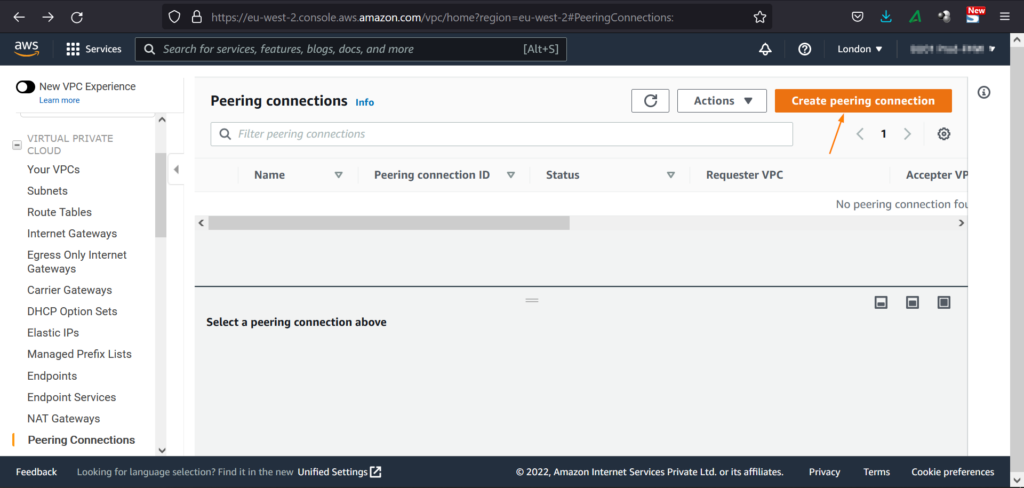
3) Create VPC Peering connection from VPC-a to VPC- b
Specify the following details
- Peering connection name tag: vpca-vpb-peering
- VPC (Requester): Select VPC-a (this is the requestor VPC in our case)
- Account: As we are setting up VPC peering of two AWS regions of same account, so select ‘My-Account’
- Region: Select ‘Another region’
- VPC (Accepter): Specify the VPC ID of VPC-b (us-west-2).
To get VPC ID, switch to us-west-2 and go VPC console,

Now create peering connection by specifying the details, example is shown below
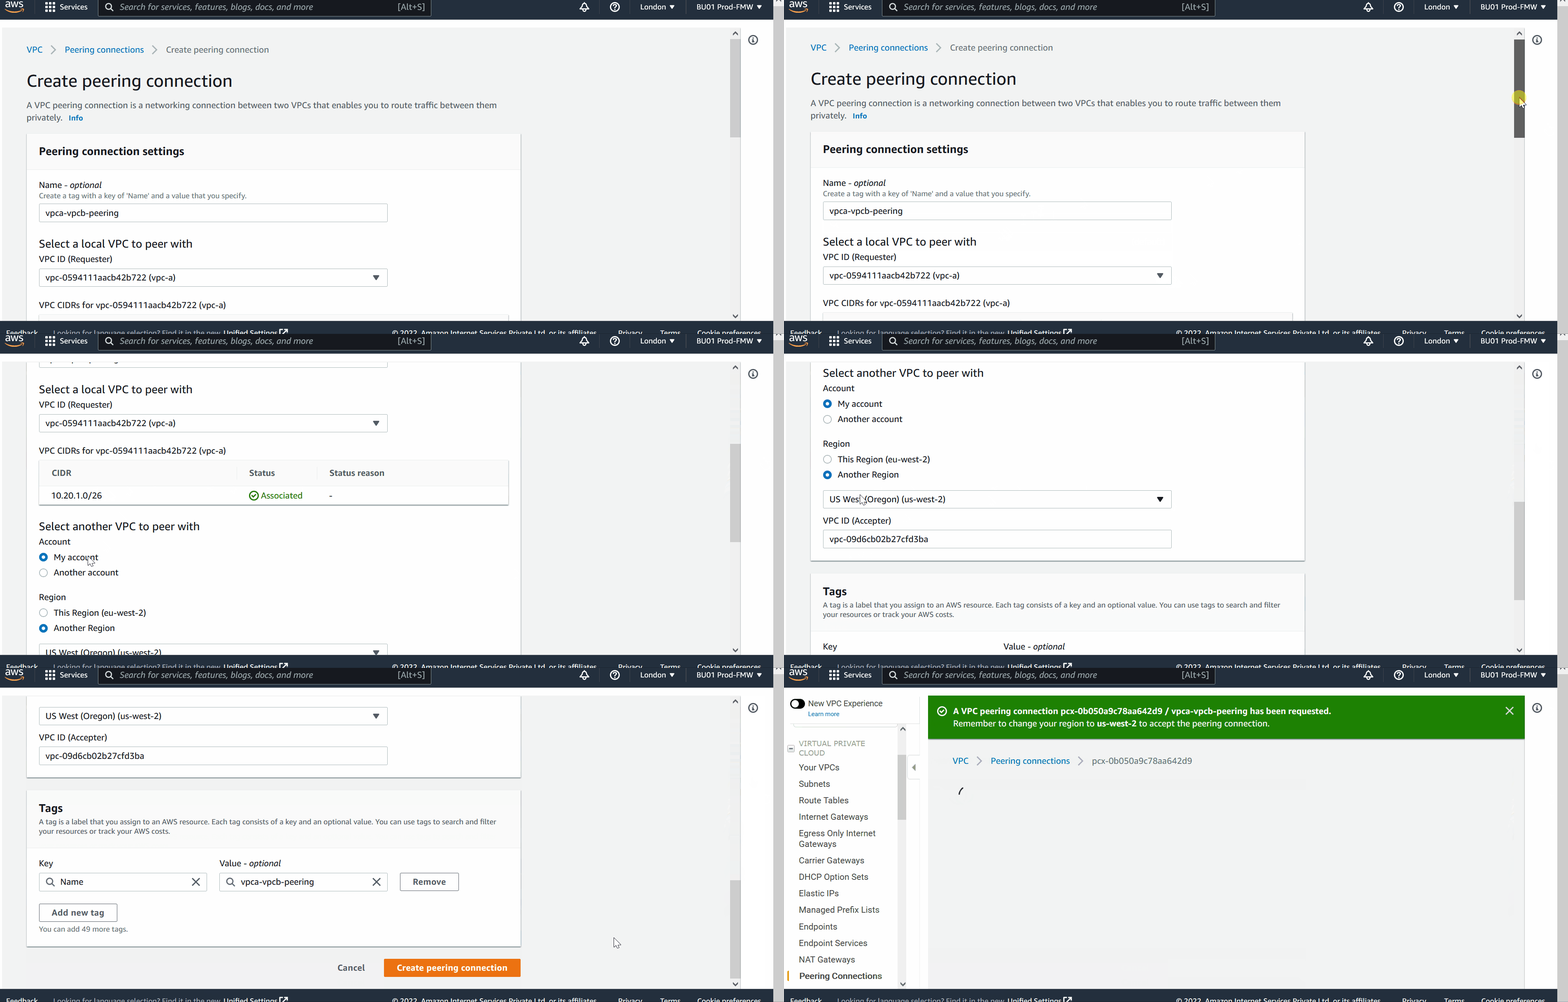
Once the peering connection is requested, we will get the following window,
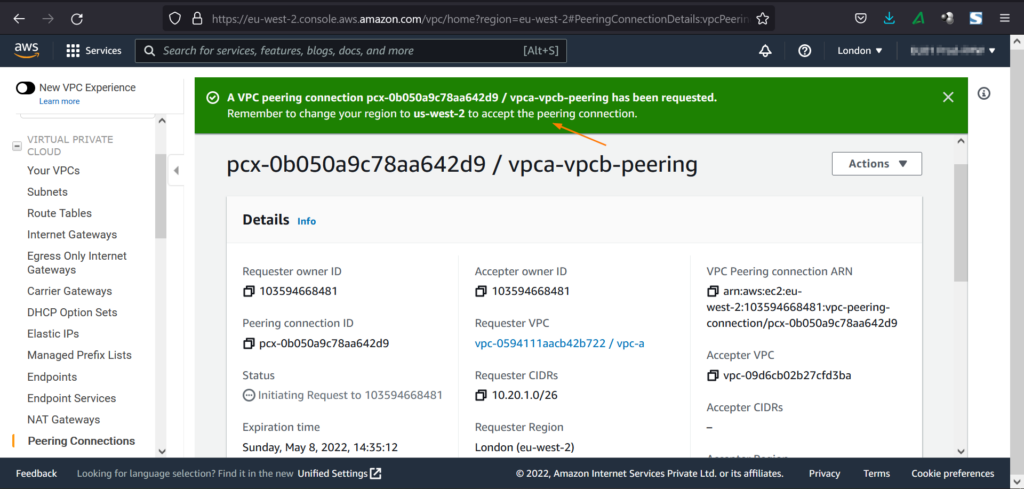
4) Accept Peering Connection from another Region
In our case, switch to us-west-2, go to peering connection from VPC navigation pane.
From Actions Tab, click on ‘Accept Request’
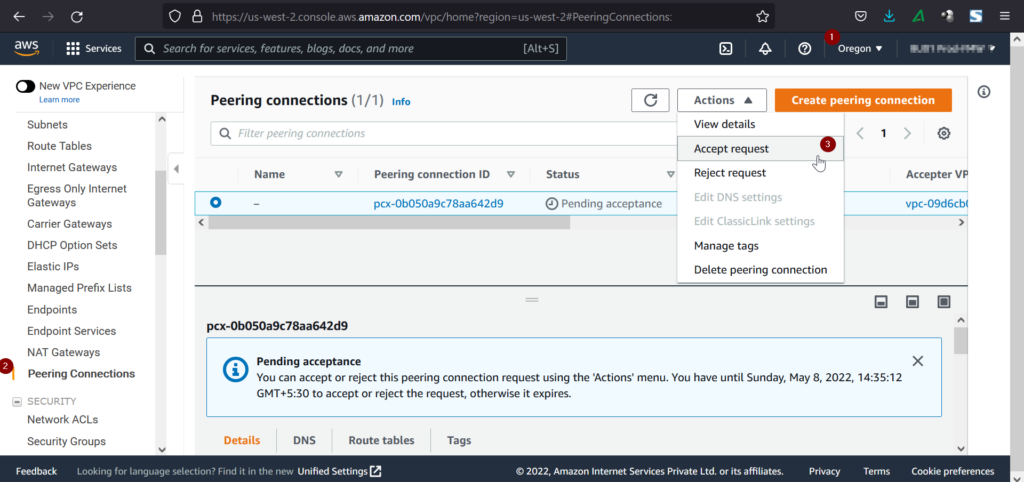
After Accepting the request, connection will become active.
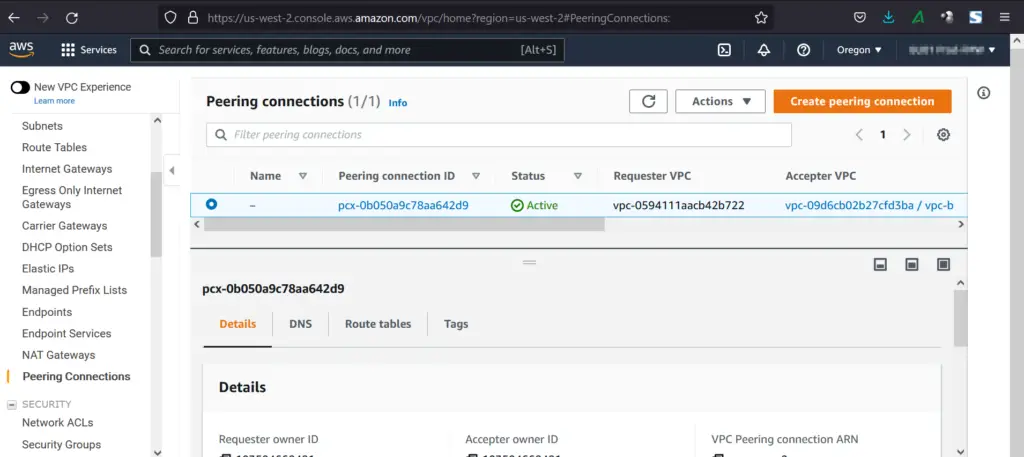
5) Modify the Route Tables
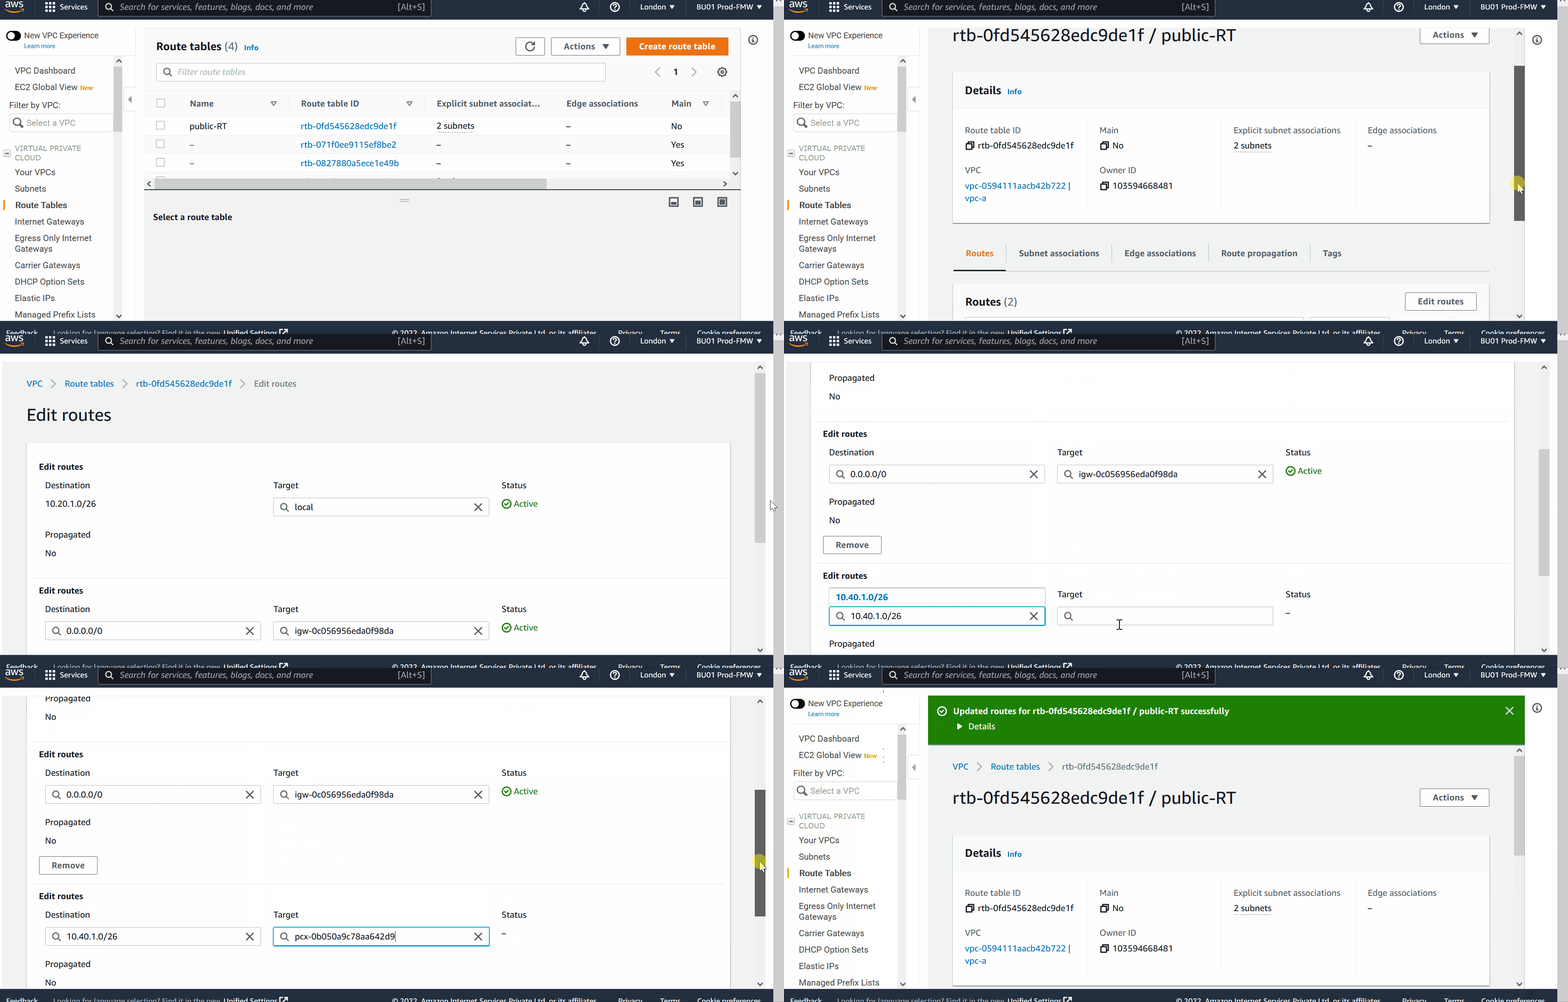
Add routes in the route table in such a way that
- For VPC-a, if the traffic is destined to 10.40.1.0/26 (this is CIDR of VPC-b) then use peering connection.
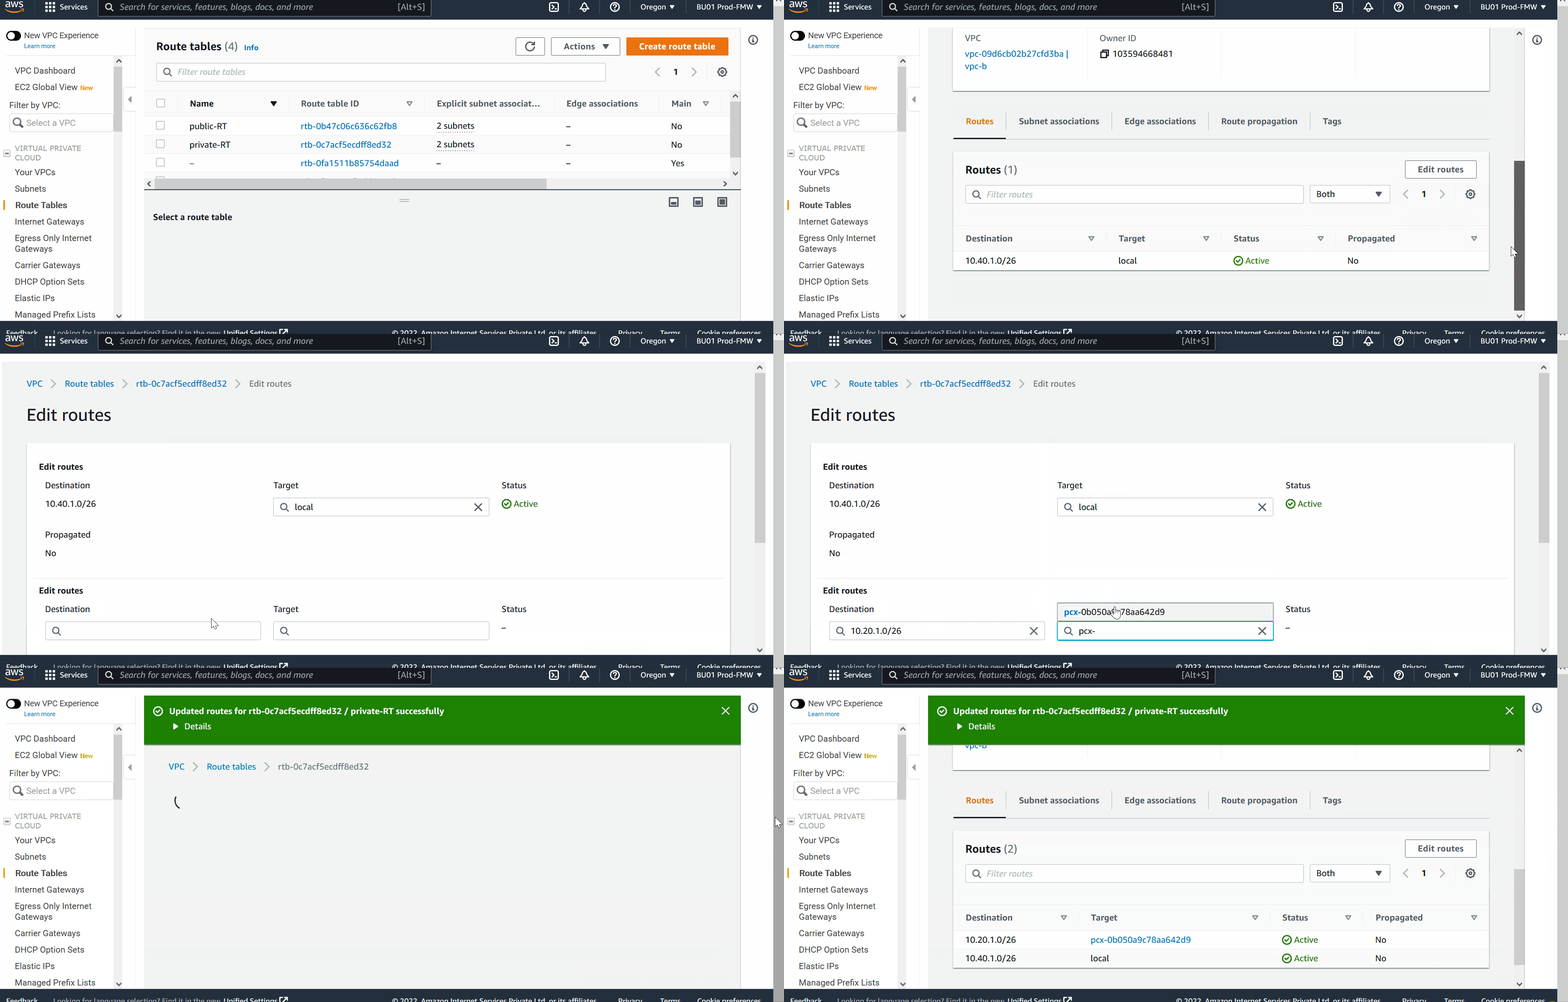
- Similarly, for VPC-b, if the traffic is destined to 10.20.1.0/26 (this is the CIDR of VPC-a) then use peering connection
As my VM-1 is in public subnet of VPC-a, so add following route in public route table,
VM-2 is private subnet of VPC-b, so add route in private route table,
Now we are all set for the testing, head back to VM -1 and try to ping and telnet VM-2 from the terminal,
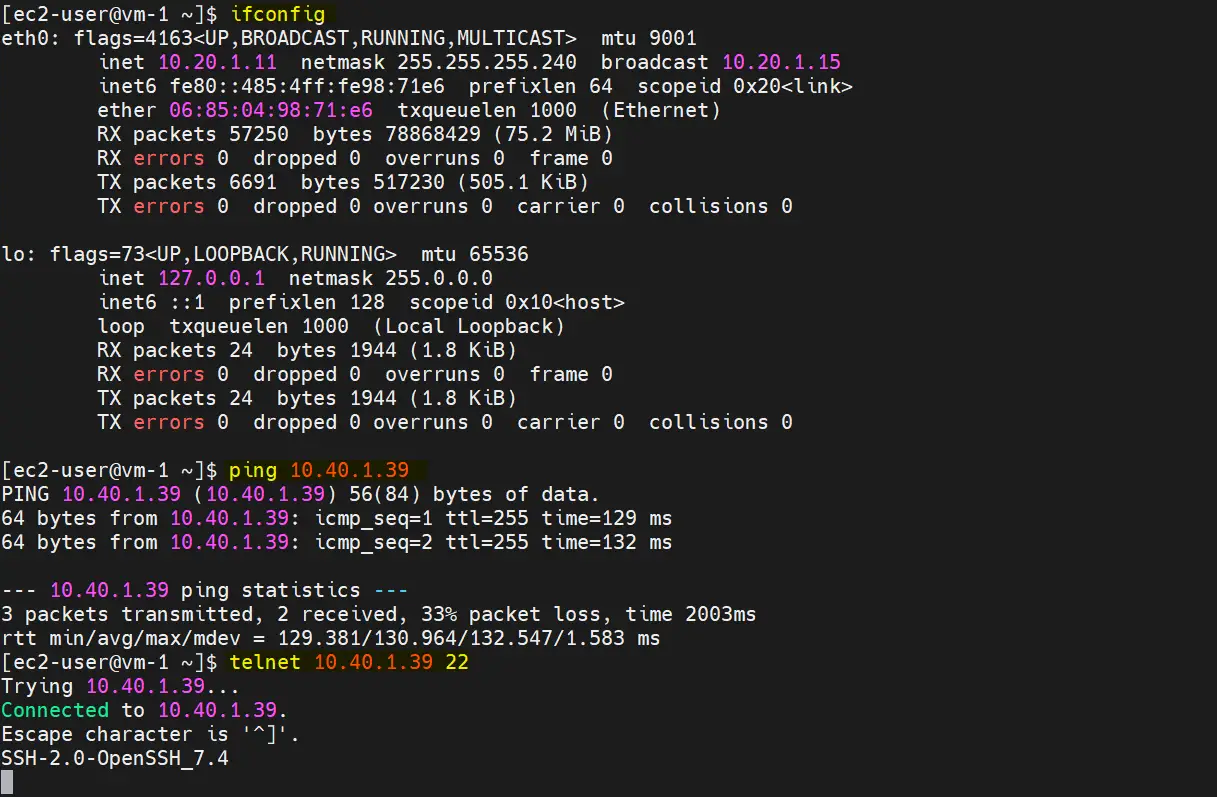
In the same way, from we can reach to VM1 from VM-2 over the private IP.
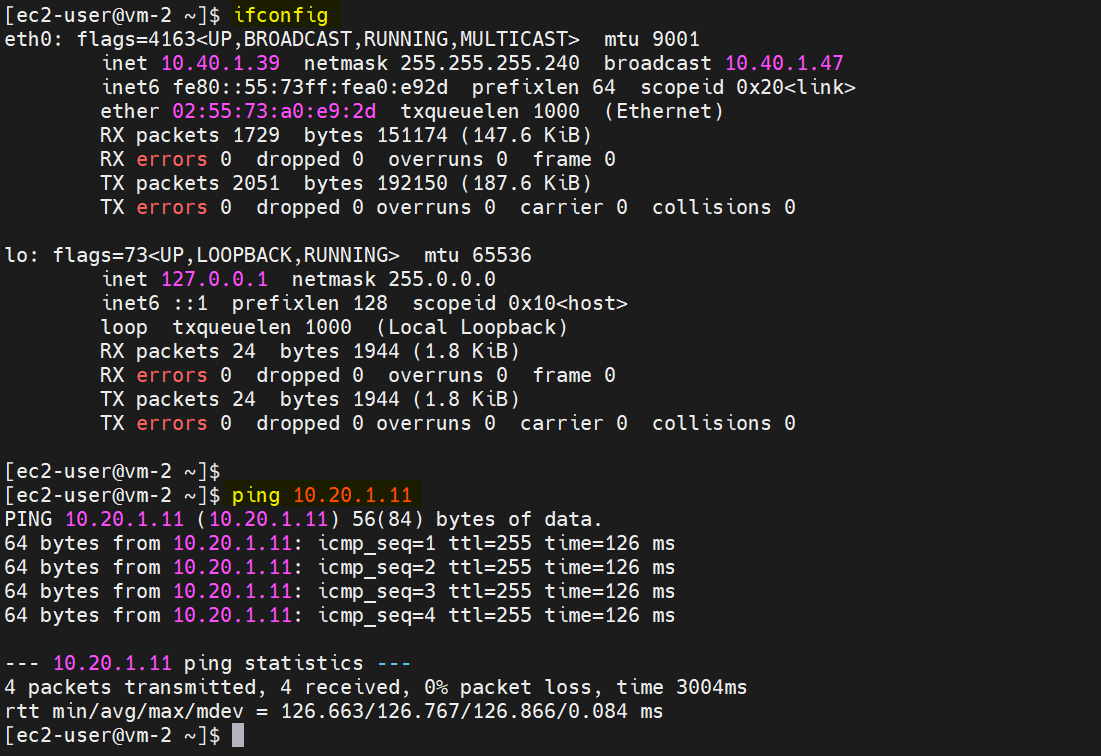
Perfect, above confirms that both VMs of two AWS regions are communicating with each using private IPs. That’s all from this guide, I hope you have found it informative. Kindly you post your queries and feedback in below comments section.
Also Read: How to Configure your own VPC(Virtual Private Cloud) in AWS
The post How to Create VPC Peering Across Two AWS Regions first appeared on LinuxTechi.
