
How to Install Ansible on Ubuntu 20.04 LTS / 21.04
Ansible is a free and opensource IT Automation and configuration tool. It is available for almost all the Linux distributions and can be used to manage Linux and Windows systems. Now a days Ansible is also used to manage EC2 instances in AWS, Virtual machines, and Containers etc. It does not require any agent on managed hosts, but it only requires ssh connection.
In this article, we cover how to install latest version of Ansible on Ubuntu 20.04 LTS / 21.04
System requirements for Ansible
- Minimal Installed Ubuntu 20.04 LTS / 21.04
- sudo user with root privileges
- 2 CPU / vCPU
- 2 GB RAM or more
- 20 GB Hard drive
- Internet Connection (In case you don’t have local configured apt repository server)
Following is my lab setup details for ansible demonstration.
- Ansible Control Node – control.example.com (192.168.1.112)
- Ansible Managed Nodes – node1.example.com & node2.example.com
- sysops sudo user on control and managed nodes with privileges.
Note: Here node1 is Ubuntu System and node2 is CentOS system and control node is the system where we will install ansible. I am assuming sysops is already created on each host.
To configure sudo user (sysops) to run all the commands without prompting for the password then run the following command on each managed host
echo "sysops ALL=(ALL) NOPASSWD:ALL" > /etc/sudoers.d/sysops
Let’s jump into the Installation steps of Ansible
Step 1) Apply Updates on Control Node
Login to Ubuntu 20.04 LTS / 21.04 system and run below apt commands to apply updates.
$ sudo apt update
$ sudo apt updgrade -y
Once all the updates are installed then reboot the system once.
$ sudo reboot
Step 2) Install dependencies and configure Ansible Repository
Install ansible dependencies by running the following apt command,
$ sudo apt install -y software-properties-common
Once the dependencies are installed then configure PPA repository for ansible, run
$ sudo add-apt-repository --yes --update ppa:ansible/ansible
Now update repository by running beneath apt command.
$ sudo apt update
Step 3) Install latest version of ansible
Now we are ready to install latest version of Ansible on Ubuntu 20.04 LTS / 21.04, run following command.
$ sudo apt install -y ansible
After the successful installation of Ansible, verify its version by executing the command
$ ansible --version

Great, above output confirms that Ansible version 2.9.6 is installed.
Step 4) Setup SSH keys and share it among managed nodes
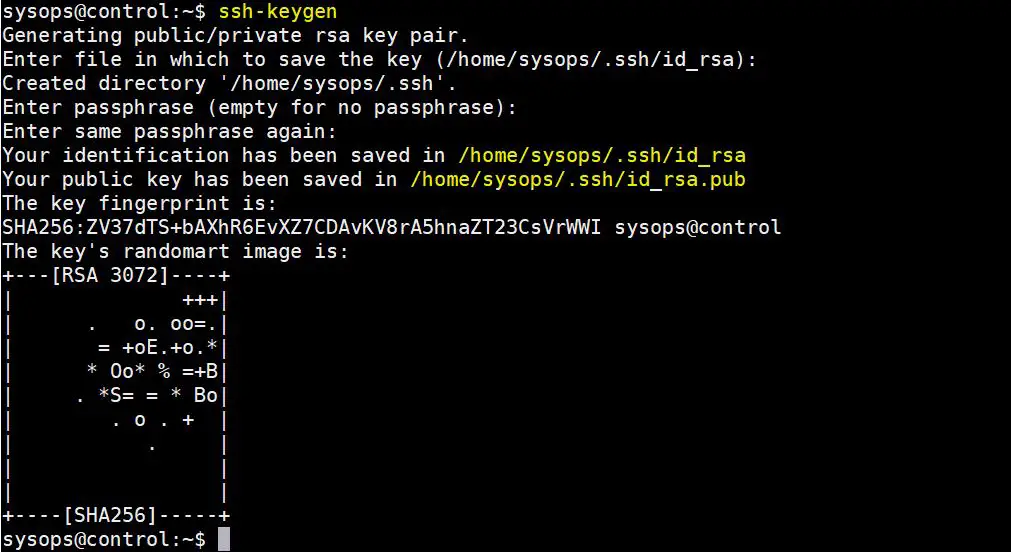
Now let’s generate the SSH keys for sysops user from control node and share it among the managed hosts. Run ssh-keygen command
$ ssh-keygen
Hit enter when prompting for the input, output is shown below
Note : Add managed host entries in /etc/hosts file on control node. This is only required when you don’t have local DNS server configured.
192.168.1.115   node1.example.com
192.168.1.120   node2.example.com
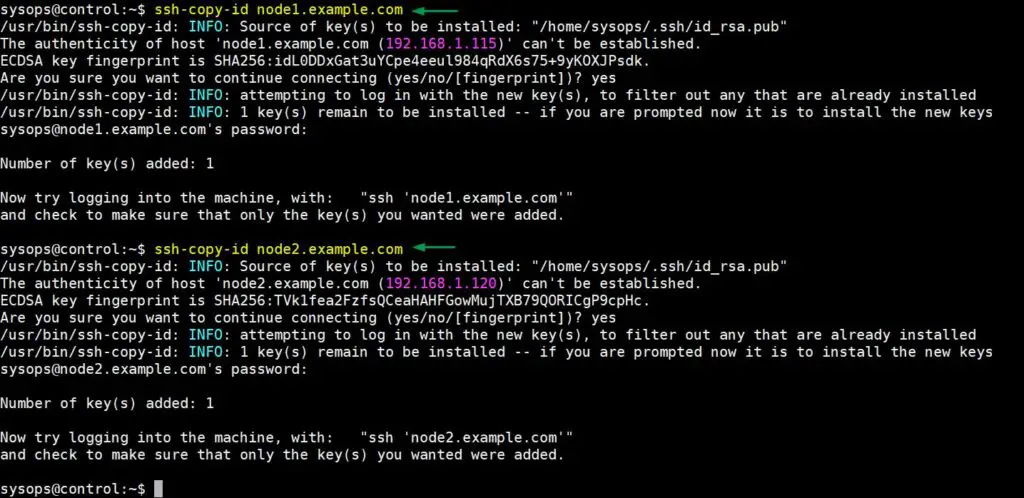
To share the ssh keys between control node to managed node, run ssh-copy-id command example is shown below
$ ssh-copy-id node1.example.com
$ ssh-copy-id node2.example.com
Output of above commands
Step 5) Create ansible cfg and inventory file
It is always recommended to have separate ansible.cfg and inventory file for each project. For the demonstration purpose, demo is the project name. So, create this folder first by running mkdir command.
$ mkdir demo
Copy the default ansble.cfg file to ~/demo folder,
$ cp /etc/ansible/ansible.cfg ~/demo/
Edit the ~/demo/ansible.cfg file, set the following parameters,
$ vi ~/demo/ansible.cfg
Under the default sections
inventory      = /home/sysops/demo/inventory
remote_user = sysops
host_key_checking = False
Under the privilege_escalation section
become=True
become_method=sudo
become_user=root
become_ask_pass=False
Save and Close the file. Now, let’s create the inventory file that we have defined in ~/demo/ansible.cfg file.
$ vi ~/demo/inventory
[dev]
node1.example.com

[prod]
node2.example.com
save and quit the file
Now finally instruct ansible to use demo project’s ansible.cfg file by declaring ANSIBLE_CONFIG variable, run the following commands,
$ export ANSIBLE_CONFIG=/home/sysops/demo/ansible.cfg
$ echo "export ANSIBLE_CONFIG=/home/sysops/demo/ansible.cfg" >> ~/.profile
Run ansible –version command from demo folder to verify ansible configuration
$ cd demo/
$ ansible --version

Great, Ansible is now reading our project’s ansible configuration file. Let’s verify the managed nodes connectivity using ansible ad-hoc command,
$ ansible all -m ping
Note : Make sure run ansible command from demo folder.
Output of command would look like below:
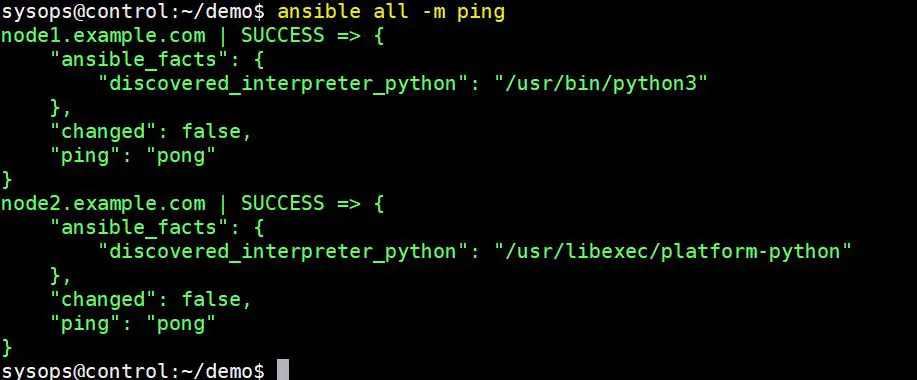
This output confirms that connectivity is in place from control node to managed hosts.
Step 6) Create Ansible playbook to Install packages on managed hosts
To verify the ansible installation and configuration, let’s create a sample playbook named as packages.yaml under demo folder.
$ vi packages.yaml
---
- name: Playbook to Install Packages
  hosts:
    - dev
    - prod
  tasks:
  - name: Install php and mariadb
    package:
      name:
        - php
        - mariadb-server
      state: present
save and Close the file
Now run the playbook using ansible-playbook command,
$ ansible-playbook packages.yaml
Output:
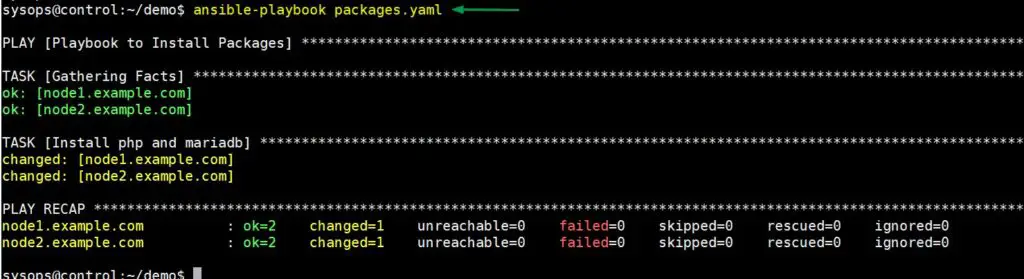
Above output confirms that playbook has been executed successfully. To verify result, run following ad-hoc commands,
$ ansible dev -m shell -a 'dpkg -l | grep -E "php|mariadb"'
$ ansible prod -m shell -a 'rpm -qa | grep -E "php|mariadb"'
That’s conclude the article. In case you have found this article informative then please do not hesitate to share it. In case, you have any query please drop it in comments sections below.
Read Also : How to Use Handlers in Ansible Playbook
The post How to Install Ansible on Ubuntu 20.04 LTS / 21.04 first appeared on LinuxTechi.