
How to Manage KVM Virtual Machines with Cockpit Web Console
In a previous topic, we walked you through how create and manage KVM machines on command line. For command-line enthusiasts, this is an ideal way of creating and keeping tabs on virtual machines. For those who prefer using a graphical display, the Cockpit utility comes very much in handy.
Cockpit is a free and opensource web-based GUI that allows you to easily monitor and administer various aspects of your Linux server. It is lightweight, and resource-friendly and does not gobble up resources and neither does it reinvent subsystems or add its own tooling layer. It’s purely an on-demand service and uses your normal system login credentials.
Cockpit allows you to perform a subset of operations including:
- Configuring a firewall.
- Creating and managing user accounts.
- Configuring network settings.
- Creating and managing virtual machines.
- Updating / Upgrading software packages.
- Downloading and running containers.
- Inspecting system logs.
- Monitoring the server’s performance.
The primary focus of this guide is to manage kvm virtual machines using cockpit web console.
Prerequisites
Before you proceed any further, ensure that KVM and all of its associated packages are installed on your server. If you are running Ubuntu 20.04, check out how to install KVM on Ubuntu 20.04.
For CentOS 8 users, we also have a guide on how to install KVM on CentOS 8.x and RHEL 8.x.
Additionally, ensure that Cockpit is installed. Check out how to install Cockpit on Ubuntu 20.04 and how to install Cockpit on CentOS 8.
In this guide, we will be managing KVM Virtual machines on Ubuntu 20.04 system.
Step 1) Install additional dependencies
To manage virtual machines, we first need to install the cockpit-machines package. This is the Cockpit user interface for virtual machines. The package communicates with the libvirt virtualization API which handles platform virtualization.
To install the cockpit-machines package on Ubuntu / Debian, run the command:
$ sudo apt install cockpit-machines
For CentOS 8.x, RHEL 8.x and Rocky Linux 8, execute the command:
$ sudo dnf install cockpit-machines
Once installed, restart the Cockpit utility.
$ sudo systemctl restart cockpit
And check to confirm whether is it running:
$ sudo systemctl status cockpit

Step 2) Access the cockpit web console
To access Cockpit, launch your browser and browse the link shown below.
https://server-IP:9090
If you are having any trouble accessing the Cockpit web console, you need to open port 9090 on the firewall. This is the port that Cockpit listens on. If you are running a UFW firewall, execute the command:
$ sudo ufw allow 9090/tcp
$ sudo ufw reload
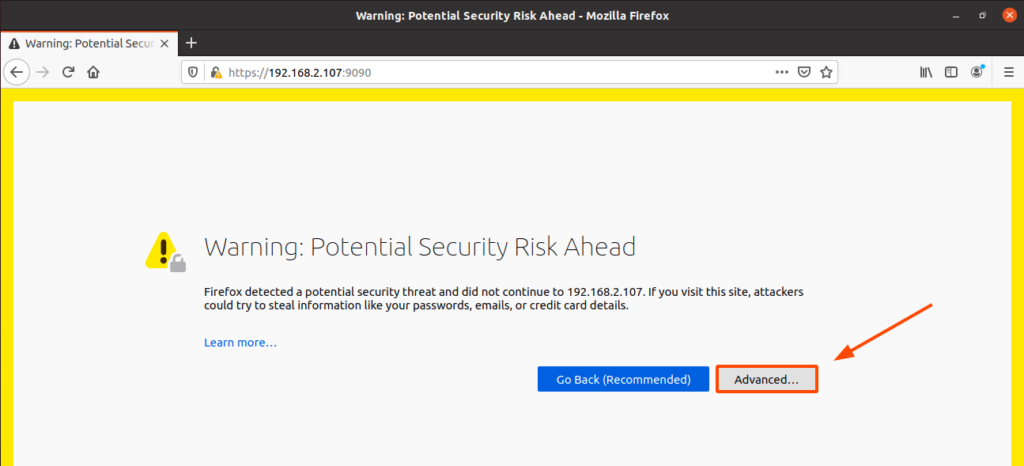
If it is your first time logging in, you will find a warning that you are about to browse a risky site. But worry not. The reason you are getting such a ‘warning’ is that Cockpit is encrypted using a self-signed SSL certificate which is not recognized by CA (Certificate Authority ).
To get around this restriction, click the ‘Advanced’ button.
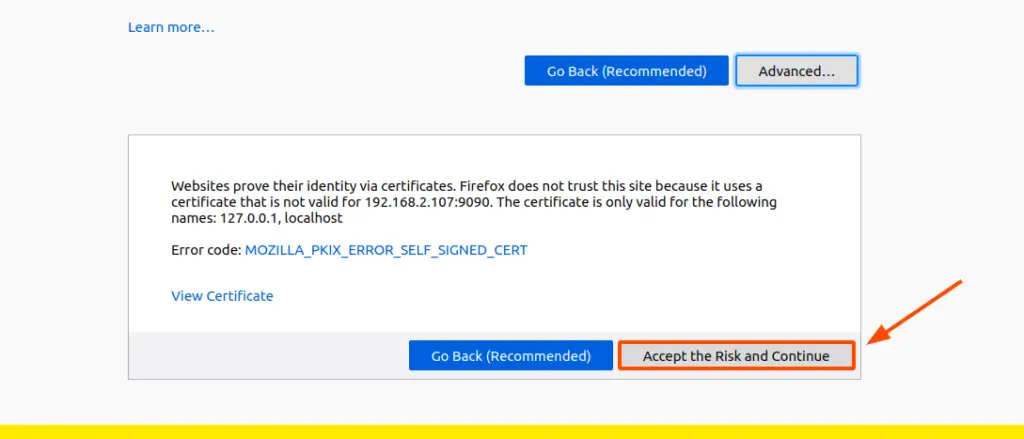
Next, click on ‘Accept the Risk and Continue’ to proceed to the Cockpit login page.
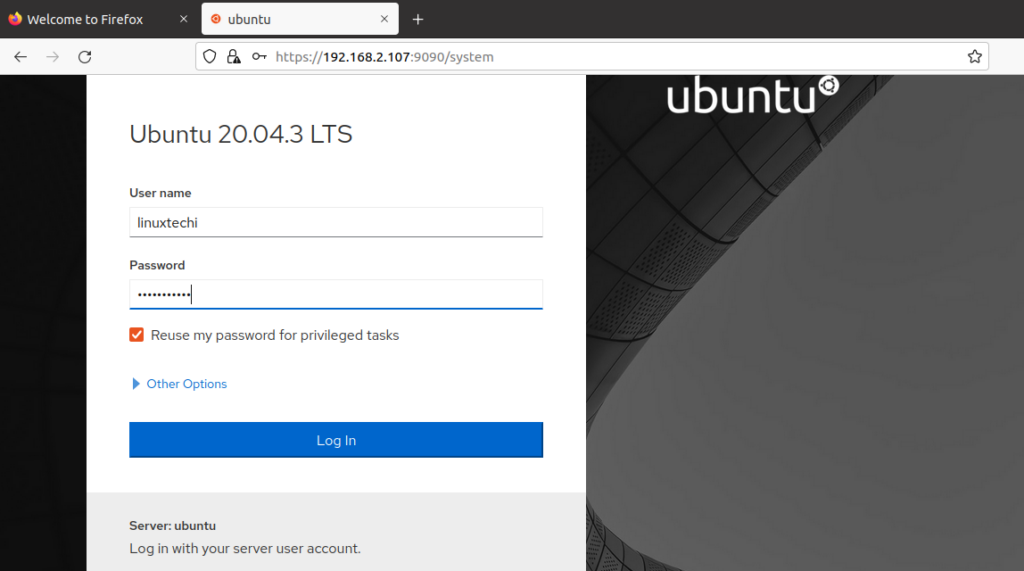
At the login screen, provide your username and password and click ‘Login’ to access the cockpit dashboard.
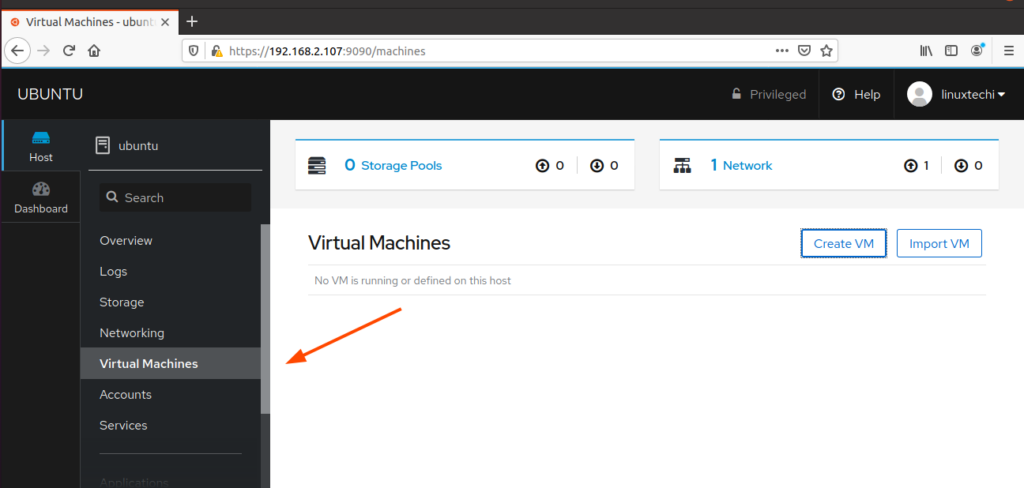
This lands you on this ‘Overview’ section that gives you a glance at your system’s performance metrics.
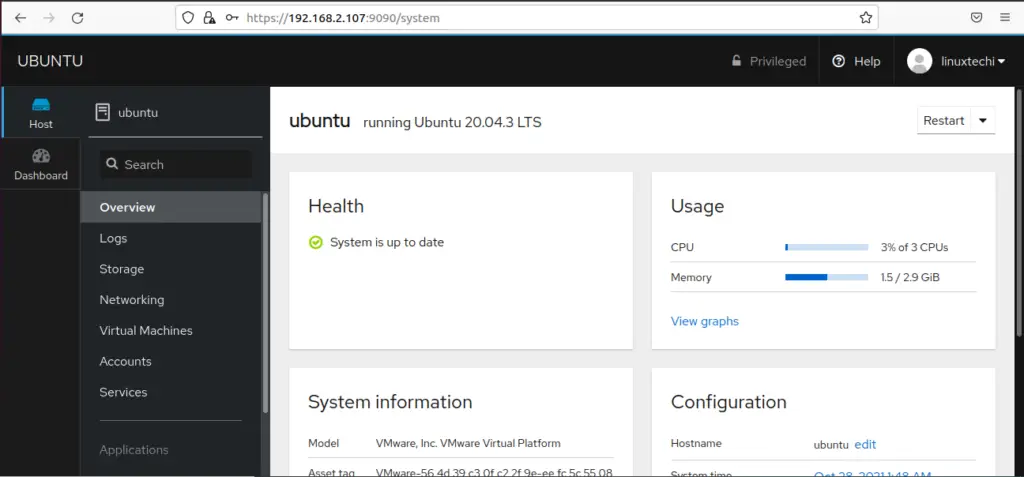
Since our interest is in creating and managing virtual machines, click on the ‘Virtual machines’ option on the left sidebar as shown.
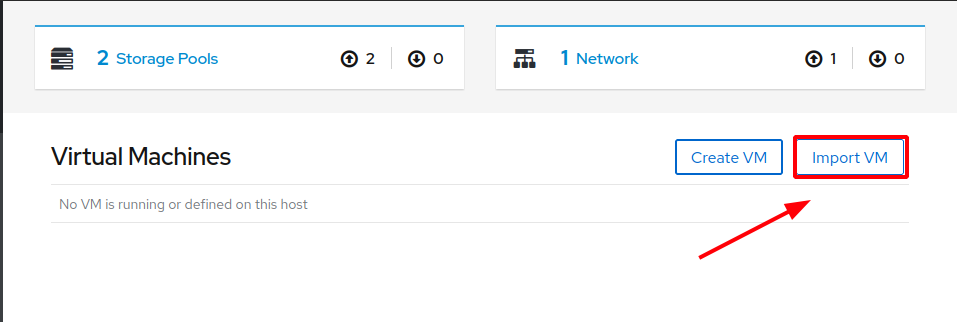
Existing virtual machines will be listed. However, since we are starting from scratch our Virtual machines section is blank. At the far right we are presented with two options ‘Create VM’ and ‘Import VM’.
How to create a new virtual machine
To create a new Virtual machine, click on the ‘Create VM’ button.
Fill out the virtual machine details including the Name of the VM, installation type, installation source, OS type, disk, and memory capacity.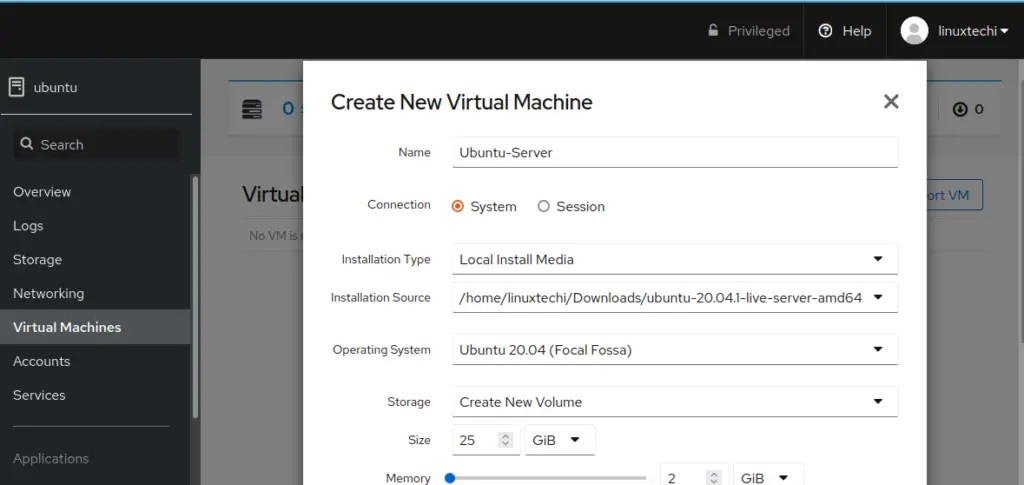
Once you have selected all the options, click the ‘Create’ button to create the virtual machine.
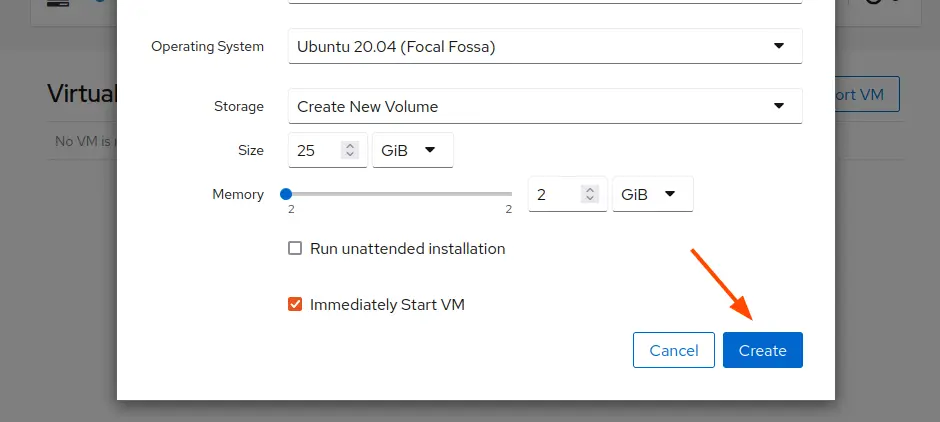
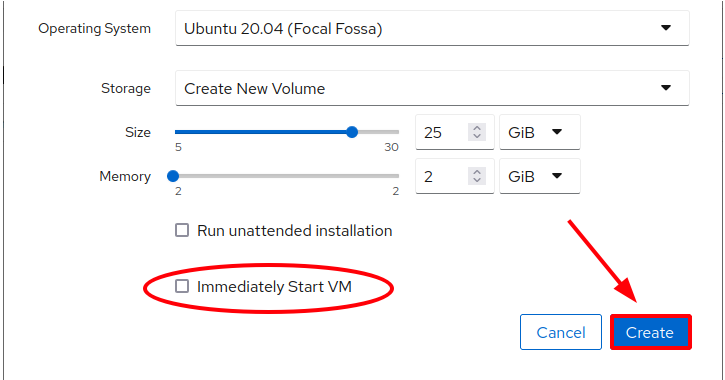
NOTE: By default, the ‘Immediately Start VM’ option is checked. This option causes the Virtual machine to be immediately launched once you click the ‘Create’ button. If you wish to review the settings before launching your virtual machine, uncheck it and hit the ‘Create’ button.
Thereafter, cockpit will start creating the virtual machine.
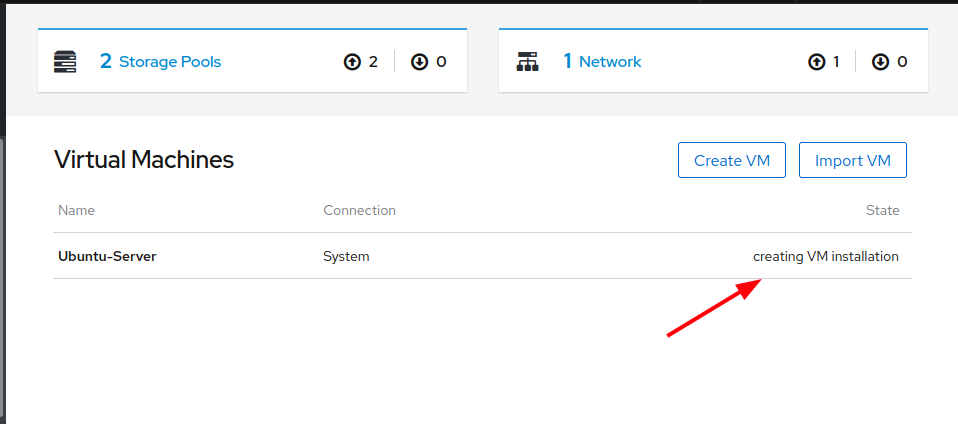
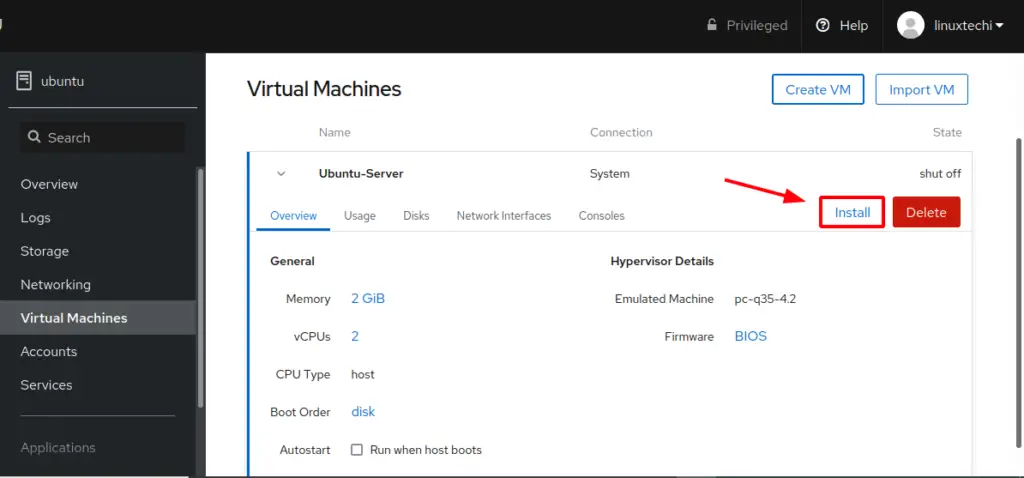
Once the creation of the VM is complete, you will get an overview of the Virtual machine details as shown. Other sections that you can navigate include Usage, Disks, Network Interfaces, and Consoles.
If you are ready, simply click the ‘Install’ button as shown.
NOTE:
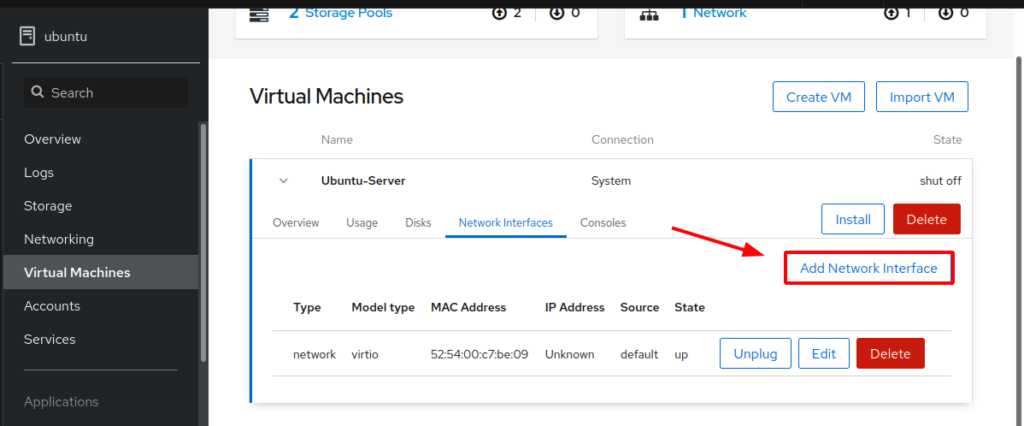
Before you proceed, one setting you might want to configure before installing the VM is the network interface. You can configure this to allow the VM to be accessible by other users within the network.
So, head over to the ‘Network Interfaces’ section and click on the ‘Add network Interface’ button.
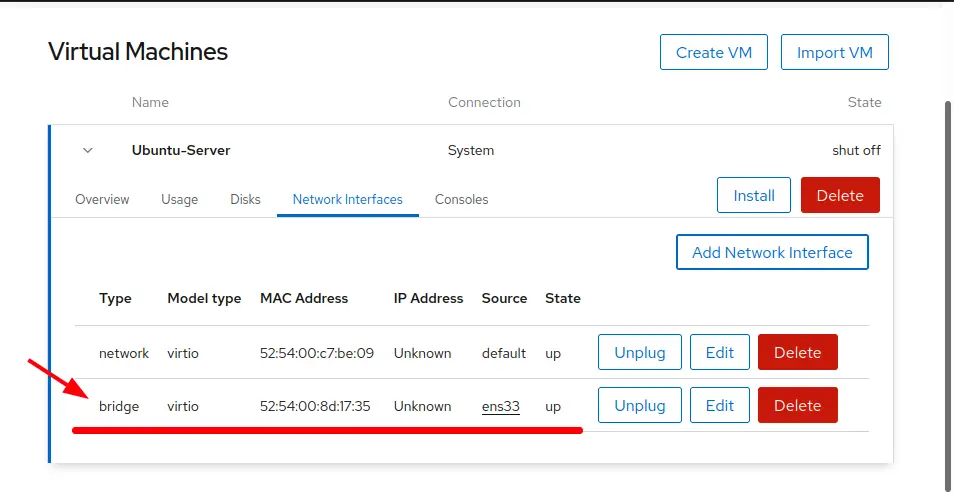
Specify ‘Bridge to LAN’ and point the source to the active network interface on your PC and click on the ‘Add’ button.

The bridged network will be listed below the default network that Cockpit creates for the VM.
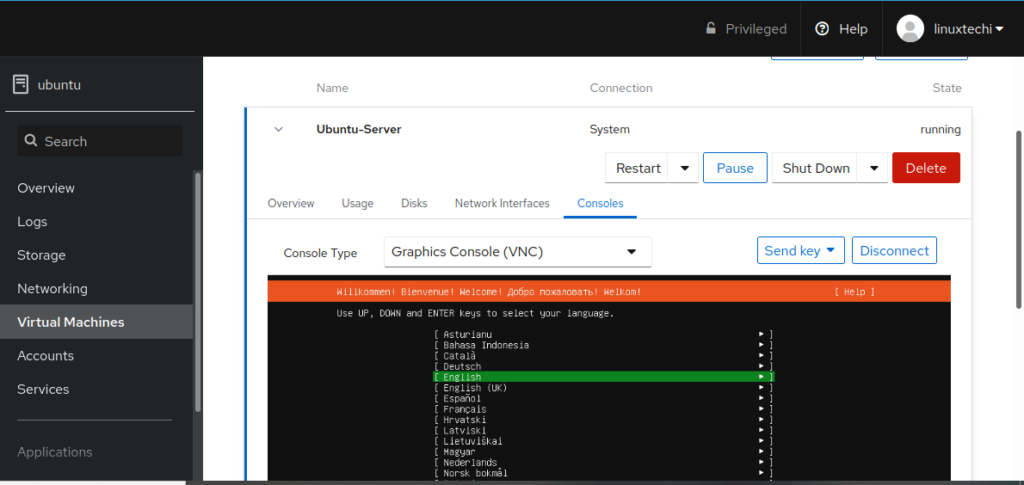
Finally, click the ‘install’ button to begin the installation of your operating system.
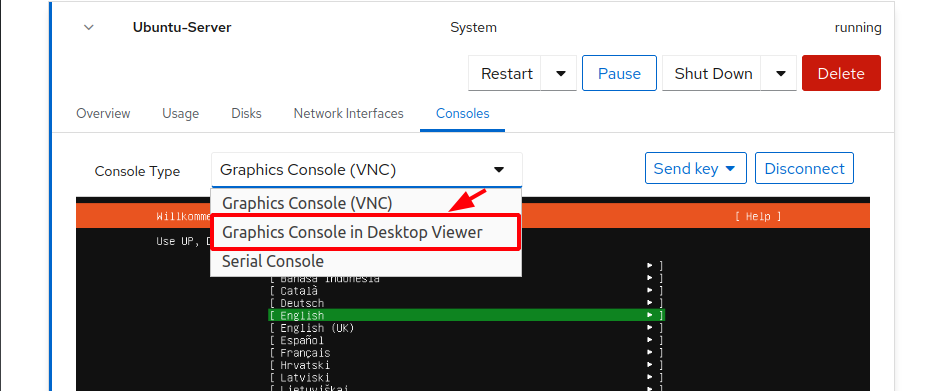
This will take you to the ‘Console’ section where you have an option of selecting the Console type. The default selection is VNC.
You have the luxury of also selecting between Desktop Viewer and Serial Console. I’d recommend selecting the Desktop viewer which is more user-friendly and easier to use to access the VM graphically.
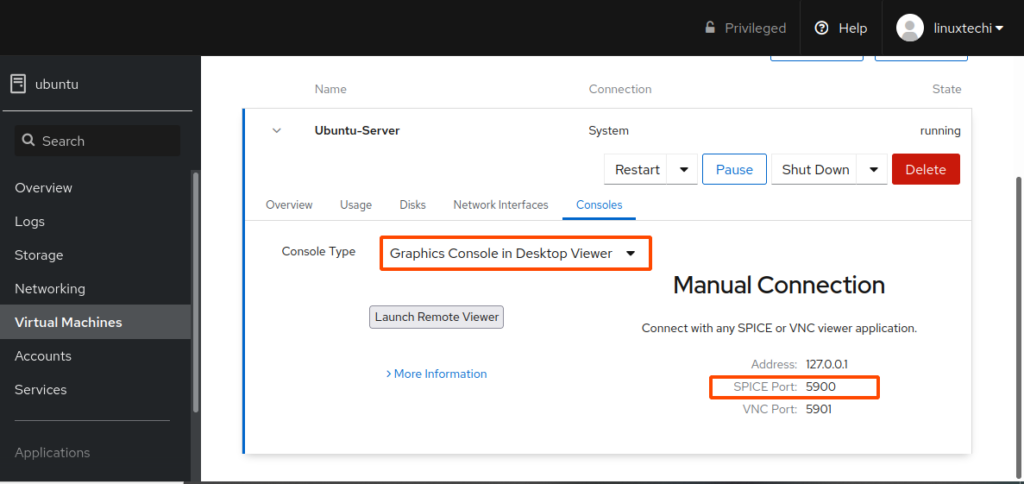
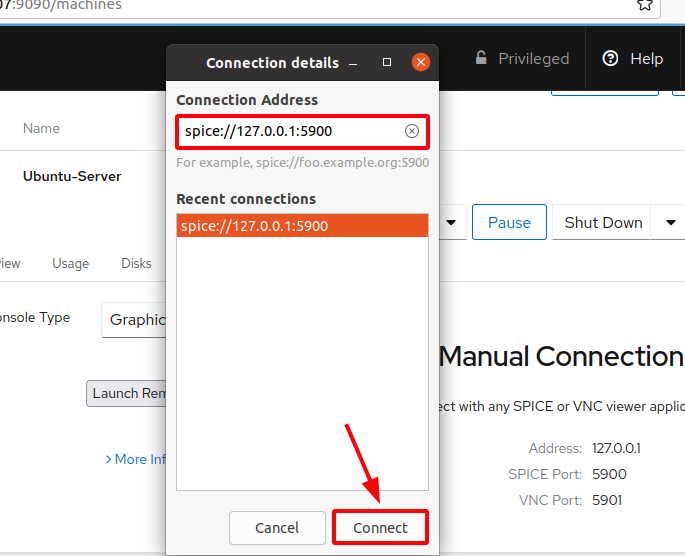
Once you have selected the ‘Desktop Viewer’ option, you will get some details on the IP and the port to use. Desktop Viewer uses the Spice GUI connection.
To make a connection, search for and launch the remote viewer which is provided by virt-viewer package.
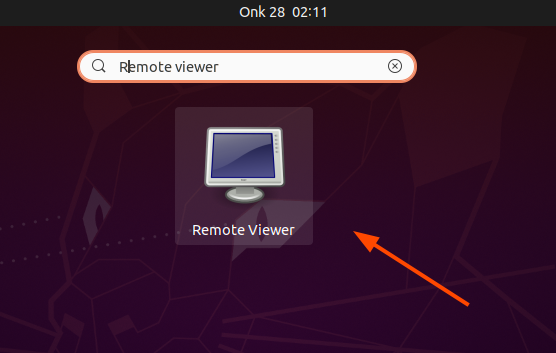
Once launched, enter the URL as provided and click connect.
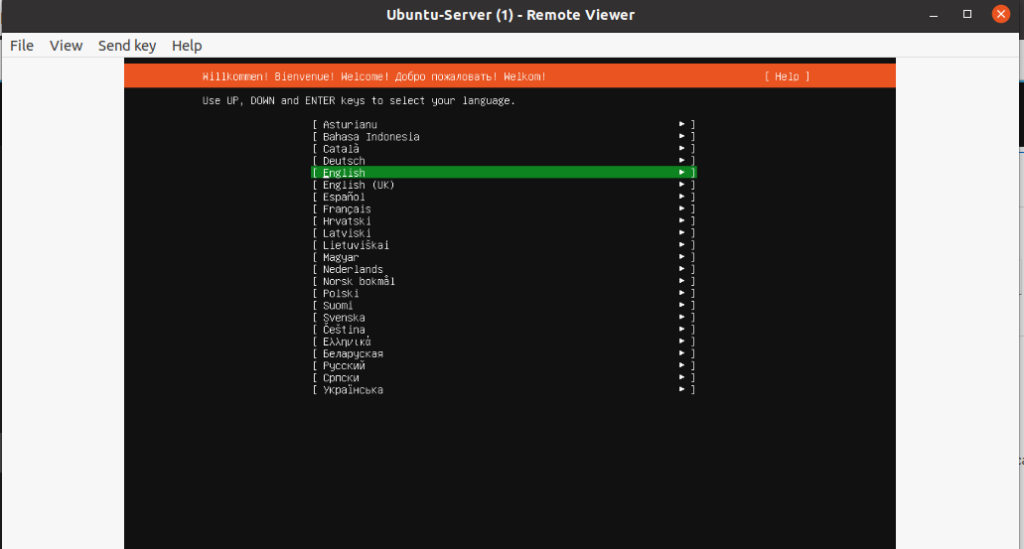
The Remote viewer will open the Virtual machine and from here, you can proceed with the installation of your operating system.
Import a Virtual machine
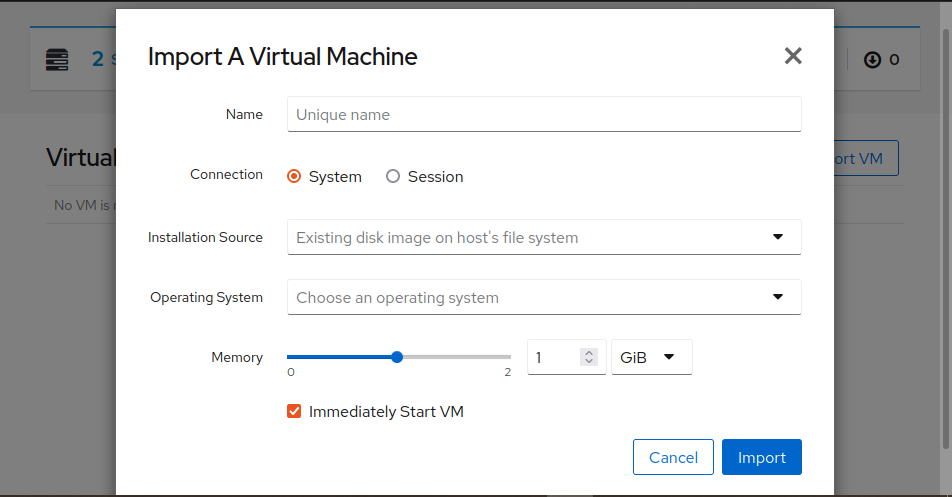
To import a VM, simply click the ‘Import VM’ tab. On the pop-up GUI that appears, be sure to fill in the name of the VM, select the existing disk image location, OS type, and memory capacity. Finally hit the ‘Import’ Button.
Fill out the details such as the name of the VM, Installation source, OS, and memory, and click ‘Import’.
Configure KVM Storage Pools
A storage pool is simply a directory or storage device that is managed by the libvirtd daemon. Storage pools comprise storage volumes that either accommodate virtual machine images or are directly connected to VMs as additional block storage.
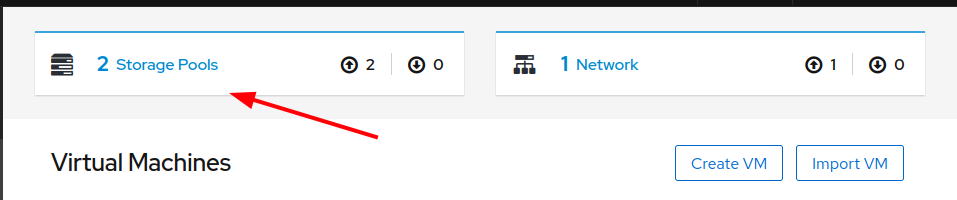
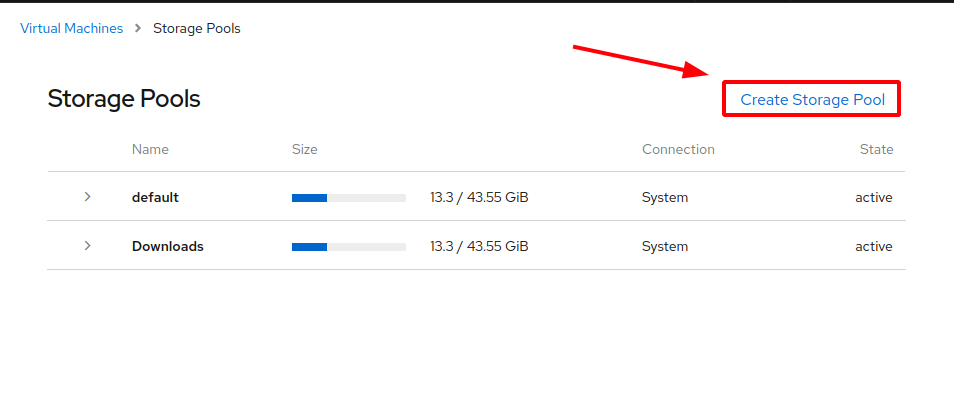
By default, there are two storage pools listed when you create a VM. To list them, click on the ‘Storage Pools’ tab.
The ‘default’ storage pool stores all virtual machine images in the /var/lib/libvirt/images directory.

Click on the ‘default’ storage pool, to reveal detailed information such as the Target path.

The other storage pool points to the location of the disk image that you used to create the VM. In my case, this is the ‘Downloads’ directory in my home directory.

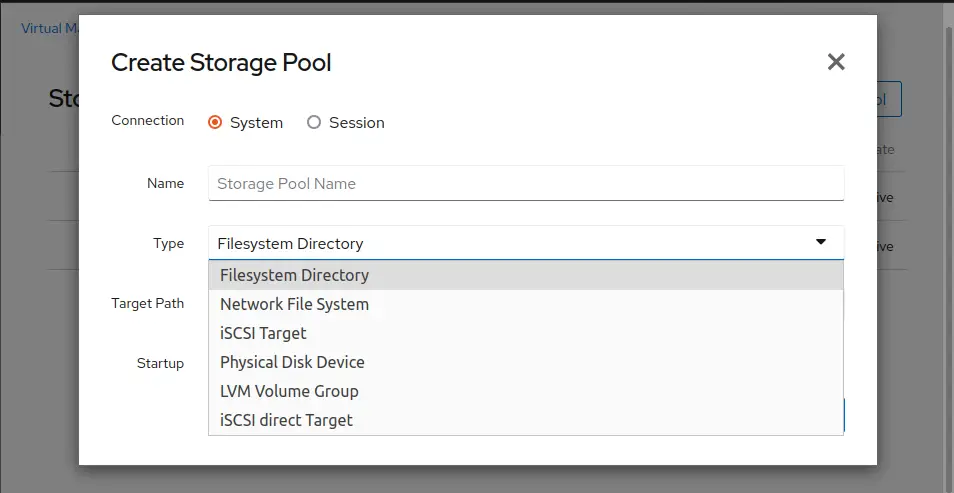
To create a new storage pool click on ‘Create Storage Pool’.
Next, fill in all the essential details. A storage pool can take various forms such as:
- Filesystem directory
- Network file system
- iSCSI target / iSCSI directory target
- Physical disk device
- LVM volume group
Configure KVM Networking
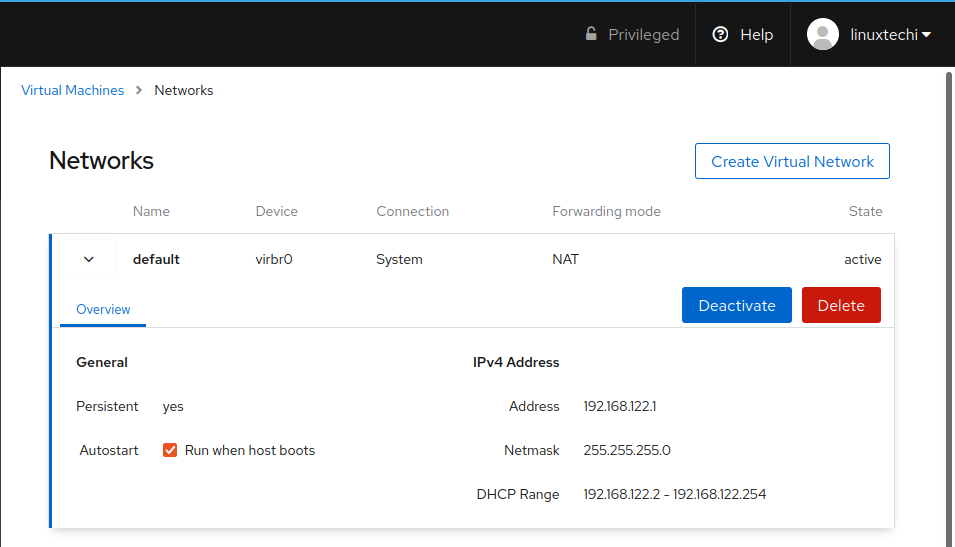
In addition, you can create virtual networks in KVM. Simply click on the ‘Network’ option.

This will list all the available virtual networks. By default, KVM creates a default virtual network called virbr0 which lets virtual machines communicate with each other.
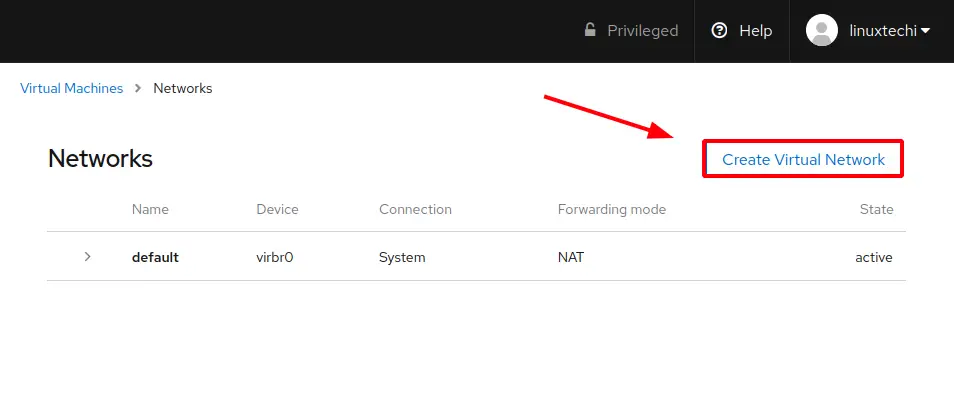
The default Virtual network provides it’s own subnet, and DHCP IP range as shown. You can add as many virtual network as per your preference. Other options in network management include deactivating and deleting a network.
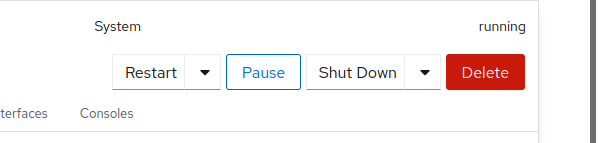
Restart / Pause / Shutdown a virtual machine
Lastly, you can control the running state of your virtual machines. You can restart, Pause, Shutdown and even delete your virtual machine.
Under the ‘Restart’ option, you get 2 other sub-options:
- Restart
- Force Restart
The ‘Restart’ option performs the usual restart of the VM while the ‘Force Restart’ immediately restarts the VM.

Under the ‘Shutdown’ option, you get 3 sub-options:
- Shut Down
- Force Shut Down
- Send Non-Maskable interrupt
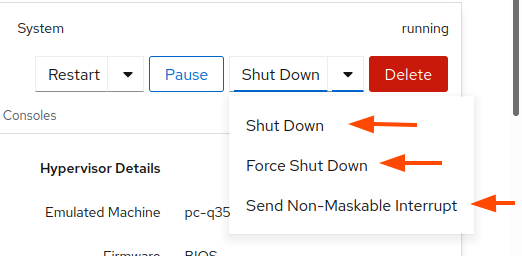
The ‘Shut Down’ option performs a graceful shutdown while the ‘Force Shut Down’ option instantly powers off the virtual machine without giving it time to gracefully shutdown.
A Non-Maskable Interrupt ( NMI ) is a signal sent to a vm which it cannot ignore. It comes in handy when the VM is not responsive to a Shutdown, or restart signal. The NMI causes the VM’s kernel to panic and generate a memory dump which is then used for debugging.
Closing Thoughts:
As you have seen, creating and managing virtual machines using cockpit is a walk in the part. You simply rely on the graphical interface to perform all operations, and not once will you be required to run any commands on the console. Cockpit provides you with the relevant tools and features to easily manage various aspects of your virtual machine.
We hope that this guide was beneficial as you get started in managing virtual machines using Cockpit.
The post How to Manage KVM Virtual Machines with Cockpit Web Console first appeared on LinuxTechi.