
How to Repair Corrupted XFS Filesystem with xfs_repair
Originally created by Silicon Graphics, the XFS file system is a robust and high-performance journaling filesystem that was first included in the Linux kernel in 2001. Since then, the popularity of the filesystem has grown exponentially, and by 2014, the XFS filesystem found its way into major Linux distributions. As a matter of fact, XFS is the default filesystem in Red Hat- based distributions such as RHEL, CentOS, and Rocky Linux. The filesystem works incredibly well with huge files and is popularly known for its speed and robustness.
As robust as the XFS filesystem is, it is not immune to suffering filesystem corruption. Common causes of filesystem errors or corruption include un-procedural or ungraceful shutdowns, NFS write errors, sudden power outages and hardware failure such as bad blocks on the drive. Corruption of the filesystem can cause grave problems such as corruption of regular files and can even render your system unable to boot when boot files are affected.
A few tools are useful in checking filesystem errors. One of them is the fsck command (Filesystem Check). The fsck system utility tool verifies the overall health of a filesystem. It checks the filesystem for potential and existing errors and repairs them alongside generating a report. The fsck command comes pre-installled in most Linux distributions and no installation is required. Another useful system utility used for rectifying errors in a filesystem is the xfs_repair utility. The utility is highly scalable and is tailored to scan and repair huge filesystems with several inodes with the highest possible efficiency.
In this guide, we walk you through how to repair corrupted XFS filesystem using the xfs_repair utility.
Step 1) Simulate File corruption
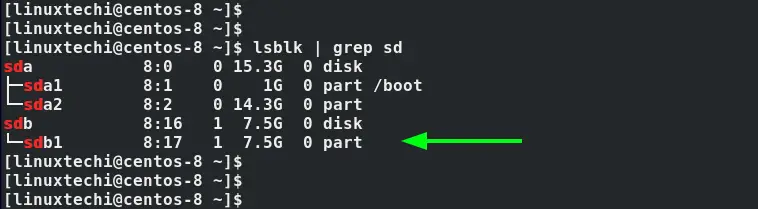
To make the most of this tutorial, we are going to simulate file system corruption of an XFS filesystem. Here we are going to use an 8GB external USB drive as our block volume. This is indicated as /dev/sdb1 as shown in the command below.
$ lsblk | grep sd
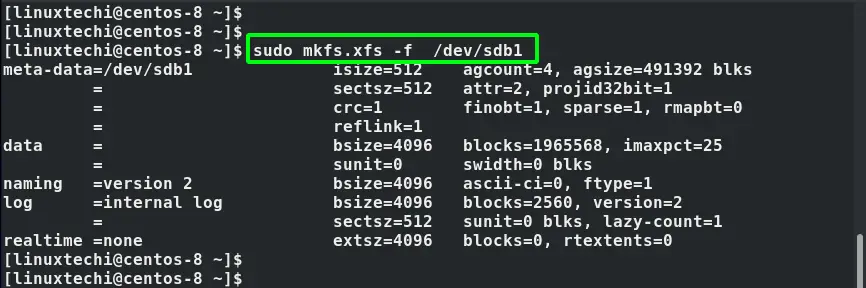
The first step is to format it to xfs filesystem using the mkfs command.
$ sudo mkfs.xfs -f /dev/sdb1
This displays the output shown
The next step is to create a mount point that we shall later use to mount the block volume.
$ sudo mkdir /mnt/data
Next, mount the partition using the mount command.
$ sudo mount /dev/sdb1 /mnt/data
You can verify if the partition was correctly mounted as shown.
$ sudo mount | grep /dev/sdb1
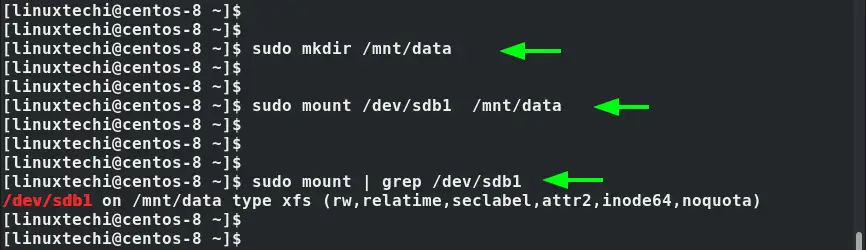
Our partition is now successfully mounted as an xfs partition. Next, we are going to simulate filesystem corruption by trashing random filesystem metadata blocks using the xfs_db command.
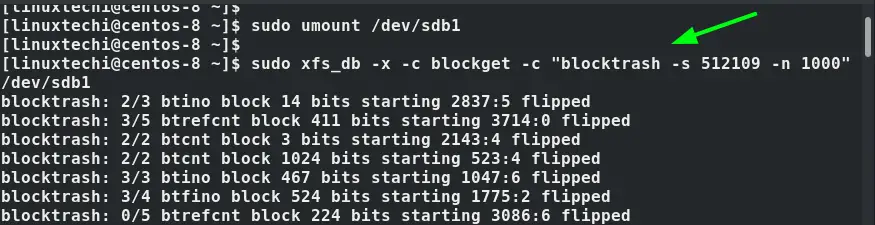
But before that, we need to unmount the partition.
$ sudo umount /dev/sdb1
Next, corrupt the filesystem by running the command below to trash random filesystem metadata blocks.
$ sudo xfs_db -x -c blockget -c "blocktrash -s 512109 -n 1000" /dev/sdb1
Step 2) Repair the XFS filesystem using xfs_repair
To repair the file system using the command, use the syntax:
$ sudo xfs_repair /dev/device
But before we embark on repairing the filesystem, we can perform a dry run using the -n flag as shown. A dry run provides a peek into the actions that will be performed by the command when is it executed.
$ sudo xfs_repair -n /dev/device
For our case, this translates to:
$ sudo xfs_repair -n /dev/sdb1
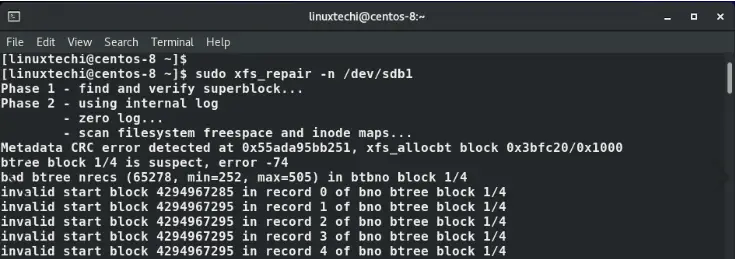
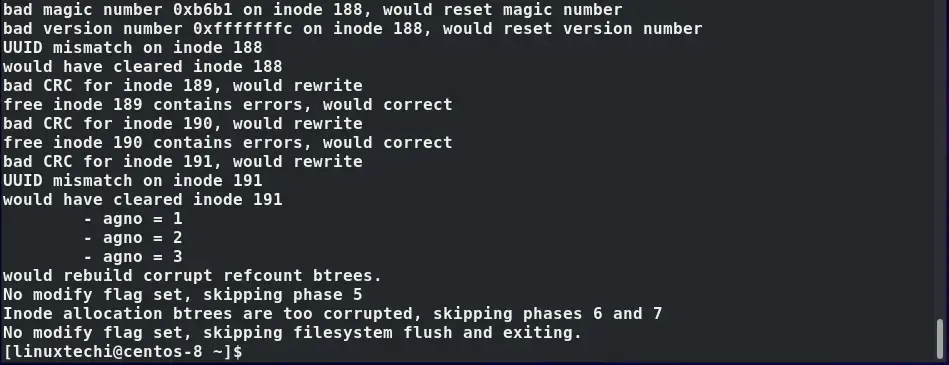
From the output, we can see some metadata errors and inode inconsistencies. The command terminates with a brief summary of the steps the actual command would have carried out. The corrective measures that would have been applied in steps 6 and 7 have been skipped.
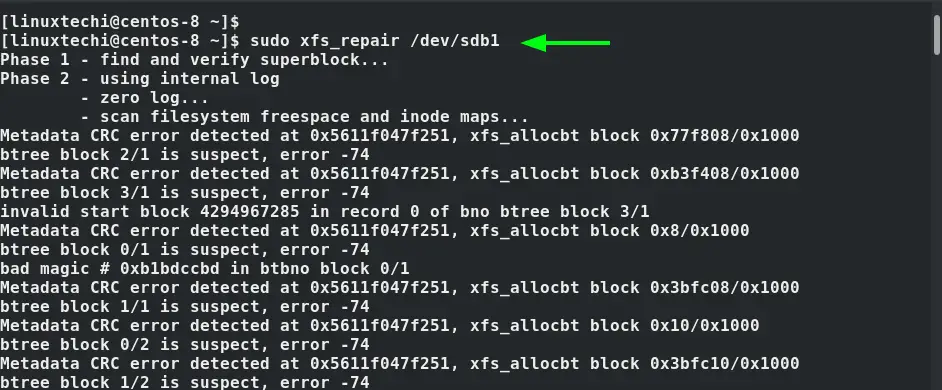
To perform the actual repair of the XFS filesystem, we will execute the xfs_repair command without the -n option
$ sudo xfs_repair /dev/sdb1
The command detects the errors and inconsistencies in the filesystem.
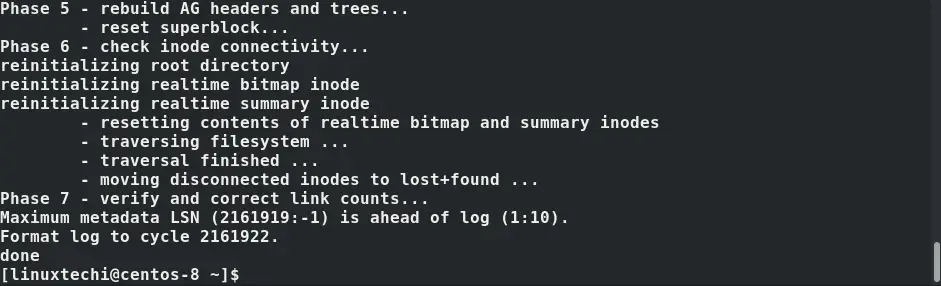
And performs remediation measures to the inodes and rectifies any other errors. The output provided shows that the command completes its tasks successfully.
For more xfs_repair options visit the man page.
$ man xfs_repair

Conclusion
That was a demonstration of how you can repair corrupted xfs filesystem using the xfs_repair command. We hope that you are now confident in fixing the corrupted xfs filesystem in Linux.
Read Also : How to Monitor Linux System with Glances Command
The post How to Repair Corrupted XFS Filesystem with xfs_repair first appeared on LinuxTechi.