How to Test Microphone on Ubuntu?

You have a microphone input connected to your Ubuntu system. But, before you hop on to that video call or conference call, you want to make sure that it works and detects input?
Well, that is a good way to ensure you are prepared. So, how do you test the microphone on Ubuntu? Can you listen to what you say, and evaluate if it sounds good enough? How do you know that it works and takes an input at the very least?
Fret not, there are a couple of ways with which you can test the microphone. Let me highlight the easiest ones here.
Check The Sound Settings for Input Activity
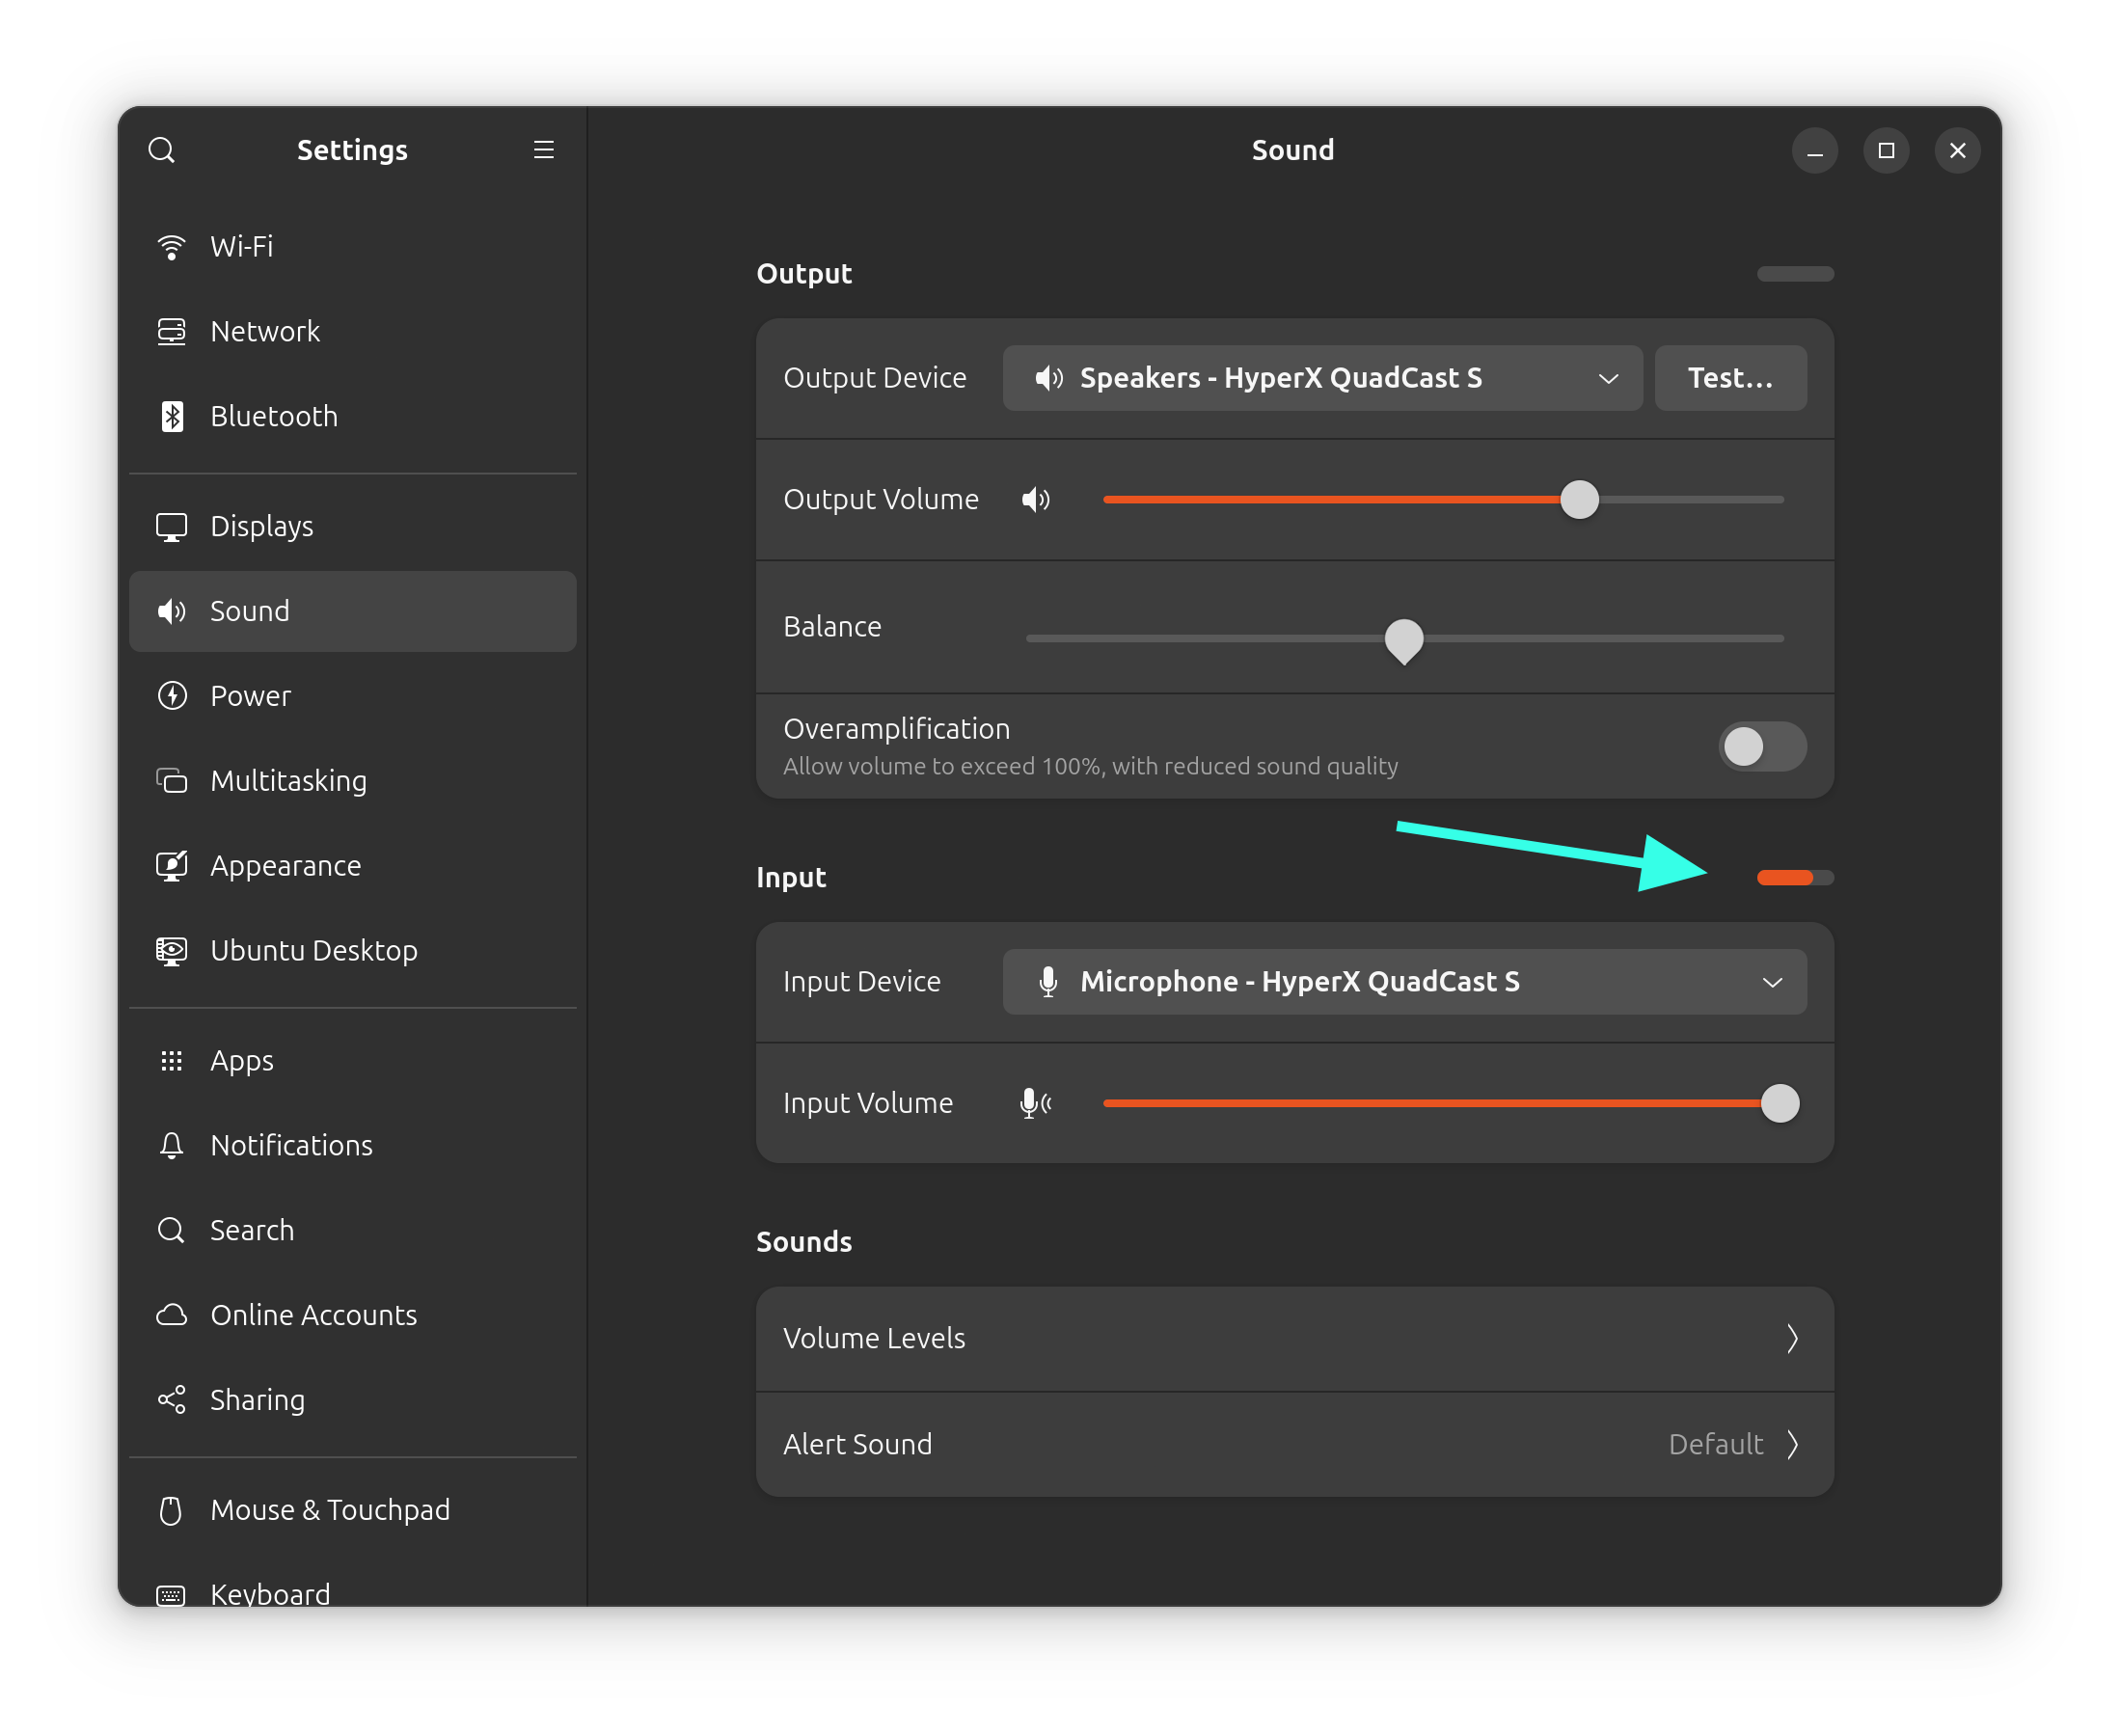
If you would rather not hear yourself, and all you want to know if the microphone takes an input (and is actively working), you can head to the “Sound” settings on Ubuntu.

Here, you should find an activity indicator (visually, it will look different on Ubuntu 22.04 LTS and Ubuntu 24.04 LTS). But, it does the same job.
Just speak in to your mic, if you see correct levels of activity, you are good to go. And, in case you do not see the correct input device highlighted, click on the dropdown menu in the input section to select the right one.
Sometimes, just re-connecting the mic makes it show up here. So, you can do that as well.
If you want something more meaningful, where you get to hear yourself, you can try installing a tool, like Audacity.
Testing Microphone Using Audacity
Audacity is a free and open-source audio editor (with a few DAW-like features), you can get it installed from the software center (or app center).

Once you have it installed, follow the steps below:
- Launch the Audacity app.
- Click on the “Red” button to start recording.
- Once you record something (and you see some waves in the visual), stop it, and play it back to hear it. This is how it should look when you have a recording:
0:00
Testing Microphone Using the Command Line
If you would rather not install any application, and want to use the terminal, you can easily do that as well.

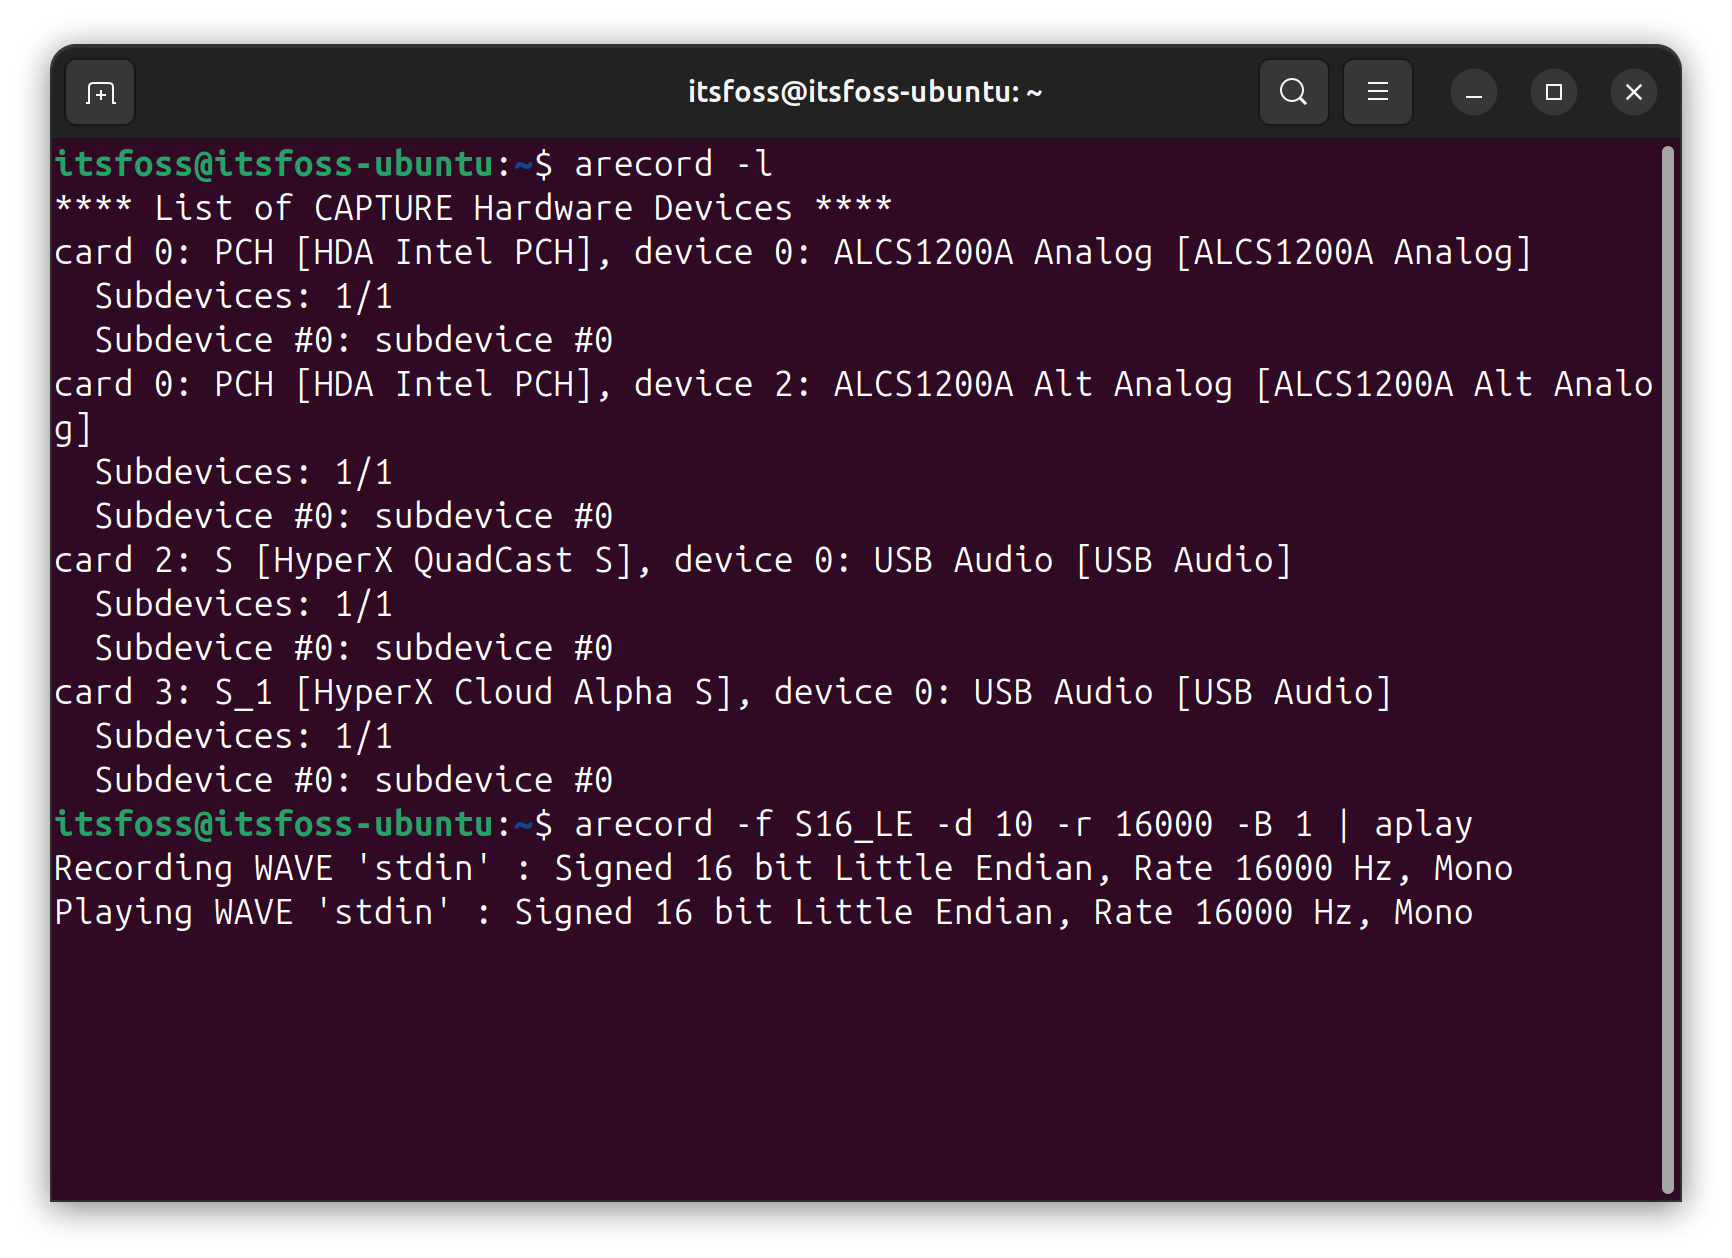
First, check if your device is listed among the capture hardware devices with this command:
arecord -lIf it is visible (mine says “HyperX QuadCast S”), you can initiate a sound check with the following command:
arecord -f S16_LE -d 10 -r 16000 -B 1 | aplayThis will take input from your microphone, and play it to you back in real-time. No recording involved. You should be able to hear yourself after you enter the above command. Once done, you can hit CTRL + C and exit the command.
Troubleshooting Tips
If your system does not detect your mic, or you get no input data to the mic listed, you will have to be a bit patient to troubleshoot things.
The most common trick that I mentioned above is to just re-plug the device. If you have already tried that with no luck, here are a few pointers:
- For Ubuntu 22.04 LTS or older, you will have PulseAudio as the server. I recommend installing
pavucontrolfrom the repositories, and try changing the input/output configuration. - Sometimes it is an app-specific issue. Check your app configuration (under preferences/audio settings) to find a potential fix.
- You should make sure that the mic works, if it is brand new (or ancient), it would be a good idea to test if it works on a spare system on a different platform. So, you don’t waste countless hours fixing what’s already broken.
- Update your system if you haven’t.
- If you think you have tried everything, you can head to forums like Ask Ubuntu, Ubuntu Forums, or It’s FOSS community to ask/look for solutions to your problem.
💬 How do you prefer to test your mic on Linux? Do you prefer installing a tool to help or use the terminal? Let me know in the comments down below!
