
Installing Proxmox on a Raspberry Pi to run Virtual Machines on it

The other day, a friend and I were talking about virtualization, spinning up virtual machines (VMs), containerization, and all that fun tech stuff.
He casually said, “You know, even a Raspberry Pi can run a VM these days.” I laughed, thinking he was joking.
A Raspberry Pi? Running a virtual machine? Come on. But he wasn’t kidding.
Later that week, I stumbled across a discussion about Proxmox and how it supports ARM-based devices like the Raspberry Pi (not officially 😉).
I’m a naturally curious person, and once I read that Proxmox now can be installed on an ARM device, I couldn’t resist. I grabbed my Raspberry Pi 5, rolled up my sleeves, and decided to give it a shot.
If you’ve never heard of Proxmox, let me introduce you.
What is Proxmox, again?
In case you didn’t know, Proxmox Virtual Environment (VE) is a powerful, open-source platform designed for virtualization. It allows you to manage virtual machines and containers through an intuitive web interface.
Think of it as the command center for running multiple operating systems on a single device, with added features like software-defined storage, network configuration, and clustering.
However, before you get too excited, let’s be real: the Pi is a capable little workhorse, but it’s no match for high-performance processors or dedicated server hardware.
It has its limits, and while it’s fun to tinker with, expecting it to handle heavy virtual machine workloads is asking too much. That said, for lightweight tasks and experimentation, it’s more than up for the challenge!
Now, let me take you through the steps I followed to get Proxmox up and running on my Raspberry Pi.
What you’ll need to install Proxmox on Raspberry Pi
Here’s your checklist:
- Raspberry Pi 4 or 5 (8GB RAM recommended)
- MicroSD card (class 10 or better for faster read/write speeds)
- 64-bit Raspberry Pi OS Lite (Bookworm)
- Power supply and Ethernet cable (or Wi-Fi, but wired is preferred)
Step 1: Start with a clean slate
First things first, make sure you’re using a fresh installation of Raspberry Pi OS Lite (64-bit, Bookworm).
During my testing, I found that using an older or cluttered setup led to unexpected errors, especially when dealing with package dependencies. A clean OS makes everything smoother.
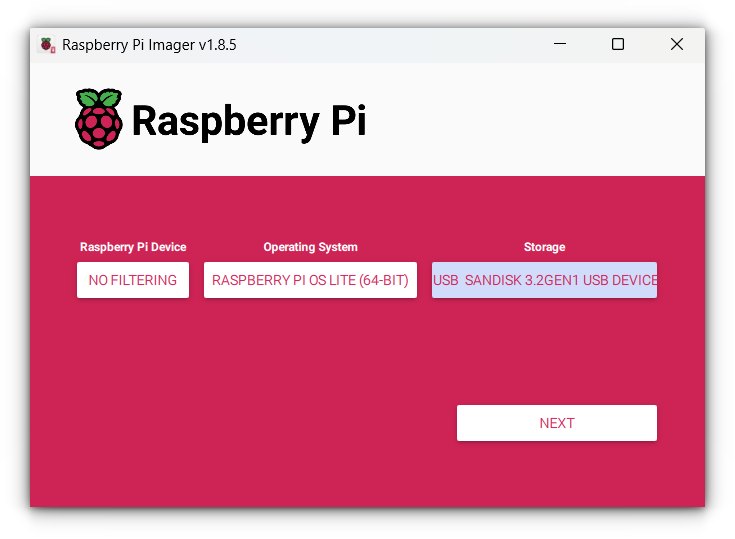
If you haven’t done so already, download the Bookworm image from the Raspberry Pi website and flash it onto your SD card using a tool like Raspberry Pi Imager.
Step 2: Update and upgrade your Pi
Once your Raspberry Pi is booted and connected, log in via SSH or directly on the terminal. Run these commands to update your system:
sudo apt update && sudo apt upgrade -yThis step ensures your Pi is up to date with the latest security patches and fixes.
We’ll use curl to grab the GPG key for the Proxmox repository later, so let’s ensure it’s installed.
If it’s missing, you can install it with this command:
sudo apt install curlStep 3: Set a static IP address
Now, here’s a crucial part. Proxmox expects a stable network connection, and having a dynamic IP (which can change after a reboot) will break the setup.
Trust me, I learned this the hard way when my web interface refused to load after a restart.
The easiest way is to set up a DHCP reservation in your router.
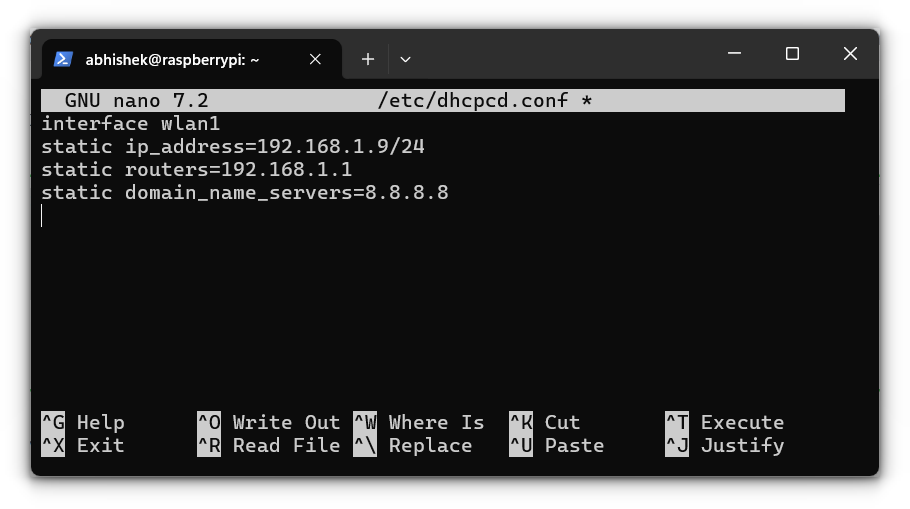
But if you don’t have access to your router, you can configure the static IP directly on your Pi. Edit the dhcpcd.conf file:
sudo nano /etc/dhcpcd.conf
Add the following lines at the end (replace the placeholders with your details):
interface [INTERFACE]
static ip_address=[STATIC IP ADDRESS YOU WANT]/24
static routers=[ROUTER IP]
static domain_name_servers=[DNS IP]
Save and reboot with:
sudo reboot nowAfter the reboot, verify your static IP with:
hostname -I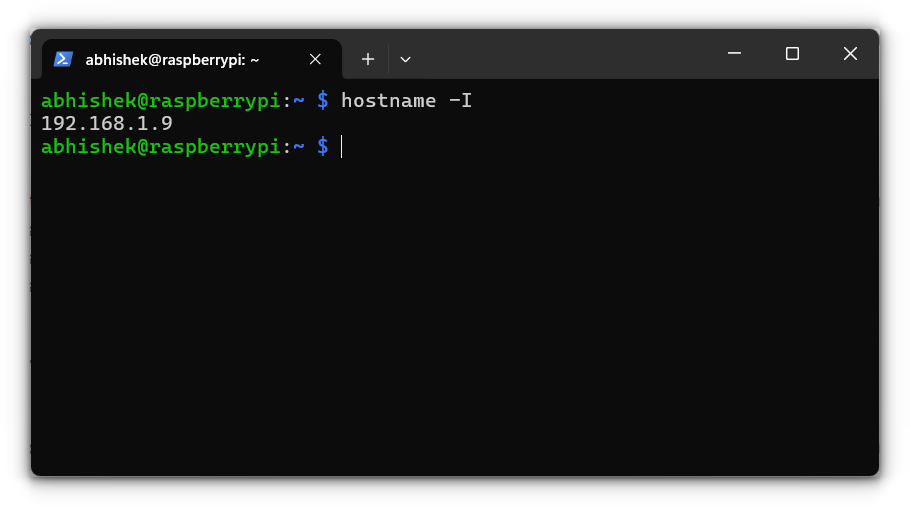
Step 4: Modifying the hosts file
With your static IP set, we need to make Proxmox aware of it by updating the hosts file. This ensures your Pi’s hostname maps correctly to its IP address.
Open the hosts file for editing:
sudo nano /etc/hosts
You’ll see a line like this:
127.0.1.1 raspberrypiReplace 127.0.1.1 with your Pi’s static IP. For example:
192.168.1.9 raspberrypi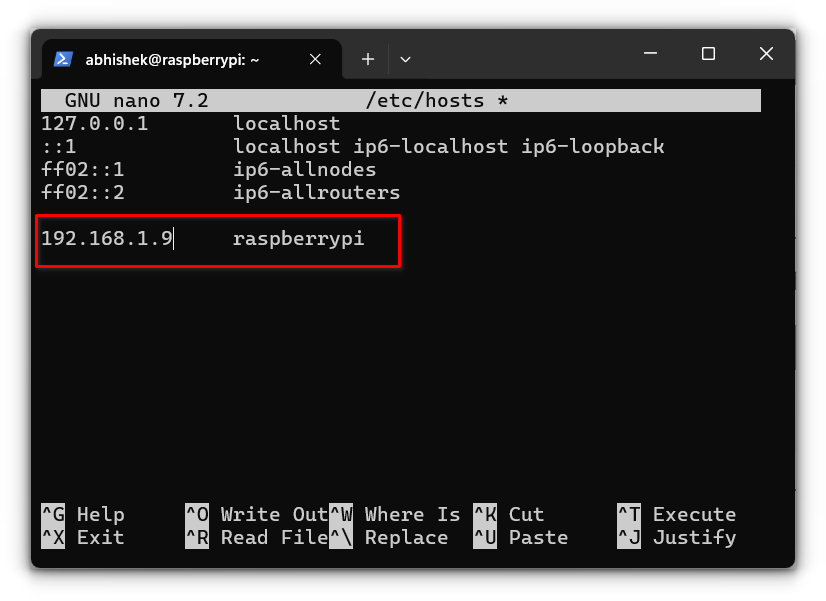
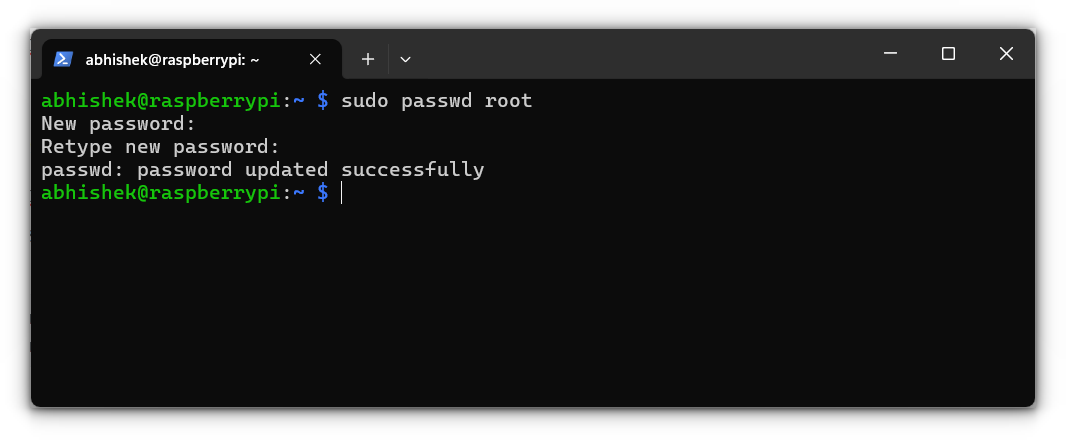
Step 5: Setting up the root user
Proxmox requires the root user for its web interface. By default, Raspberry Pi OS doesn’t have a password set for the root user, so let’s create one:
sudo passwd root
Enter a strong password when prompted. You’ll need this later to log in to Proxmox.
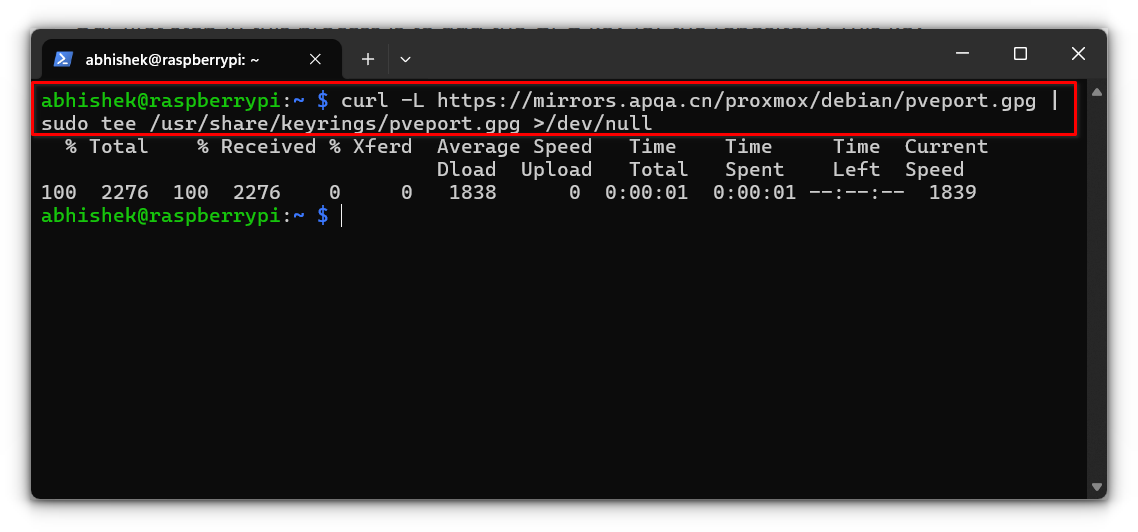
Step 6: Add the GPG key
Proxmox for ARM isn’t officially supported, but a third-party repository makes it possible. First, we need to add its GPG key to authenticate the packages:
curl -L https://mirrors.apqa.cn/proxmox/debian/pveport.gpg | sudo tee /usr/share/keyrings/pveport.gpg >/dev/null
This step ensures that the packages we’re about to install are legitimate.
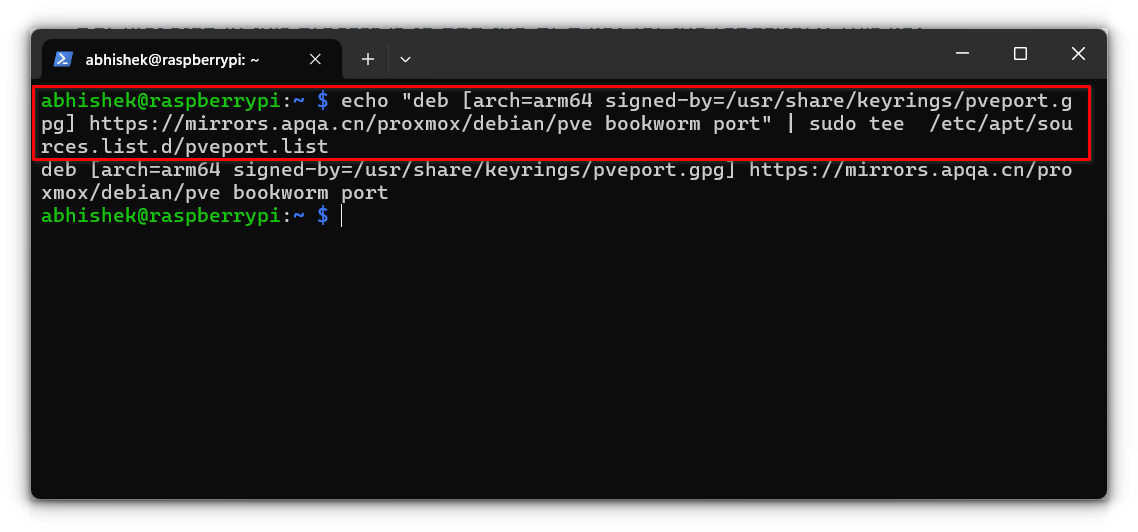
Step 7: Add the repository
Now, let’s add the Proxmox repository to the package manager’s sources list:
echo "deb [arch=arm64 signed-by=/usr/share/keyrings/pveport.gpg] https://mirrors.apqa.cn/proxmox/debian/pve bookworm port" | sudo tee /etc/apt/sources.list.d/pveport.list
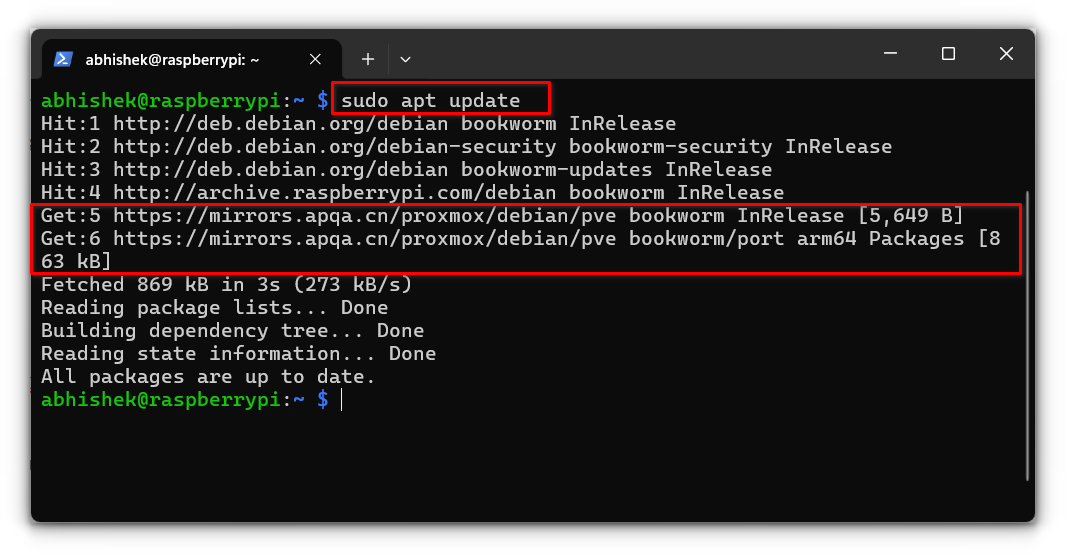
Step 8: Update the package list
Whenever you add a new repository, you need to refresh the package list so your system knows about the new software:
sudo apt update
Step 9: Install Proxmox
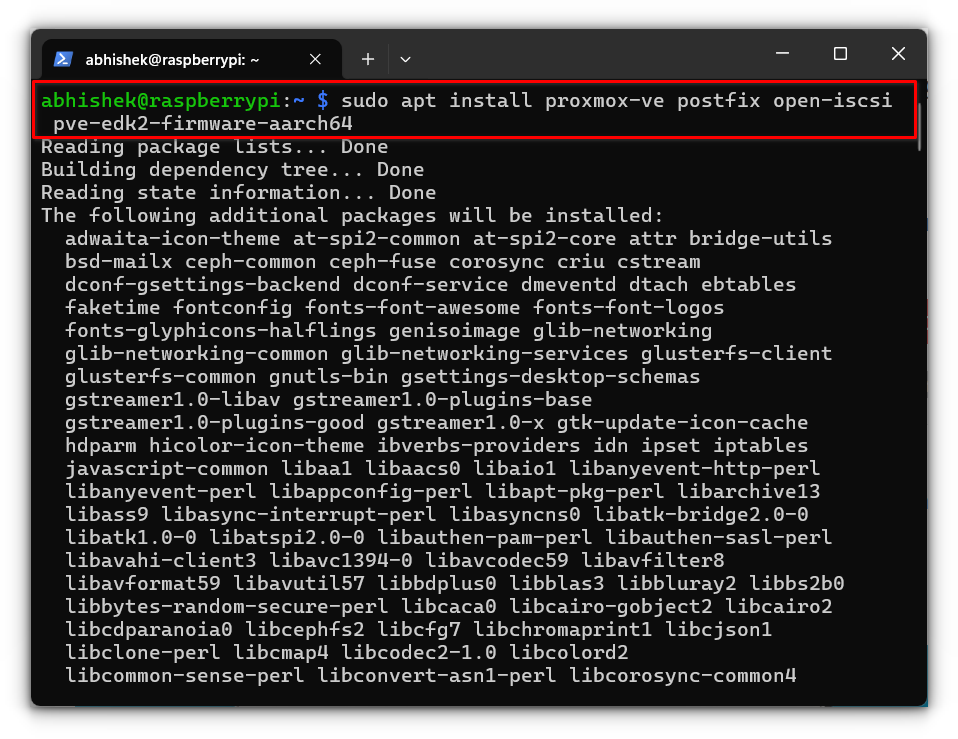
Finally, install Proxmox and its required packages:
sudo apt install proxmox-ve postfix open-iscsi ifupdown2 pve-edk2-firmware-aarch64
proxmox-ve: This is the main Proxmox Virtual Environment package that sets up the Proxmox server, including the tools and user interface for managing virtual machines and containers.postfix: A mail server used by Proxmox to send email notifications, such as alerts or updates about your virtual environment. You can configure it as “Local only” if you’re unsure or don’t need external email functionality.open-iscsi: Provides iSCSI (Internet Small Computer Systems Interface) support, enabling Proxmox to connect to and manage remote storage over a network.ifupdown2: A network management tool that Proxmox relies on for configuring and managing network interfaces, especially for virtual machine bridge setups.pve-edk2-firmware-aarch64: This is the ARM64 firmware package for Proxmox, enabling the virtualization of ARM-based systems, which is essential for running Proxmox on Raspberry Pi.
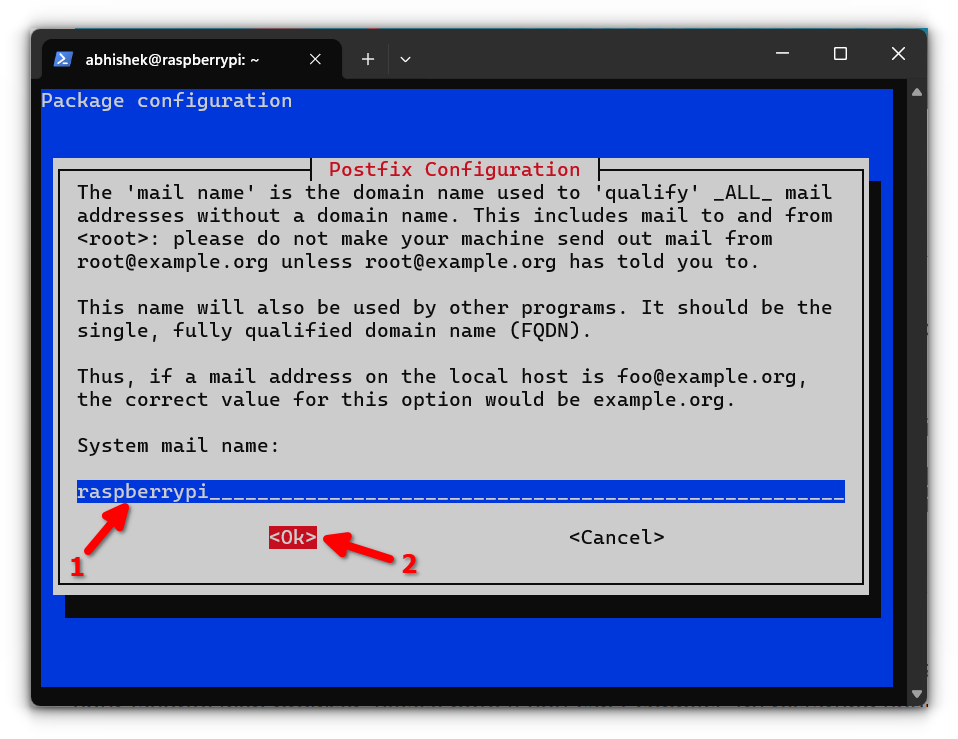
During installation, select “Local only” when configuring Postfix,
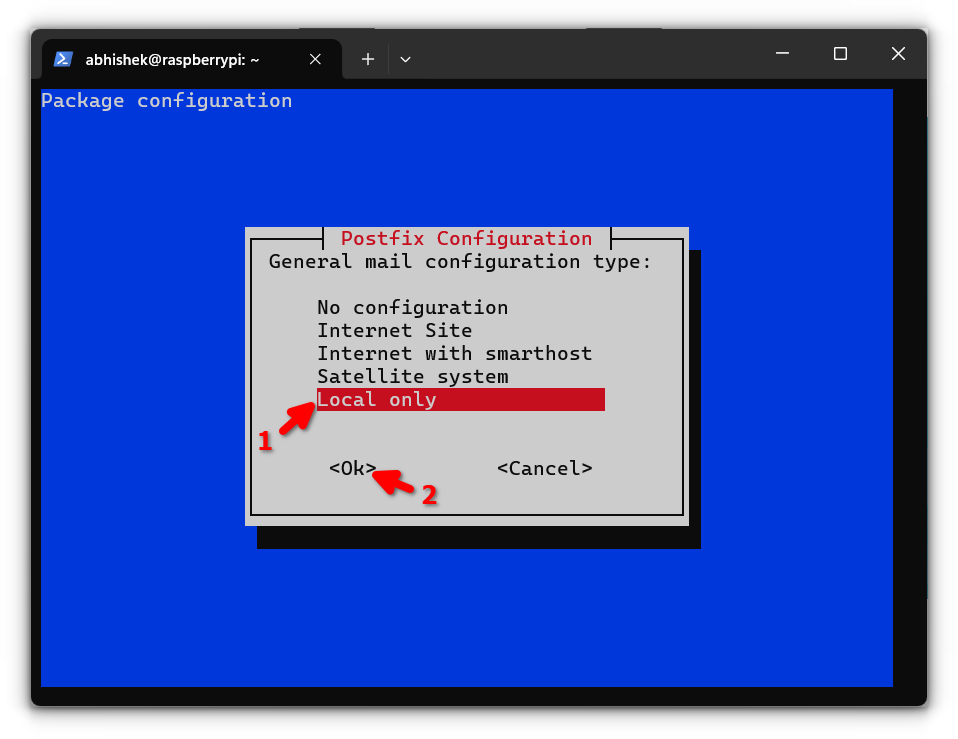
and use the default mail name if unsure.
Step 10: Accessing the proxmox web interface
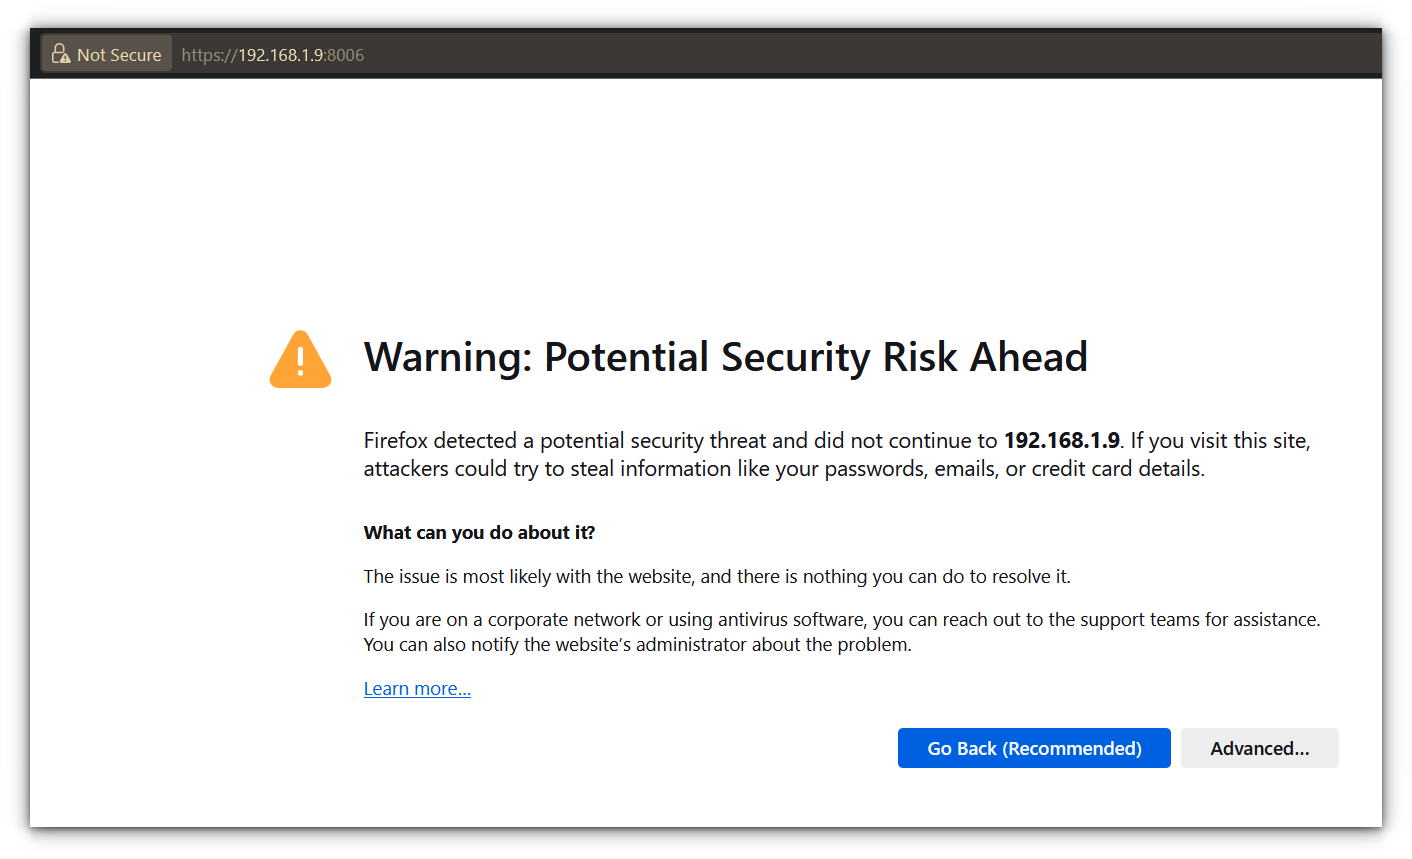
After installation, access the Proxmox web interface in your browser:
https://<IPADDRESS>:8006
Since Proxmox uses a self-signed SSL certificate, you’ll likely encounter a warning about the site’s security.
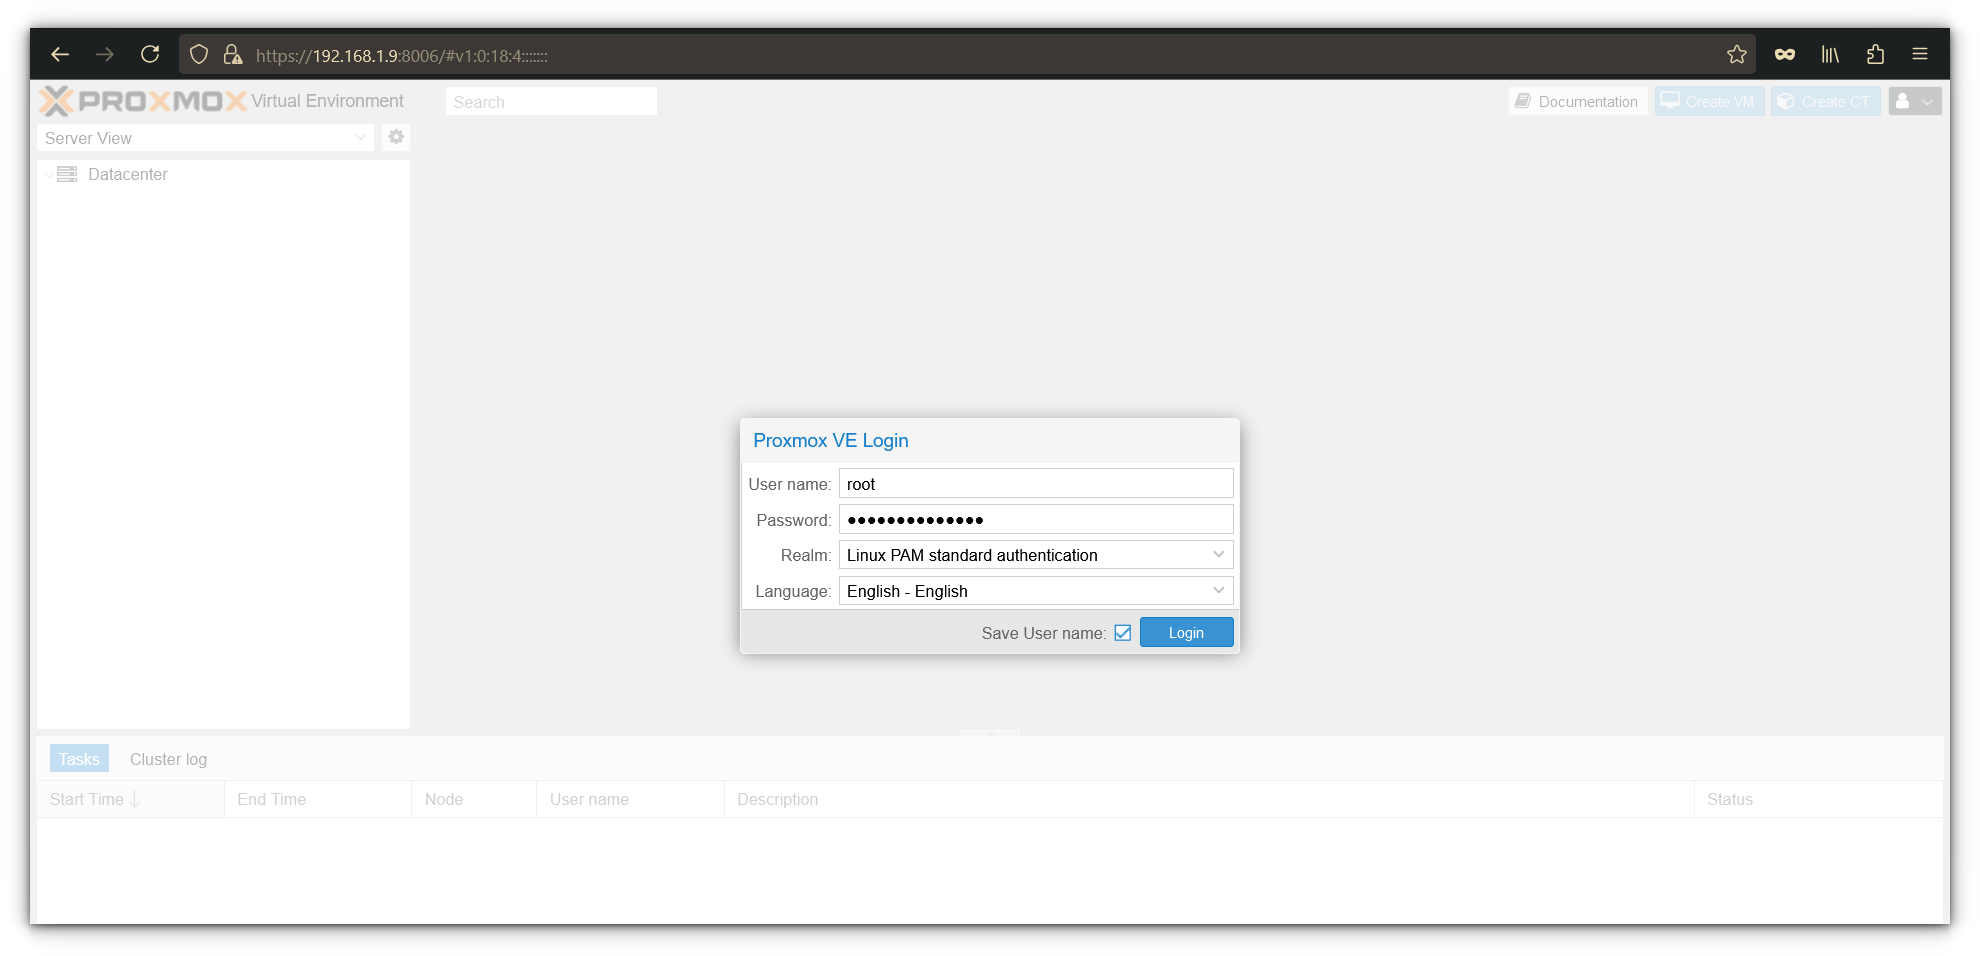
Don’t worry, this is expected. Simply proceed by clicking through the warning, and you’ll land on the Proxmox login page.
Log in using root as the username and the password you set earlier.
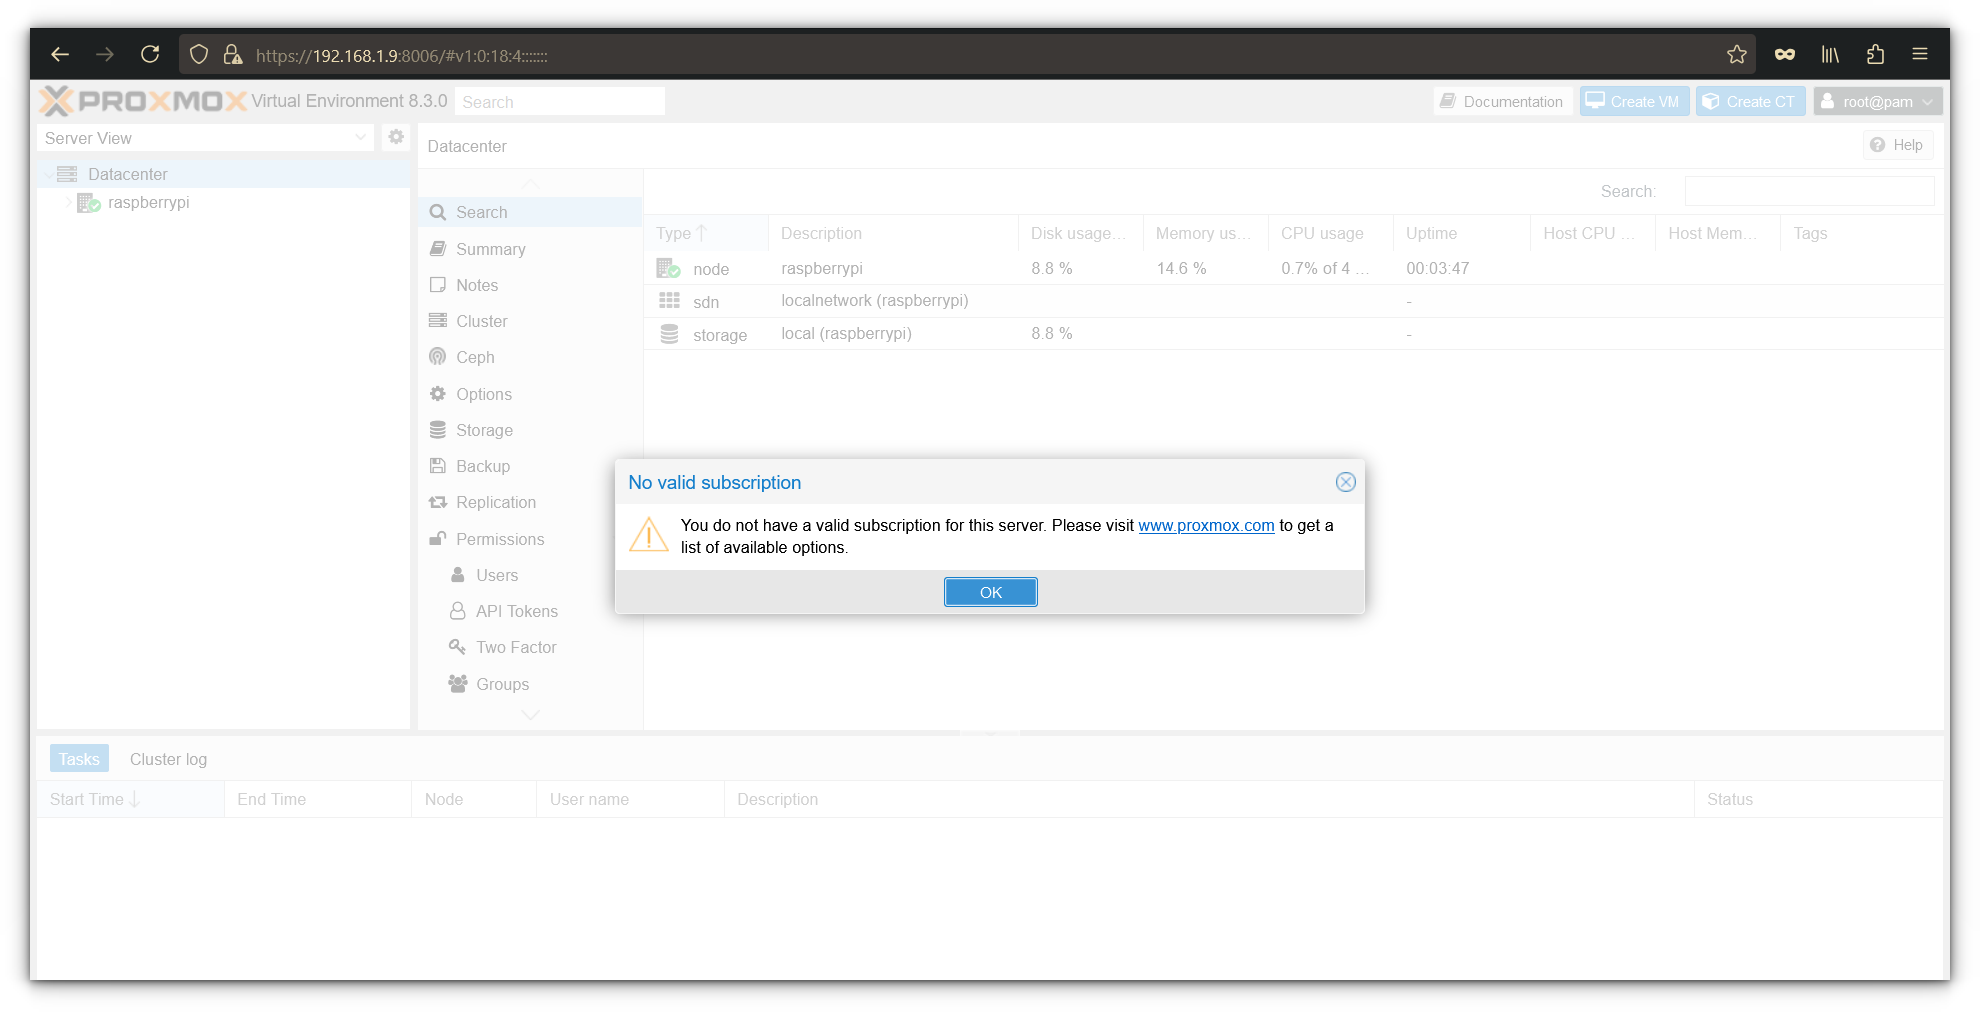
After logging in for the first time, Proxmox will greet you with a notification about an invalid subscription.
This is because the free version of Proxmox doesn’t come with a commercial subscription. Just click OK to dismiss the message.
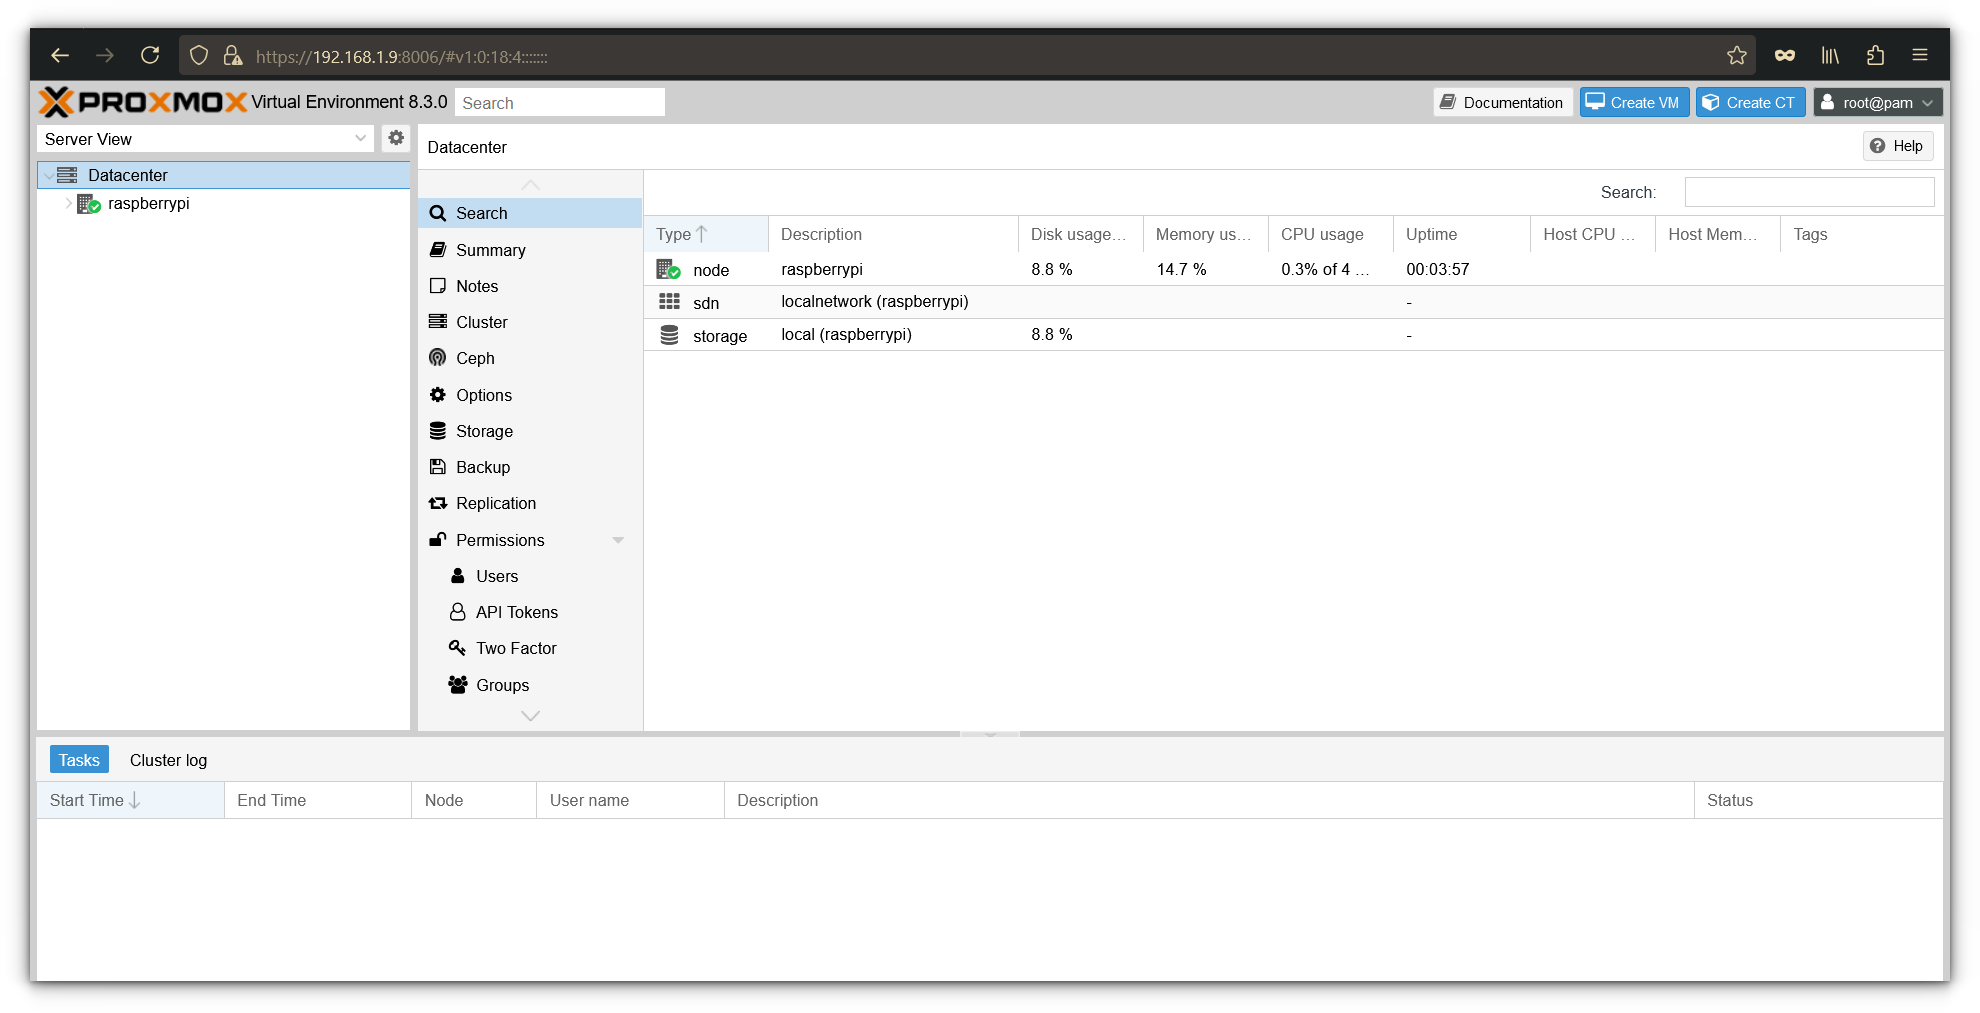
You’ve officially made it into Proxmox VE! The dashboard gives you an overview of your server’s health, including CPU usage, memory, and storage stats.
Now, you’re ready to create your first virtual machine (VM). To do this, click the Create VM button in the top-right corner of the interface.
The intuitive wizard will guide you through the process of spinning up a new virtual machine.
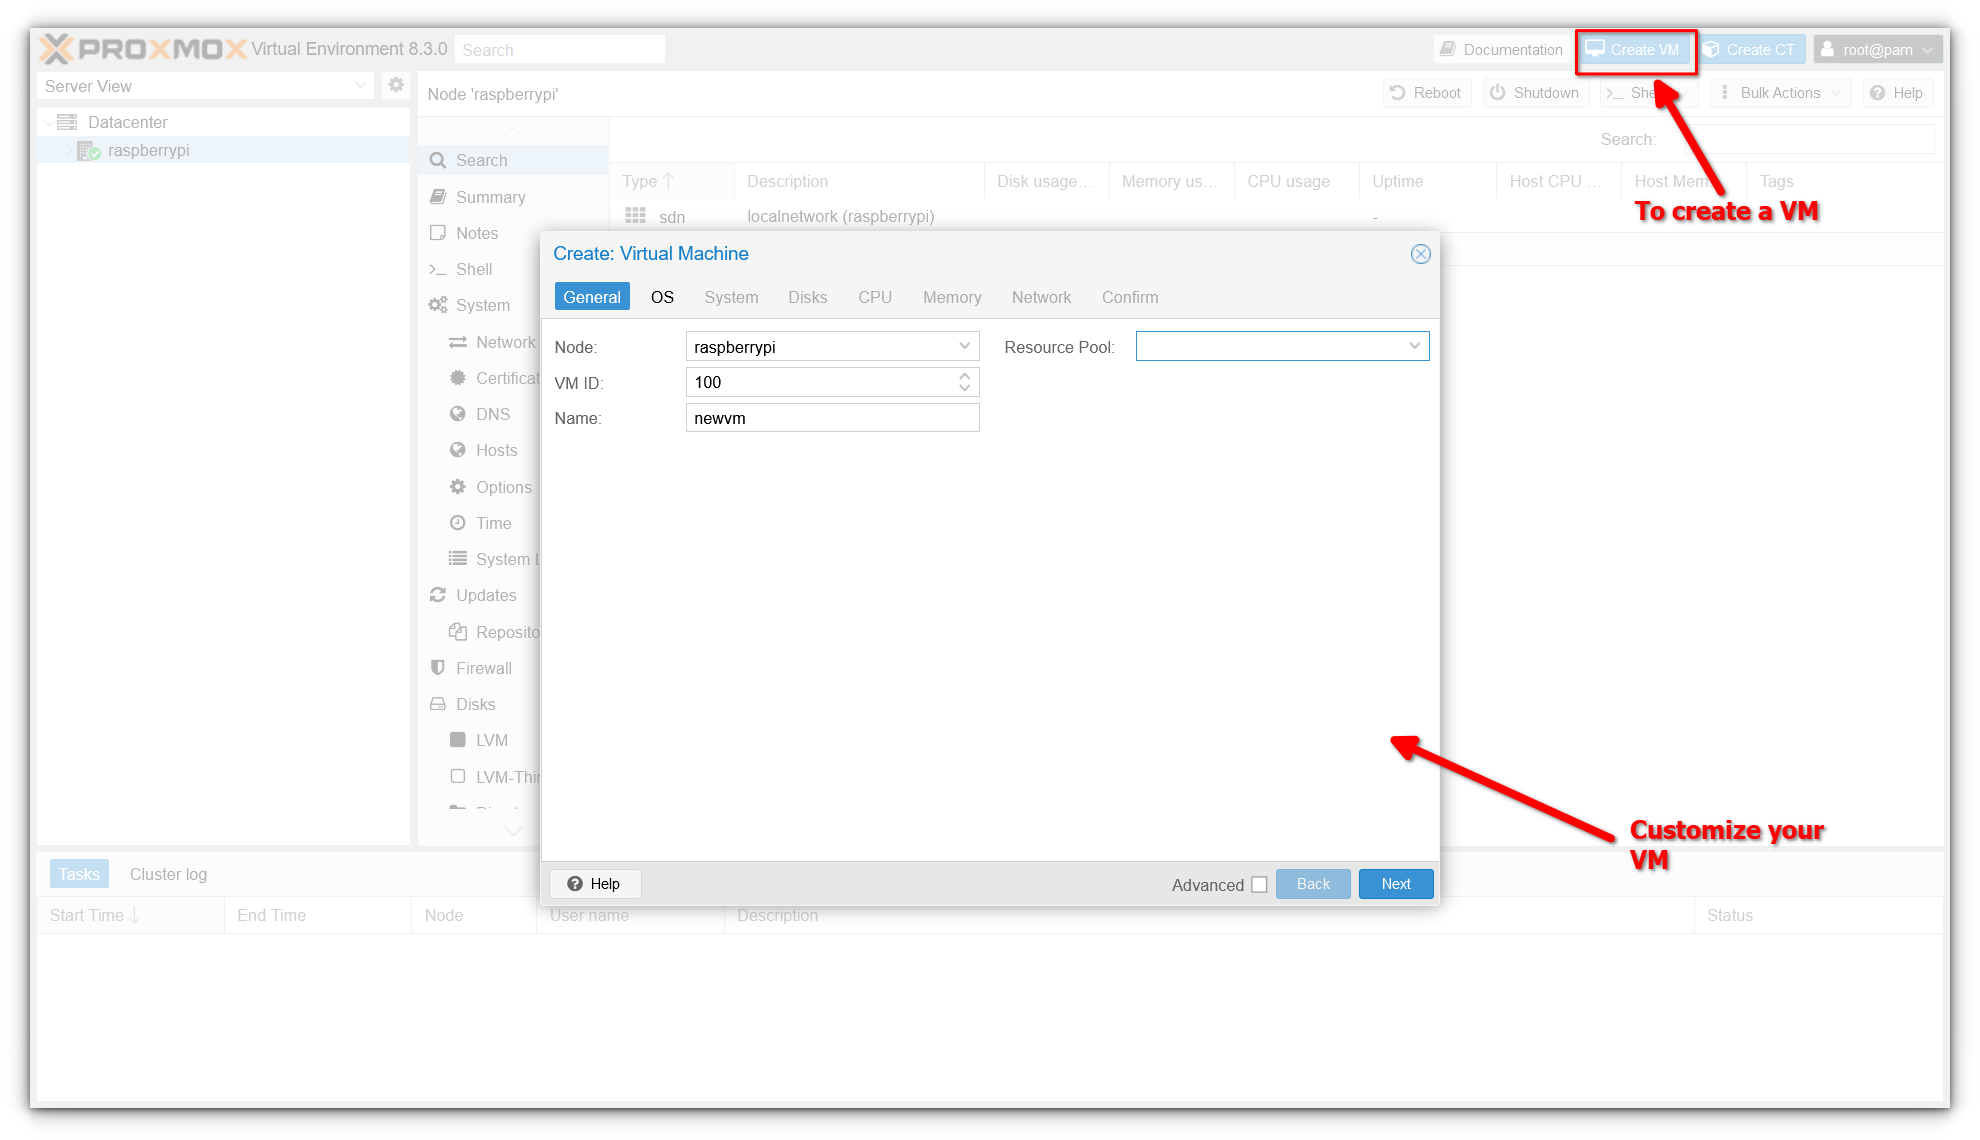
While setting up a VM is outside the scope of this article, we’d be happy to cover it in a follow-up. If you’d like a detailed guide on creating and managing VMs in Proxmox, let us know in the comments below!
Conclusion
And that’s it! Seeing Proxmox running on a Raspberry Pi is nothing short of amazing. It’s a testament to how far computing power has come, enabling a tiny device like the Pi to host and manage virtual environments.
That said, there’s still plenty more to explore. What else can this little powerhouse do with Proxmox installed? I’ll be diving deeper into its capabilities and perhaps share some along the way. Meanwhile, here’s a good place to start learning Proxmox.

If you have any doubts, questions, or find yourself stuck during the installation process, don’t hesitate to ask in the comments. I’d love to help you out!