Top 12 Things to Do After Installing Linux Mint 21 (Vanessa)
Linux Mint is one of the highly rated Linux distribution for desktops. Recently Linux Mint 21, code name Vanessa has been released. We have already covered an article which shows Linux mint 21 Installation steps.
In this article, we will learn what are the Top 12 things to do after installing Linux Mint 21.
1) Configure Backup with timeshift
The first important thing is to enable backup of your system using timeshift tool. From the system menu, search timeshift and start it.
Click on Wizard, setup it as per requirements. Basically, it has four steps
- Snapshot Type (choose Rsync)
- Snapshot Location (Disk like /dev/sda2 or /dev/sda3)
- Snapshot Levels (Daily, hourly, weekly & monthly)
- User Home directories (Select the folders to be backed up)
Now click on ‘Create’ to create first snapshot of your system,
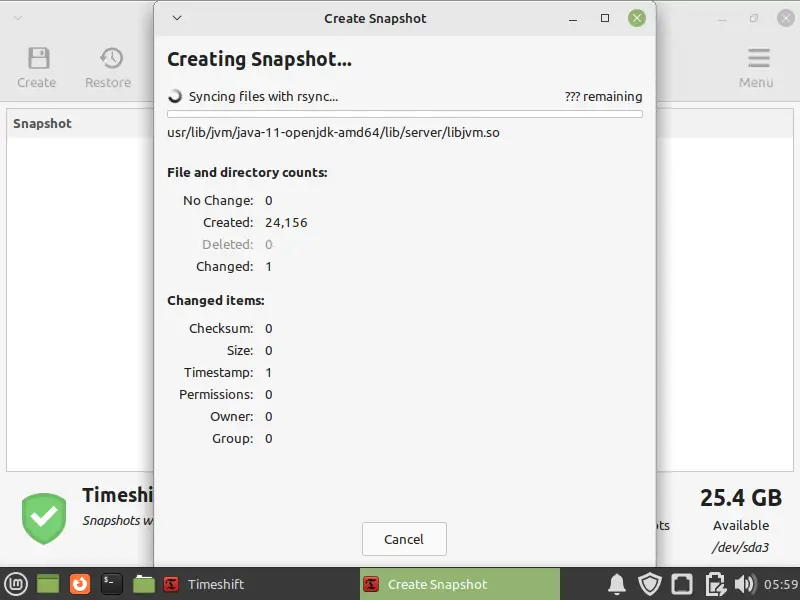
Once the snapshot is created, you can restore the system using that snapshot in case of misconfigurations or accidently lost data.
2) Disable Linux Mint Welcome Screen
After the installation of Linux Mint 21, whenever we login to desktop environment, we will get the following screen,
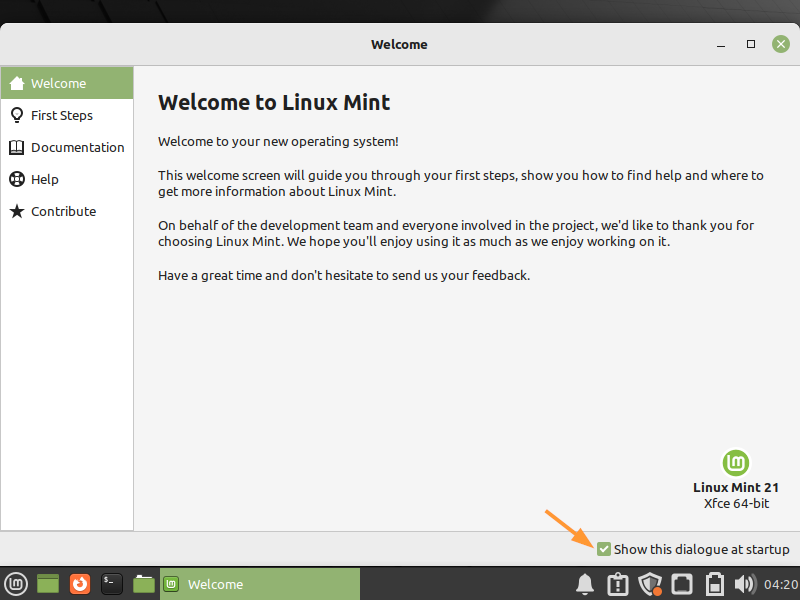
So, to disable it, uncheck the option ‘Show this dialogue at startup’
3) Install Security and System Updates
It is always recommended to install security and system updates after installing Linux Mint. So, to install updates, your system must have connected to internet.
Access the Update Manager from system menu and enable local mirror first.
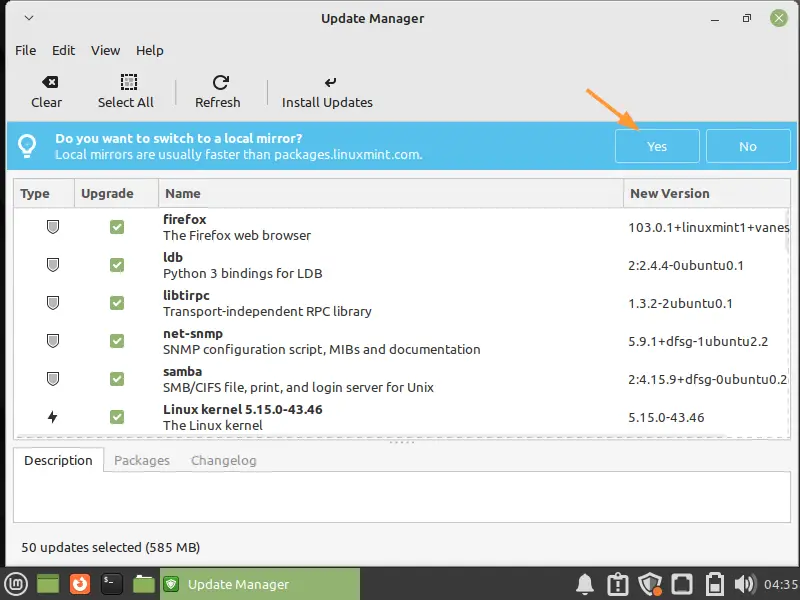
Click on Yes and then it will prompt you to enter your user’s password.
In the following screen, click on ‘Install updates’
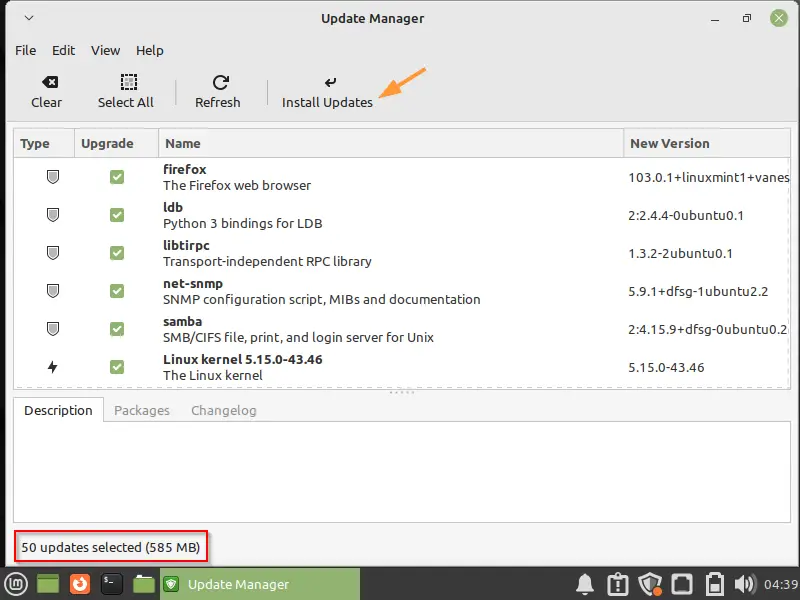
It will show us what additional packages will be installed as a part of upgrade,
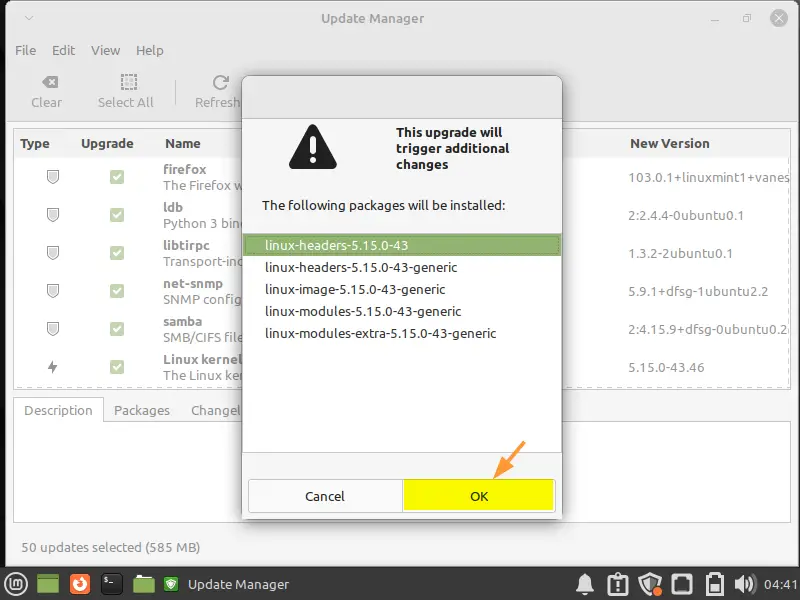
Click on OK, it will prompt you to enter your user password. After entering the password, it will start downloading packages.
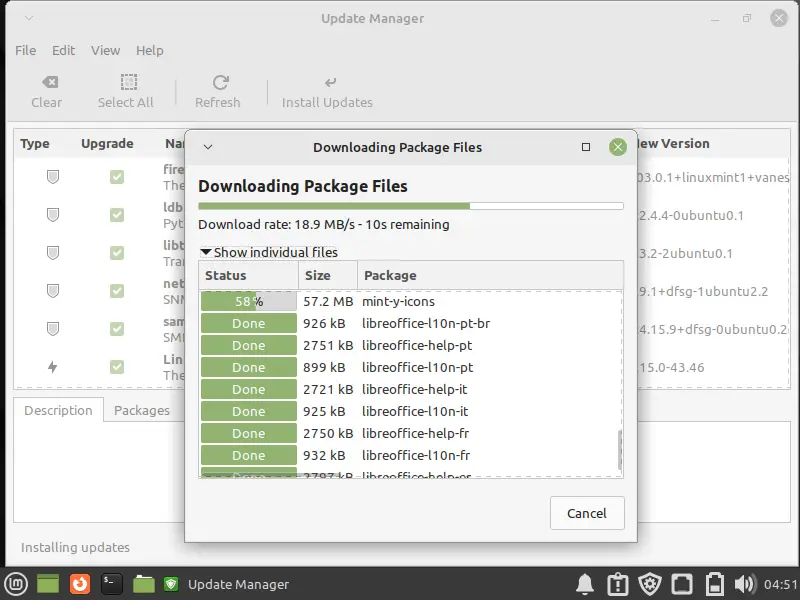
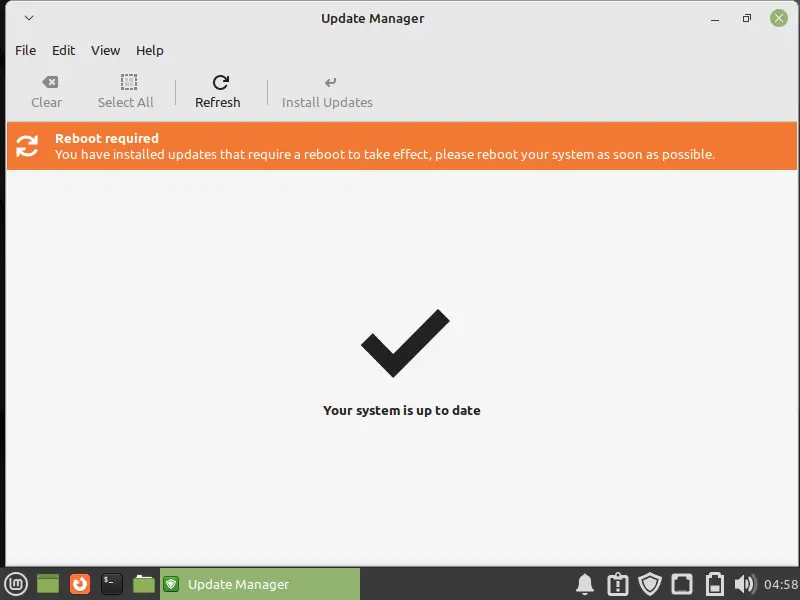
Once all the updates are installed, reboot your system.
4) Enable Firewall
To secure your system, it is highly recommended to enable system firewall. Search firewall from the system menu,
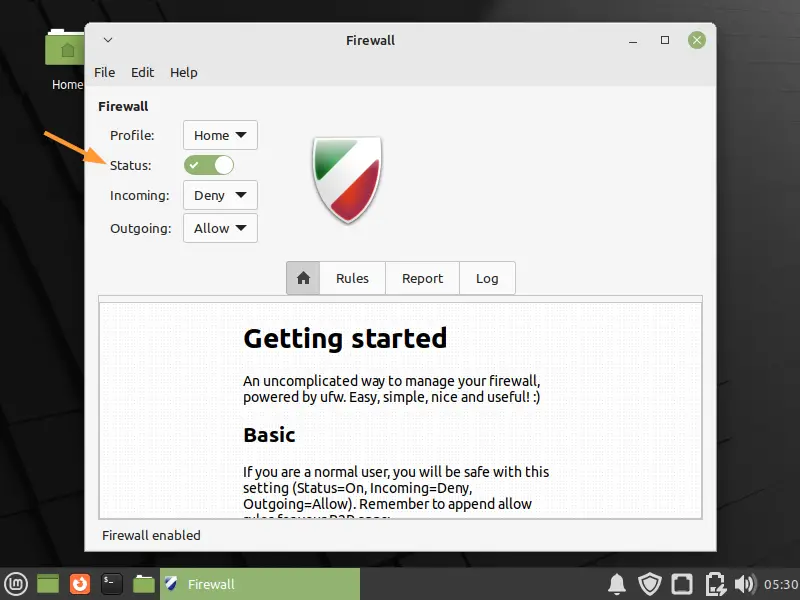
After enabling firewall, configure incoming and outgoing rules as per your requirement.
5) Enable Redshift
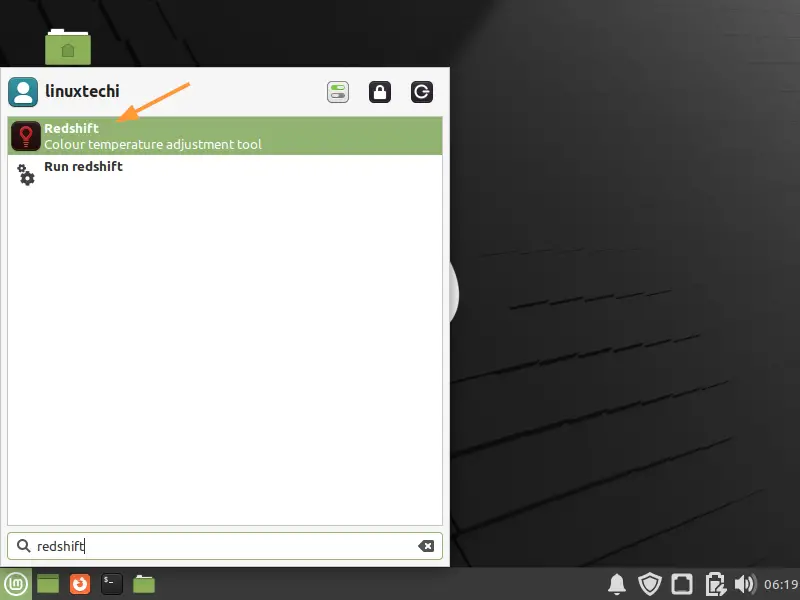
Redshift is a colour temperature adjustment tool and protects our eyes by decreasing the blue light of the screen. To enable Redshift, to go system menu, search redshift and click on its icon.
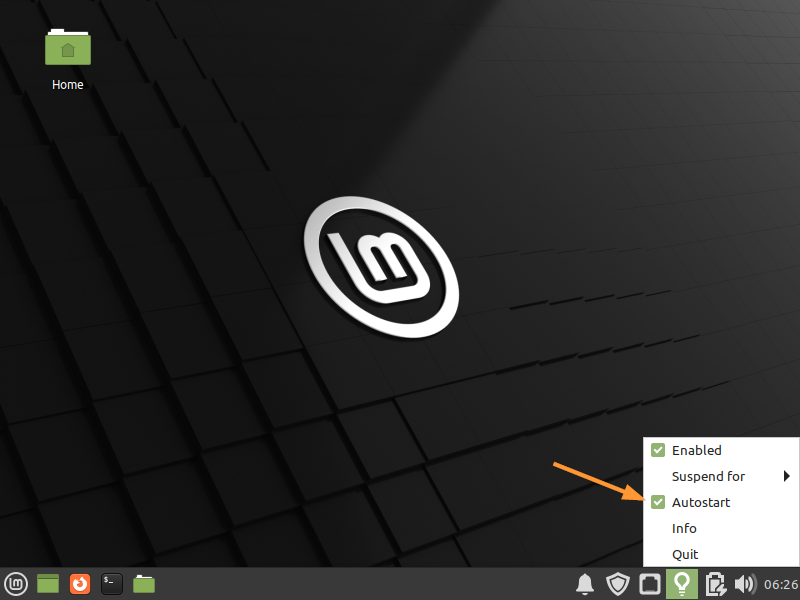
This will start Redshift and its icon will appear on system tray, right click in its icon from the system tray, enable AutoStart so that it starts automatically during the reboot.
6) Install Multimedia Codecs
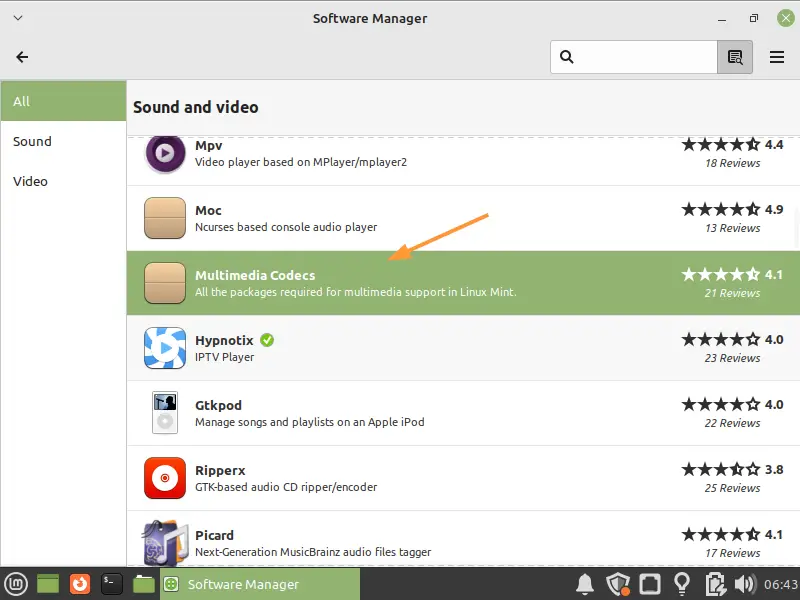
Multimedia codecs will allow to play different types of video formats on your desktop. To Install multimedia codecs,
System Menu –> Software Manager –> Click on Sound & Video Category –> Double click on Multimedia codecs –> Click on Install.
7) Install Popular Applications
Install the following popular applications,
- VLC
- Audacity
- Skype
- Shutter
- Gimp
- Spotify
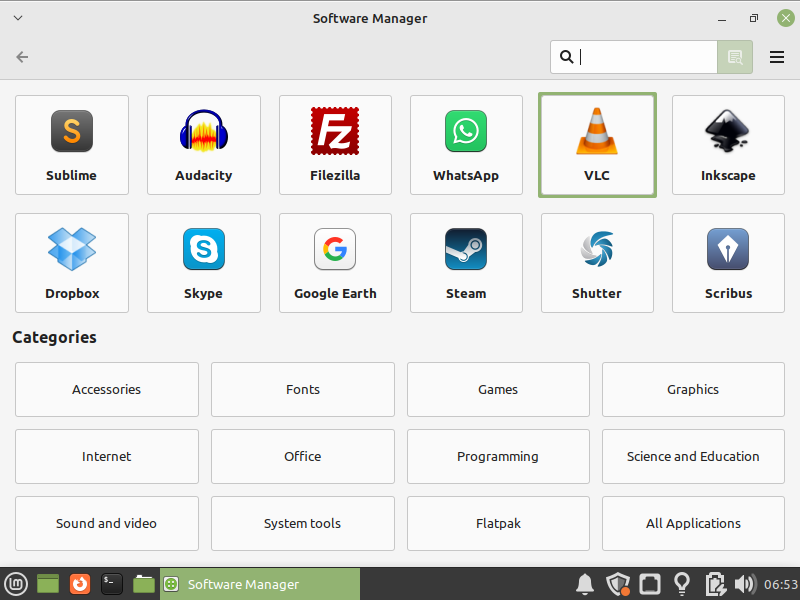
To install above applications, go to System Menu –> Software Manager
Search these applications and double click on their icons and the click on install
8) Increase Battery Time
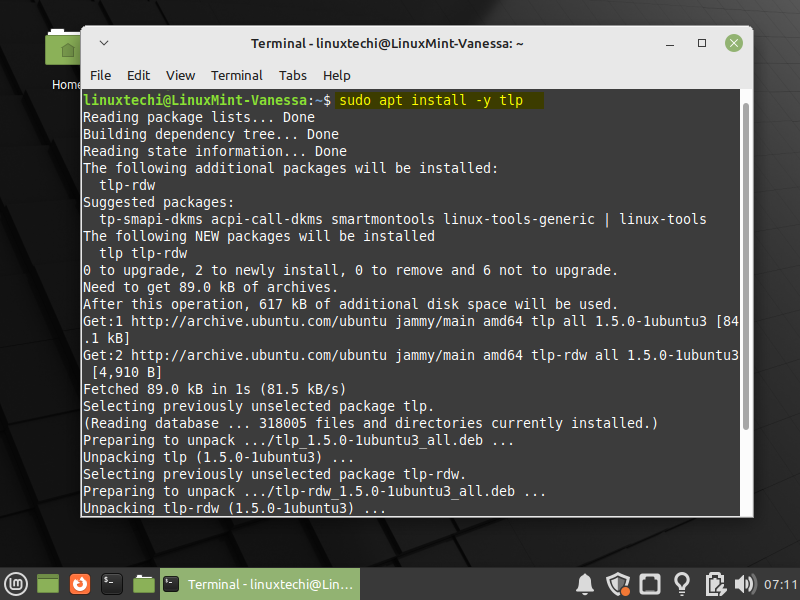
To increase the battery time of your laptop, install tlp package. Open the terminal and run following apt command
$ sudo apt install -y tlp
9) Boost System Performance
Note : This is only recommended for systems which have more than 16 GB of RAM.
To boost your system performance, you should consider decreasing the swap usage by tweaking swappiness value. Open the terminal and run following command with sudo rights,
$ sudo sysctl -w vm.swappiness=10
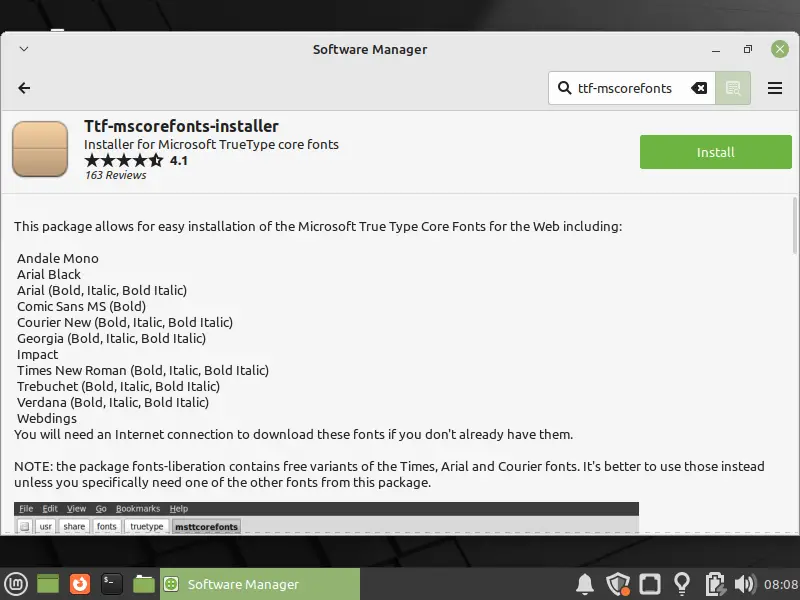
10) Install Microsoft fonts
Open the software Manager and search ‘ttf-mscorefonts’, click on ‘Ttf-mscorefonts-installer’ and then click on Install
11) Install Additional Drivers
Start the Driver Manager from system menu, it will prompt you to enter user password.
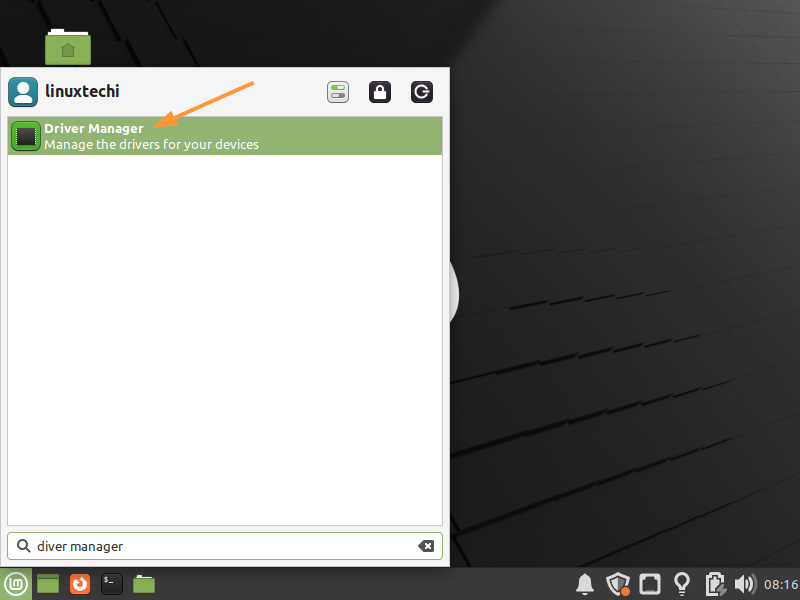
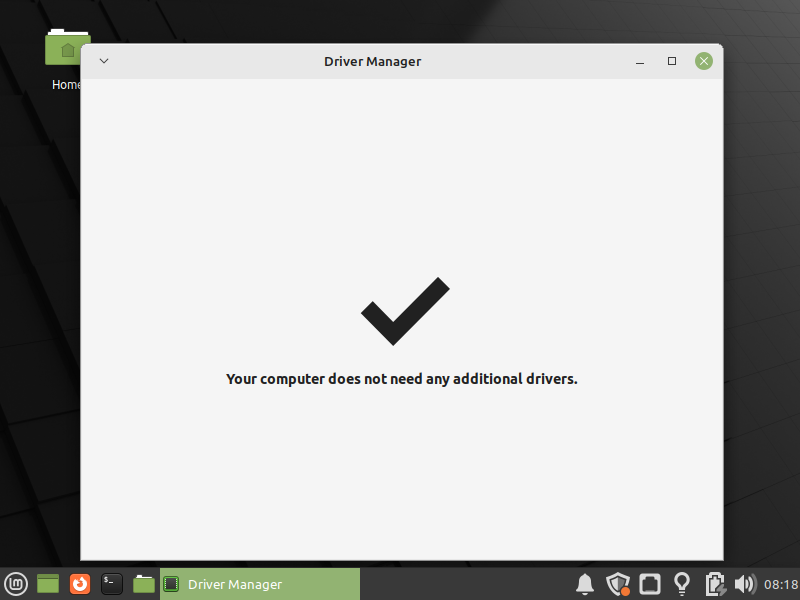
If there are some additional drivers available for your system, then it will show the drivers. Recommendation is to install them and if your system has all drivers up to date then it will show following screen.
12) Clean the System with Bleachbit
Bleachbit is a tool which deletes unnecessary files to free up disk space and remove junk. It also removes cache, internet history, cookies, and temporary files.
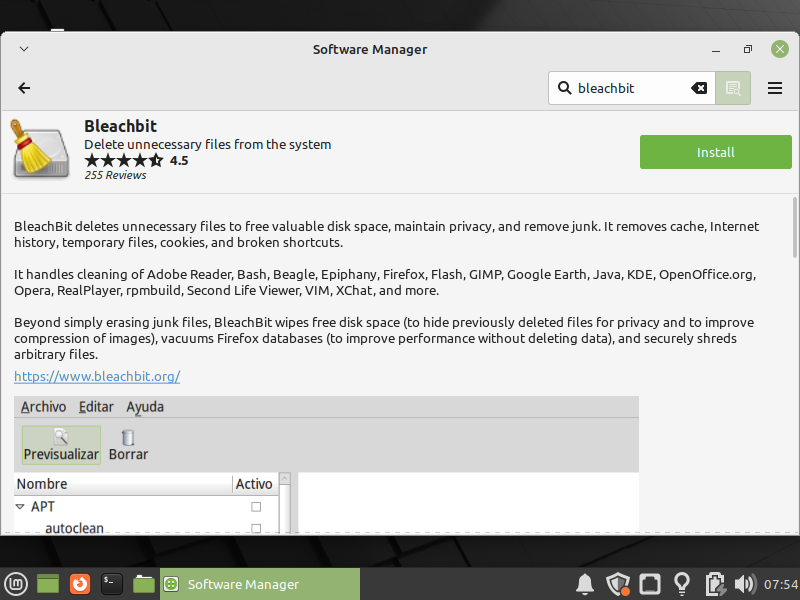
To Install bleachbit, open the Software Manager and search bleachbit, click on its icon and then click on Install.
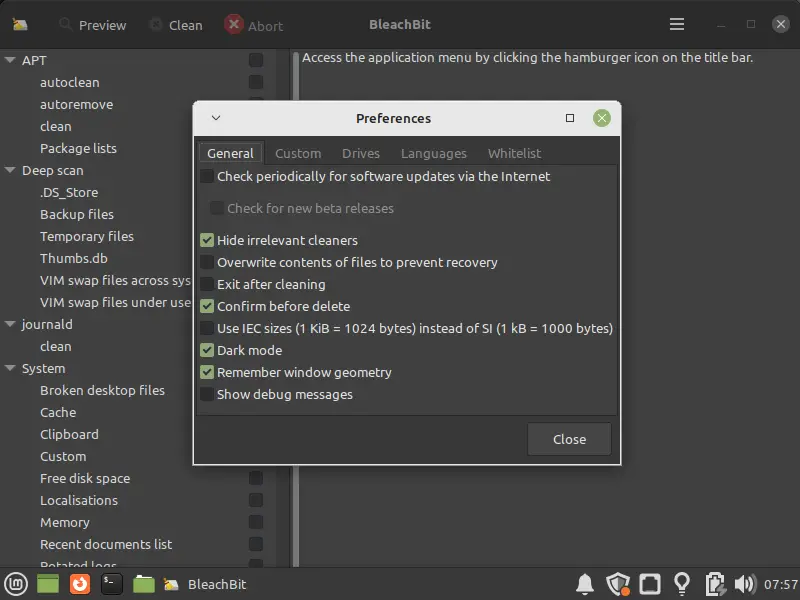
Once installed, access it and configure preferences as per your requirement
That’s all from this article. I hope you have found this article useful. Kindly do post your queries and feedback in below comments section.
The post Top 12 Things to Do After Installing Linux Mint 21 (Vanessa) first appeared on .
