
How to Install Fedora Server 37 Step-by-Step
Hello techies, in this post, we will cover how to install Fedora server 37 step-by-step with screenshots.
Fedora Server is a free, open-source and powerful Linux distribution, which is built for servers. It is suitable for a wide range of workloads, from web servers to databases and file servers, and it provides a lot of features out of the box and with a fast release cycle.
Fedora server is developed and maintained by Fedora Project, which is a community based open-source project sponsored by Red Hat.
Minimum System Requirements for Fedora Server
- 2 GB RAM or more
- 2 GHz dual core processor or mor
- 20 GB disk space
- Installation Media (USB / DVD)
Without further ado, let’s deep dive into Fedora server 37 installation steps.
1) Download Fedora Server 37 ISO File
From the Fedora official page get Fedora server 37 Standard ISO file for x86_64.
- Download Fedora Server ISO
Once the iso file is downloaded then burn it into a USB drive and make it bootable.
In Linux, refer following to create bootable USB drive,
- How to Create Bootable USB Drive on Ubuntu / Linux Mint
Use Rufus in Windows OS to create a bootable USB drive using ISO file
2) Boot the System with Bootable Media
Move to the target system, boot it with bootable media (USB drive). When the system boots up, we will get following screen,
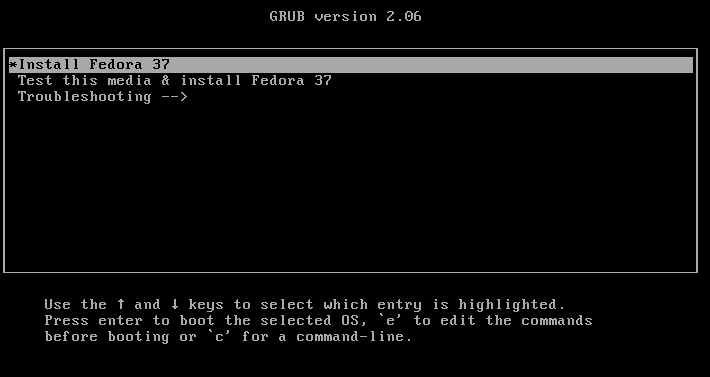
Choose the first option “Install Fedora 37” and hit enter.
3) Select Your Preferred Language
Choose your preferred language for Fedora Server installation,
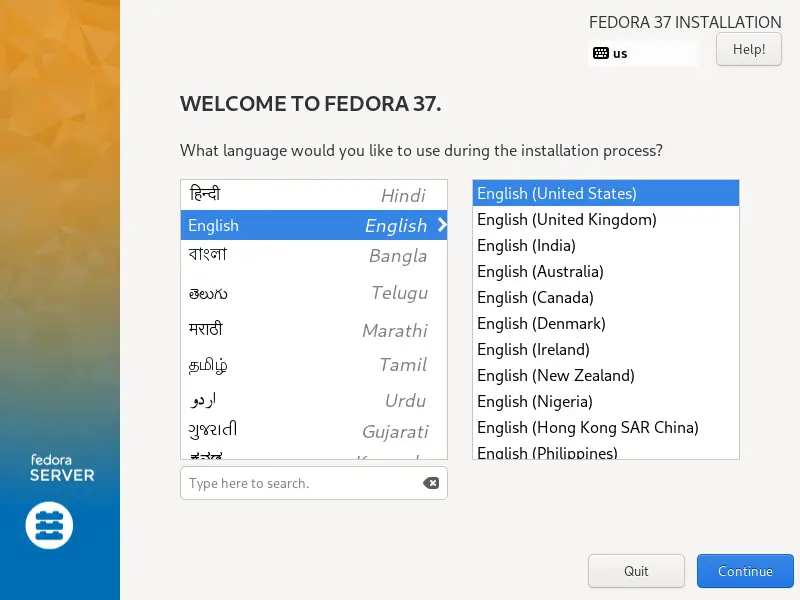
Click on Continue
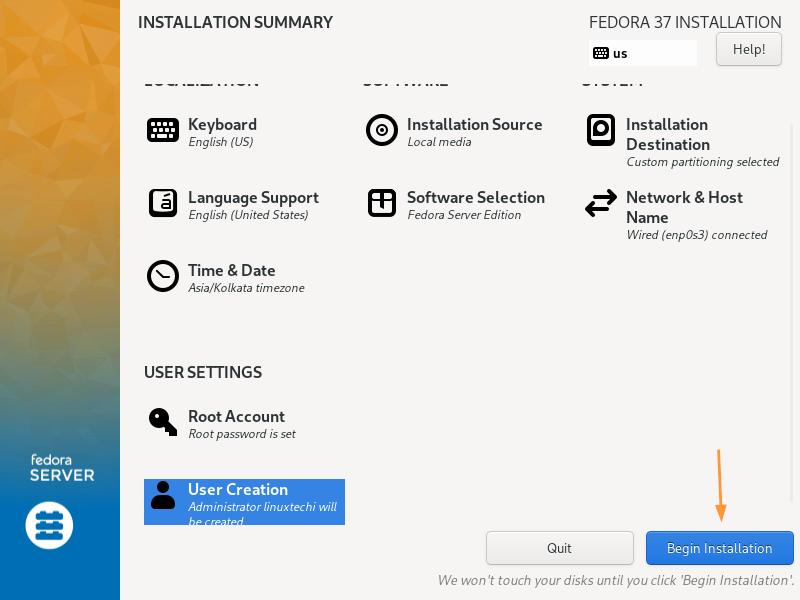
4) Installation Summary
In this step, we will get the following installation summary screen, we must complete the items marked with icon to proceed with the installation.
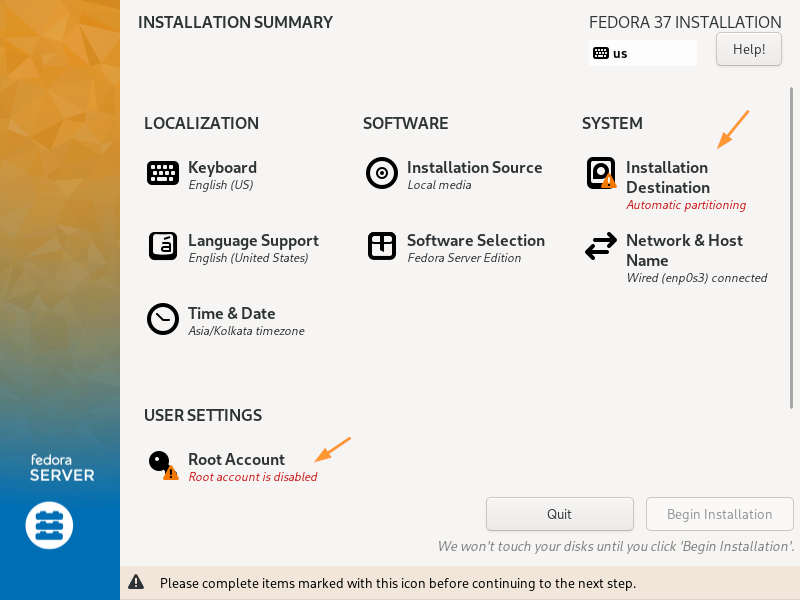
Complete the following marked items
- Installation Destination
- Root Account
- User Creation
Installation Destination:
In this section, we decide partitioning scheme for Fedora Server. There are two options here:
- Automatic Partitioning: Here Installer will automatically create partitions on the disk.
- Custom: If you wish to create own custom partitions manually then choose this option.
In this post, we will go with 2nd option and will create following partitions on 80 GB disk.
- /boot – 2GB (Std XFS file system)
- /home – 25 GB (XFS file system)
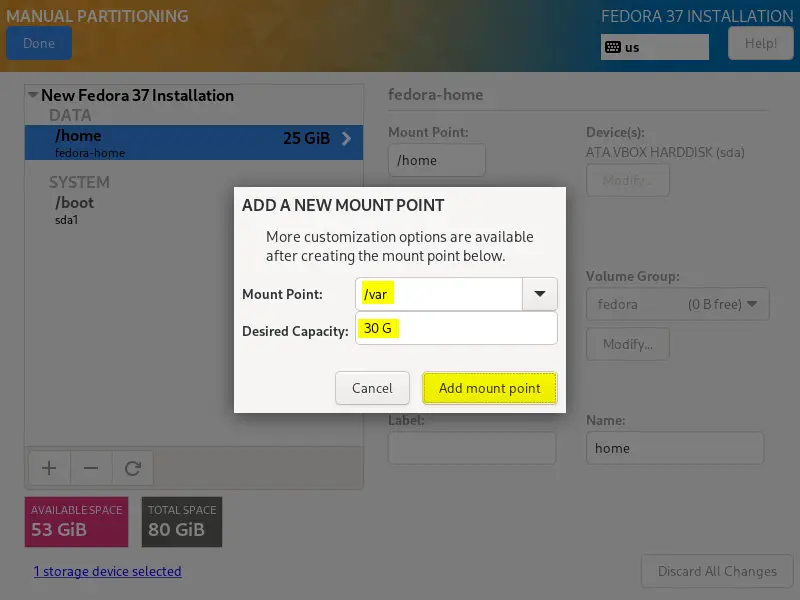
- /var – 30 GB (XFS file system)
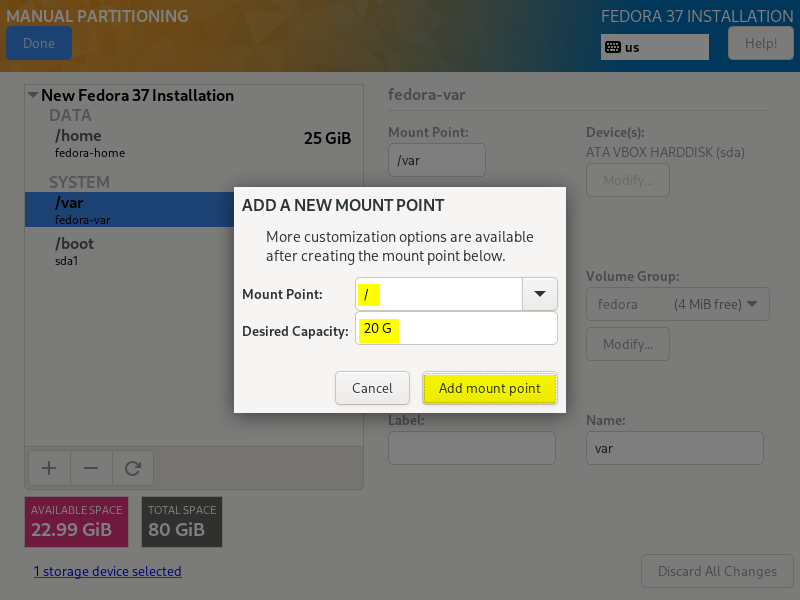
- / – 20 GB (XFS file system)
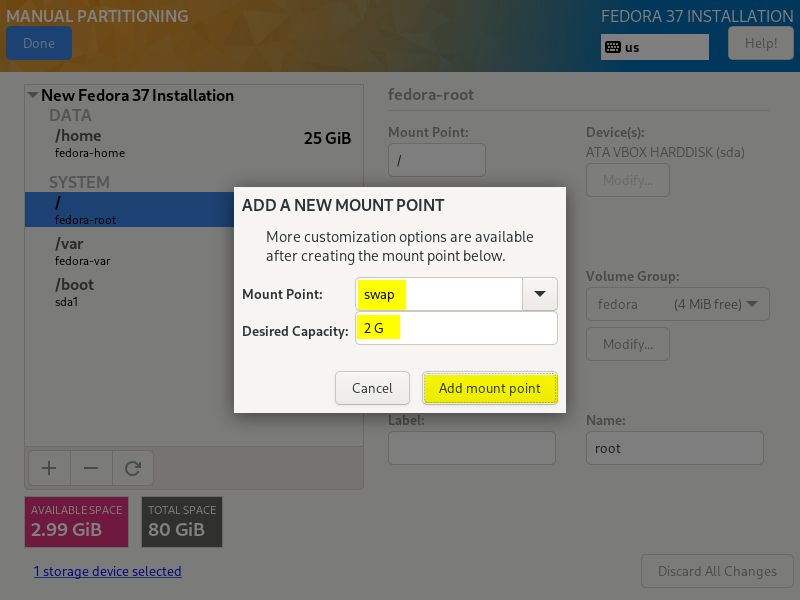
- Swap – 2GB
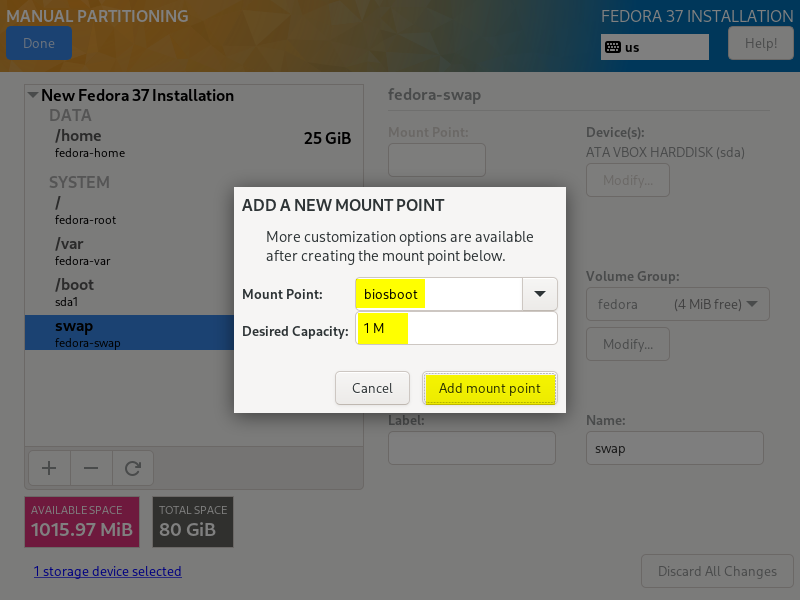
- biosboot – 1MB
Click on ‘Installation Destination” then we will get following screen,
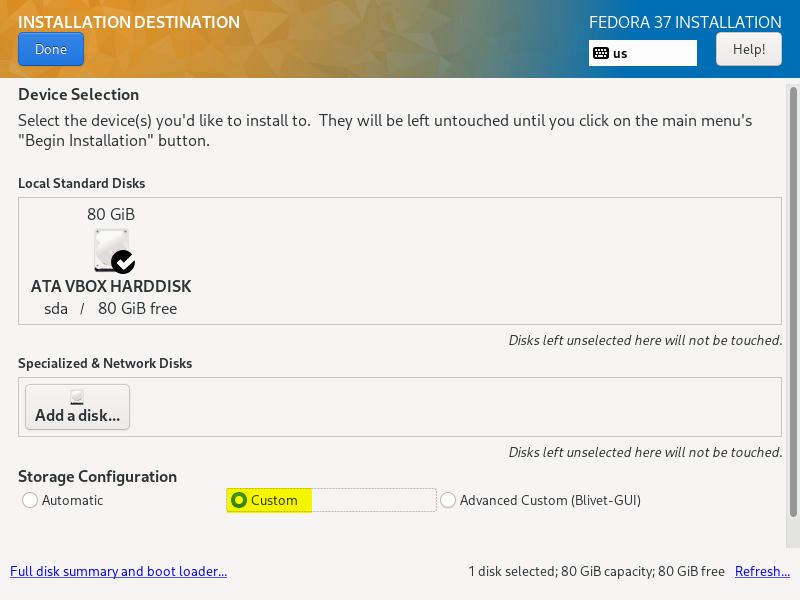
Select Custom and then click on Done, this will take us to the following screen.
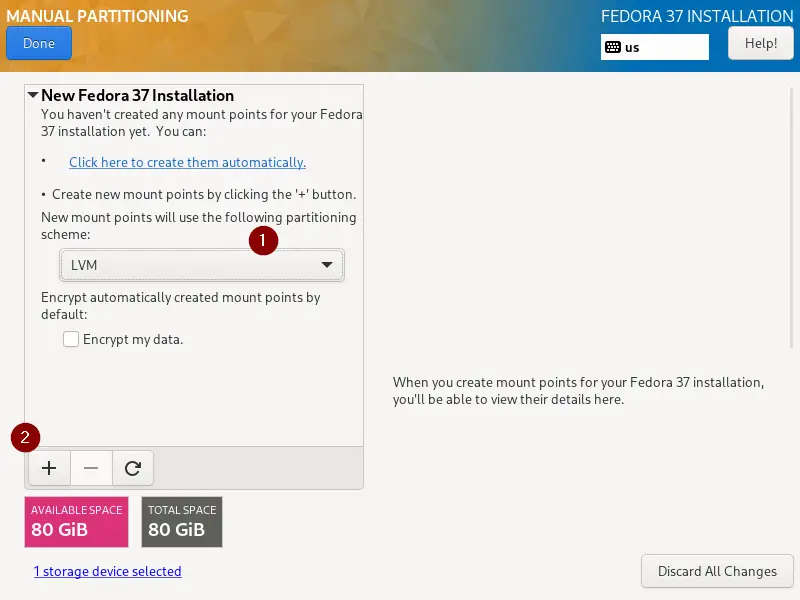
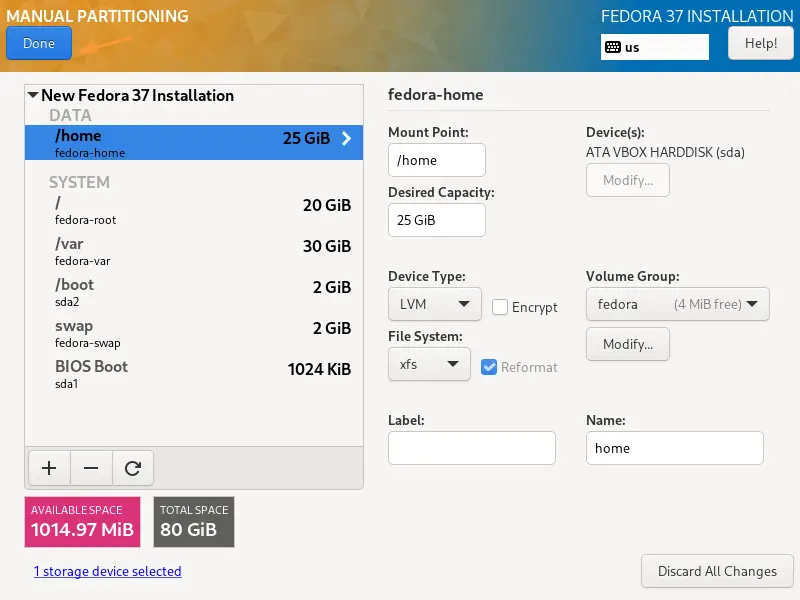
Choose LVM and click on + (plus) symbol.
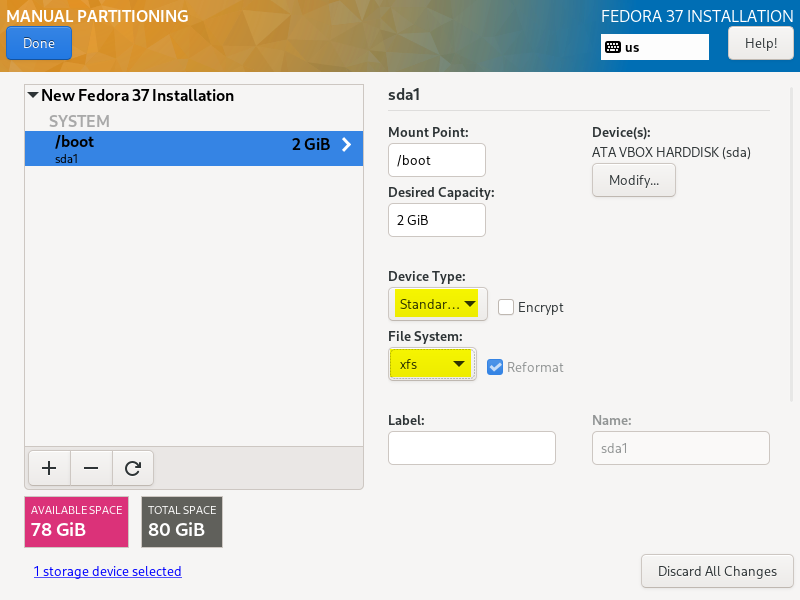
Create the first partition as /boot of size 2 GB and format it as standard XFS file system.
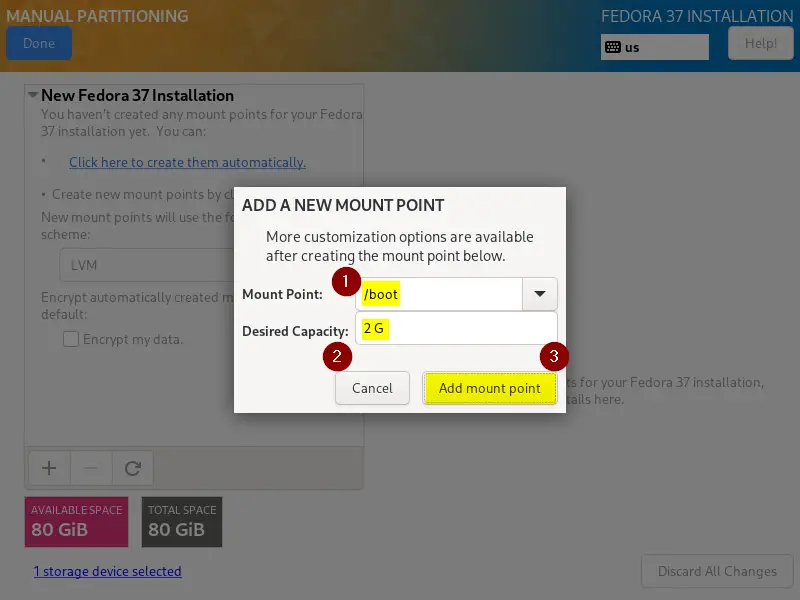
Click on “Add mount point”
Next, create /home LVM partition of size 25 GB with XFS file system.
Click on + symbol again, specify the details as shown below:
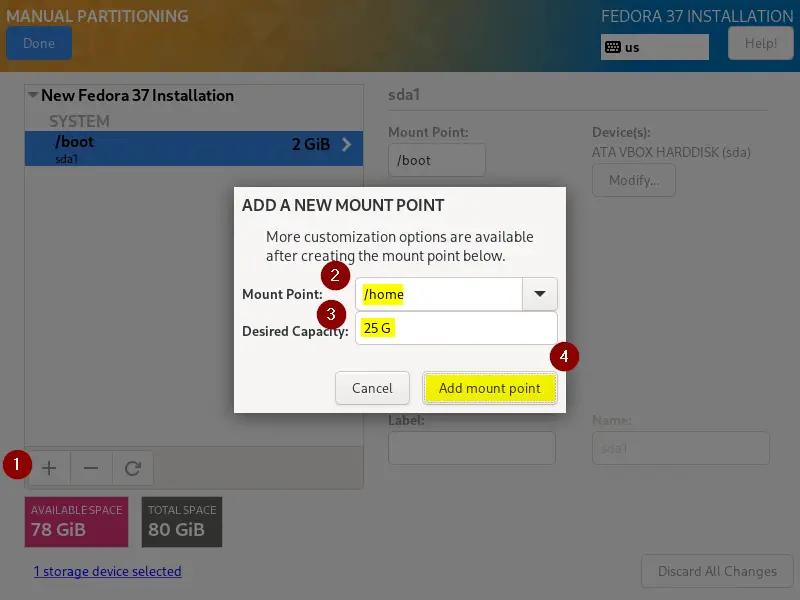
Click on “Add mount point”, it will automatically mark this partition as LVM of type XFS.
Similarly Create /var and / of size 30GB and 20GB respectively.
Now, create last partition as swap of size 2GB.
Note: If your disk is GPT label then you need to create biosboot partition of size 1 MB
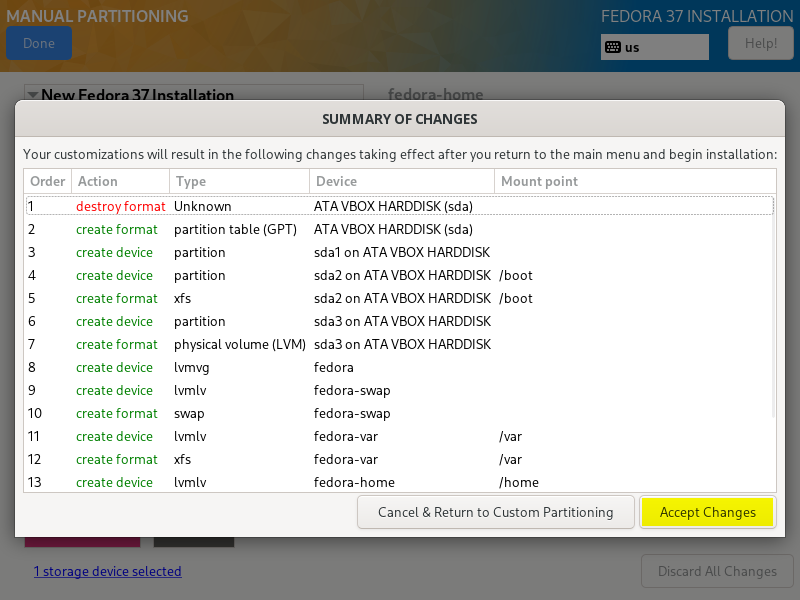
Once you are done with custom manual partitions, click on Done to proceed further.
Choose “Accept Changes”
Now, set Root User password and create local user. Click on Root Account from Installation Summary screen, enable root account and set it’s password.
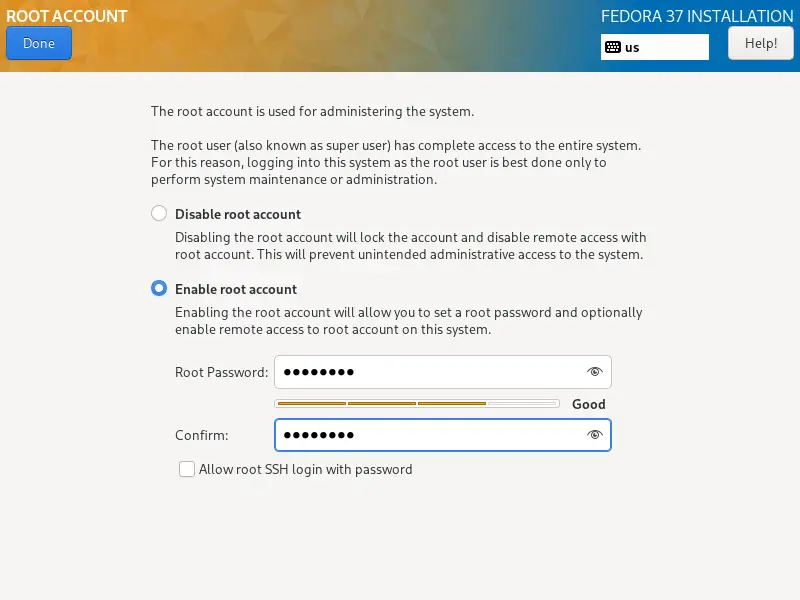
Click on Done, this will take us back to installation summary. Now, click on “User Creation” and specify the local user details as show below,
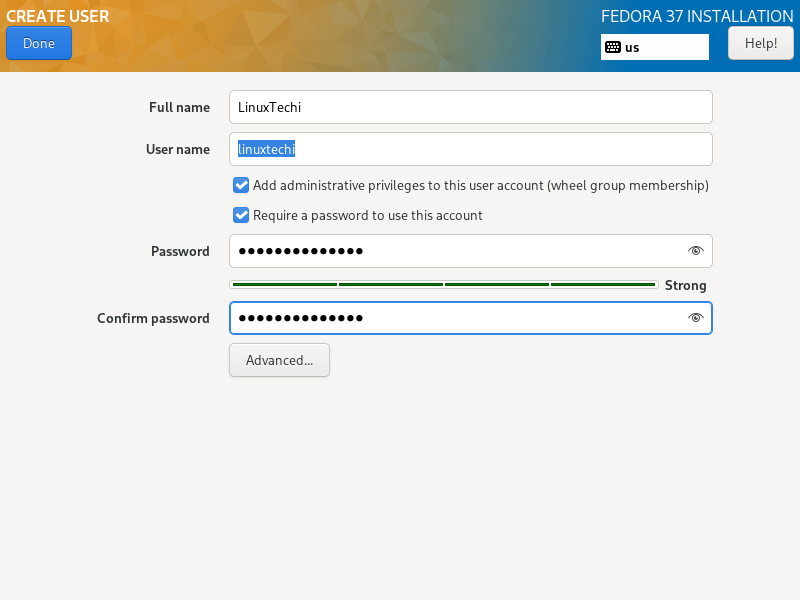
Click Done.
We are all set to start the actual installation, click on “Begin Installation” to proceed further.
5) Fedora Server Installation Progress
As we can see in the following screen, installation is started and is in progress.

Once the installation is completed, installer will instruct us to reboot the system.
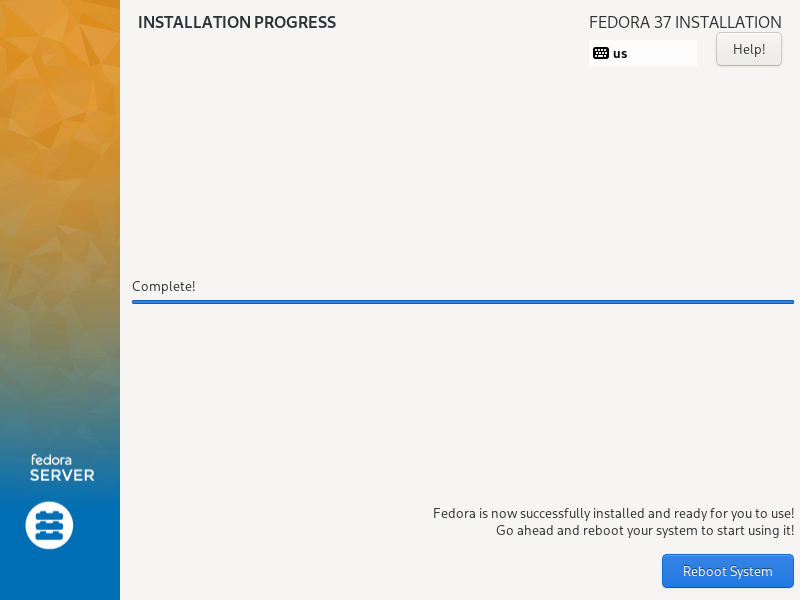
Click on “Reboot System”. It will restart the system and don’t forget to remove the installation media and set the boot medium as hard disk.
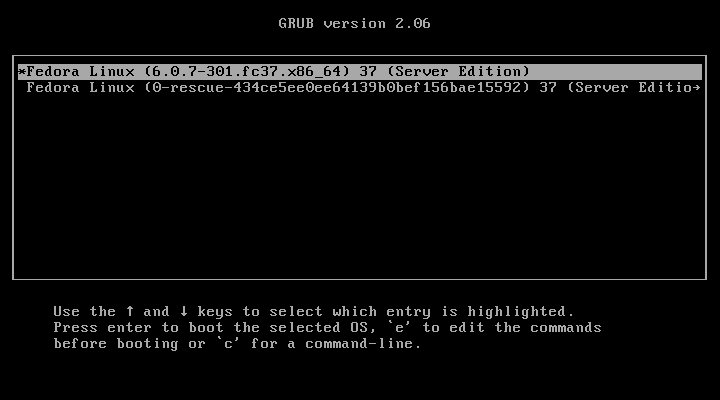
6) Fedora Server Login Screen After Installation
When we reboot the Fedora Server we will get following grub screen, choose the first option and hit enter.
When the system boots up successfully, we will get beneath login cli screen. We can use either root user or local user credentials to login that we have created during the installation.
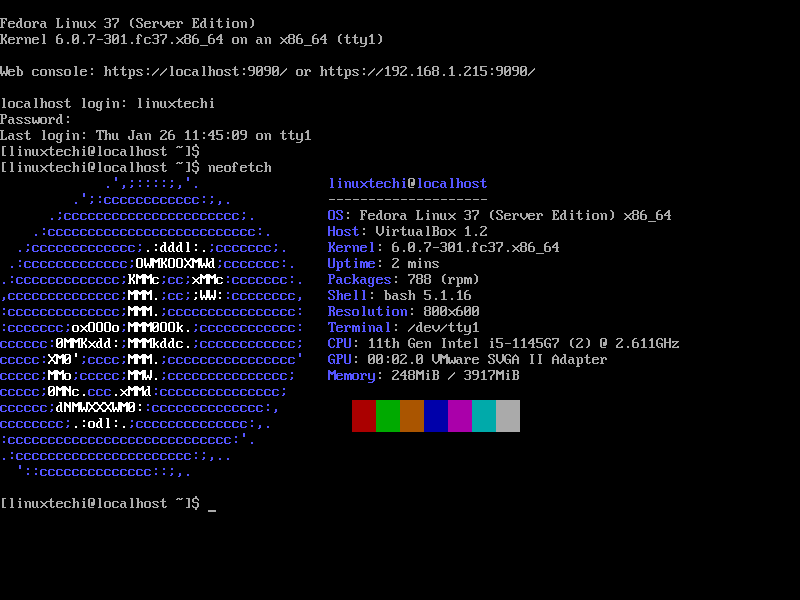
Perfect, above screen confirms that we have successfully installed Fedora Server 37.
That’s all from this post. Kindly do post your queries and feedback in below comments section.
The post How to Install Fedora Server 37 Step-by-Step first appeared on .