
How to Install PgAdmin4 on RHEL 9 Step by Step
Pgadmin4 is a free and opensource web-based administration and development platform for PostgreSQL. It interacts with PostgreSQL database server on both local and remote servers and displays server statistics using intuitive and interactive dashboards.
Pgadmin4 is a rewrite of Pgadmin 3 and provides the following notable features:
- A responsive web UI with intutive and real-time monitoring dashboards
- An improved web interface with cool and new panels and icons.
- An SQL query editor with syntax highlighting.
- Extensive documentation.
- Useful tips to help you get started.
In this guide, we will demonstrate how to install Pgadmin4 on RHEL 9.
Prerequisites
Before you begin, ensure that you have a RHEL 9 server instance with PostgreSQL database server installed. Check out guide on how to install PostgreSQL 15 on RHEL 9.
With PostgreSQL server installed, carry on with the following steps.
Step 1) Add Pgadmin4 Repository on RHEL 9
The first step is to add the Pgadmin4 repository on RHEL 9. But first, install the EPEL repository which provides essential software packages.
$ sudo dnf install https://dl.fedoraproject.org/pub/epel/epel-release-latest-9.noarch.rpm
Next, install Pgadmin4’s repository as follows.
$ sudo dnf install -y https://ftp.postgresql.org/pub/pgadmin/pgadmin4/yum/pgadmin4-redhat-repo-2-1.noarch.rpm
Once done, build a cache for Pgadmin4 and EPEL repositories as follows.
$ sudo dnf makecache
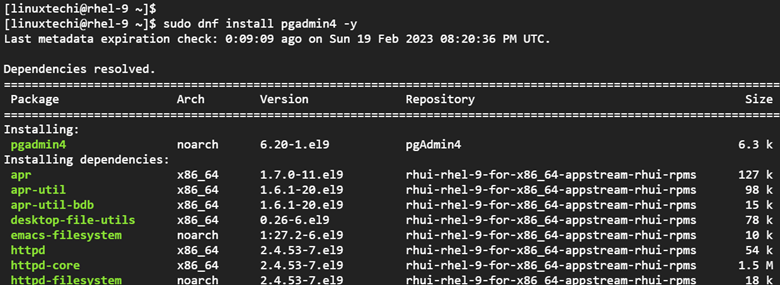
Step 2) Install PgAdmin4 on RHEL 9
Once the Pgadmin4 and EPEL repositories are in place, proceed and install Pgadmin4 using the DNF package manager as shown.
$ sudo dnf install pgadmin4 -y
This installs a myriad of packages including Pgadmin4, Apache HTTP web servers, and Python packages to mention a few.
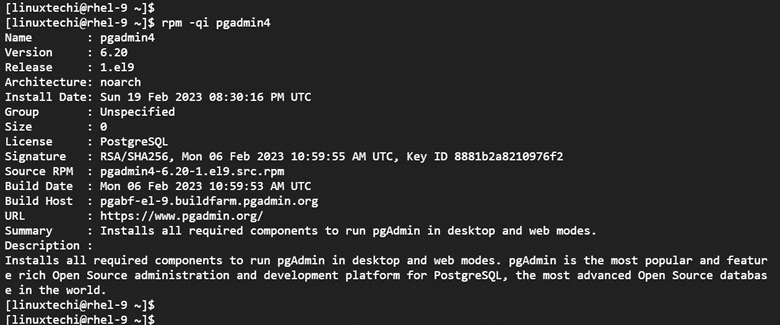
To confirm that Pgadmin4 has been installed, run the following command:
$ rpm -qi pgadmin4
This prints out quite some information including the name, version, release, and architecture of the installed package.
Step 3) Start / Enable PgAdmin4 on RHEL 9
At this point, Pgadmin4 is successfully installed. However, you need to go a step further and get it running. To start the Pgadmin4 service, run the command:
$ sudo systemctl start httpd
Be sure also to enable the service to start every time the system boots.
$ sudo systemctl enable httpd
To confirm that Pgadmin4 is running run the command:
$ sudo systemctl status httpd

Step 4) Initializing PgAdmin4 on RHEL 9
The Pgadmin4 package provides a configurable script for setting up the pgAdmin web service. This allows you to create a user account which is used to authenticate and configure SELinux policies and Apache web server.
Therefore, run the script as follows.
$ sudo /usr/pgadmin4/bin/setup-web.sh
Provide the email and password that you will use as login credentials on the login page.
NOTE: Sometimes, you may encounter a ‘semanage: command not found‘ error as shown in the output below. This indicates that the semanage package is missing.
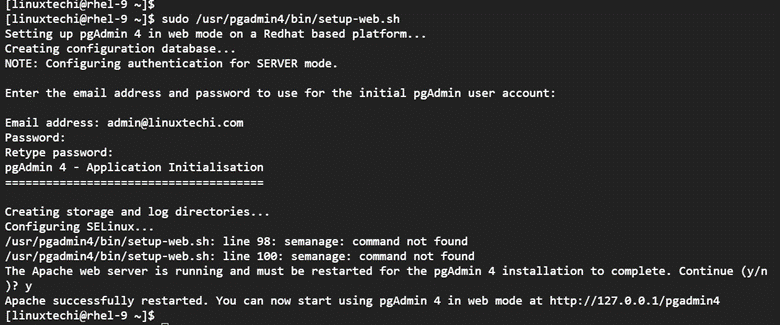
Semanage, short for SELinux (Security-Enhanced Linux) policy management tool, is a utility used to configure some aspects of SELinux policy without requiring modification to or recompilation from policy sources.
To fix this error, you need to check for the package that provides semanage. You can do this by running the command:
$ sudo dnf provides /usr/sbin/semanage
From the output, you can see that semanage is provided by the policycoreutils-python-utils-3.3-6.el9_0.noarch package.

To install this package, run the following command.
$ sudo dnf install policycoreutils-python-utils -y
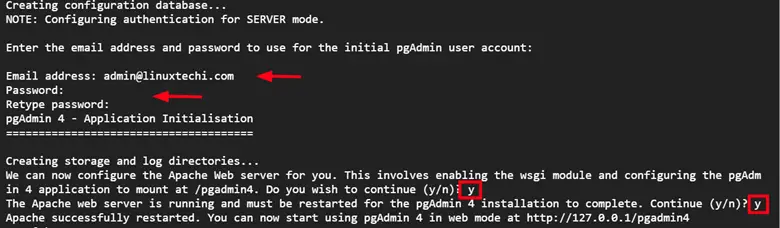
Once again, run the Pgadmn4 installation script as shown. Provide the email address and password and type ‘y’ when prompted.
$ sudo /usr/pgadmin4/bin/setup-web.sh
Step 5) Access the Pgadmin4 Web Interface
At this point, Pgadmin4 is successfully installed. To access it from a web browser, head over to the following address:
http://server-ip/pgadmin4
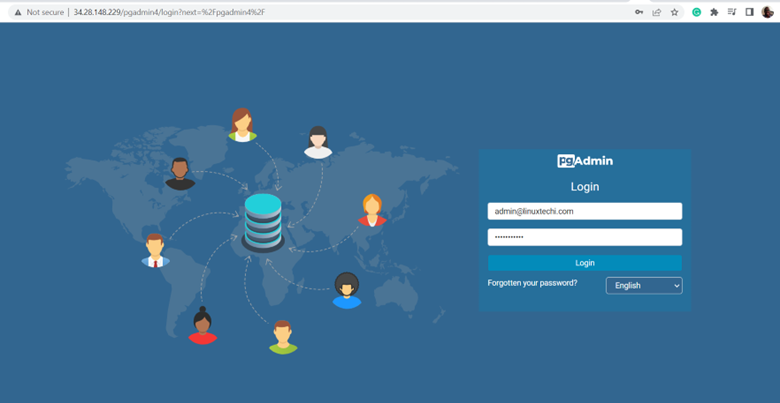
You will get the following login web interface. Be sure to provide the Email and password you provided when running the installation script and click ‘Login’.
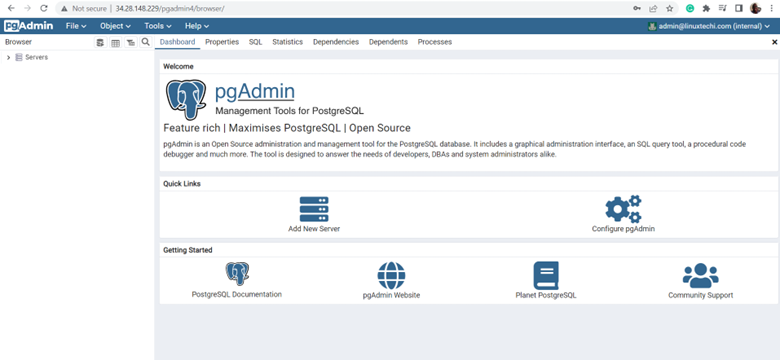
Once logged in, the Pgadmin4 dashboard will come to view as shown.
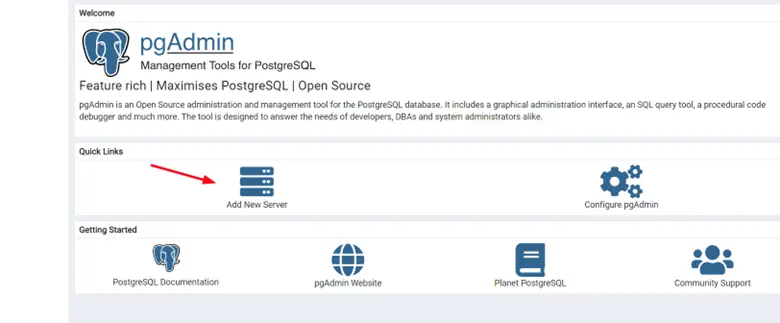
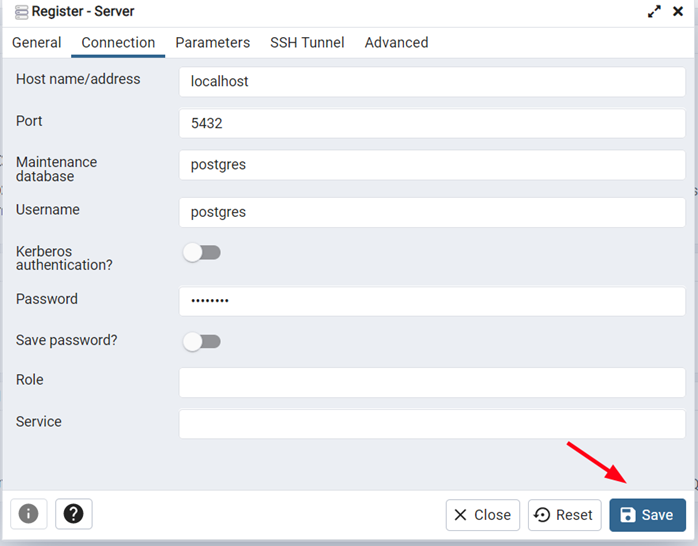
To add a server that can be administered by Pgadmin4, click ‘Add New Server’
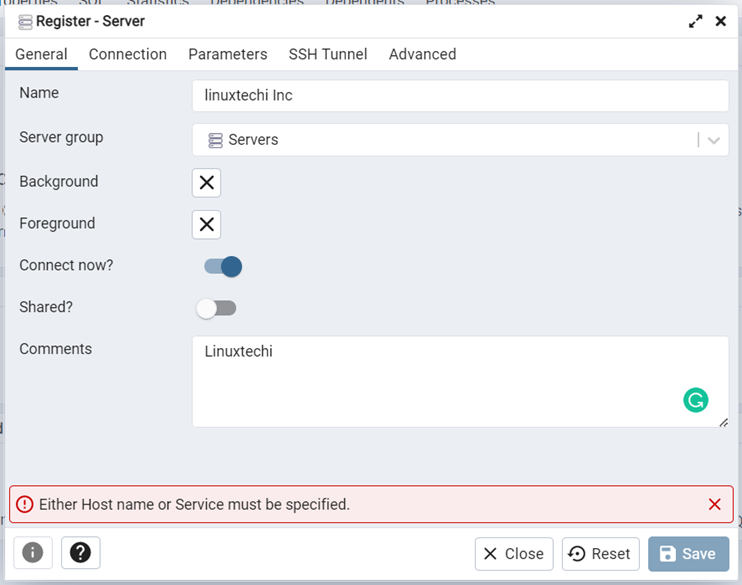
On the ‘General’ tab fill out the name of the server and add comments for better description.
Next, click ‘Connection’ and fill out the Hostname/Address , Port , maintenance database , username and password. Then finally click ‘Save’.
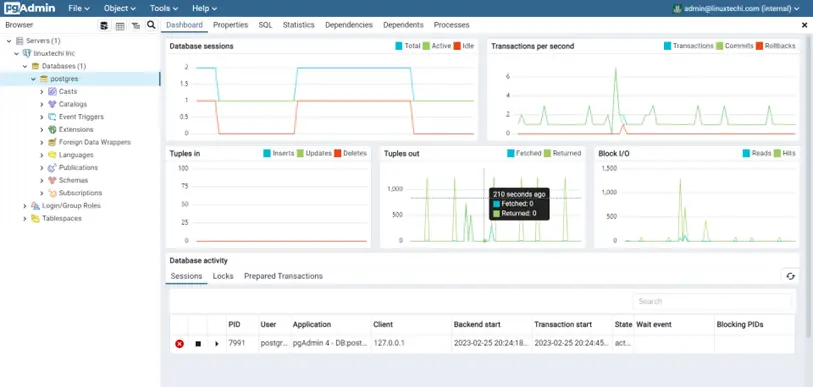
Thereafter, you will see PosrgreSQL server statistics displayed on interactive and intuitive dashboards. On the left sidebar, you can browse various PostgreSQL parameters.
Conclusion
We hope you found this guide informative, kindly do post your queries and feedback in below comments section.
The post How to Install PgAdmin4 on RHEL 9 Step by Step first appeared on .