
Terminal Basics Series #3: Listing the Contents of Directory With ls Command

The ls command in Linux is used for listing the contents of directories. You can think of ls as a short form for list.
There is more to just listing what a directory consists of. You can see the file size, the time it was created, whether it is a file or directory, and file permissions. You can even sort the output based on those criteria.
I won’t go into a lot of detail. You should know just enough basics to get your way around it at this stage.
Prepare your test setup
This Terminal Basics tutorial series uses a hands-on approach where you learn things by doing them. It will be better to create a working scenario on your system so that you can try things and see similar results, as shown in this tutorial.
Open a terminal and switch to the home directory and create a ls-command directory under the practice directory and then enter this newly created directory.
cd ~
mkdir -p practice/ls-command
cd practice/ls-command
It’s okay if you don’t recognize some commands here. Just enter them as it is shown.
Create a couple of empty files:
touch empty_file_{1,2}Copy a huge text file:
cp /etc/services .Create a few directories:
mkdir dir_{1..3}Create a hidden file:
echo "Now You See Me" > .john-cenaAnd let’s end the setup with a soft link (like a shortcut to a file):
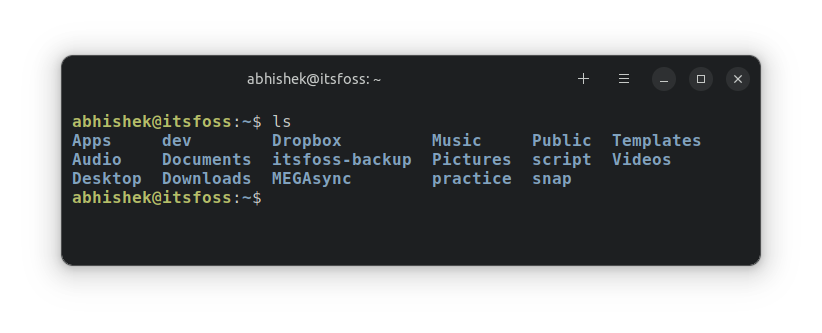
ln -s services link_servicesLet’s see how the ls-command directory looks now:
abhishek@itsfoss:~/practice/ls-command$ ls
dir_1  dir_2  dir_3  empty_file_1  empty_file_2  link_services  services
Long list: Listing with details
While the ls command shows the content, it doesn’t give any details about the contents.
This is where you can use the long listing option -l.
ls -lIt will show the directory’s contents in individual rows with additional information in alphabetical order:
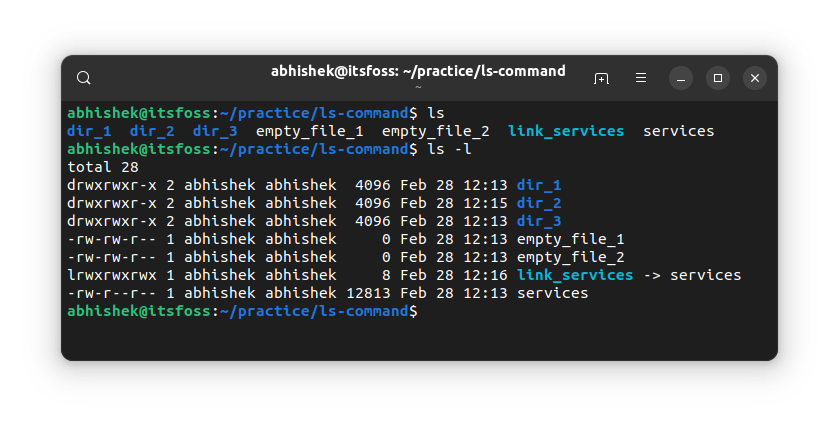
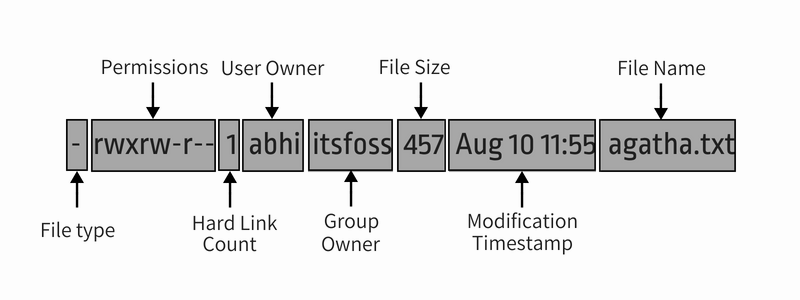
You’ll see the following information in the long listing:
- File type: – for file, d for directory, l for soft links.
- Number of hard links: Usually 1 unless there is actually a hard link (don’t worry too much about it).
- Owner name: The user who owns the file.
- Group name: The group that has access to the file.
- File size: Size of the file in bytes. It is always 4K (or 4096) for the directories, irrespective of the directory size.
- Date and time: Usually, the file’s last modified time and date.
- Filename: Name of the file, directory, or link .
It is a good idea to know about file permission and ownership. I highly recommend reading this tutorial.

Displaying the hidden files
Remember that you created a ‘hidden file’ named .john-cena? But you don’t see it in the output of the ls command.
In Linux, if a filename starts with a dot (.), the file or directory is hidden from the normal view.
To see these ‘hidden files’, you have to use the option -a:
ls -aActually, you can combine more than one option together in most Linux commands. Let’s combine it with the long listing option:
ls -laNow, it will show the hidden .john-cena file:
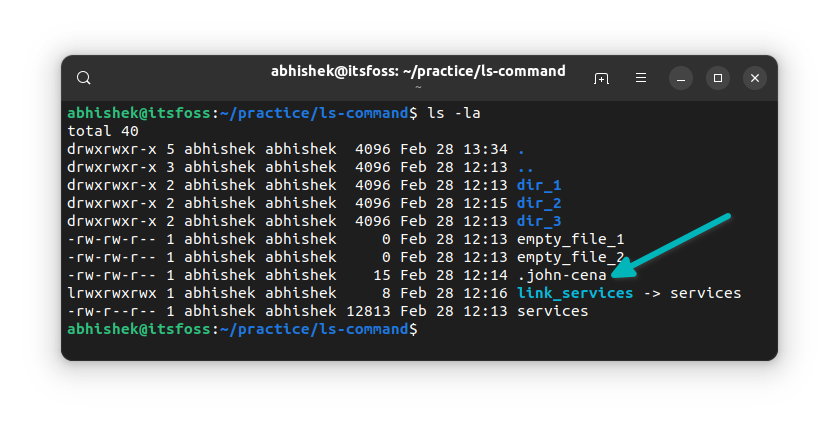
Did you notice the special directories .(current directory) and ..(parent directory) are also displayed now?
You can make them go away and still show other hidden files using the option -A instead of -a. Go ahead and try it.
Display file size
The long listing option -l shows the file size. However, it is not easy to understand. For example, in the examples above, the services file has size 12813 bytes.
As a normal computer user, it makes more sense to see the file size in KB, MB and GB.
The ls command has a human-readable option -h. Combine it with the long listing option and you can see the file size in recognizable formats.
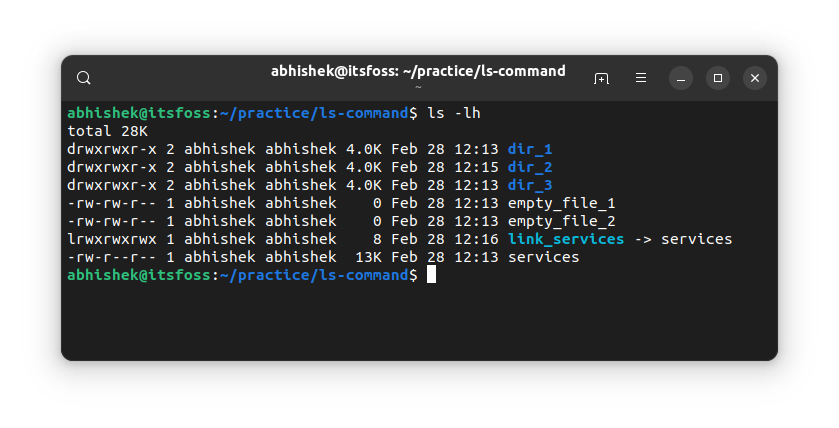
du command.Display the newest files first
You already saw that the long listing shows the modified time of a file/directory.
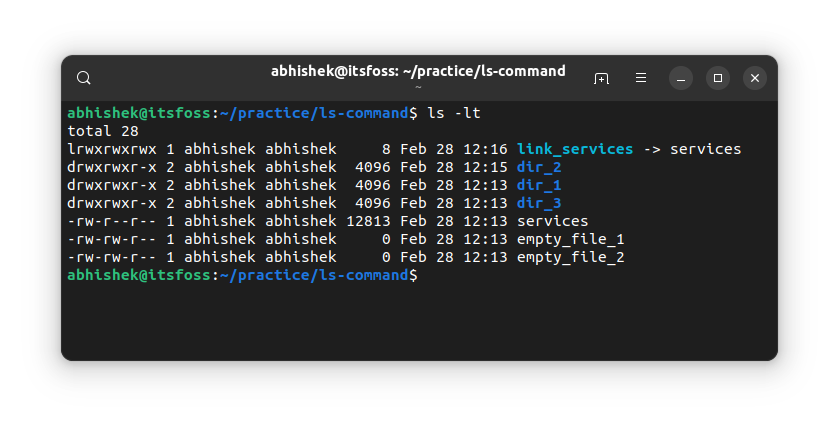
You can sort the output of the ls command based on this timestamp using the -t option:
ls -ltAs you can see, the link was the most recent of them all.
-t with the reverse option -r. What do you see?Show details on individual files
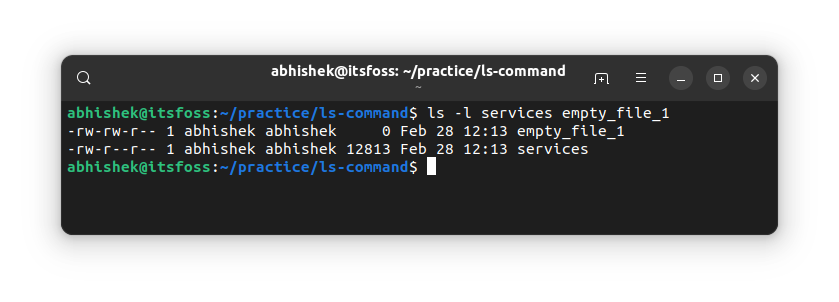
So far, you have used the ls command on the entire current directory. You can also use it on a single file or a bunch of files and directories. What’s the point? Well, you can use the long listing option to get the details on selected files.
ls path_to_file1 path_to_file2Here’s an example:
ls command with a directory path, it will show its content. If you want to see the stats of a directory, use the option -d.Test your knowledge
Most Linux commands have numerous options. It is impossible for anyone to know them all, even for the most frequently used commands like ls here.
For now, you have a decent idea about listing the contents of a directory and checking file stats. It’s time to put your knowledge to some test.
Try the following:
- Create a new directory called ls_exercise and enter this directory
- Use the following command to copy a file:
cp /etc/passwd . - Check the content of a directory. What’s the filename?
- What is the size of this file?
- Copy some more files using this command:
cp /etc/aliases /etc/os-release /etc/legal . - Sort the files in the reverse order of modified time.
- What do you observe if you run the following command:
ls -lS?
You can discuss this exercise in the community forum.
In the next chapter of the Terminal Basics series, you’ll learn about creating files in Linux command line.
Do let me know if you have questions or suggestions.